
NETGEAR WAC540 Insight Managed Smart Cloud Wireless Access Point

Ceiling- and wall-mounting kit contents
|
|
|
|
|
|
 Mounting plate
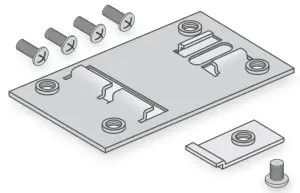 Metal bracket with T-bar, lock screw, and 4 short screws
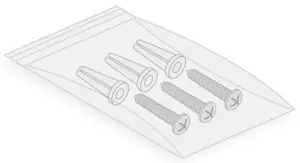 3 tall screws and anchors for wall mounting
Mount the access point on a drop ceiling
Before mounting the access point, first set up and test the access point to verify WiFi network connectivity.Note: If you are mounting the access point on a hard ceiling, use the wall mounting instructions on the other side of this document.
- Slide the T-bar partially into the metal bracket.
- Attach the metal bracket to the ceiling bar.
- Push the T-bar over the ceiling bar.
- Use the lock screw to lock the metal bracket into place.

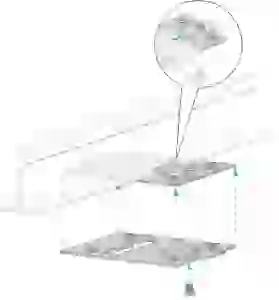
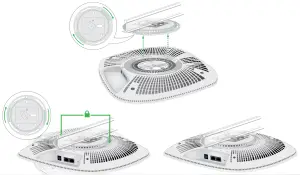
- Connect a PoE cable or power adapter to the access point before mounting. The access point is designed to be unobtrusive, so it sits flat on the ceiling surface when it is mounted.
- Hold the access point upside down and attach it to the mounting plate.
- Use the four short screws to attach the mounting plate to the T-bar.
- Twist the access point clockwise to lock it onto the mounting plate.
Mount the access point on a wall
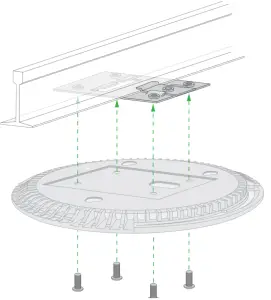
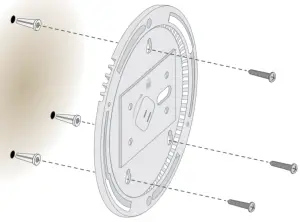
- Place the mounting plate on the wall.
- Mark the wall where the mounting holes are.
- Use the wall anchors and screws to attach the mounting plate to the wall. Connect any cables.
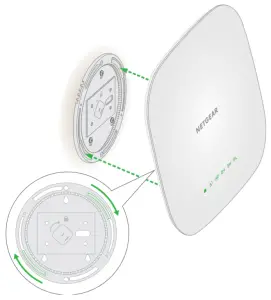
- Attach the access point to the mounting plate.
- Twist the access point clockwise to lock it onto the mounting plate.
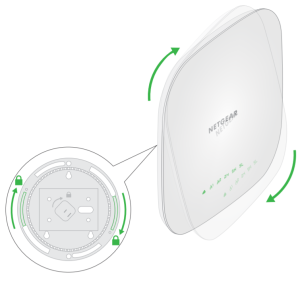
Unmount the access point
IMPORTANT: Make sure you hold the access point so that it does not drop when you release it from the mounting plate.
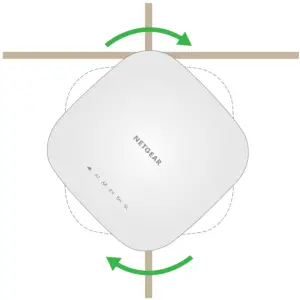
6. To find the locking latch, place your thumb on the center of the LEDs, and your finger on the other side of the device, directly opposite the thumb.7. Press and hold the latch down to release the lock and keep the lock open.8. Turn the access point counterclockwise until the access point releases from the mounting plate. The mounting plate remains attached to the ceiling or the wall.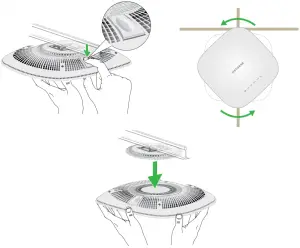
Support and Community
Visit netgear.com/support to get your questions answered and access the latest downloads.You can also check out our NETGEAR Community for helpful advice at community.netgear.com.
Regulatory and Legal
(If this product is sold in Canada, you can access this document in Canadian French at https://www.netgear.com/support/download/.)For regulatory compliance information including the EU Declaration of Conformity, visit https://www.netgear.com/about/regulatory/.See the regulatory compliance document before connecting the power supply.For NETGEAR’s Privacy Policy, visit https://www.netgear.com/about/privacy-policy.By using this device, you are agreeing to NETGEAR’s Terms and Conditions at https://www.netgear.com/about/terms-and-conditions. If you do not agree, return the device to your place of purchase within your return period.
NETGEAR, Inc.350 East Plumeria Drive San Jose, CA 95134, USA
NETGEAR INTL LTDBuilding 3, University Technology Centre Curraheen Road, Cork, Ireland
References
[xyz-ips snippet=”download-snippet”]