![]()
SA164MIDI Interface / Port Expander / Multi-Pedal Scene SaverUser’s Guide
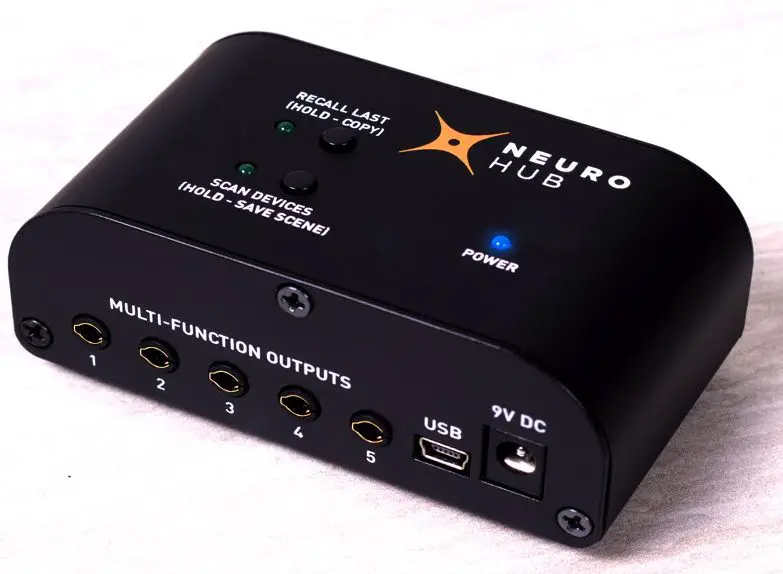
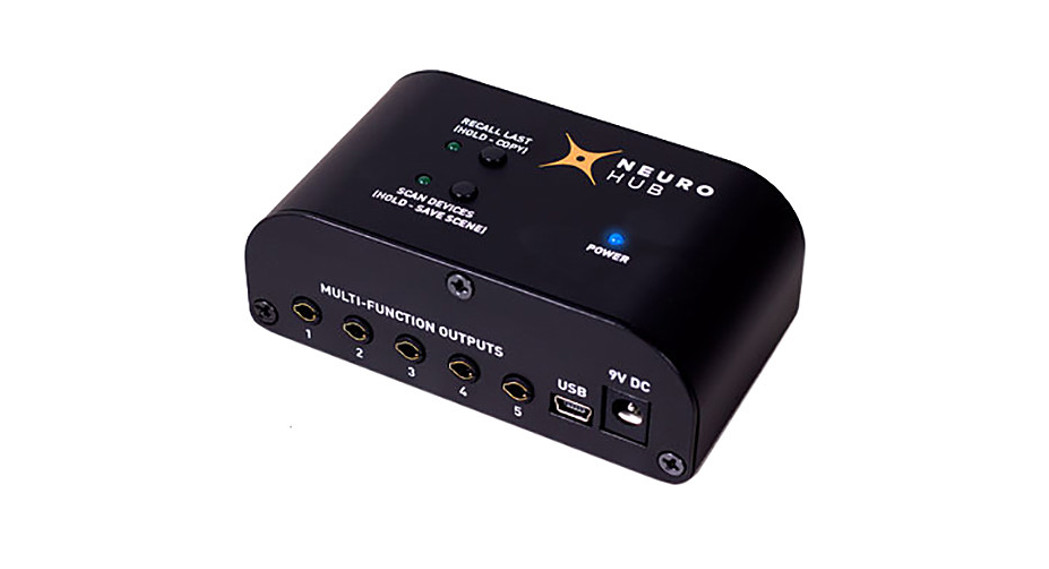
WelcomeThank you for purchasing the Neuro Hub! The Neuro Hub unites all your One Series and Soundblox 2 pedals into a single, stage-ready system. It features expression pedal and Hot Hand® inputs, control ports for up to five pedals, and USB connectivity for use with the Neuro Desktop Editor. The Hub features a powerful Scene Saving functionality, which allows you to create up to 128 multi-pedal presets (scenes). Each scene or parameter change is recallable via MIDI PC and CC messages on one or multiple MIDI channels.
Getting StartedYour Neuro Hub package includes the following items:
- One Neuro Hub unit
- One 9 Volt DC power supply (negative tip, positive barrel)
- Three 1/8” TRRS sensor cables
- One USB A to mini B cable
The Hub is powered by its 9 Volt DC power supply. It can also be powered by a 9V DC output from most pedalboard power supplies, but please be sure to check the output voltage and polarity before connecting to the Hub. Only regulated outputs should be used.
Neuro Hub Firmware Updates
The Neuro Hub is compatible with our Neuro Desktop Editor software. Use the Neuro Desktop to change and edit multi-pedal scenes and update the firmware. You can download this application for Mac or Windows from the Editors and Firmware page on the Source Audio website:https://www.sourceaudio.net/editorsandfirmware.html
To update your Hub’s firmware:
- Open the Neuro Desktop Editor on your PC (available for Mac and Windows) and connect your Neuro Hub via its mini USB port.
- The Neuro Hub will appear in a blue box on the top left corner of the Neuro software interface, in the Connections field.
- If the arrow icon in this blue box is framed in yellow, you need to perform a firmware update.
- Click the arrow icon and follow the prompts.
- When the process is complete your Neuro Hub firmware has been updated.
To update One Series pedal firmware:
- Open the Neuro Desktop Editor (available for Mac and Windows) and connect your One Series pedal directly from its USB port to your PC.
- The pedal’s name will appear in a blue box on the top left corner of the Neuro interface, in the Connections field.
- If the downward arrow icon in this blue box is framed in yellow, you need to perform a firmware update.
- Click the arrow icon and follow the prompts.
- When the process is complete your One Series pedal firmware has been updated.
To update Soundblox 2 pedal firmware:
- Open the Neuro Desktop Editor on your PC (available for Mac and Windows) and connect your Neuro Hub via its mini USB port.
- If the Soundblox 2 pedal is connected to the Hub, its name will appear as a sub-category in the blue box labeled “Neuro Hub” in the Connections field.
- If the downward arrow icon next to the name of the Soundblox 2 pedal is framed in yellow your pedal needs a firmware update.
- Select this downward arrow icon and follow the prompts.
- When the process is complete your Soundblox 2 pedal firmware has been updated.
Front Connections
The front panel of the Hub features 5 Multi-Function outputs, USB, and the 9V DC power jack.
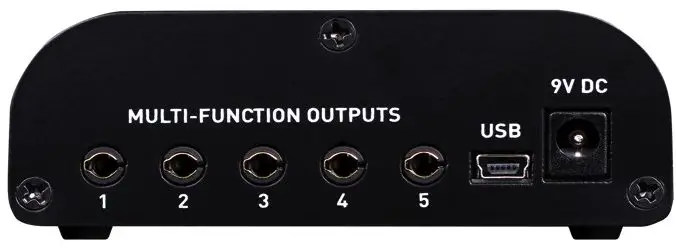
- Multi-Function Outputs: Connect your One Series “Control Inputs” or Soundblox 2 “MultiFunction” Inputs here via the included 1/8” TRRS sensor cables.
- USB: Connect to your computer via the included USB-Mini cable. The Hub will install automatically and can be used with the Neuro Desktop Editor application. The Hub will also appear as a MIDI device for outputting MIDI directly to your pedals from a computer, without requiring another MIDI interface.
- 9V DC: Power the Hub here with the included power supply. The power supply is negative tip, positive barrel. The Hub can also be powered by most 9V DC outputs providing 100mA, but be sure that the polarity and voltage are correct. Only regulated supplies should be used.
Rear ConnectionsThe rear panel of the Hub features MIDI I/O, an Expression Input, and a Sensor Input for use with Hot Hand.
 Sensor Input: Connect a Hot Hand® receiver here using the provided 1/8” TRRS sensor cable.The Hot Hand receiver will be powered from the Hub. The Hot Hand signals will automatically be routed to any connected pedals.
- MIDI IN: Standard 5-pin DIN connectors can be used here to connect a MIDI controller to the MIDI IN jack. The Hub can receive and respond to a variety of MIDI commands. See the MIDI Features section for more detail.
- MIDI OUT: This jack is by default a MIDI Thru connection. This means that any messages received on the MIDI IN port are immediately passed to the OUT port. The MIDI OUT jack can alternatively be used to convert incoming expression pedal or Hot Hand signal to MIDI CC messages. To do this, connect your Hub to the Neuro Desktop Editor, and select “Hardware Settings” (the gear icon). Change “MIDI Out Mode” from “MIDI Thru” to “MIDI Out.” You can then configure your incoming expression pedal and Hot Hand signal to be translated into MIDI CC messages using the “Hot Hand X MIDI Out,” “HOT HAND Y MIDI Out,” and “Expression MIDI Out” parameters.
- EXP IN: Connect a passive expression pedal, such as the Source Audio Dual Expression Pedal or Source Audio Reflex Universal Expression Pedal. The port may be used with a 3rd party expression pedal, but the connection must be “Tip hot” and the value of the internal pot should be in the 10k to 50k range for best results.
 Sensor Input: Connect a Hot Hand® receiver here using the provided 1/8” TRRS sensor cable.The Hot Hand receiver will be powered from the Hub. The Hot Hand signals will automatically be routed to any connected pedals.
Top Panel ControlsThe Neuro Hub has a very simple interface on the top panel. The blue POWER LED should be lit whenever the device is powered. There are also two buttons that perform multiple functions:
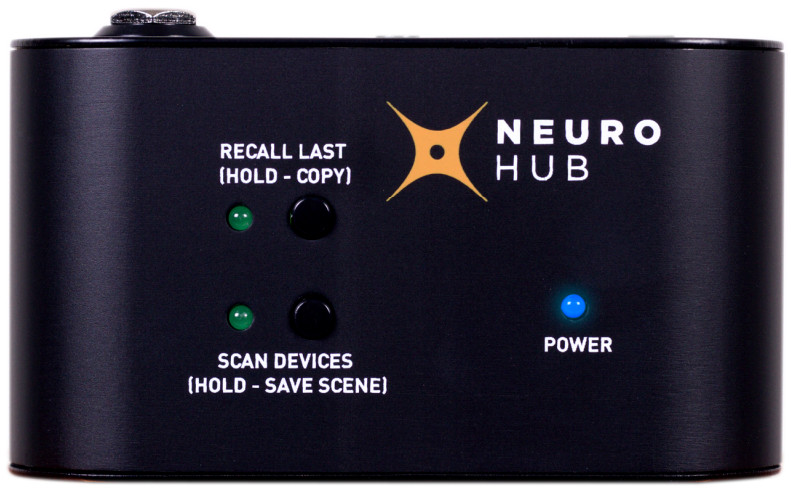
Scan Devices (Hold – Save Scene):
- Scan Devices: Pressing the Scan button will send a “ping” message to all of the attached devices to check the connections and the state of the pedal. The Hub automatically scans the attached pedals when it powers up. However, if a new pedal is connected later, press Scan to make sure that the Hub is properly connected to it. The Sensor LED on any connected pedals will blink to acknowledge.
- Save Scene: Pressing and holding the button for two seconds will perform a “Scene Save” function. The Hub queries all of the attached Soundblox pedals settings and stores them in flash memory inside the Hub. There are 128 Scene locations. By default, scenes are stored to location 1. To access the other locations, connect an external MIDI controller. The Hub will automatically save scenes to the last received MIDI Program Change number (1 through 128).
Recall Last (Hold – Copy):
- Recall Last: Pressing the Recall Last button to recall the scene corresponding to the last MIDI Program Change number received. On powering up, the Hub will recall the scene in location 1 when the Recall Last button is pressed. The LED next to the Recall button will also flash when the Hub receives an incoming MIDI message.
- Copy: Press and hold to button for two seconds to put the Hub into Copy mode. The LED next to the button will begin to blink to indicate that the Hub is in Copy mode.While in Copy mode, the Hub will ignore any incoming MIDI Program Change messages. This allows you to cycle through PC numbers until you get to the desired PC number you wish to save the scene to. Press the Recall/Copy button again to recall the copied preset, then press and hold the Scan/Save button to complete the Scene Save to the new location. The LED will blink slowly to acknowledge that the save was successful.Example: The last PC number sent to the Hub was 10. Scene 10 was recalled. To save the same scene to location 37, enter copy mode. Cycle through PC numbers on your MIDI controller until 37 is reached. Press the Recall/Copy button again, then press and hold the Scan/Save button for two seconds. Scene 10 is now copied to location 37.
Scene SavingOne of the most powerful features of the Neuro Hub is the ability to save pedalboard scenes for all of the connected One Series and Soundblox 2 pedals. A scene is a snapshot of all the connected pedals including ON/OFF state, all knob settings, and all control options. Since all pedal settings are saved, this gives users the ability to save and store unique effect combinations not possible with traditional pedals.
There are 128 scene memory locations that can be selected by received MIDI messages. The Hub requires the use of an external MIDI device or computer to set the current scene memory location to be saved or recalled. A simple MIDI PC switcher like the Tech 21 MIDI Mouse can be used for this purpose. More advanced MIDI controllers like the Source Audio Soleman MIDI Foot Controller, computers, and tablets can also be used.
MIDI FeaturesThe Hub uses MIDI PC messages for saving and recalling scenes. Additionally, the Hub can also respond to MIDI Continuous Control (CC) messages and MIDI Clock.
MIDI CC messages received by the Hub are passed on to the connected pedals. MIDI CC mappings for One Series pedals must be created by connecting the Neuro Desktop Editor directly to the USB port on the pedal (not through the Neuro Hub), clicking the Device option in Neuro Desktop’s top row navigation, and opening the Edit Device MIDI Map window. Map CC numbers by selecting one of the options in the corresponding Assigned Parameter dropdown menu. For Soundblox 2 pedals, the function of each CC number is hard mapped to pedal functions across the line. The Soundblox 2 MIDI implementation table is available on the next page of this document. If you plan to use MIDI CC messages to control parameters, we recommend assigning all of your Soundblox 2 pedals to a single MIDI channel and each One Series pedal to its own MIDI channel. If you only plan to use MIDI PC messages to engage pedal scenes, all the pedals can stay on a single MIDI channel.The Hub can also accept MIDI Clock messages to synchronize LFOs on One Series and Soundblox 2 pedals that support this function. This allows an external MIDI device to set the LFO rate on an effect by sending a MIDI Clock stream to the Hub. The MIDI Clock is sent simultaneously to attached pedal so it is possible to use MIDI Clock input to synchronize LFOs between two or more pedals.
The MIDI Output functions as a MIDI Thru connection by default. This means that any incoming MIDI messages are immediately sent back out on the MIDI Out jack. However, it is possible to use the Neuro Desktop Editor to change the mode of the MIDI Out. For example, it can be set to take incoming Expression and Hot Hand messages and send them on the MIDI Out as Continuous Control messages. Go to the MIDI OUT section of the Rear Connections page of this document for further instructions.
MIDI Continuous Control TableThis table describes the mapping of MIDI CC messages to functions on corresponding Soundblox 2 effect pedals. MIDI CC mappings for all One Series pedals are listed in the Neuro Desktop Editor under the “Device” in the top bar navigation.
SA220 Multiwave Distortion
| MIDI CC# | Parameter Name |
| 0 | SA220_DRIVE |
| 1 | SA220_SUSTAIN |
| 2 | SA220_OUTPUT |
| 3 | SA220_TREBLE |
| 4 | SA220_MID |
| 5 | SA220_BASS |
| 6 | SA220_EFFECT |
| 7 | SA220_ONOFF |
| 8 | SA220_MORPH |
SA221 Multiwave Bass Distortion
| 12 | SA221_DRIVE |
| 13 | SA221_CLEANMIX |
| 14 | SA221_OUTPUT |
| 15 | SA221_TREBLE |
| 16 | SA221_MID |
| 17 | SA221_BASS |
| 18 | SA221_EFFECT |
| 19 | SA221_ONOFF |
| 20 | SA221_MORPH |
SA223 Manta Bass Filter
| 36 | SA223_DEPTH |
| 37 | SA223_FREQUENCY |
| 38 | SA223_MODSOURCE |
| 39 | SA223_SPEED |
| 40 | SA223_RESONANCE |
| 41 | SA223_MIX |
| 42 | SA223_OUTPUT |
| 43 | SA223_DISTORTION |
| 44 | SA223_DISTTYPE |
| 45 | SA223_EFFECT |
| 46 | SA223_ONOFF |
| 47 | SA223_DIRECTMOD |
SA225 Dimension Reverb
| 60 | SA225_TIME |
| 61 | SA225_PREDELAY |
| 62 | SA225_OUTPUT |
| 63 | SA225_DIFFUSION |
| 64 | SA225_LFORATE |
| 65 | SA225_BASS |
| 66 | SA225_LFODEPTH |
| 67 | SA225_TREBLE |
| 68 | SA225_MIX |
| 69 | SA225_EFFECT |
| 70 | SA225_SEND |
| 71 | SA225_ONOFF |
SA226 Orbital Modulator
| 72 | SA226_FREQUENCY |
| 73 | SA226_DEPTH |
| 74 | SA226_SPEED |
| 75 | SA226_MODSOURCE |
| 76 | SA226_FEEDBACK |
| 77 | SA226_OUTPUT |
| 78 | SA226_LORETAIN |
| 79 | SA226_TREMOLO |
| 80 | SA226_MIX |
| 81 | SA226_EFFECT |
| 82 | SA226_ONOFF |
| 83 | SA226_DIRECTMOD |
SA227 OFD Guitar microModeler
| 84 | SA227_VOICE |
| 85 | SA227_DRIVE |
| 86 | SA227_OUTPUT |
| 87 | SA227_TREBLE |
| 88 | SA227_MID |
| 89 | SA227_BASS |
| 90 | SA227_EFFECT |
| 91 | SA227_ONOFF |
| 92 | SA227_MORPH |
SA228 OFD Bass microModeler
| 96 | SA228_MIX |
| 97 | SA228_DRIVE |
| 98 | SA228_OUTPUT |
| 99 | SA228_TREBLE |
| 100 | SA228_MID |
| 101 | SA228_BASS |
| 102 | SA228_EFFECT |
| 103 | SA228_ONOFF |
| 104 | SA228_MORPH |
Specifications
- Weight: 6 oz.
- Dimensions: 3.8 in. (W) x 2.1 in. (L) x 1.4 in. (H)
- Power requirements: 9 Volts DC @ 40mA (up to 80mA with Hot Hand accessories)
- Power plug size: 2.1mm (inner dia.), 5.5mm (outer dia.) center negative, barrel positive
- Expression Pedal input: Stereo ¼ in. plug, tip hot, 10k-50k Ohm resistance. Linear type.
- Multi-Function connector: 4 conductor, 3.5mm plug
Limited Warranty
Source Audio, LLC (hereinafter “Source Audio”) warrants that your new Source Audio Soundblox Hub v1 when purchased at an authorized Source Audio dealer in the United States of America (“USA”), shall be free from defects in materials and workmanship under normal use for a period of one (1) year from the date of purchase by the original purchaser. Please contact your dealer for information on warranty and service outside of the USA.Under this Limited Warranty, Source Audio’s sole obligation and the purchaser’s sole remedy shall be repair, replacement, or upgrade, at Source Audio’s sole discretion, of any product that, if properly used and maintained, proves to be defective upon inspection by Source Audio. Source Audio reserves the right to update any unit returned for repair and to change or to improve the design of the product at any time without notice. Source Audio reserves the right to use reconditioned parts and assemblies as warranty replacements for authorized repairs. Any product repaired, replaced, or upgraded pursuant to this Limited Warranty will be warranted for the remainder of the originalwarranty period.This Limited Warranty is extended to the original retail purchaser. This Limited Warranty can be transferred to anyone who may subsequently purchase this product provided that such transfer is made within the applicable warranty period and Source Audio is provided with all of the following information: (i) all warranty registration information (as set forth on the registration card) for the new owner, (ii) proof of the transfer, within thirty (30) days of the transfer, and (iii) a photocopy of the original sales receipt. Warranty coverage shall be determined by Source Audio in its sole discretion. This is your sole warranty. Source Audio does not authorize any third party, including any dealer or sales representative, to assume any liability on behalf of Source Audio or to make any warranty on behalf of Source Audio.WARRANTY INFORMATIONSource Audio may, at its option, require proof of the original purchase date in the form of a dated copy of original authorized dealer’s invoice or sales receipt. Service and repairs of Source Audio products are to be performed only at the Source Audio factory or a Source Audio authorized service center. Prior to service or repair under this Limited Warranty, the purchaser must request from Source Audio a return authorization, which is available at: Source Audio LLC 120 Cummings Park, Woburn, MA 01801 (781) 932-8080 or at www.sourceaudio.net.Unauthorized service, repair, or modification will void this Limited Warranty.
DISCLAIMER AND LIMITATION OF WARRANTYDO NOT OPEN THE SOUNDBLOX HUB UNDER ANY CIRCUMSTANCE. THIS WILL VOID THE WARRANTY.THE FOREGOING LIMITED WARRANTY IS THE ONLY WARRANTY GIVEN BY SOURCE AUDIO AND IS IN LIEU OF ALL OTHER WARRANTIES. ALL IMPLIED WARRANTIES, INCLUDING WARRANTIES OF MERCHANTABILITY AND FITNESS FOR ANY PARTICULAR PURPOSE, EXCEEDING THE SPECIFIC PROVISIONS OF THIS LIMITED WARRANTY ARE HEREBY DISCLAIMED AND EXCLUDED FROM THIS LIMITED WARRANTY. UPON EXPIRATION OF THE APPLICABLE EXPRESS WARRANTY PERIOD, SOURCE AUDIO SHALL HAVE NO FURTHER WARRANTY OBLIGATION OF ANY KIND, EXPRESS OR IMPLIED. SOURCE AUDIO SHALL IN NO EVENT BE LIABLE FOR ANY SPECIAL, INCIDENTAL OR CONSEQUENTIAL DAMAGES SUFFERED BY THE PURCHASER OR ANY THIRD PARTY, INCLUDING WITHOUT LIMITATION, DAMAGES FOR LOSS OF PROFITS OR BUSINESS OR DAMAGES RESULTING FROM USE OR PERFORMANCE OF THE PRODUCT, WHETHER IN CONTRACT OR IN TORT.SOURCE AUDIO SHALL NOT BE LIABLE FOR ANY EXPENSES, CLAIMS OR SUITS ARISING OUT OF OR RELATING TO ANY OF THE FOREGOING. Some states do not allow the exclusion or limitation of implied warranties so some of the above limitations and exclusions may not apply to you. This Limited Warranty gives you specific legal rights, and you may also have other rights, which vary, from state to state. This Limited Warranty only applies to products sold and used in the USA. Source Audio shall not be liable for damages or loss resulting from the negligent or intentional acts of the shipper or its contracted affiliates. You should contact the shipper for proper claims procedures in the event of damage or loss resulting from shipment.
© SOURCE AUDIO LLC 120 CUMMINGS PARK, WOBURN, MA 01801 ONLINE AT: SOURCEAUDIO.NET
References
[xyz-ips snippet=”download-snippet”]