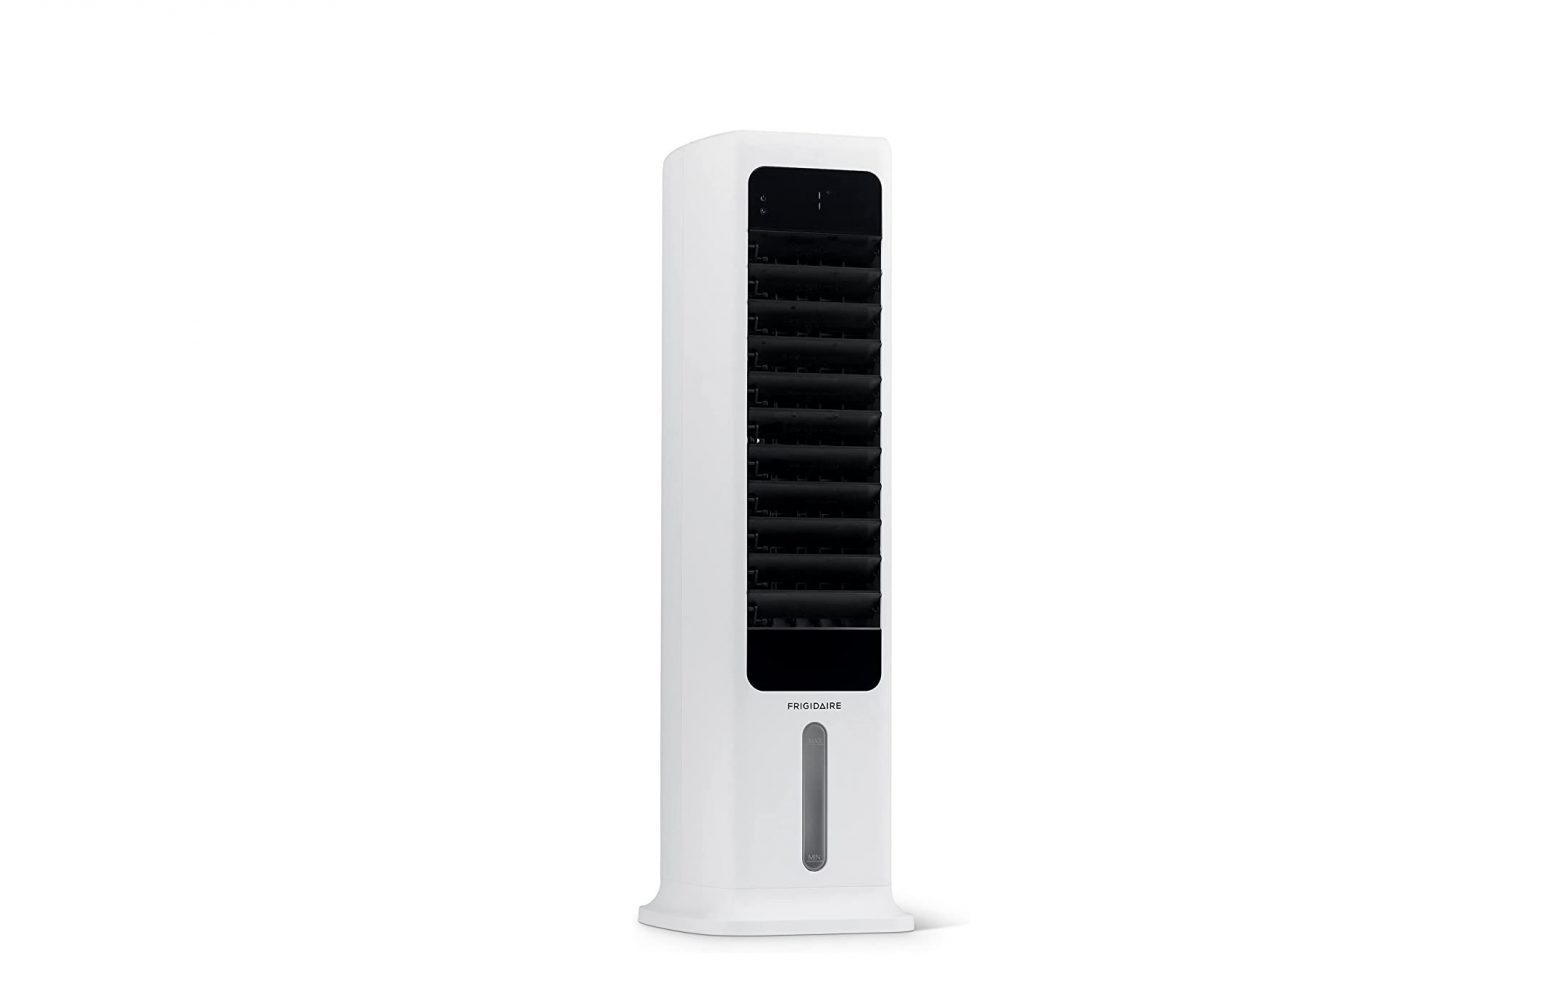
newair FEC450WH00 Evaporative Cooler User Manual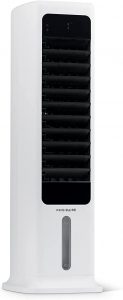
INTRODUCTION
Welcome to our family
Register Your Frigidaire Product Online Today!Take advantage of all the benefits product registration has to offer:
 Service and SupportDiagnose troubleshooting and service issues faster and more accurately
- Recall NotificationsStay up-to-date on safety notices, system updates, and recall notifications
- Special PromotionsOpt-in for promotions and offers
Registering your product information online is safe & secure and takes less than 2 minutes to complete:
Alternatively, we recommend you attach a copy of your sales receipt belowand record the following information, which can be found on the manufacturer’s nameplate on the back of the unit. You will need thisinformation if it becomes necessary to contact the manufacturer for service inquiries.
Date of Purchase:_____________Serial Number:_______________Model Number:______________
IMPORTANT SAFETY INFORMATION
![]() WARNINGPlease read all instructions before using this appliance.
WARNINGPlease read all instructions before using this appliance.
![]() WARNINGCancer and Reproductive Harm www.P65Warnings.ca.gov
WARNINGCancer and Reproductive Harm www.P65Warnings.ca.gov
Safety Definitions
This is the safety alert symbol. It is used to alert of potential personal injury hazards. Obey all safety messages that follow this symbol to avoid possible injury or death.
![]() DANGERDANGER indicates an imminently hazardous situation which, if not avoided, will result in death or serious injury.
DANGERDANGER indicates an imminently hazardous situation which, if not avoided, will result in death or serious injury.
![]() WARNINGWARNING indicates a potentially hazardous situation which, if not avoided, could result in death or serious injury.
WARNINGWARNING indicates a potentially hazardous situation which, if not avoided, could result in death or serious injury.
![]() CAUTIONCAUTION indicates a potentially hazardous situation which, if not avoided, may result in minor or moderate injury.
CAUTIONCAUTION indicates a potentially hazardous situation which, if not avoided, may result in minor or moderate injury.
IMPORTANTIMPORTANT indicates installation, operation or maintenance information which is important but not hazard related.
Child Safety
Destroy or recycle the carton, plastic bags, and any exterior wrapping material immediately after the refrigerator is unpacked. Children should NEVER use these items to play. Cartons covered with rugs, bedspreads, plastic sheets or stretch wrap may become airtight chambers, and can quickly cause suffocation.
Safety Instructions
These instructions are not meant to cover every possible condition and situation that may occur. Please read all instructions before using this evaporative cooler. Failure to carefully read all instructions may result in possible electric shock or fire hazard, and will void the manufacturer’s warranty
- Before use, please check whether the operating voltage matches the voltage on the label of the unit.
- Cleaning and maintenance should never be done by children without supervision.
- WARNING: Unplug or disconnect the appliance from the power supply before servicing or cleaning.
- The appliance is only for household and indoor use.
- This appliance has one polarized plug blade that is wider than the other. To reduce the risk of electric shock, this plug is intended to fit in a polarized outlet only one way. If the plug does not fit fully into the outlet, reverse the plug. If it still does not fit, contact a qualified electrician. Do not attempt to override this safety feature.
- WARNING: TO REDUCE THE RISK OF FIRE OR ELECTRIC SHOCK, DO NOT USE THIS FAN WITH ANY SOLIDSTATE SPEED CONTROL DEVICE.
- WARNING: Chemical Burn Hazard. Keep batteries away from children.
- This product (the remote control) contains a lithium button/coin cell battery. If a new or used lithium button/coin cell battery is swallowed or enters the body, it can cause severe internal burns and can lead to death in as little as 2 hours. Always completely secure the battery compartment. If the battery compartment does not close securely, stop using the product, remove the batteries, and keep it away from children. If you think batteries might have been swallowed or placed inside any part of the body, seek immediate medical attention.
- Turn off the power and remove the power cord (be sure to unplug the power cord when cleaning the body, or else it may cause electric shock and fire or other personal injury).
- When cleaning, use ordinary detergent and a soft brush. Do not use chemical agents.
- Do not use corrosive detergent or solvent.
- Do not clean the appliance with excessive amounts of liquid cleaners, as it may cause electrical shock.
- After cleaning, please ensure that the Outer Dust Filter, Cooling Pad, and Water Tank are correctly installed before using.
- When the product is not going to be used for a long time, remove the power plug, package the product, and prevent dust from entering the body, or else it may cause mechanical damage long term.
SAVE THESE INSTRUCTIONS
FEATURES
- Wind speed: Low, medium, and high
- Wind mode: Normal, natural, and sleep
- Wind oscillation: Horizontal and vertical options
- Timer shutdown: 1-9 hours timer
- Water pump cooling/humidification
- Dry wind function
- Automatic dimming LED light after 1 minute without action
- Remote control (operation distance up to 19 ft.)
- Easy to clean and fill water tank
- Spray water circulation refrigeration technology for faster cooling
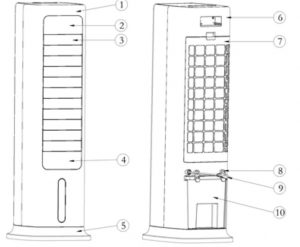
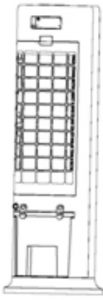
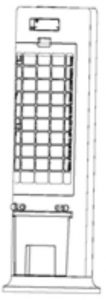
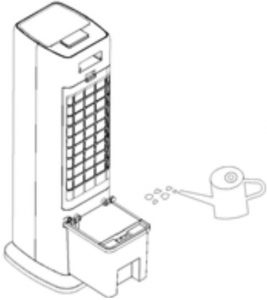
| 1. | Front case |
| 2. | Display panel |
| 3. | Horizontal blade |
| 4. | Cover panel |
| 5. | Base |
| 6. | Rear case |
| 7. | Rear grill |
| 8. | Winding frame |
| 9. | Power cord |
| 10. | Water tank |
ACCESSORIES
- Remote Control

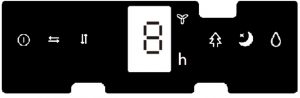
FEC450WH00 control panel.
- ON/OFF
- OSCILLATION
- FAN
- TIMER
- MODE
- COOLING


- Power on/off
- Horizontal oscillation
- Vertical oscillation
- Fan speed (Low-Medium-High)
- Timer (1-9hours)
- Mode (Normal, Natural, Sleep)
- Cooler/Humidifier


- Display panel
- Remote control operation panel
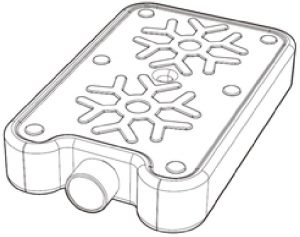
- Ice pack

SPECIFICATIONS
Ice pack use:
- Place ice pack on the freezer until completely frozen.
- Slide open the water tank, place frozen ice pack inside and close shut. Wait about 10min for the air temperature to decrease.
- Avoid opening the lid of the ice pack and/or consuming its contents.
SPECIFICATIONS
| MODEL NO: | FEC450WH00 |
| RATED VOLTAGE | 120V |
| RATED FREQUENCY | 60Hz |
| RATED POWER | 60W |
| NOISE | ≤55dB (average) |
| CFM | 412 |
| PRODUCT DIMENSIONS | 11.4” W x 11.4” D x 35.8” H |
CONTROLS & OPERATION
INSTALLATION METHODAfter the product is taken out of the package, it can be used immediately by just plugging it in.
Use of each function
- When it is first powered on, the buzzer beeps twice and the device will enter standby mode, with all function indicators off. All buttons will be inactive except for the “On/Off” button.
- “On/Off”:In standby mode, press this key to turn the unit into working mode. The power indicator and speed indicator light will turn on at the same time, and the current speed will be displayed. When the unit is first turned on, the setting is at low speed and wind mode is in the normal mode.When the power is on, press this button to shut down. The buzzer will beep. When the device is shut down, the system will return to the standby state without any output or display.
- “Left-Right” OscillationIn working mode, press to turn on/off the horizontal oscillation, and the corresponding LED indicator will light up.
- “Up-Down” OscillationIn working mode, press to turn on/off the vertical oscillation, and the corresponding LED indicator will turn on.Note: After powering on for the first time, the motor needs to swing downward to find the original point first. The horizontal blades may close for about 10 seconds and then swing upwards, which is normal.When no oscillation is not turned on, the horizontal blade will swing to the horizontal position and stop.
- “Fan”5.1 In working mode, press to adjust the wind speed with 1 time for low, 2 for medium, and 3 for high on the control panel.Dry wind function:
- In working mode, press and hold for 3 seconds to enter the dry wind function. After starting the LED light will be on and flash for 20 minutes;
- During the operation of the dry wind function, except for and keys, all other function keys are blocked (press the key and hold for 3 seconds to exit the dry wind function).
- After 20 minutes of high wind, the unit will automatically shut down and enter working mode.
- In working mode, press and hold for 3 seconds to enter the dry wind function. After starting the LED
- “Timer”This is used to activate the timing function with a time range of 1-9 hours. The time duration increases by hours and is shown on the digital display. In working mode, press this key to set the power off time of the unit. The timer indicator and time indicator will turn on and the digital display will flash to show the set time, indicating that the timer is activated. At this moment, you can press the timer key to set a different timing and press any button (except On/Off) or wait 5 seconds to exit the setting. After setting the timer, the digital display will alternately show the set timing and the current wind speed at 10 seconds intervals, and the wind speed indicator and time indicator will light on accordingly. When the time lapse set reaches its end, the unit will shut down and enter standby mode.
- “Mode”Press to select different wind modes in the following sequence: normal → natural → sleep, and the corresponding LED indicator will turn on. There is no indicator for normal mode.
Normal mode: the fan runs at a fixed speed selected without any change.
Natural mode: the fan speed fluctuates between low, medium and high on a random pattern.
In the natural mode, the LED indicator shows the selected mode; the speed indicator will only show the initial wind speed; other changes during natural mode will not show (i.e., if the natural mode is turned on high speed, the speed indicator will only show the high indicator without switching).
Sleep mode: Regardless of the speed set before selecting sleep mode, the sleep wind mode will start on the current setting. The wind speed will start lowering in 30 minutes intervals, and the speed LED indicator will show the speed changes at the same time until the lowest speed is reached. If there is a timer set at the same time, once the timing interval is over the unit will shut down
- “Cooling”In working mode, press to turn on/off the cooler function, and the corresponding LED indicator will turn on.
- ” Screen off”(only on remote)In working mode press for all the LED indicators to turn off.Press again on the remote or press any button on the unit’s control panel when the LED display is off to turn it back on, then press any other button to execute the corresponding function.
Notes
- There is a low water level sensor and alarm: After the water pump works for 60s, and the software detects that the water level is low for 5 consecutive seconds (65 seconds in total), the water pump will stop working and unit will beep 10 times
- If there is no activity on the control panel while in working mode for 1min the indicator lights will dim automatically and will return to regular brightness once you press any button on the control panel again.
- In case of power loss, the unit’s memory function will restart the unit with the previous setting once energy it’s recovered.
- If the unit is turned off and on manually, it will restart on medium wind speed and then switch to the previous speed setting after 3 seconds.
- If the unit is in sleep mode before turning off (manually or by power outage), the memory function will not restart on previous mode, but will restart in normal mode.
Water filling:
If the cooling and humidification functions are turned on, please add water to the water tank. Before adding water, unlock the water tank knob by rotating the knob to a horizontal position. After the water tank is half drawn out, slowly pour the water into the water tank (Fig. 1, Fig. 2, Fig. 3). After adding the water, return the water tank into its original position, and then lock the water tank knob rotating it to its original vertical position.
- Water tank lock knob is locked (Fig. 1)
- Water tank lock knob is unlocked (Fig. 2)
- Water tank is drawn out for water filling (Fig. 3)
- When adding water manually, please pay attention to the water level displayed on the water tank (Fig.5).

- When adding water, please be careful not to fill above the maximum water level or below the minimum water level. Be careful when using an ice pack since it can affect the water level on the tank.
- Be sure to use clean water.
- Tip: It is normal if there is a slight smell and the water is slightly colored when the unit is used for the first time. It is non-toxic and harmless, and will not affect your health.
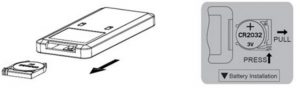
Use of remote control
- First, open the battery cover on the back of the remote control and install a 3V CR2032 battery.
- When using the remote, point it toward the control panel, which has a receiver on the far right of the panel.
- When the battery is low, please replace it immediately. Dispose of batteries properly and keep them away from children. Please note that even used batteries could be hazardous.
Caster Wheels Installation
- Step 1: Lay unit on its back
- Step 2: Push in the caster wheels with even pressure into the openings
Note:The wheels can be hard to slide in, make sure to use enough force to slide fully into place.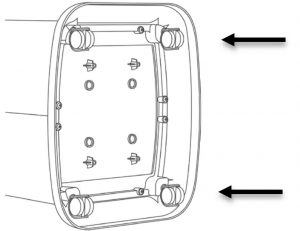
CLEANING AND MAINTENANCE ATTENTION
- Don’t use chemicals when cleaning.
- Turn off the power and unplug it to avoid electric shock.
- Please use a soft cloth to wipe surface dust, if any: if it’s too dusty, please mix water with a soft detergent, wipe with soft cloth and dry.
- When cleaning, please don’t use gasoline, corrosive detergent or solvent that may damage the outer surface.
Cleaning of rear net and cooling padAs excessive dust or specs can accumulate on the net, it may affect air circulation, is recommended to clean it at least once every other month.
- Unplug the power
- Take out rear net and cooling pad (as in figure shown below)
- Soak cooling pad in detergent for a few minutes, then clean and dry it.
Water tank cleaning
- Unplug the power supply, unlock the water tank by rotating the knob to a horizontal position, and pull out the water tank halfway.
- Put your hand into the water tank, rotate the fixing buckle 90°, and then push the water pump box assembly down to take it out, and finally take out the water tank.
- Wipe off the scale in the water tank with a towel dipped in detergent, and then pour out the sewage after washing with water.
Cleaning of body surface
- Clean the body surface with a wet cloth.
- Don’t use corrosive detergent or solvent for cleaning.
- When cleaning the body, please be sure to turn off the power switch and unplug the power cord to avoid electric shock.
Installation and use after cleaning
- Install wet cooling pad and rear net properly in the correspondingsequence.
- Connect the power supply and ensure normal operation of the unit.
Maintenance
- When not using for a long time, unplug the power cord and pack the product to avoid dust.
- Make sure that the cooling pad and filter screen are dry and there is no water in the water tank before packaging.
TROUBLESHOOTING
Let us help you troubleshoot your concern! This section will help you with common issues. If you need us, visit our website, chat with an agent, or call us. We may be able to help you avoid a service visit. If you do need service, we can get that started for you!
| Problem | Possible Causes | Solution |
| The unit does not cool. | There is insufficient water in the tank. | Check the water level in the tank and make sure there is enough water. |
| The water pump is not lowered all the way to the bottom.The pump is defective. | Check the water pump to make sure it is lowered all the way to the bottom, then press the evaporative cooling button.Contact customer service if there is an issue with the water pump. | |
| The unit does not cool on high speed. | The cooling pad is not sufficiently saturated with water. | The cooling pad will be fully soaked after the unit runs for 10 minutes. |
| The water tank is leaking. | The water tank is damaged. | Contact customer service if there is an issue with the water tank. |
LIMITED WARRANTY
This appliance is covered by a limited manufacturer’s warranty. For one year from the original date of purchase, the manufacturer will repair or replace any parts of this appliance that prove to be defective in materials and workmanship, provided the appliance has been used under normal operating conditions as intended by the manufacturer.
Warranty Terms:During the first year, any components of this appliance found to be defective due to materials or workmanship will be repaired or replaced, at the manufacturer’s discretion, at no charge to the original purchaser. The purchaser will be responsible for any removal or transportation costs.
Warranty Exclusions:The warranty will not apply if damage is caused by any of the following:
- Power failure
- Damage in transit or when moving the appliance
- Improper power supply such as low voltage, defective household wiring or inadequate fuses
- Accident, alteration, misuse or abuse of the appliance such as using non approved accessories, inadequate air circulation in the room or abnormal operating conditions (extreme temperatures)
- Use in commercial or industrial applications
- Fire, water damage, theft, war, riot, hostility or acts of God such as hurricanes, floods, etc.
- Use of force or damage caused by external influences
- Removal of stickers and/or screws
- Partially or completely dismantled appliances
Obtaining Service:When making a warranty claim, please have the original bill of purchase with purchase date available. The purchaser will be responsible for any removal or transportation costs. Replacement parts and/or units will be new, remanufactured or refurbished and are subject to the manufacturer’sdiscretion.For technical support and warranty service, pleaseemail:[email protected]
FRIGIDAIRE is a pending or registered trademark used under license fromElectrolux Home Products, Inc.All rights reserved.Manufactured under license by:NewAir, LLC6600 Katella Ave, Cypress, CA 90630
Our home is your home. Visit us if you need help with any of these things:
![]() owner support
owner support![]() accessories
accessories![]() service
service![]() registration(See your registration card for more information.)newair.comPhone: 1 (855) 963-9247
registration(See your registration card for more information.)newair.comPhone: 1 (855) 963-9247
![]()
References
[xyz-ips snippet=”download-snippet”]