
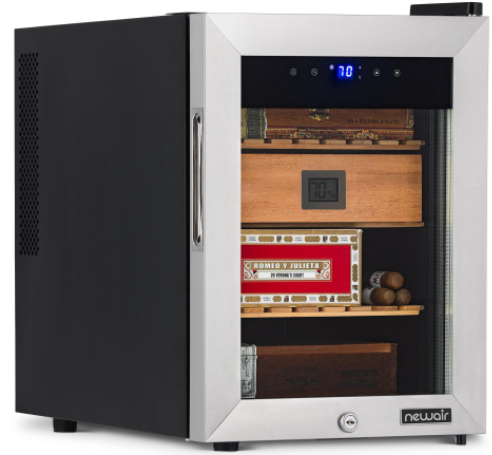
newair NCH250SS01 250 Count Thermoelectric Cigar Humidor
SPECIFICATIONS
| MODEL NO. | NCH250SS01 |
| CAPACITY: | 1.16 Cu. Ft. |
| VOLTAGE: | 110-120V |
| CURRENT: | 70W / 1.0A |
| FREQUENCY: | 60Hz |
| TEMPERATURE CONTROL RANGE: | 52 – 74°F |
| WEIGHT: | 32 lbs. |
| DIMENSIONS: | 19.3” D x 13.6” W x 18.5” H |
REGISTER YOUR PRODUCT ONLINE
Register Your NewAir Product Online Today!Take advantage of all the benefits product registration has to offer:
Service and SupportDiagnose troubleshooting and service issues faster and more accurately
Recall NotificationsStay up to date for safety, system updates and recall notifications
Special PromotionsOpt-in for NewAir promotions and offers
Registering your product information online is safe & secure and takes less than 2 minutes to complete: newair.com/register
SAFETY INFORMATION & WARNINGS
To reduce the risk of electric shock or injury when using your appliance, follow these basic precautions:
- Read all instructions before using this cigar humidor cabinet.
- Never allow children to operate or play with this appliance.
- Never clean appliance parts with flammable fluids. The fumes can create a fire hazard or explosion.
- Do not store or use any flammable vapors and liquids in the vicinity of this appliance. The fumes can create a fire hazard or explosion.
- This appliance is not intended for food storage.
- This appliance is not intended for use by people (including children) with reduced physical, sensory or mental capabilities, lack of experience or knowledge of its operation, unless well instructed or under supervision of a person responsible for their safety.
PARTS LIST

- LED Light
- Cedar Wood Tray
- Cedar Wood Drawer
- Hygrometer
- Cedar Wood Tray
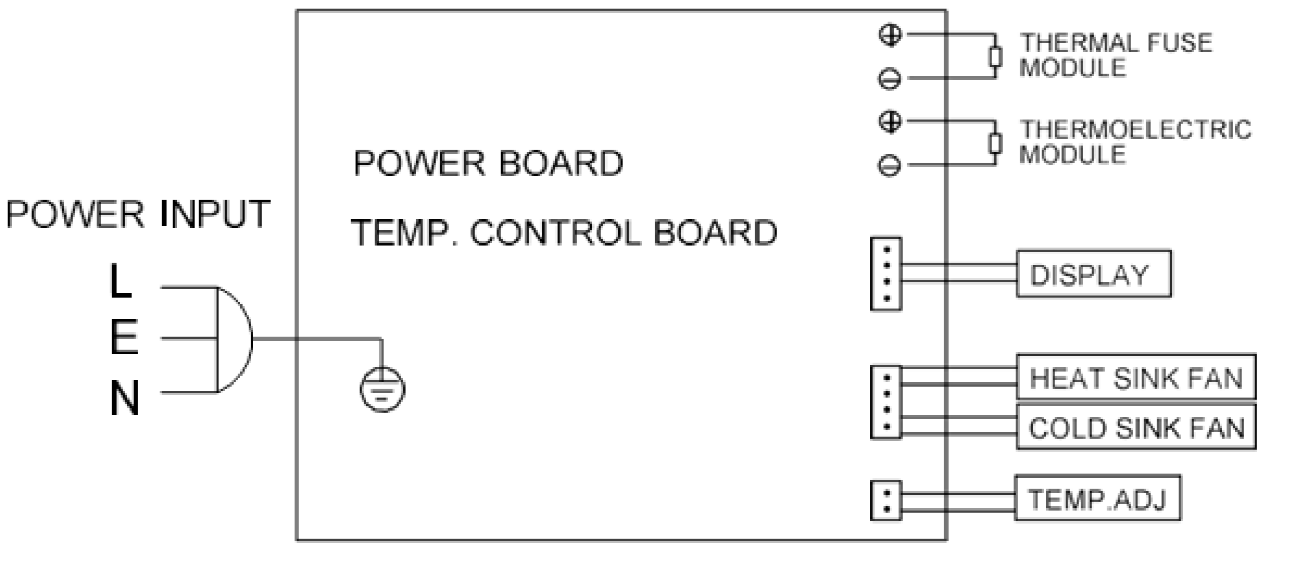
ELECTRICAL DIAGRAM
ASSEMBLY & INSTALLATION
Before using your cigar humidor, complete the following steps:
- Remove all exterior and interior packaging
- Make sure the following parts are included:
- 3 wood shelves
- 2 keys
- 1 moisture container
- 1 instruction manual
Before operating your cigar humidor for the first time, follow these steps:
- Clean the interior surface with lukewarm water using a soft cloth.
- Place your appliance on a flat surface strong enough to support the appliance when it is fully loaded. To level your humidor, adjust the front legs at the bottom of the appliance.
- Ensure the cabinet is located away from direct sunlight and sources of heat (i.e.: stove, heater, radiator, etc.). Direct sunlight may affect its acrylic coating. Extreme cold or hot ambient room temperatures may also cause the appliance to not perform properly and/or increase electrical consumption.
- The appliance is intended for indoor use only.
CAUTION: Please keep the cabinet away from combustible materials or substances.
FACTORY ODOR REMOVALWash the interior of the humidor with a mild detergent and warm water. Make sure to not get the wood wet. Leave the door open and allow it to air dry thoroughly. If a “plastic” smell persists, place a dish of baking soda in the unit or stuff the humidor with newspapers overnight. When finished, let the unit run a full day to complete the airing out process.
DRAWER SET-UPThe drawers and shelves included with this humidor are designed to sit flush with the front edge of the cabinet. This will allow air to circulate freely through the unit. When inserting the drawers and shelves, avoid pushing them all the way against the rear wall of the cabinet.
SEASONING YOUR CIGAR HUMIDORIt is best to season your wood shelves and drawers before adding your cigars so that the wood is at an ideal RH and does not absorb humidity from your cigars. To season your new cigar humidor:
- Add distilled water to the included moisture container or add a sponge that is damp with distilled water. Make sure that the water is not touching the wood directly or this may damage the wood.
- Allow the moisture container, or other humidity-adding device, to sit in the humidor until it reaches a relative humidity of 5% higher than your preferred level. This process may take as long as 3 days but is the best way to ensure your cigars stay optimal.
- Once the humidor reaches this mark, you can begin to add cigars. You may add a few at a time in order to monitor the RH and make sure it stays at a level you want it at. If it drops too much, you can use the same seasoning method to bring it back up.
NOTE: During this entire process, it is recommended to not open the door unnecessarily, as this lets moisture escape and can delay the process.
OPERATING INSTRUCTIONS
It is recommended that you setup the cigar cabinet in a place where the ambient temperature is between 50 – 77°F. If the ambient temperature is above or below recommended temperatures, the performance of the unit may be affected. For example, placing in extreme cold or hot conditions may cause the interior temperature to fluctuate or not reach the appliance’s range.The temperature may fluctuate depending on whether the interior light is on or off or how cigars are placed on the upper, middle, or lower section.
HOW TO SET TEMPERATURE:There are four touch-buttons on the control panel:
Increases or decreases the set temperature by 1 degree (temp range is 52 – 74°F).Button turns on or off the interior light.Selects temperature display setting Fahrenheit or Celsius.
Note: This product is designed to operate in rooms with an ambient temperature range of 50 – 77°F.
CLEANING & MAINTENANCE
CLEANING YOUR CIGAR CABINETTo clean your cigar cabinet:
- Unplug the cigar humidor and remove its contents and trays.
- Clean the inside with a warm water and baking soda solution, about 2 tablespoons of baking soda to a quart of water.
- The outside of the cigar humidor should be cleaned with mild detergent and warm water.
- Take out the water reservoir and clean with warm water.
TRANSPORTING THE CABINET
- Remove all contents and sliding shelves.
- Secure all loose items inside the unit.
- Adjust the leveling legs up to the base to avoid damage.
- Secure door shut.
- Be sure the cigar humidor stays in an upright position during transportation.
DISPOSAL
- Please remove the door before disposing of this appliance.
- Do not dispose of this product as unsorted municipal waste. Collection of such waste should be treated separately. Flammable insulation and or gases should be disposed appropriately. Take the cabinet to a recycling plant.
CIGAR STORAGE GUIDE
- The ideal temperature for storing cigars is between 65° and 73°F.
- The ideal relative humidity (RH) for storing cigars is between 65% and 75% RH. To properly maintain RH in this unit, you will need to include a method of adding humidity. For your convenience, a moisture container is included.
- To add humidity to the unit using the included moisture container, simply fill the container with distilled water or a damp sponge wet with distilled water and place it back in the unit. Please note this water should be changed after reaching the desired humidity and refilled when used again.
- Keep cigars out of direct sunlight to avoid exposure to damaging UV rays.
- It is recommended to keep cigars in their original boxes and packaging as long as possible. Keep unwrapped cigars separate in your humidor to avoid unwanted mingling of flavors.
- Check cigars regularly for signs of tobacco beetles and mold, and take preventative measures if necessary.
- Properly stored cigars can improve with age for as long as 5-10 years, and can be kept even longer in ideal conditions.
TROUBLESHOOTING
You can resolve most common usage problems easily by reviewing and following the troubleshooting information below.
| Problem | Possible Causes | Solution |
| The humidor will not operate. | The unit may be plugged in using a different voltage. | Check if using the wrong voltage. |
| The circuit breaker may be tripped or there is a blown fuse. | Reset the circuit breaker or check for a broken fuse. | |
| The humidor is not cold enough. | The external environment may require a higher setting. | Lower the temperature of the humidor. |
| The door may be opened too frequently. | Open the door less frequently. | |
| The door is not closed completely. | Make sure the door is closed securely. | |
| The door seal does not seal properly. | Replace the seal on the door. Replacements can be acquired from the NewAir customer support department. | |
| The humidor does not have sufficient clearance. | Make sure there is at least 5 inches clearance between the back of the unit and any adjacent walls. | |
| The light does not work. | There may be a problem with the display board. | Contact the NewAir customer support department. |
| The humidor vibrates while operating. | The unit is not sitting on a level floor, or the unit’s feet are not correctly installed. | Make sure the unit’s feet are in the proper position and tightened securely. |
| The humidor produces a lot of noise. | The unit is not leveled. | See above. |
| Check the fan. | Check the fan to make sure there is no debris or obstruction. If not, contact the NewAir Customer Support Department. |
LIMITED MANUFACTURER’S WARRANTY
This appliance is covered by a limited manufacturer’s warranty. For one year from the original date of purchase, the manufacturer will repair or replace any parts of this appliance that prove to be defective in materials and workmanship, provided the appliance has been used under normal operating conditions as intended by the manufacturer.
Warranty Terms:During the first year, any components of this appliance found to be defective due to materials or workmanship will be repaired or replaced, at the manufacturer’s discretion, at no charge to the original purchaser. The purchaser will be responsible for any removal or transportation costs.
Warranty Exclusions:The warranty will not apply if damage is caused by any of the following:
- Power failure
- Damage in transit or when moving the appliance
- Improper power supply such as low voltage, defective household wiring or inadequate fuses
- Accident, alteration, misuse or abuse of the appliance such as using non-approved accessories, inadequate air circulation in the room or abnormal operating conditions (extreme temperatures)
- Use in commercial or industrial applications
- Fire, water damage, theft, war, riot, hostility or acts of God such as hurricanes, floods, etc.
- Use of force or damage caused by external influences
- Partially or completely dismantled appliances
- Excess wear and tear by the user
Obtaining Service:When making a warranty claim, please have the original bill of purchase with purchase date available. Once confirmed that your appliance is eligible for warranty service, all repairs will be performed by a NewAir™ authorized repair facility. The purchaser will be responsible for any removal or transportation costs. Replacement parts and/or units will be new, re-manufactured or refurbished and is subject to the manufacturer’s discretion. For technical support and warranty service, please email [email protected]
 report this ad
References
[xyz-ips snippet=”download-snippet”]