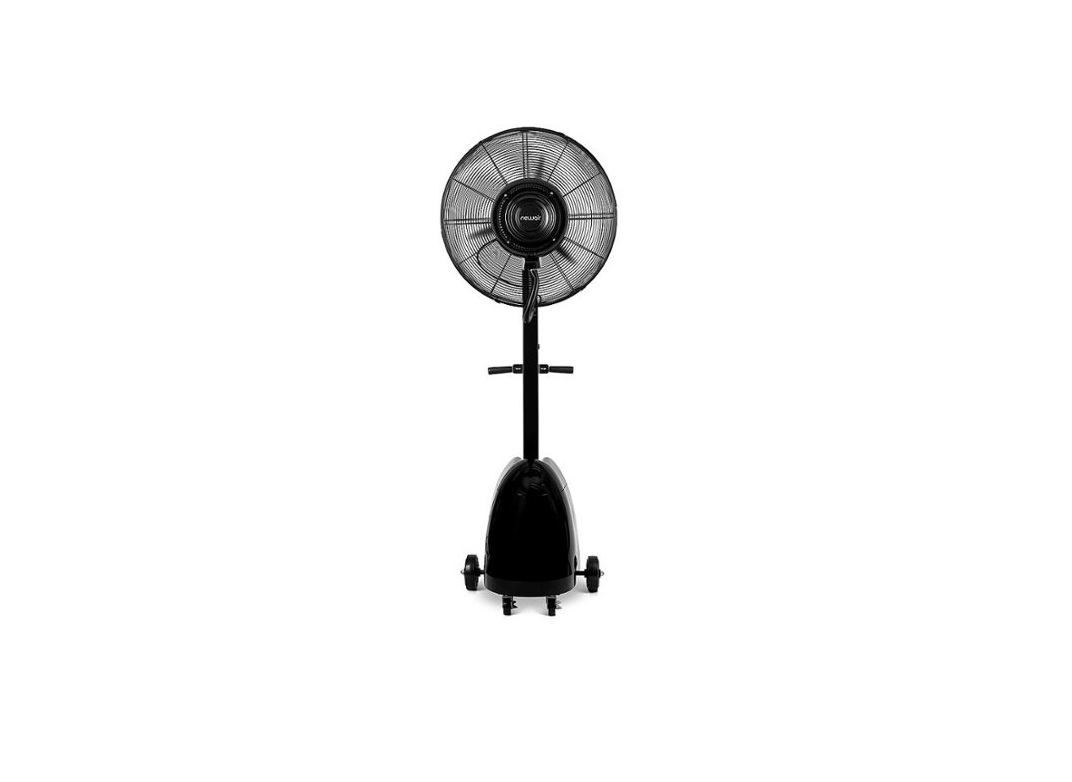
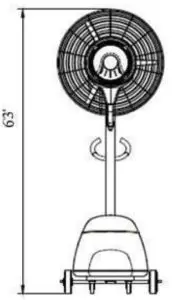
newair NMF8K7BK00 26 Inch Outdoor Misting Fan Owner’s Manual
SPECIFICATIONS
| MODEL NO: | NMF8K7BK00 |
| RATED VOLTAGE | 120V |
| RATED POWER | 300W |
| NOISE | 57 dB |
| AIRFLOW | 8652 CFM |
| FAN SPEEDS | 3 |
| SPEED | 1600 RPM |
| MIST VOLUME | 1.3 gal/h |
REGISTER YOUR PRODUCT ONLINE
Register Your NewAir Product Online Today!
Take advantage of all the benefits product registration has to offer:
Service and SupportDiagnose troubleshooting and service issues faster and more accurately
Recall NotificationsStay up to date for safety, system updates and recall notifications
Special PromotionsOpt-in for NewAir promotions and offers Registering your product information online is safe & secure and takes less than 2 minutes to complete:
newair.com/register
Alternatively, we recommend you attach a copy of your sales receipt below and record the following information, located on the manufacturer’s nameplate on the rear of the unit. You will need this information if it becomes necessary to contact the manufacturer for service inquiries.
Date of Purchase:______________________________________Serial Number:________________________________________Model Number:_______________________________________
SAFETY INFORMATION & WARNINGS
IMPORTANT SAFETY INFORMATION: Please carefully read this manual before attempting to install or use this misting fan. For your safety, comply with all safety instructions and warnings contained in this owner’s manual to prevent personal injury or property damage.
- Use this misting fan only as instructed in this owner’s manual. Other usesmay cause electric shock injury or fire.
- Close supervision is required if this fan is used near children or pets.
- To protect against electric shock, do not immerse this fan or its plug andcord in water.
- If the fan is being transported or will not be in use, disconnect it from thepower supply by tightly gripping the fan’s plug and pulling it from the power outlet. Do not disconnect the power supply by pulling on the fan’spower cord.
- Avoid contact with any of the misting fan’s moving parts.
- Place the misting fan on a level surface. This misting fan is intended to fit into a matching receptacle. Under no circumstances should the grounded plug be altered in any way. An improper connection can result in electric shock.
- If possible, avoid using extension cords with this misting fan. If an extension cord is necessary, do not use more than one extension cord to operate one fan.
- Do not insert objects, allow fingers or any body parts into the fan head, as this may cause electric shock or bodily injury. Do not block or tamper the misting fan while it is in operation.
- Do not place the fan near curtains, drapes or any other materials that can get caught in the misting fan’s grills.
- Do not run the power cord under mats or carpeting and do not cover the power cord with runners. Arrange the power cord away from room traffic where it can be tripped over.
- Do not operate this misting fan in the presence of flammable substances, explosives or corrosive material.
- Do not place the fan near an open flame or cooking/heating appliances.
- If the fan will not be in use, empty the tank of any remaining water.
- If the fan’s plug or power cord is damaged, do not attempt to repair the components yourself.
- This appliance is not intended for use by people (including children) with reduced physical, sensory or mental capabilities, lack of experience or knowledge of its operation, unless well instructed or under supervision of a person responsible for their safety.
- This product is not a toy, small children should always be under strict adult supervision if operating this appliance.
- Allow damaged supply cords to be replaced by the manufacturer, a service agent or a similarly qualified person to avoid hazard to yourself.
PARTS LIST

- Safety cover
- Safety grill
- Misting plate
- Water outlet
- Whorl bent connector
- Water receiving plate
- Water receiving plate cover
- Flexible tube
- Plug
- Misting motor
- Front grill
- Blade
- Rear grill
- Fan motor
- Motor cover
- Motor protective cover
- Oscillating structure
- Tube connector for stand pole
- Stand pole
- Handle
- Ball valve
- Water tank cover
- Tank cart
- Wheel
- Caster
- Water pump
- Water tank
FEATURES
- Centrifugal misting system means there is no clogged nozzles and no need to use filtered water.
- Fan surface is epoxy resin coated, anti-rust and durable.
- Waterproof electrical components.
- Easy to move tank cart with smooth gliding wheels and castors.
- Air supplying and misting functions are driven by different motors. Motors have high quality ball bearings, long service life, low noise, and strong overloading ability.
- The misting volume is adjustable.
- The pump is fully insulated and enclosed with a protective structure for safe operation.
- Easy to use with three adjustable speeds and left and right oscillation function.
- Designed for cooling large areas such as patios, factories, manufacturingfacilities, garages, athletic fields, greenhouses, livestock breeding farms and more.
WIRING DIAGRAM
ASSEMBLY INSTRUCTIONS
DO NOT plug in the fan before assembly. This misting fan comes in 3 boxes. Carefully remove all packing materials and keep for future storage/use. Make sure there is no residual packaged foam left in any of the components. Check all the components to ensure no parts are missing, were scratched or damaged during transportation. A screwdriver and a wrench will be required to assemble this misting fan.
STEP 1: ASSEMBLING THE STAND POLE
- Refer to Diagram 1. Locate the tank cart and stand pole.
- Remove the four M8X25 bolts, spring washer, flat washer, and nuts fromthe tank cart.
- Position the stand pole on the tank cart and make the ball valve switchface the back.
- Align the holes on the pole with the four holes on the cart.
- Using the bolts, washers, and nuts removed in step 1, screw the stand poleinto the tank cart.
- Make sure the stand pole is securely screwed onto the cart beforeproceeding to the next step.

STEP 2: FRONT COVER PLATE INSTALLATION
- Refer to Diagram 2. The six-pin plug connects the power cord and the water pump power cord together. Insert the six-plug into the opening at the bottom of the stand pole and feed it through the shaft until it comesthrough the opening at the top of the stand pole.
- Insert the blue tube and black tube into the round hole of the front cover.Insert the blue tube into the water pump connector. Ensure that the tubesin the stand pole don’t bend or twist once inserted.
- Mount the front cover onto the stand pole and fix with screws.
STEP 3: FAN HEAD AND TUBES INSTALLATION
- Refer to Diagram 3. Align the stand pole and the bottom of the fan headand connect the two pieces. Fasten the screw to secure the two piecestogether.
- Connect the six-pin plug with the six-pin socket, then insert the three-pinplug into U-groove hole in front of the stand pole. Plug the three-pin pluginto the three-pin socket.
- Connect the two tubes. Make sure each tube matches with its same colortube.
- Plug the four-pin plug into the four-pin socket. Mount the side panel andconnector.
STEP 4: WATER TANK ASSEMBLY
- Refer to Diagram 4. Position the tank on the tank cart; align the base of the tank with the two edges of the tank to fix in place.
- Put the water pump into the U-groove inside the water tank.
- Ensure the pump tube, water recycling tube and pump power cord get through U-groove of tank cover and get securely suctioned to the bottom of the water tank.
- Pull the fan power cord out of the tank bottom.
- Mount the handle on the stand pole.
STEP 5: MISTING TESTING
- Fill the water tank with clean water and cover with lid.
- Position ball valve from “on ” to “off ” and remove metal protective barsbefore turning power on. Turn the switch knob and check if the motor and blade operate normally.
- Press misting button to run misting motor and water pump, and check ifthe misting motor, misting plate and water pump operate correctly.
- Turn ball valve from “off” to “on” and observe the misting adjustmentfunction.
- Adjust the oscillation screw, and check if the oscillation function workssmoothly.
OPERATING INSTRUCTIONS
- Use the fan under the voltage and frequency shown on the rating label, donot use in corrosive environment.
- Do not install this appliance in places where the altitude is higher than3,280 ft or temperature is over 104 F.
- When socket is used in power supply, the socket should meet the IEC335-1 standard; when power liner is from direct power supply, a polarity switch should be installed with contact gap no less than 1/8 inch on the fixation wiring.
- Oscillating angle adjustment: loosen the oscillation screw and move it to the desired position (the more outward the bigger oscillation angle), tighten oscillation screw after adjustment to maintain the desiredoscillation motion.
- Tilting angle adjustment: loosen the fixing nut and move the motor to thedesired position, tighten the fixing nut to secure the angle.
- Speed adjustment: low speed, medium speed and high speed can beachieved by turning the switch knob on the motor to the specific speedneeded.
- If appliance is selected to operate on misting mode, its misting magnitudecan be adjusted gradually by turning between “off” and “on”.
- The tank must be filled to max level with water to use the misting mode.The fan can operate continually for 4 hours with the maximum mistingsetting. Re-fill the tank whenever needed to keep using misting option. Tounload water after using or cleaning the tank, unscrew the knob on thebottom.
- When using the handcart, please lock the front cartwheel to avoid slipping. To move the handcart, loosen the front cartwheel lock.
- Clean the water tank before using and take out the water pump beforecleaning the water tank.
CLEANING AND MAINTENANCE
MAINTENANCE
- In order to maintain its optimum performance, the appliance should becleaned regularly.
- Unplug unit before cleaning and remove the front guard and blade. Clean unit with soft cloth (avoid use of gasoline or other corrosive liquid), then dry the guard and blade with dry cloth, and proceed to operate the unit. Note: mist plate inside misting system can’t be disassembled).
- Avoid splashing water in the motor and electric elements during cleaning.Avoid pressing, bending, or changing the blade angles.
- In order to keep clean water in the tank, wash the water tank and waterreceiving plate regularly.
- To ensure smooth unit oscillation, apply grease or oil to the rotary part ofthe mechanism every 6 months.
- For long storage periods clean unit and cover entirely to avoid dust or dirt accumulation.
TROUBLESHOOTING
| Problem | Possible Causes | Solution |
|
The fan will not operate. |
The unit may be plugged in using a different voltage | Make sure fan is plugged into a 120V AC, 60Hz polarized outlet /receptacle. |
| The circuit breaker may be tripped or there is a
blown fuse. |
||
| Reset the circuit breaker or
check for a broken fuse. |
||
|
The fan is not rotating. |
There is an obstruction. |
Check for obstructions in the fan. If you find something, turn the fan off. Unplug the fan and carefully remove the obstruction. Plug the fan in and turn it on again by referring to the operating
instructions. |
| Fan is on but air coming out of it is not strong enough. |
There is dust built up at the back of the fan. |
Clean the front and rear grilles as described under “Cleaning/Maintenance
Instructions.”. |
|
No mist is produced. |
There is no water coming from the hose. |
Check and make sure below:
1. The garden hose is correctly attached to the misting hose valve and the spigot. 2. The spigot is turned on. 3. The valve is open. |
|
Mist output is too strong. |
Water supply is too strong.
Fan speed is in high setting. |
1. Reduce the water supply by turning the valve handle counterclockwise.
2. Set the fan speed to low setting. |
LIMITED MANUFACTURER’S WARRANTY
This appliance is covered by a limited manufacturer’s warranty. For one year from the original date of purchase, the manufacturer will repair or replace any parts of this appliance that prove to be defective in materials and workmanship, provided the appliance has been used under normal operating conditions as intended by the manufacturer.
Warranty Terms
During the first year, any components of this appliance found to be defective due to materials or workmanship will be repaired or replaced, at the manufacturer’s discretion, at no charge to the original purchaser. The purchaser will be responsible for any removal or transportation costs.
Warranty Exclusions
The warranty will not apply if damage is caused by any of the following:
- Power failure
- Damage in transit or when moving the appliance
- Improper power supply such as low voltage, defective household wiring or inadequate fuses
- Accident, alteration, misuse or abuse of the appliance such as using non-approved accessories, inadequate air circulation in the room or abnormal operating conditions (extreme temperatures)
- Use in commercial or industrial applications
- Fire, water damage, theft, war, riot, hostility or acts of God such as hurricanes, floods, etc.
- Use of force or damage caused by external influences
- Partially or completely dismantled appliances
- Excess wear and tear by the user
Obtaining Service
 report this ad
When making a warranty claim, please have the original bill of purchase with purchase date available. Once confirmed that your appliance is eligible for warranty service, all repairs will be performed by a NewAir™ authorized repair facility. The purchaser will be responsible for any removal or transportation costs. Replacement parts and/or units will be new, re-manufactured or refurbished and is subject to the manufacturer’s discretion. For technical support and warranty service, please email [email protected]
References
[xyz-ips snippet=”download-snippet”]