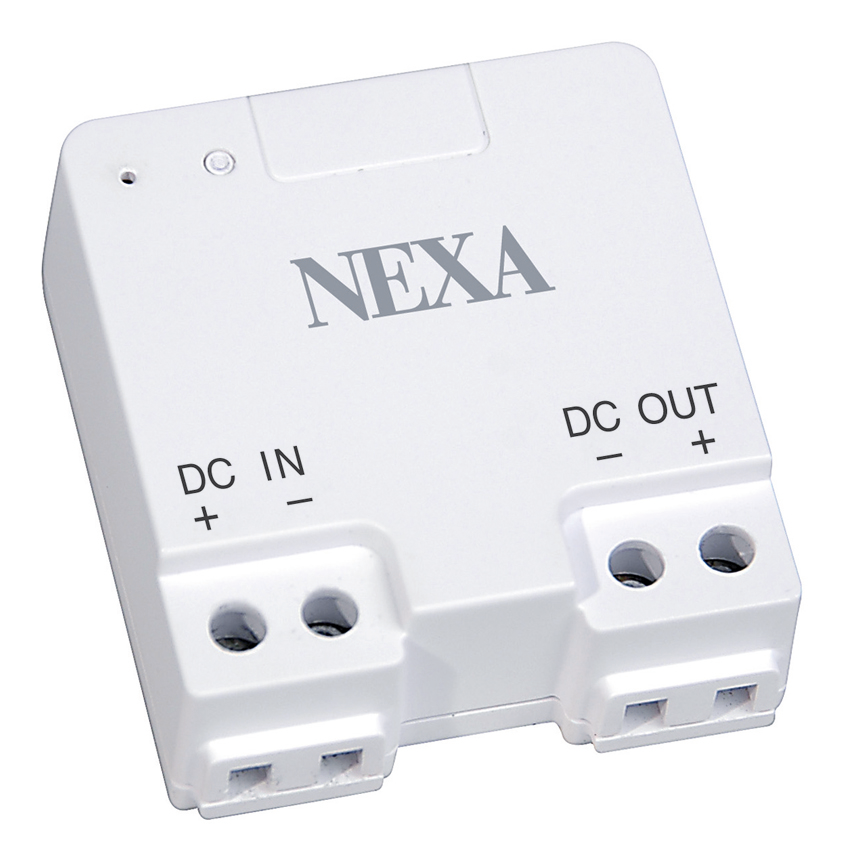
NEXA LED 12-24v Dimmer Module
Dimmer receiver for permanent installation with adjustable minimum brightness. Suitable for dimmable LED strip and LED luminaires with a built-in 12-24 V driver
SAFETYRead through all of the instructions first. Call in a professional if necessary. Nexa cannot be held liable if the product is used for any purpose other than the one for which it is designed, or if there is failure to comply with the instructions. Never connect bulbs or equipment exceeding the receiver’s maximum stated load – this could lead to faults, short-circuiting or fire. Do not attempt to repair the product. The product contains no repairable parts.
INSTALLATION
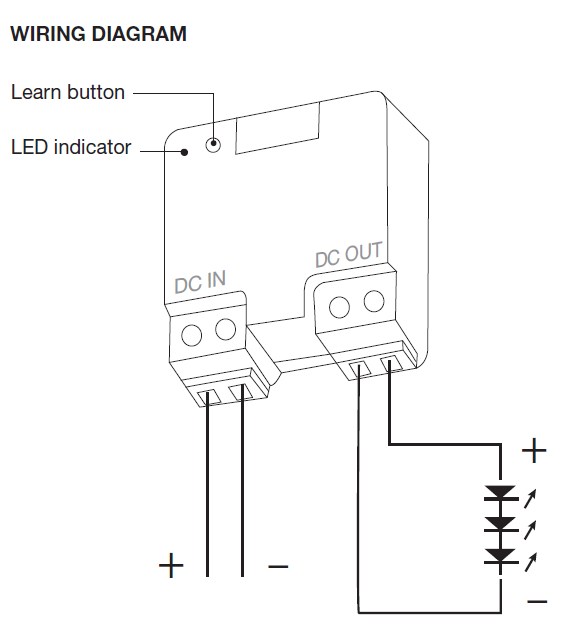
Connect the positive conductor from the voltage source (AC/DC adapter) to + and the negative conductor to – on DC in, the load’s positive conductor + and negative conductor to – on DC out on the LDR-075. See also wiring diagram.
LINKING
- Power up the LDR-075
- Press the learn button, the LED indicator will start to flash
- Press the “ON” button for the selected channel on a System Nexa transmitter within 15 seconds.
LINKING CONFIRMATIONThe LED indicator lights steadily, if there is a bulb connected to the receiver it will flash twice.
DELETING A MEMORY SLOT
- Press the learn button
- Press the “OFF” button for the selected channel on a System Nexa transmitter within 15 seconds.
DELETION CONFIRMATIONThe LED indicator lights steadily, if there is a bulb connected to the receiver it will flash twice.
DELETING ALL MEMORY SLOTS.
- Press and hold down the learn button for 6 seconds, the LED indicator starts to flash rapidly.
- Release the learn button and then briefly press it again.
CONFIRMATION OF THE DELETION OF ALL MEMORY SLOTSThe LED indicator lights steadily, if there is a bulb connected to the receiver it will flash twice.
MEMORYThe LDR-075 has 6 memory slots which means that it can be controlled by up to six transmitters at the same time.
DIMMER SETTINGSThere are a total of four levels for lowest dimmer level where 4 is the lightest and 1 the darkest. The receiver is supplied set to the highest level (4).
SET THE LOWEST DIMMER LEVEL
- Light the connected lamp using the transmitter
- Press the training button twice. The LED indicator starts to flash and the connected lamp dims to the lowest level currently set
- Press the “OFF” button for the selected channel on the transmitter to lower the level one step and “ON” to raise the level one step
- Press the training button twice to confirm the selected dimmer levelIf the connected bulb starts to flicker or goes out completely, go back one step in the lowest dimmer level settings.
SETTING THE LOWEST DIMMER LEVEL CONFIRMATIONThe LED indicator lights steadily, if there is a bulb connected to the receiver it will flash twice.
CONTROL
The receiver can be controlled in a number of ways.
- Using a trained System Nexa remote control
- Using other trained System Nexa transmitters
- Using a Nexa Bridge
OTHER INFORMATIONRange indoors: up to 30 m (optimal conditions). The range is very dependent on local conditions, if there is metal in the vicinity for example. The thin metal coating in low emissivity energy glass has a negative effect on the range of radio signals for example. There may be restrictions on the use of the unit outside the EU. If appropriate, you should check that the unit complies with local regulations.Max. load: Never connect bulbs or equipment that exceed the maximum load of the receiver. This could lead to faults, short-circuiting or fire.Life-support equipment: Never use Nexa’s products for life-support equipment or other devices where faults or interference could have life-threatening consequences.Interference: All wireless units can suffer from interference that can affect performance and range. Because of this, the minimum distance between two receivers should be at least 50 cm .Repair: Do not attempt to repair the product. It does not contain any repairable parts.Water tightness: The product is not waterproof. Make sure it remains dry at all times. Damp will cause the internal electronics to corrode and this could lead to short-circuiting, faults and a risk of electric shock.Cleaning: Clean the product using a dry cloth. Do not use chemicals, solvents or strong cleaning agents.Environment: Do not expose the product to intense heat or cold as this could damage or shorten the service life of the electric circuits.
WIRING DIAGRAM
References
[xyz-ips snippet=”download-snippet”]