
NEXTECH 1080p Dash Camera
 Box Contents
 Box Contents
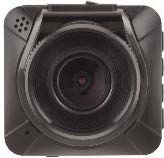
1 x 1080p Dash Camera
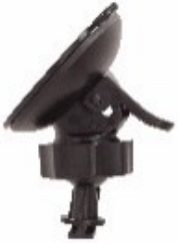
1 x Suction Cup Mount
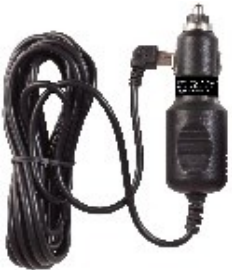
1 x Car Cigarette Lighter Charger
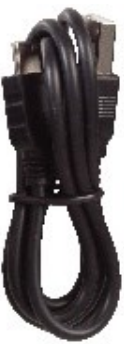
1 x USBCable
Product Diagram
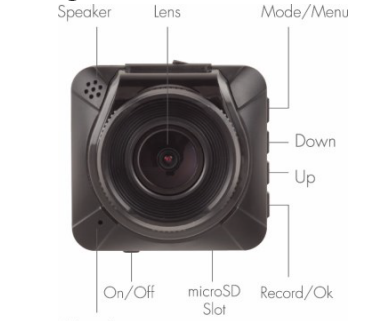
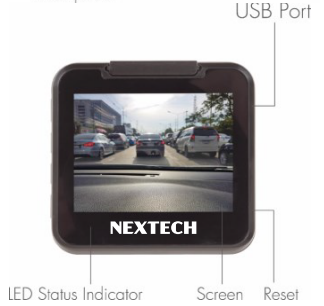
LED Status Indicator

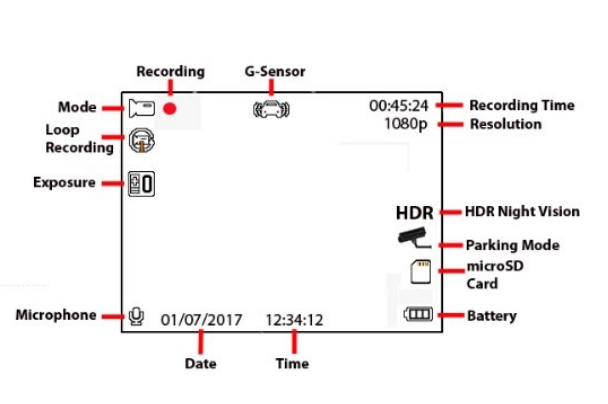
LCD Diagram
Installation
Suction Cup Mount
- Attach the suction cup mount to the top of the dash camera and slide securely in place.
- Position the suction cup mount on the windscreen of your vehicle and push down the locking tab to fix it securely in place.
- Adjust the best angle for your dash camera’s lens and tighten the knob to fix the position.
- It is recommended to place the dash camera behind the rear vision mirror to prevent the camera from obstructing your view while driving.
Power
- Insert the car cigarette lighter charger cable into the cigarette socket of your vehicle.
- Plug the USB end of the car charger into the USB power socket located on the top of the dash camera.
- The dash camera will automatically turn on and start recording once the car has been started by default. You may also wish to run the power cable along the top of the windscreen so that the cable isn’t hanging down directly in the middle of your windscreen.
MicroSD
- Before initial use, insert a microSD card into the microSD card slot located at the bottom of the dash camera.
- You will hear a clicking sound once the microSD card has been inserted correctly.
- The suggested microSD card is 8-32GB Class 10.
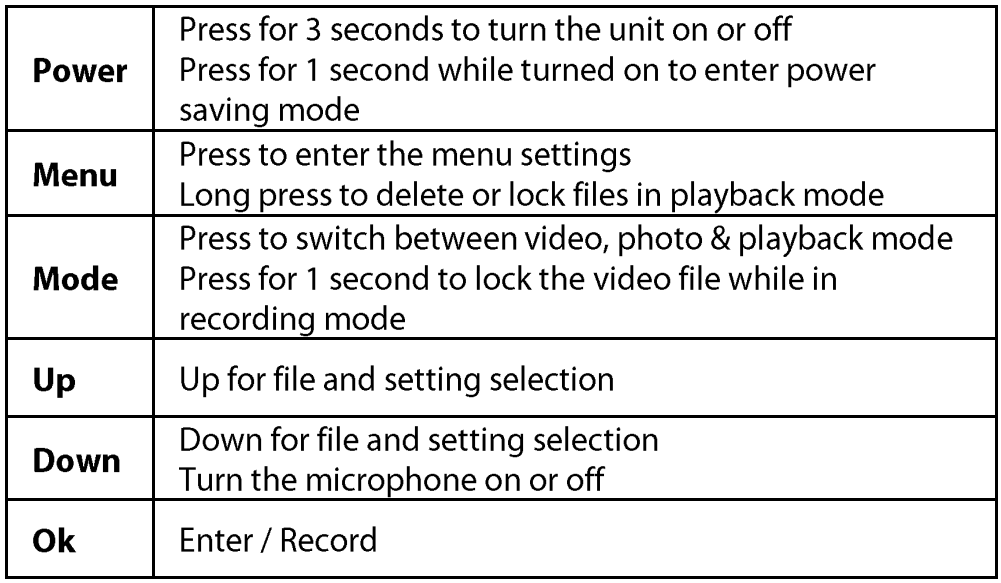
Operation
Turning On/ Off
- On: Press and hold the power button for up to 3 seconds to turn on the device. Once the unit is turned on, the red LED indicator will illuminate and a welcome screen will appear.
- Off: Press and hold the power button for up to 3 seconds for the unit to turn off.
Charging
- Before initial use, the battery needs to be fully charged via the included car cigarette lighter charger or a USB charging port.
- The LED status indicator will be illuminated red while charging; once fully charged it will stop being illuminated.
- It is suggested to keep the dash camera connected to power at all times. The video recording using the battery will be very short due to the small size of the battery.
Recording
- Video Recording: Press the Ok/Record button to initialize the recording. The red recording icon should be shown in the top left-hand corner. Press the Ok/Record button to stop the recording.
- The dash camera by default will automatically start recording once the car has been turned on and the car charger is connected.
- Image Recording: Press the mode button to switch from video to image mode and the icon in the top left-hand corner will change. Once in image mode; press the Ok/Record button to take an image.
Modes
The dash camera has three modes of operation which include Video, Image, and playback.
Video
This video mode will appear as default when the unit is first turned on. This mode will allow you to record video and access the video settings.
Image
Select this mode by pressing the mode button and a photo image will appear in the top left-hand corner of the display. In this mode, you can take photos and access the image settings.
Playback
- Select this mode by pressing the mode button twice.
- You can select the file you wish by using the up and down buttons; to play a file press the Ok button.
- To delete or protect a video or image file, press the settings button while in playback mode and the setting will appear.
USB Connection
Connect the USB cable provided to the socket of the dash camera and the opposite end to your computer. Once the device is connected you will notice 2 options will appear on the dash camera. These options include mass storage and video.
Mass Storage
This will gain access to the files from your dash camera and appear as a removable storage device on your computer. Use the Ok button to select this mode.
Video
Press the down button twice and select Ok to enter back to normal video mode and will continue to charge.
Settings
This device has 3 settings which include video, image, and system settings.
- Select the mode by pressing the mode button and change it to either video or image mode depending on which settings you wish to change.
- Press the settings button once you’re in either the video or image mode and the settings will display.
- You can cycle through the settings by using the up and down buttons. To select a setting, use the Ok button to enter.
- To access the system settings, press the settings button twice in either video or image mode. You will notice a system settings list will now display instead of the video or image settings.
- To exit the settings, press the setting button either once or twice depending on if you are in the image, video, or system settings and it will revert you back to the normal display.
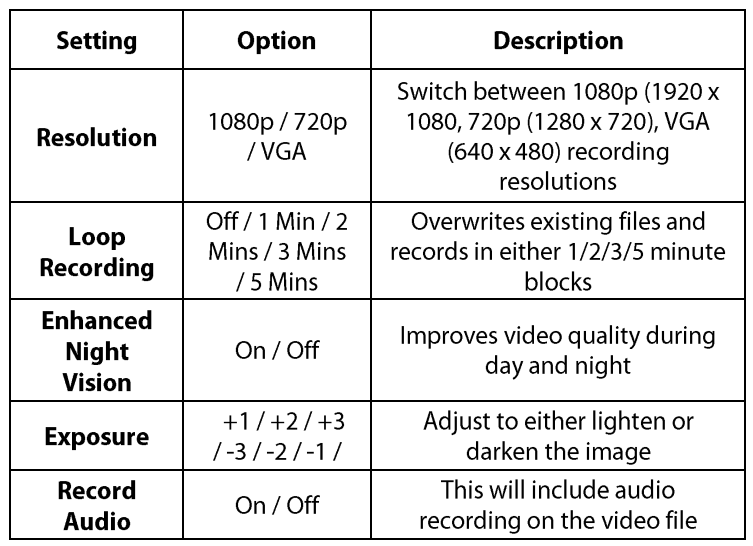
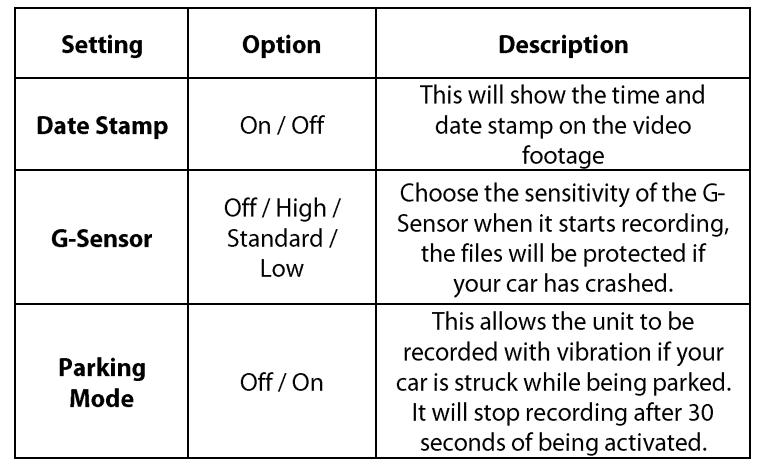
Video
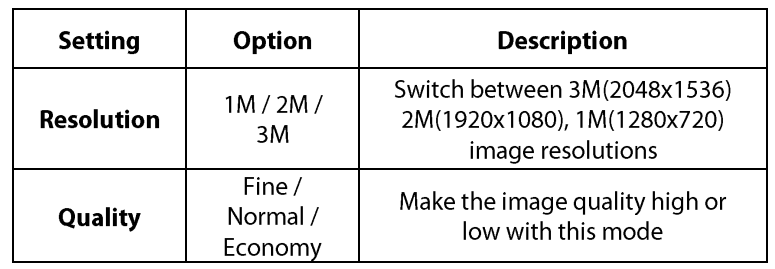
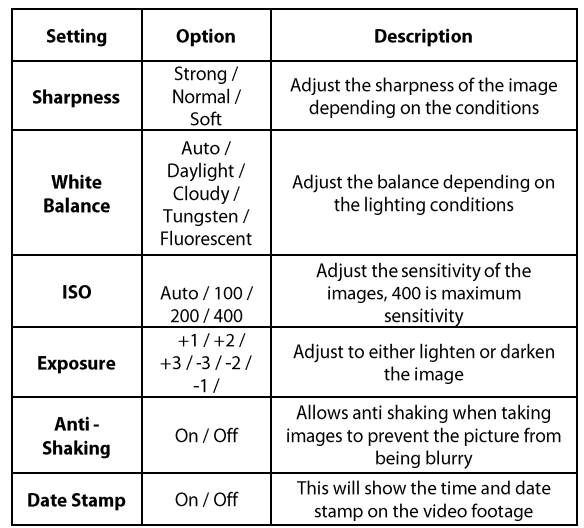
Image
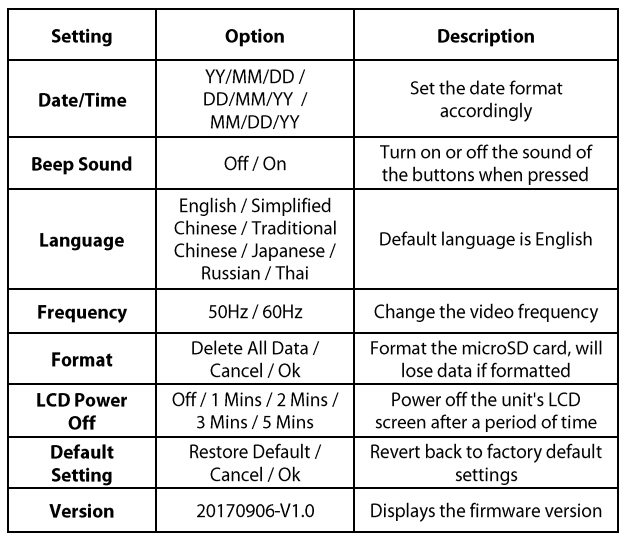
System
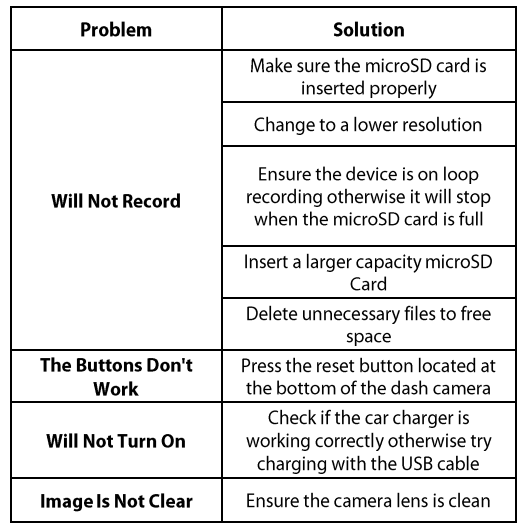
Troubleshooting
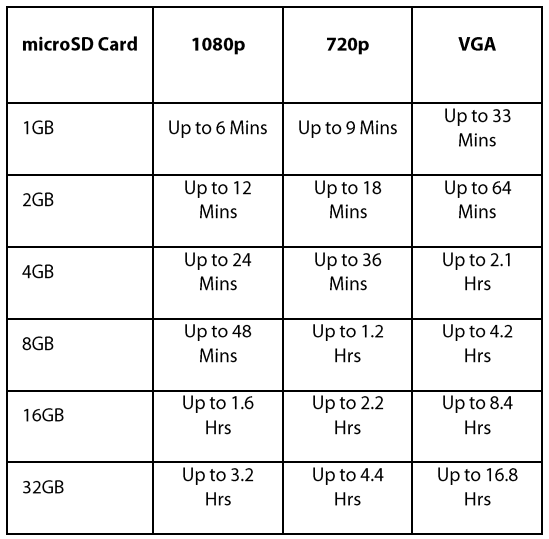
Recording Time
Features
- G-Sensor
- Manual & Loop Recording
- Parking Mode
- Wide 140 Lens
- Auto Power On Recording
- 12/24VDC Operation
- In-Built Mic &Speaker
Specifications
- Display: 2″ LCD
- Video Resolution: 1080p (1920 x 1080)
- 720p (1280 x 720)
- VGA (640x 480)
- Image Resolution: 3MP
- Frame Rate: 30fps
- Lens Angle: 140
- Video Compression: MJPEG
- Video File Format: AVI
- Image File Format: JPEG
- Loop Recording: 1 /2/3/S Minutes
- Storage: Up to 32GB MicroSD (Class 1 OJ
- Battery: Li-Ion 3.7V, 1 SOmAh
- Power: SVDC @ l .SA
- Power Consumption: 350mAh
- Car Charger Voltage Input: 12-36VDC
- Dimensions: 53(H) x 49(W) x 35(D)mm (Excluding Suction Cup)
Distributed by:
- TechBrands by Electus Distribution Pty. Ltd.
- 320 Victoria Rd, Rydalmere
- NSW 2116 Australia
- Ph:1300 738 555
- Int’l:+61 2 8832 3200
- Fax: 1300 738 500
- Site: www.techbrands.com
[xyz-ips snippet=”download-snippet”]