NEXTECH 720p Security Camera Floodlights User Manual
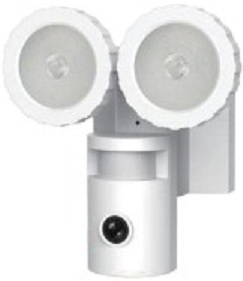
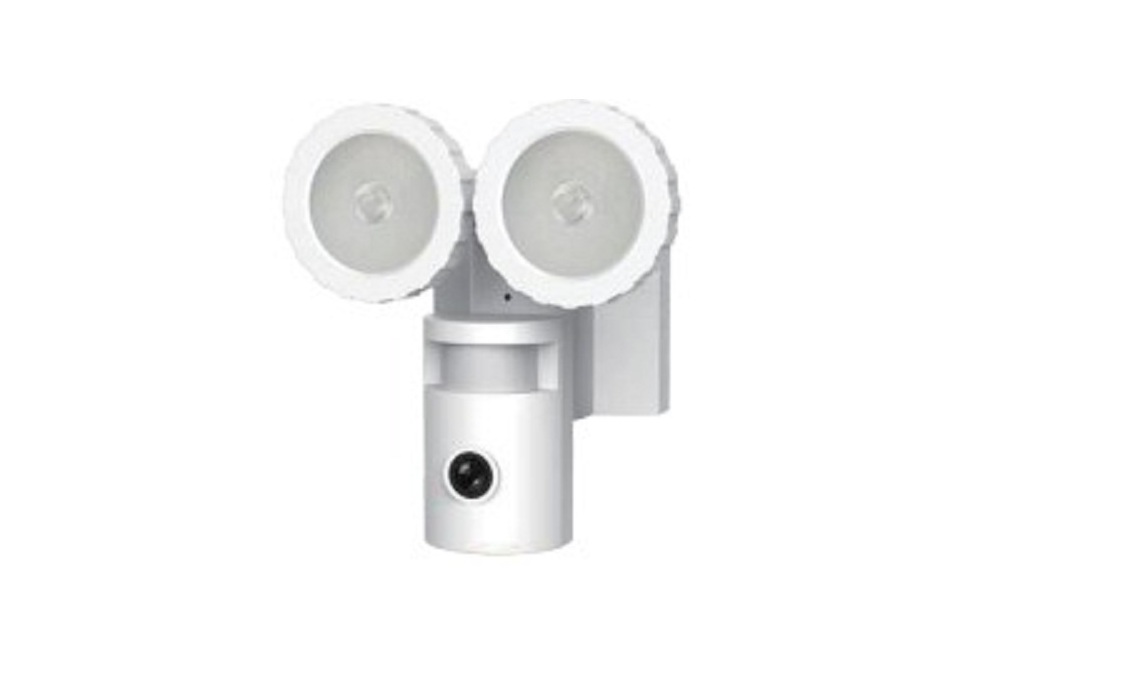
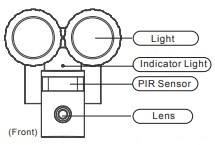
Product diagram Packing list
- Products Diagram

- Box Conrent: Camera, Solar Panel, User Manual, Screws, Bracket, Plastic, Anchor Plugs\Solar PanelBracketScrew*5Plastic Anchor plug *5
 Solar Panel
 Bracket
 Screw*5
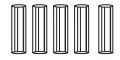 Plastic Anchor plug *5
Key features
- 2x3W LEDs for illumination.
- Completely wireless
- IOS & Android compatible.
- Solar powered
- 720P HD video
- Motion detection
Set up Camera
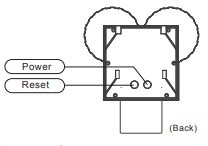
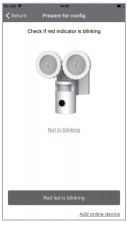
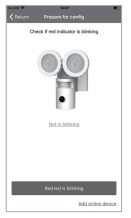
When using the camera for the first time, press the “Power” button on the back of the camera, you will see the camera indicator light flash green color fast, then indicator light will be flash red color slowly. If device LED does not flash red then reset the device and start again.
Set up APP
Download APP and install it into your smart phone with following two ways. You can scan following QR Code to install the app NVDP to your smart phone

![]() NVDP
NVDP
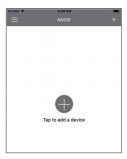
Add Device Make sure your smart phone is connected to your 2.4 GHz Wi-Fi, then run NVDP App.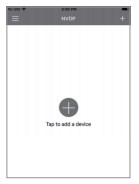
Click above “Add Device” or “+” at top right corner, then you will see following screenshot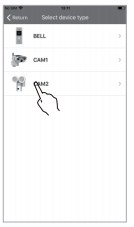
Click “CAM2” and make sure your Camera has been reset successfully, then you can scan QR Code on the bottom of the device.
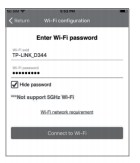
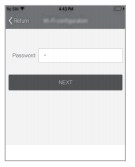
Enter your Wifi password.
After Wi-Fi configuration you then can set up access password for the device.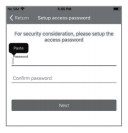
Next Step, please turn up the volume on your smart phone, make sure smart phone is close to the camera .

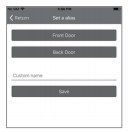
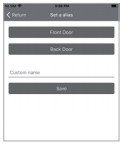
Once setup is successful you can then customize the name of the device.
Congratulations!Your device is setup and ready to go. Note: After setup, if the screen shows configure fail, please check if you are connected to a 2.4GHzWi-Fi network. This device does not support 5.0GHz network. Please reset it and try again on a 2.4GHz network.
Add Online Device .Make sure your smart phone is connected to your locality 2.4GHz Wi-Fi then Click the App NVDP on your phone.
Click above “Add Device” or “+” at top

Click above CAM2, you will get the screen as following, and Click Add online device at the bottom right of screen window. Click “Add online device” then you can scan QR Code screen that is saved as a photo or any other device. Enter your access password you configured previously
Click above “Save”and wait 3 minutes for configuration.(as-picture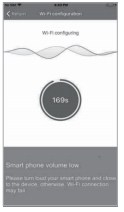
Once setup is successful you can then customise the name of the device.
Congratulations!Your camera is setup and ready to go. Note: After setup if the screen shows configure fail, please check if your network is on 2.4GHz Wi-Finetwork. It does not support 5.0G network. Please reset it and try again in 2.4G network.
Mount Your Camera
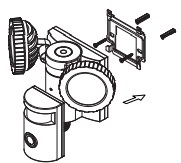
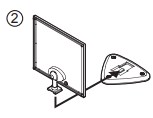
Drill two holes on wall according to camera bracket holes and then use anchor plugs. Then fasten the bracket on wall with the screws provided. Hang the Camera to bracket.
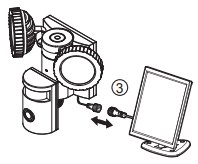
Connect the camera to the solar panel by jointing their connectors together. Make sure the connectors are screwed tightly.
What You Need


 Screw driver Drill
 ![]() 6mm
6mm


 Pencil Ruler Level ruler Smartphone
Operation Setting on App
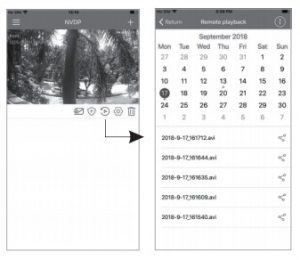
How to replay recording: Open the App NVDP and make sure there is device online, then you can see the steps according to direction of arrow like as pictures:
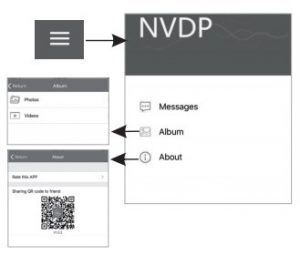
 Make sure your smart phone is connected to your locality 2.4GHz Wi-Fi then Click the App NVDP on your phone. How to check messages and Album:Open the App NVDP and make sure there is device online, then you can see the steps according to direction of arrow like as pictures:
How to set device: Open the App NVDP and make sure there is device online, then you can see the steps according to direction of arrow as pictures:
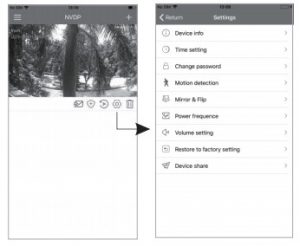
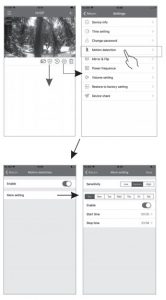
How to set motion detection: Open the App NVDP and make sure there is device online, then you can see the steps according to direction of arrow as pictures:
How to upgrade device firmware: Open the App NVDP and make sure there is device online, then you can see the steps according to direction of arrow as pictures:

FAQ
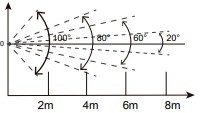
- How to use the camera? A1: Make sure the motion detection function has been enabled via the APP and the valid working time is set. Once a motion is detected, the unit will record for 15s. Floodlight will be activated only at night and have been activated in the APP. NOTE: Motion detection will be triggered every 30 seconds.
- Does CAM2 need to connect DC power Supply? A2: No, doesn’t. It is solar powered and with 4400mAh Li-battery inside.
- How long is the working time with one full charge? A3:2-4 months without sunshine.
- Does CAM2 support remote live streaming? A4:Yes,it supports. It needs to connect network well.
- How many viewers can watch video via CAM2 at the same time? A5:Three users can view at the same time.
- What smart phone does CAM2 App support? A6: The APP supports IOS 8.0 and above, android 4.0 and above.
Important Stafety Information and Warning
Batteries built-in device can EXPLODE, CATCH FIRE, and/or CAUSE BURNS if disassembled, punctured, cut, crushed, short-circuited, incinerated, recharged, or exposed to water, fire, or high temperatures. To ensure optimal safely and performance. Use only batteries that contain built-in fault and heat protection. DO NOT use counterfeit or inferior-quality batteries in Wire-Free cameras. Use only the batteries supplied by official, or high-quality batteries from, established, well-known manufacturers, such as Panasonic®Energizer®, or Duracell®.DO NOT use rechargeable batteries. DO NOT place loose batteries in a pocket, purse, or other receptacle containing metal objects. DO NOT store batteries with hazardous or combustible material; store in cool, dry, ventilated area. While your CAM2 Wire-Free camera is weatherproof and safe to use outside. DO NOT allow the batteries or battery compartment to get wet prior to or during installation. ALWAYS keep batteries away from children. REPLACE ALL batteries at the same time with batteries of the same type purchased at the same time from the same manufacture and DO NOT load batteries backwards. MAKE SURE the battery compartment is empty and free of any loose debris before inserting batteries. Follow the directions in the quick start guide and/or written on the Wire-Free camera. Follow local guidelines to dispose of used batteries. To the extent permissible by applicable law, failure to follow these warnings and/or directions could result in damage to your CAM2 Wire-Free cameras that will not be covered by our warranty.
Distribute by:Electus Distribution Pty.Ltd.320 Victoria Rd, RydalmereNSW 2116 Australia
www.electusdistribution.com.au
Made is china
[xyz-ips snippet=”download-snippet”]