
NEXTECH Outdoor WiFi PTZ Camera QC3859 User Manual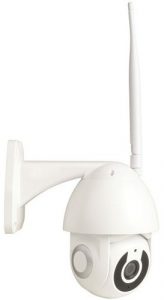

Product Introduction
Packing list: Smart Camera x 1, Manual x 1, USB Power Cord x 1, Power Adapter x 1 ,Screw Accessories Package x 1
- Smart Camera

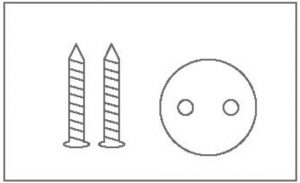
- Screw Accessories Package
- USB Power Cord
- Manual
- Power Adapter


Basic Parameters
- Product Name: Smart Camera
- Pixel: 1.0Mp/2.0MP
- Video Compression: H.264 High Profile
- Image Enhancement: Digital Wide Dynamic 3D Noise Reduction
- Local Storage: MicroTF card
- Wireless Encryption: WEP/WPA/WPA2 Encryption
- Power Input: 5V 1A(Min)
- Total Power Consumption: 5W (Max)
- WirelessStandard: 2.4G 802.11 b/g/n
- Support Platform: Android/iOS
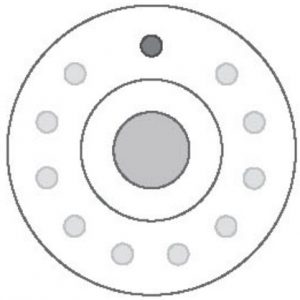
Component Description:Reset Button: Long press “reset” hold 5 seconds.
It is recommended to use 8-64GB high-speed Micro SD card, otherwise it will be difficult for the camera to store and view past video recordings. support Important
Install APP
Download APP: scan the QR code below to download and install. Register and login: open the ” Smart Life” APP to register and login according to the prompts.

Add The Device-Scan QR code mode
- Make sure Wi-Fi is available and connected to the Internet.
- Connect the camera to the power, then system startup completed.
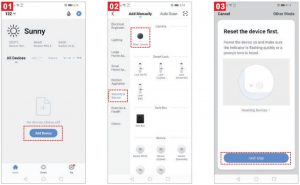
- Open “Smart Life” APP, press the’+’ in the upper right corner of the main screen (Figure 01); choose “Security & Sensor”, click “Smart Camera” (Figure 02) to add camera; and then click “Next step” (Figure 03);
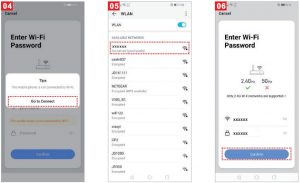
- If the mobile phone is not connected to wi-fi, please click “Connect to Wi-fi” (Figure 04);
- It will jump to the WLAN interface and connects Wi-Fi (Figure 05).Please note that only 2.4 GH Wi-Fi network is supported;
- If the phone is connected to Wi-Fi (Figure 06);
- click “Confirm”. It will jump to the interface to prompt to scan the QR code with camera and click “Continue” (Figure. 07);
- A QR code will prompt on your screen and you need to scan it with the Smart Camera. (the camera is about 20-30 cm away from the mobile phone lens). Then click “hear the prompt sound” (Figure. 08).
- “connecting” (Figure. 09);
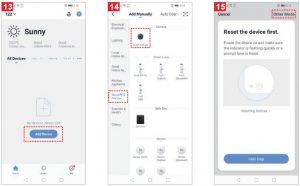
- When the progress reaches 100%,connection completed(Figure 13), and click “Finish”;
- Then jump to preview interface (Figure 11)
- After closing the device preview interface, the interface returns to the APP home page. At this time, the connected device will appear on the APP home page (Figure 14). Then you can click directly to the device interface to see the monitoring situation without re-adding afterwards.


Add The Device-AP Mode
If you want to use AP Mode,press the reset button on the machine
- Make sure Wi-Fi is available and connected to the Internet.
- Connect the camera to the power, system startup completed.
- Open “Smart Life” APP, press the’+’ in the upper right corner of the main screen (Figure 13); choose “Security & Sensor”, click “Smart Camera” (Figure 14) to add camera ; Alternatively, choose “other ways” to add (as shown in Figure 15);Note : Before using the “AP Mode”,you need to switch to “AP Mode” by lightly pressing the “Reset key” of the device.
- Then click “hot spot configuration” (Figure 16);
- Then click” compatibility mode”, clicks”Next” (Figure 17);
- Then click “change Network” (Figure 18);
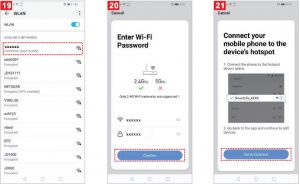
- Then enter the password to complete the connection (Figure 19);
- Click Back and return to the APP compatible mode interface, where the Wi-Fi name and the connected Wi-Fi name are displayed Password, click the “Confirm” button (Figure 20);
- The page jumps to where the interface prompts “Wi-fi” to connect to the device hotspot and clicks “Connect” (Figure 21)
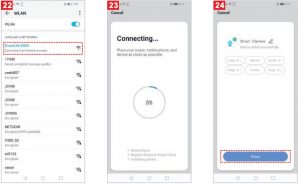
- The interface jumps to the WALN connection interface, finds the Wi-Fi at the beginning of “Smart Lifi”, and clicks on the connection (Figure 22);
- When the connection is completed, click back and return to the APP interface, at which time the APP display device is connected (Figure 23).
- At this time, the device has been successfully connected; the interface jumps to “Add Device Successful” (Figure 24);
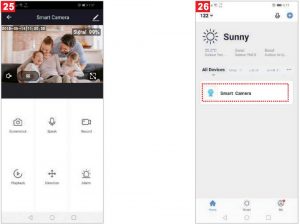
- Then click “connected”, it will jump to the Preview Interface of the Device (Figure 25)
- Close the device preview interface and the interface returns to the APP home page, at which point the connected device will appear on the APP home page.(Fig. 26), After entering the device interface to view, no need to re-add, click directly into the device interface to view .
 Note : Before using the “AP Mode”,you need to switch to “AP Mode” by lightly pressing the “Reset key” of the device.
Customer Support
Distributed by: Electus DistributionPty. Ltd. 320 Victoria Rd, Rydalmere NSW 2116 Australia
www.electusdistribution.com.au
Made in China
[xyz-ips snippet=”download-snippet”]