![]() QV3868
QV3868
 4K Dashcam with TouchscreenInstruction Manual
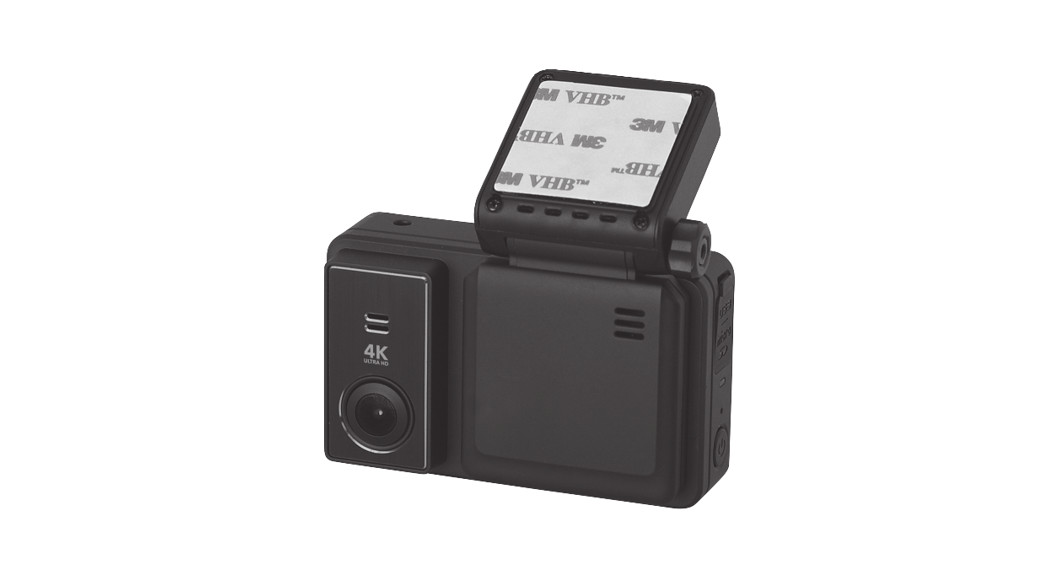
ABOUT THE PRODUCT:The 4K Dashcam with Touchscreen is a multi-functional driving recorder with HD photo taking, video recording, G-sensor, parking guard, and other functions. It supports 4K video recording, fully meeting your driving safety requirements.
IMPORTANT SAFETY INSTRUCTIONS:
- Please use the special car charger provided by our company. Using an unqualified car charger will do harm to the product or even burn out the product.
- Please keep the equipment dry.•Do not let the equipment, battery, and car charger come into contact with water and vapor.•Do not operate the equipment or car charger with wet hands.This precaution is to avoid short circuits of the equipment, failure caused by corrosion, and electric shock of personnel.
- Do not make the equipment, battery, and charger suffer strong shock or vibration, so as to avoid the fault of the equipment, battery, and charger.
- Do not place the device, battery, and charger in an area where the temperature is too high or too low, otherwise it may cause fault of the device, battery and The normal operating temperature of the equipment is -10°C/+60°C
- Do not use in an environment where dust density is too high, so as to avoid dust contamination of lens and other components, which will affect the recording effect.
- Please do not dismantle the equipment and accessories without authorization, otherwise, the equipment and accessories will not be covered by our warranty.
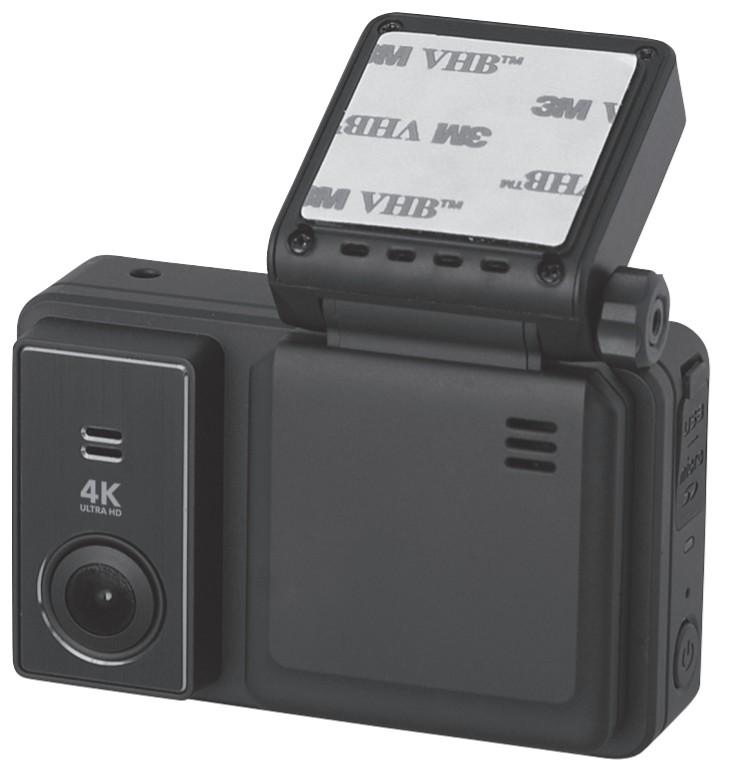
PRODUCT STRUCTURE AND INSTRUCTIONS:

| Ref | Component |
Description |
| 1 | MINI USB interface, SD card slot, reset button | USB interface: Connect to PC for data (SD card) transfer with a MINI USB cable.SD card slot: Insert SD Card (Support 512G Max min class 10).Reset button: If the device fails to operate properly, try resetting the device. Press the reset button by using a fine pen or paperclip. |
| 2 | LED | When recording, the charging indicator light flashes. |
| 3 | Power | When the unit is off, long-press the [power]button to start the unit, and the dash camera will start to work automatically.When the unit is on, long press [power] button to turn it off; short press [Power] to enter into the setting interface. |
| 4 | Type-C USB | Connect to a Type-C cable to charge the battery. |
| 5 | Bracket | It’s a Magnetic suction mount with a GPS module inside. |
| 6 | AV IN port | Connect to the Reverse Camera (Optional). |
| 7 | LCD Screen | 3″ IPS screen. |
| 8 | 3M sticker | Use it to fix the bracket on the windscreen. |
| 9 | Speaker | |
| 10 | Camera Lens |
PRODUCT OPERATION:
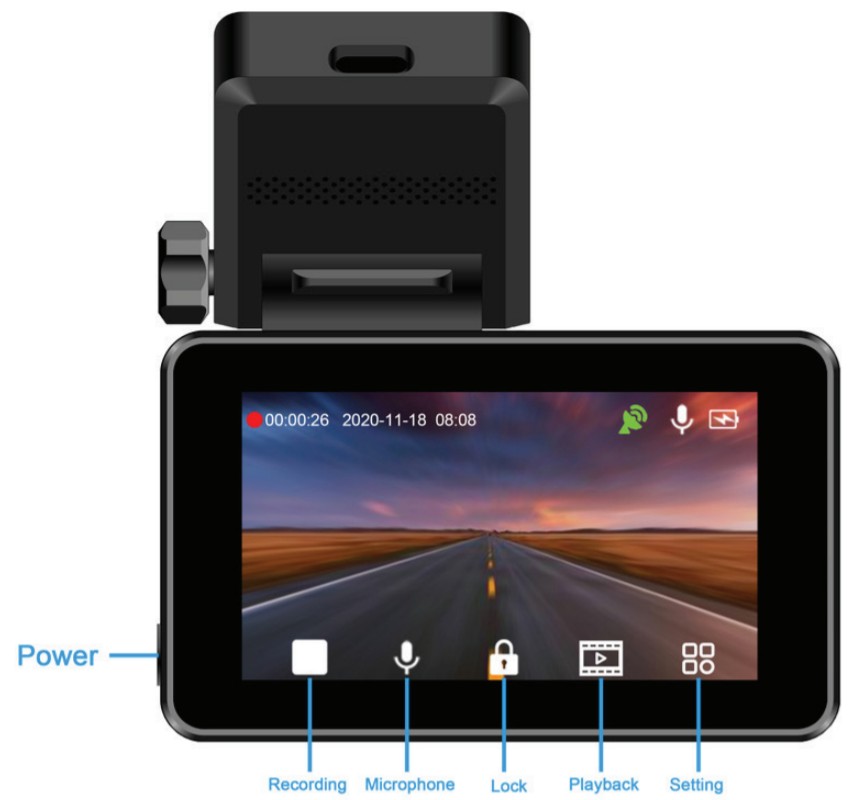
- PowerWhen the unit is off, long-press the [power]button to start the unit, and the dash camera will start to work automatically. When the unit is on, long press [power] button to turn it off; short press [Power] to enter into the setting interface.
- RecordingFunction 1: Turn on/off the recording functionPress the [recording] icon to start recording, and press the [recording] icon again to stop recording.Function 2: Take a photoIn video mode, slide your finger from left to right in the blank area of the screen to take photos.
- MicrophonePress the [microphone] icon to turn on /off the video audio.
- LockIn the recording mode, if you want to protect the current video from being overwritten, activate the emergency lock function by press the [lock] icon. At this time, a yellow scroll bar will appear at the bottom of the screen, saving the current recording as a special video, which will not be overwritten.
- PlaybackPress the [playback] icon to enter into the photo album, then select the video or photo you need to playback or view.
- SettingPress [setting] icon to enter into system setting interface. Slide up/down the screen to select the options you want to set. Details as below.
|
Setting |
Description |
Option |
| Video resolution | Set the video sharpness | 4K/1080P |
| Photo resolution | Set the photo sharpness | 8M/4M |
| Screen saver | Set automatic LCD screen power-off time | Off/min/3min |
| Anti-flicker mode | Change depending on the electrical power frequency in your area (Default setting is 50Hz and you may not have to change this setting). | 50Hz/60Hz |
| Impact sensitivity (G-sensor) | This function helps protect/ lock video files in case of a sudden movement/collision. You can change the sensitivity level of the G-sensor. | Off/low/ middle/high |
| Parking mode | When the car engine and the unit are turned off, this mode enables the unit to turn back ON automatically and create a locked recording when G-Sensor picks up the vibration. The unit must have sufficient battery power remaining in order to record. The G-Sensor must also be turned on. | Off/low/ middle/high |
| Date format | Change the date format. | YY-MM-DD/ DD-MM-YY/ MM-DD-YY |
| Audio | Use this setting to enable or disable audio recording | On/off |
| Volume | Set the sound level | Mute/low/ middle/high |
| Loop recording | Use this option to set the length of each video clip. If you choose the option ‘Off’ then the recorder will not loop record and the files will not be overwritten on the micro SD card. | Off/l min/3min /5min |
| Date & time | Change the date & time by using the relevant UP and DOWN keys, and then press OK/confirm to confirm the setting. | Can be set: year, month, day, hour, minute |
| License plate setting | Edit the car plate stamp. Use the UP/DOWN keys to select a number or an alphabet and press confirm to save the setting. | |
| Time zone | Set the correct time zone for the GPS to get the correct time settings for the device. | |
| Language | The default language is English | English/ Chinese/ French/ Spanish/ German/Italian |
| Format SD | Use this option to format the SD card. (All files will be permanently erased.) | Confirm/ Cancel |
| Flips video image (mirror) | The default setting is off. | Off/on |
| Reset system | Resets the device to factory settings. Note that restoring defaults will not erase data on the SD card | Confirm/ Cancel |
| Motion detection | Enable this setting to allow the unit to record only when it detects movement. | Off/low/ middle/high |
| About | Display the device firmware version. |
IMPORTANT PRODUCT FUNCTION:
- Video recordingWhen the SD card is inserted in and power is on, the dash camera will record automatically. The red recording indicator will flash on the screen. From 00:00:00, press [Recording] icon to stop recording.
- Take PhotoIn video mode, slide your finger from left to right in the blank area of the screen to take photos.
- PlaybackPress the [playback] icon to enter into the photo album, then select the video or photo you need to playback or view.
- G-sensorG-sensor is built into the camera. In case of a vehicle collision, the recorder will lock the broken video of the accident and save it as a special image.Meanwhile, a yellow scroll bar appears at the bottom of the display screen. The locked image is not covered by the loop. Note: G-sensor supports sensitivity adjustment, which can be changed in the Settings menu.
- Loop recordingThis dash camera can cycle over the recording without missing a second. The cycle mode can be set in the recording menu. For example, the setting range is: off /1 minute /3 minutes /5 minutes.
- Date & time settingIn the standby state, press [Settings] to enter the system Settings menu, and select the date/time option by scrolling up/down. [Note] In order to effectively record the date and time of obtaining evidence of driving safety accidents, please set the correct time before using the product.
- Connect to PCConnect the device to the USB interface of the PC through a mini USB cable. The screen shows three optional modes: USB storage, PC camera, and charge.
- ChargeWhen the power is connected, the charging indicator icon will be displayed on the upper right of the screen and the charging icon will flash continuously during the battery charging when the device is working.
- Screen saverThe LCD display can be automatically powered off to make the product work at very low power consumption; In the “screen saver” of the system menu, three modes of “Off”, “1 minute” and “3 minutes” are optional. For example, select “3 minutes” to enter the power-saving mode after three minutes of power on and turn off the display. The default is off.
- GPSThis device has a built-in GPS module. When the GPS icon turns green, it means the device has been successfully located.
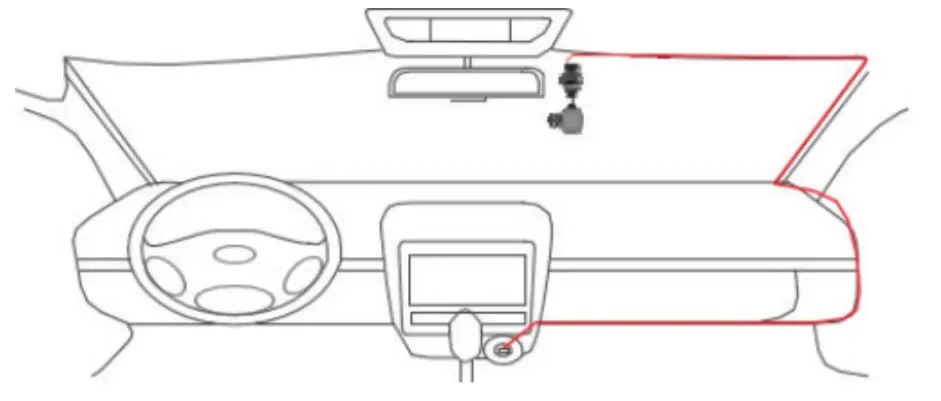
INSTALLATION GUIDE:
- Turn off the car engine.
- Insert the SD card into the SD card slot.Note: Please use a high-speed SD card (above Class10) with a capacity of not less than 8G. For the first time of use, please format the SD card on the device.
- Mount the bracket on the device and attach it to the windshield of the car.
- Insert the car charger into the cigarette lighter.
- Connect the USB port of the device to the car charger.
 Note: During wiring, the charging extension cord can be laid along the windshield edge of the car.
 - Adjust the lens position to make sure the lens is level with the ground.
- Start the engine and check if the device is installed correctly.Note: When the device is installed correctly, the working indicator light will be on; when the device starts to record,the recording indicator flashes.
 Note: During wiring, the charging extension cord can be laid along the windshield edge of the car.
SPECIFICATIONS:
| MCU | HS3559V200 | |
| Case Material | Black Plastic | |
| Memory | SPI Flash | |
| Display | Display | 3.0″ IPS |
| Resolution | 640*360 pixels | |
| Video Resolution | 3840 X 2160P/30 fps | |
| Front Camera Sensor | Sony IMX415 | |
| Video Resolution | 3840 * 2160 | |
| Lens | 6 glasses | |
| Viewing Angle | 170 ° | |
| Touch Screen | Yes | |
| GPS Location | Support | |
| Battery | Li-ion 3.7V, 200mAh | |
| Video Compression | H.264 | |
| Video formats | MP4 | |
| Photo Format | JPEG | |
| G-Sensor | Support | |
| Parking Monitor | Support | |
| Storage | Support 512G TF Max | |
| Input Power | DC12V-24V, 2A MAX | |
| Rear camera | Support |
TROUBLESHOOTING GUIDE:
If there are problems with the device, please refer to the following methods to resolve.
- Unable to boot.Check whether the device is properly connected to the car charger. If it is started manually, check whether the battery power is too low and needs to be charged. If there is a programming problem, you can press the RESET button to restore to the factory settings.
- Automatically stop the recording or do not cycle the recording. Because of the huge amount of video data, it’s possible that memory CARDS can’t read and write fast enough. Please use a high-speed TF card such as a C10 high-speed card. It is also possible that the G-sensor function is opened and the memory card is full of locked files. Please turn off G-sensor and format the memory card.
- The video or photo is not clear.Please check the lens if there are dirty and finger marks. Please clean the lens surface before working to keep the lens clean and tidy.
- The screen freezes.Please press the “RESET” button with a pin to restart the device.
- The display turns off after a few minutes.Please check the screen saver setting and select “off”.
- The memory card is full.Please allow loop recording to overwrite older recording files or delete unwanted files including emergency recordings.
- The camera feels warm during operation.It is normal for the camera to get warm during operation. Please bear in mind that if the camera is exposed to high temperatures for a long period of time, it might fail to boot up. Cool it down and try again.
![]() Distributed by:Electus Distribution Pty. Ltd.320 Victoria Rd, Rydalmere NSW 2116 Australiawww.electusdistribution.com.auMade in China
Distributed by:Electus Distribution Pty. Ltd.320 Victoria Rd, Rydalmere NSW 2116 Australiawww.electusdistribution.com.auMade in China
[xyz-ips snippet=”download-snippet”]