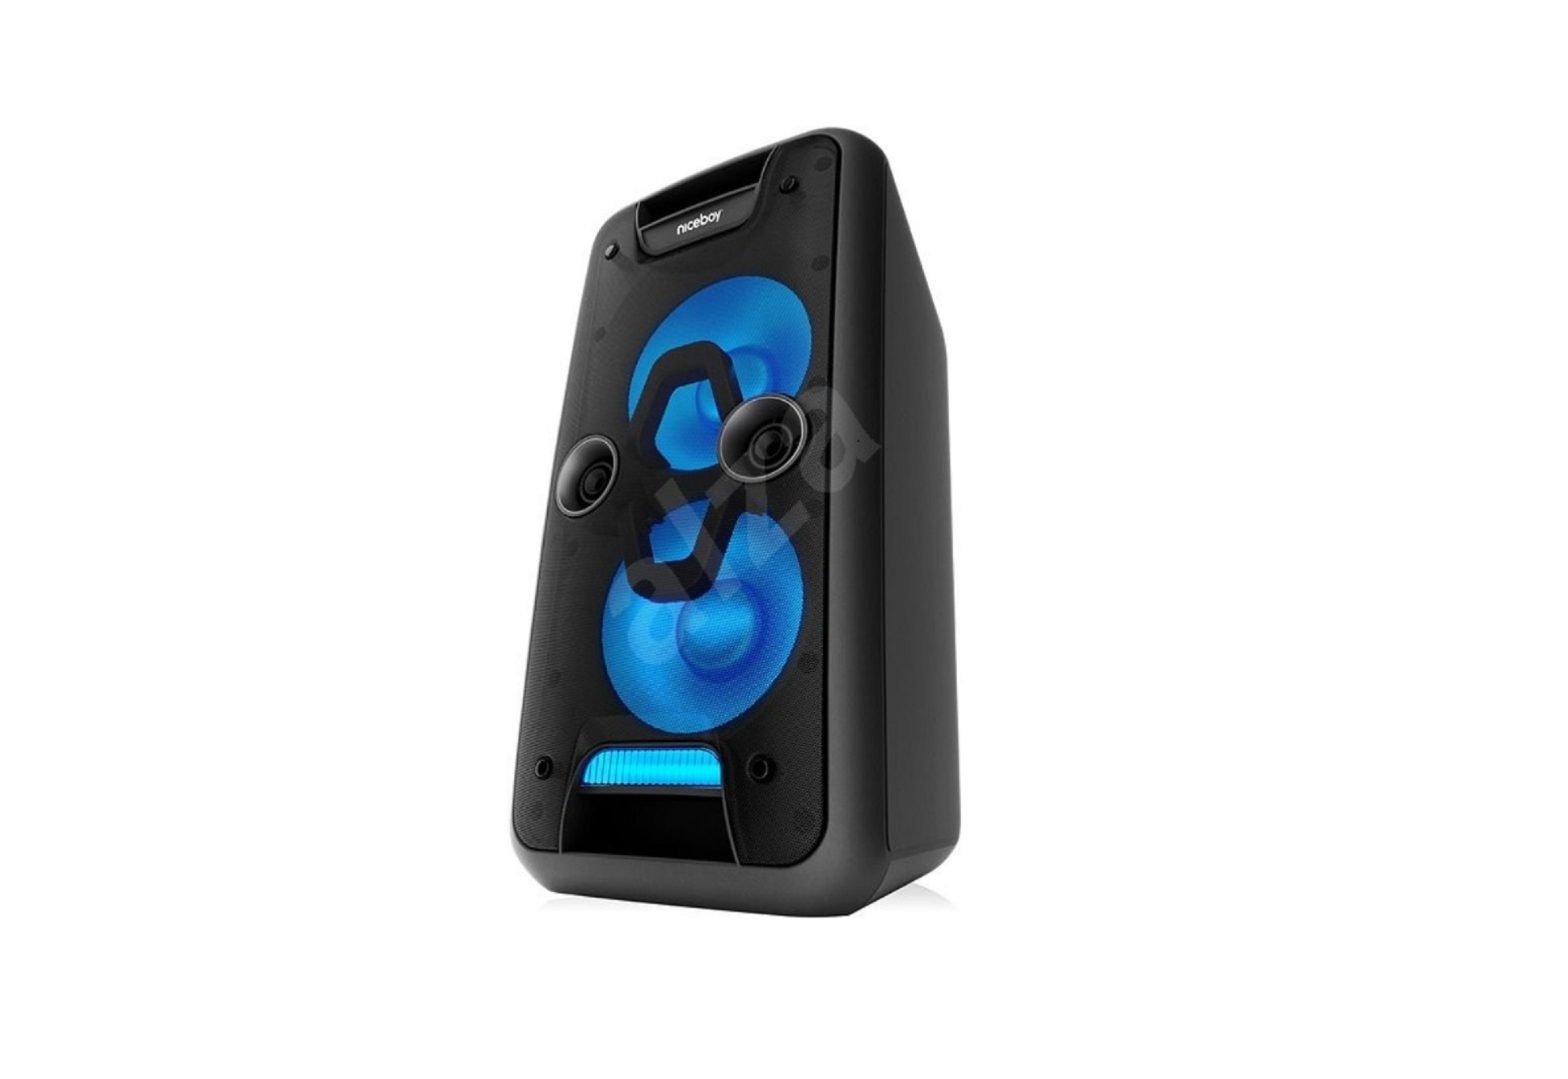
niceboy NCB045M Party Boss 200W Speaker User Manual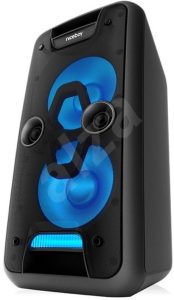
POWER SUPPLY AND CHARGING
- Connect the supplied cable to the socket (3) on the rear panel of the speaker.
- If the speaker is connected to the mains, the integrated battery will start charging.
- Battery charging is indicated by a red LED (8) on the top panel. When fully charged, the LED will turn green.
SWITCHING ON
- Turn the main volume knob on the top panel (18) all the way to the left.
- Connect all input devices and tools that you plan to use.
- Turn on the speaker with the power switch on the rear panel (1). The speaker is now in Bluetooth mode. After switching to the desired mode, you can slowly increase the volume.
PRODUCT DESCRIPTION
UPPER PANEL
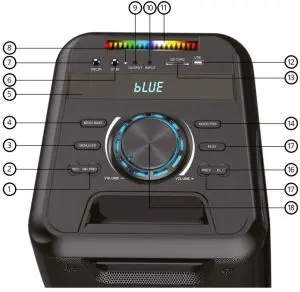
- MIbC PRIO – When the button is on, it prefers the microphone by muting the music when you speak into the microphone. When this function is off, the volume of the played music remains unchanged.
- REC – Activates the recording function when using either a wired or wireless microphone.
- MENU / LED – Press this button to adjust bass, treble, microphone volume and echo effects. Press and hold the button to turn on / off the LED illumination effect.
- MEGABASS – Press this button to turn on / off the mega bass effect.
- LED display – This screen shows the selected input mode: Bluetooth, USB, AUX, SD and FM radio. It also shows the volume level, the song being played and the selected FM station.
- GT.IN – Input for guitar or another musical instrument.
- MIC.IN – Input for microphone or another musical instrument.
- Charging LED – The LED remains red during charging and turns green when fully charged.
- OUTPUT – Output for connection to another speaker. The volume level is controlled by using the VOLUME main knob (18).
- LED lights – Colours: purple, green, yellow, red, light blue white.
- INPUT – 3,5mm jack input for AUX cable.
- USB – Allows you to play audio using MP3 and WAV music files stored on a USB memory device. The USB socket can also be used as an output power supply. In such a case, the speaker acts as a power bank.
- SD CARD – Input for inserting an SD card for playing MP3 and WAV music files.
- MODE / TWS – while pressed briefly: audio source selection between Bluetooth, USB, SD, Line-In (AUX), FM.Pressing and holding: TWS mode for pairing two Niceboy PARTY Boss 200W speakers.
- PLAY – In USB, SD or Bluetooth mode, briefly press this button to start and pause media playback. In FM radio mode, press this button to search for channels from the lowest to the highest frequency and automatically store them as presets.Note: This button does not work in the LINE IN (AUX) mode.
- NEXT – Press this button to select another song from the playlist. Available in Bluetooth, SD, USB and FM modes.
- PREV – Press this button to select the previous song from the playlist. Available in Bluetooth, SD, USB and FM modes.
- VOLUME – The knob increases or decreases the speaker volume level. The volume can also be adjusted directly from any of the sources connected to the speaker.
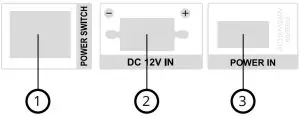
REAR PANEL
- POWER SWITCH: Turns the speaker on and off.
- DC 12V IN: For connecting an external 12V battery.
- POWER IN: Plug the supplied AC power cord into this connector.

REMOTE CONTROLLER
Before using the controller, open the bottom cover and insert the supplied AAA batteries.
- BT – Switches the speaker to Bluetooth mode.
- MENU – Press this button to adjust the bass, treble, microphone volume and echo effects. Use the „+“ and „-“ buttons to set the values.
- VOL- – Reduces the volume.
- CH- – Plays the previous track in Bluetooth, USB or SD mode. In FM mode, go to the previous station.
- REPEAT – Repeats a track on a USB or SD card.
- LIGHT – Turn on / off the illumination effects.
- NUMBER BUTTONS – In USB and SD modes, press any key from 0 to 9 to directly select the tracks you want to play. In FM mode, this allows you to enter frequencies manually.
- Power – Turns the speaker on and off.
- Mute – Turns the speaker sound on and off.
- EQ – Switches between preset equalizer values.
- SCAN – In FM mode, automatically searches for and stores available stations from the lowest to the highest frequency.
- VOL+ – Increases the volume.
- CH+ – Plays the next track in Bluetooth, USB or SD mode. In FM mode, go to the next station.
- PLAY – Plays or pauses the track in Bluetooth, USB or SD mode.
- TUNER – Switches the speaker to FM radio mode.
- USB / SD – Switches the speaker to USB or SD card mode.
- AUX – Switches the speaker to AUX mode.
BLUETOOTH MODE
- The speaker is by default in Bluetooth mode after being switched on. If the speaker is in another mode, it is necessary to actívate the Bluetooth mode by briefly pressing the MODE button. The Bluetooth pairing mode is indicated on the display by a flashing word BLUE.
- Activate Bluetooth on your device. Select “Niceboy PARTY Boss 200W” in the list of available devices.
- The device will connect to the loudspeaker. A successful pairing is announced by an acoustic prompt and the word BLUE is permanently lit on the display.
- After switching it on again, the speaker automatically connects to the last paired device.
AUX MODE
- The speaker must be turned off.
- Insert the included 3.5mm jack cable into the INPUT audio input (11).
- Switch the speaker on and then briefly the MODE button (14) to switch to AUX mode.
- AUX mode is indicated on the display by LINE.
- Use the device to which you have connected the loudspeaker to control the music being played.
You can control the speaker volume with the VOLUME knob (18) on the top panel.
USB MODE
- After inserting the USB device into the USB slot (12), the speaker will automatically switch to the appropriate mode. This is indicated on the display by the word USB.
- To start or pause a track, briefly press the PLAY button (15).You can control the volume with the VOLUME knob (18) on the upper panel. Briefly press the NEXT (16) and PREV (17) buttons to skip to the next or previous track.
The device supports data storage devices with a maximum capacity of 32GB and MP3 and WAV audio formats. The USB socket can also be used as an output power supply. In such a case, the speaker acts as a power bank.
SD CARD MODE
- 13. After inserting the SD card, the speaker will automatically switch to the appropriate mode. This is indicated on the display by the word SD.
- To start or pause a track, briefly press the PLAY button (15).You can control the volume with the VOLUME knob (18) on the upper panel. Briefly press the NEXT (16) and PREV (17) buttons to skip to the next or previous track.
The device supports data storage devices with a maximum capacity of 32GB and MP3 and WAV audio formats.
FM RADIO MODE
Place the speaker in an open area so that the radio signal strength is sufficient.The speaker is equipped with an integrated antenna.
- Briefly press the MODE button (14) to find the FM radio mode. This is indicated on the display by the FM station number, for example, 90.3.
- Briefly press the PLAY button (15) to start scanning for the available stations. The device automatically stores the discovered stations in preset channels.
- When the scanning is finished, you can switch between FM stations with the NEXT (16) and PREV (17) buttons, or with the number buttons on the remote control.
EQUALIZER
The speaker has two basic equalizer settings, which you can switch between with the MEGABASS button (4). To customize this function, briefly press the MENU / LED button (3) to find L (bass) and H (treble) on the display. Use the NEXT (16) and PREV (17) buttons to set the values from -8 to 8.
WIRELESS MICROPHONE
Unscrew the bottom cover of the microphone and insert the supplied AA batteries. Screw on the cover again and turn the microphone back on by using the switch on top. The microphoneautomatically connects with the speaker, provided the speaker is on. To adjust the microphone volume and echo effect, briefly press the MENU / LED button (3) to find N (volume) and E (echo) on the display. Use the NEXT (16) and PREV (17) buttons to set the values from 0 to 10 for volume and 0 to 12 for echo.
RECORDING
When wireless or wired microphone or musical instrument is connected via the microphone inputs, you can record the singing / musical instrument to a USB drive or SD memory card.The storage medium must contain at least one mp3 or WAV audio file in order to be detected by the device.
- Turn the speaker off and connect other instruments to the MIC.IN or GT.IN inputs.
- Turn the speaker on.
- Insert a USB drive or SD card into the appropriate USB or SD CARD slots.
- The speaker will switch to the appropriate storage media mode.
- Briefly press the REC button to start recording your audio track. The recording is indicated on the display by REC.
- To end the recording, press the REC button briefly again.
- The speaker will automatically play the recorded audio track.
- To delete a track, press and hold the REC button.
- Use the PREV and NEXT buttons to switch between the recorded tracks.
PACKAGE CONTENTS
- Niceboy PARTY Boss 200W speaker
- Power cable
- Wireless microphone
- Remote control
- 3.5 mm jack cable
- 2x AA batteries
- 2x AAA batteries
- Operating instructions
PARAMETERS
- Bluetooth version: 5.0
- Degree of protection: IPX4
- RMS performance: 200W
- Power supply: 100–240V, 60/50Hz
- Battery: 4A 12V
- Charging time until charged: 4 hours
- Battery life: 8 hours
- Woofer: 2 x 8”
- Frequency range: 20 Hz-6 kHz
- Impedance: 3Ω, ± 10%
- Sensitivity: 88db, ±2dB
- Tweeter: 2×2”
- Frequency range: 40Hz – 20kHZ
- Impedance: 4Ω, ±15%
- Sensitivity: 85dB,±3dB
- Microphone: wireless, directional
- Frequency: 40 Hz- 15 kHz
- Impedance: 10kΩ / 1kHz
- Sensitivity: 5dB
This product complies with all the basic requirements of relevant EU directives.
USER INFORMATION FOR DISPOSING ELECTRICAL AND ELECTRONIC DEVICES (HOME USE)
This symbol located on a product or in the product’s original documentation means that the used electrical or electronic products may not be disposed together with the communal waste. In order to dispose of these products correctly, take them to a designated collection site, where they will be accepted for free. By disposing of a product in this way, you are helping to protect precious natural resources and helping to prevent any potential negative impacts on the environment and human health, which could be the result of incorrect waste disposal. You may receive more detailed information from your local authority or nearest collection site. According to national regulations, fines may also be given out to anyone who disposes of this type of waste incorrectly. User information for disposing electrical and electronic devices.
 report this ad
(Business and corporate use)In order to correctly dispose of electrical and electronic devices for business and corporate use, refer to the product’s manufacturer or importer. They will provide you with information regarding all disposal methods and, according to the date stated on the electrical or electronic device on the market, they will tell you who is responsible for financing the disposal of this electrical or electronic device. Information regarding disposal processes in other countries outside the EU. The symbol displayed above is only valid for countries within the European Union. For the correct disposal of electrical and electronic devices, request the relevant information from your local authorities or the device seller.
[xyz-ips snippet=”download-snippet”]