niceboy VEGA X PLAY Action Camera
DESCRIPTION AND FUNCTIONS
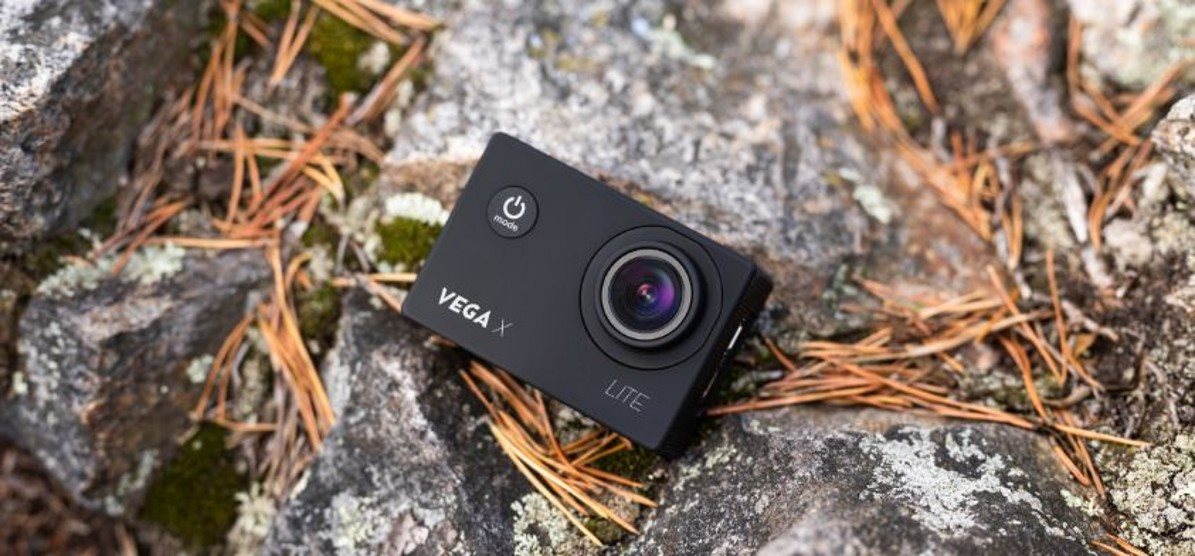
- Camera lens
- Front display – informational display, which shows the current mode (video, photo, settings), battery life, Wi-Fi on, inserted memory card, etc.
- Up button/Wi-Fi – press while in the menu to move between the available options. Press when not in the settings menu to turn on/off Wi-Fi.
- Down button/Microphone – press while in the menu to move between the available options. Press when not in the settings menu to turn on/off the camera’s microphone.
- Speaker – plays back sounds.
- micro USB – designated for charging and connecting to a PC.
- Micro SD slot – designated for inserting a memory card.
- micro HDMI – designated for connecting to a TV or monitor.
- Power button/Mode switch/Menu – press and hold to power on/off the camera. While the camera is powered on, press to move through the modes of recorded videos, captured photos, slow motion, playback and settings. Used while in the menu to switch between recorded videos, captured photos, camera settings and system settings.
- Release/OK – press to film or take a photo. Use while in the menu to select a chosen folder/item.
- Display – 2” rear, colour camera display.
- Charging diode – once connected to a charge the diode will flash red. The diode will stop flashing and shine red after full charge is complete.
- Operational diode – the diode will shine blue when the camera is turned on, the diode will flash when a video is being recorded.
- Battery cover – open to insert/eject the battery.
SETTING THE CAMERA’S LANGUAGE MENUPower on the camera by pressing and holding the power button (9). Once the camera is powered on, press the same button (9) 4 times. Press the OK button (10) to open the menu. Press button (9) 3 times and confirm by pressing the OK button (10). Here you may select your desired language for the camera menu, and confirm your choice by pressing the OK button (10).
MICRO SD CARDSelect a brand name micro SD card with a capacity of 64GB, type UHS-I U3. The memory card must be formatted in a PC to the FAT32 file system before its first use.Only use programs designated for formatting SD cards. Insert the memory card into slot (7) with the PINs facing the camera lens (front part of the camera). Insert the memory card into the camera until it clicks. Eject the memory card by pressing it until it clicks out of the slot (7).Notice: regularly format the memory card in a PC in order to avoid errors with recorded videos. The manufacturer of the SD card you selected may supply you with more information about using or formatting your memory card.
BATTERY/CHARGINGTo insert or remove the battery, open the cover on the underside of the camera. Connect a USB cable to the USB port (6) located on the left side of the camera for charging the camera. Connect the other end of the cable to a charging adapter, ex. a mobile phone charging adapter (5V voltage and electrical current minimum of 1A). The camera may also be charged by connecting the USB cable to the camera and then to a PC or powerbank.Notice: fully charge the battery before the camera’s first use. Don’t expose the battery to large temperature differences. Supervise the camera while the battery is charging. The time it takes to charge the battery depends on the electrical current type of your charging adapter. The camera charges faster when powered off.
POWER THE CAMERA ON/OFFPower on/off the camera by pressing and holding the power button (9).
SWITCHING BETWEEN CAMERA MODESSwitch between individual camera modes by pressing button (9). The camera comes equipped with the following modes:
- Video modeStart and stop filming by pressing button (10).
- Photo modeTake a photo by pressing the button (10).
- Slow motion modeStart and stop filming slow motion video by pressing button (10).
- Playback mode
- Here you can play back recorded videos or view captured photos. User the side buttons (3,4) to move between individual videos and photos. Start and stop playing back a video by pressing the OK button (10). Press and hold the OK button (10) to erase an item.
- Settings mode(menu)Press the OK button (10) to open the settings menu. Use the Menu button (9) to move between the categories of recorded videos, captured photos, camera settings and system settings. User the side buttons (3,4) to move between individual options. Use the OK button (10) to select any of the individual options.
VIDEO SETTINGSVideo definition: definition settings for video recording.Audio: powers on/off the camera’s microphone.Time lapse: time interval settings for time-lapsed videos.Video loops: video cycle, or time segment, settings in which your videos will be recorded.Slow motion: settings for recording decelerated videos.
PHOTO SETTINGSPhoto resolution: resolution settings for capturing photos.Timer: settings for pictures captured with a time delay (after the camera release has been pressed, the photo will not be taken until the previously set time has been reached).Time lapse: time interval settings for time-lapsed photos.Photo burst: determines how many photos the camera will take in a series.
CAMERA SETTINGSExposure: compensation exposure settings. The higher the positive value, the lighter the video and the lower the negative value, the darker the video.White balance: white balance settings for various methods of lighting a scene.Wi-Fi: turns on/off the camera’s Wi-Fi.Picture rotation: option to rotate the picture 180°.Vehicle mode: powers on/off the camera’s function in which it automatically begins filming after being plugged in to charge.Frequency: frequency settings.LED indication: option to turn on/off the operational diode (13).Screen saver: sets the time at which the display will power off. The powered-off display does not affect video recording. Activate the display by pressing any button.Automatic power off: settings for the camera’s automatic power off function when the camera is not in use.Time stamp: turns on/off the option to insert the date and time into captured photos.
SYSTEM SETTINGS
Language: language settings for the in-camera menu.Date/time: date and time settings.Format: erases all data located on the memory card.Factory settings: reset the camera to its factory settings.Firmware: information regarding the camera’s firmware.
CONNECTING THE CAMERA TO YOUR TELEPHONE VIA WI-FIInstall the app XDV (free) to your phone (located in the Appstore for iOS and on Google Play for Android). Do not open the app after it has downloaded, instead follow these steps:
- Turn on the camera’s Wi-Fi by pressing button (3) on the right side of the camera or via the Wi-Fi option in the menu.
- Open the Wi-Fi settings on your mobile device and connect to the camera’s network (name: Niceboy VEGA X Play, password: 1234567890).
- Once your mobile device is connected to the camera’s network, then launch the app from where you will be able to control the camera via your mobile device.
- Press the Wi-Fi button (3) on the right side of the camera to turn of the Wi-Fi.
Notice: enable all app permissions in your phone settings, turn off your phone’s “data connection”, and leave Wi-Fi on before using the app.The app is compatible with mobile phones with iOS 9.0 and newer and mobile phones with Android 8.0 and newer.
CONNECTING THE CAMERA TO A PCConnect the camera to a PC using the USB data cable plugged into the camera’s USB port (6). You can then choose between the following modes:
- USB – files saved on your memory card inside the camera may be managed while connected to a PC (the camera acts as external storage connected to a PC).
- PC camera – the camera may be used as a PC camera when used by programs that allow the connection of external cameras.
- Charging – the camera will only charge.
WATERTIGHTNESSThe camera is watertight only when paired with its watertight case, and may only be submerged in water under the following conditions:The case is watertight to the depth of 30 meters. Before using the camera in its case, ensure that the case’s rear door has been closed correctly with the help of the mechanism located on the upper side of the case. The small door and gaskets much be completely rid of any foreign materials such as dust, sand and the like. If the case has been used in salt water, wash the case off with fresh water. Do not use any textile materials or external heat sources to dry the camera (fans, microwave ovens, etc.), always let the case slowly dry out on its own.Warning: the camera is not watertight without its case! Use only the original case to ensure the watertightness of the camera.
REMOTE CONTROLRemote control does not need to be paired to the camera, remote control automatically starts to work oncea micro SD card has been inserted into the camera. Press the “video-button” to both playback and pause recorded videos. Press the photo button on the controls to take a photo.
Controller propertiesRange: 20 metersNotice: the remote controller is not watertight!
PACKAGE CONTENTS
- Niceboy VEGA X Play camera
- Remote control
- Watertight case (may be connected to other accessories) Handlebar attachment
- Open mount (may be connected to other accessories) Tripod camera mount
- Stick-on mount (ex. placement on a helmet)
- Hitches meant for connecting other accessories Secure cable and carrying strap
- Cleaning cloth
- Battery
- USB charging cable
- Manual
SPECIFICATIONS
The manual may be installed in its electronic form at www.niceboy.eu under the support section. This product meets all basic EU regulation requirements placed upon it.
Importer to EU: RTB media s.r.o., Pretlucka 16,Prague 10, 100 00, Czech Republic, ID: 294 16 876Made in China.
References
[xyz-ips snippet=”download-snippet”]