ICE CREAM MAKERQUICK START GUIDE – READ FIRST
Product Guide
OUTER BOWL LIDLocks paddle in place.
PADDLEThis dual functioning paddle finely haves and mixes frozen ingredients into the creamiest treats.DESSERT TUBSBPA-free tubs and lids for making and storing treats.
OUTER BOWLSecurely holds the tub in place during processing.All accessories above are dishwasher safe on the top rack.This is NOT a blender.![]() Do NOT process a solid block of ice or ice cubes. Do NOT make a smoothie or process hard, loose ingredients such as frozen fruit. Fruit must be crushed to release its juice or combined with other ingredients and frozen before processing.
Do NOT process a solid block of ice or ice cubes. Do NOT make a smoothie or process hard, loose ingredients such as frozen fruit. Fruit must be crushed to release its juice or combined with other ingredients and frozen before processing.
Display Guide
One-Touch Programs
Each program is intelligently designed to whip up delicious creations in 1 to 2 1 /2 minutes. Programs vary in length and speed depending on the optimal settings to get perfectly creamy results for that type of recipe.When the program is running, the paddle will move down through a frozen base and return back to the top to create chef-approved treats.
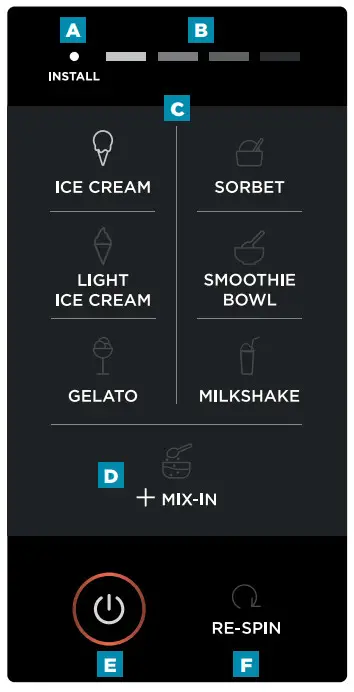
A Install LightBlinking light – Indicates the bowl is not properly installed.Solid Light – Indicates the paddle is not installed correctly.B Progress BarIndicates the progress of the program selected. When a program is finished, all 4 segments will flash twice and then turn off.C Pre-set ProgramsSelect the program that suits your recipe and the paddle will process the base to create the ideal texture in 1 – 21/2 minutes.When you’re ready to get started refer to the recipe guide for ideas of what you can make with each program.D MIX-INUse after you’ve processed your dessert to mix in extras like chocolate chips, nuts, or sweets.E Power ButtonUse to turn unit on and off.F RE-SPINUseful if the base looks crumbly after running a program. This can happen if the base is really cold.Do not RE-SPIN if using MIX-IN.Refer to the recipe guide for more detailed information on each function.
Assembly
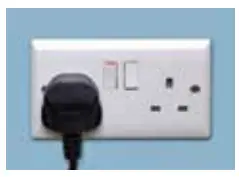
- Plug-in unitMake sure to plug in the unit before assembly and switch the Power
 on. The unit will NOT recognize the outer bowl and therefore will not work if it is installed before the unit is plugged in.
 - Install tubRemove the lid from the tub and check that the ingredients in the tub have not been frozen at an angle. Place the tub containing the frozen base in the outer bowl.
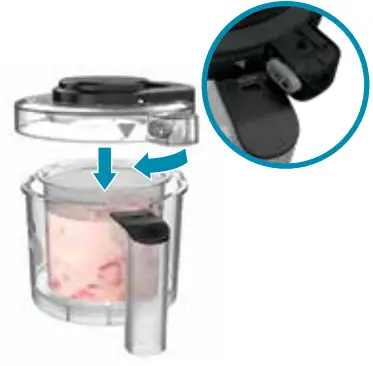
- Install paddlePress and hold the paddle latch on the top of the outer bowl lid, then insert the paddle in the bottom of the lid. Release the latch to secure the paddle. The latch will be in the center when the paddle is correctly installed. NOTE: The paddle will feel loose when installed. Turn the lid upside down or give the paddle a spin to be sure it is secured.
- Install lidPosition the tab of the lid just slightly to the right of the outer bowl handle so the lines on the lid and handle align. Rotate the lid clockwise to lock.
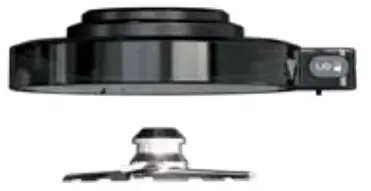
- Install outer bowlAfter plugging in the unit, place the outer bowl on the motor base with the handle in the middle of the unit. Twist handle to the right to raise the platform and lock the owl in place. You will hear a click when the bowl is correctly installed.
Processing
- Choose programSelect a program and processing will begin. When complete, all 4 segments of the progress bar will flash twice and then turn off.
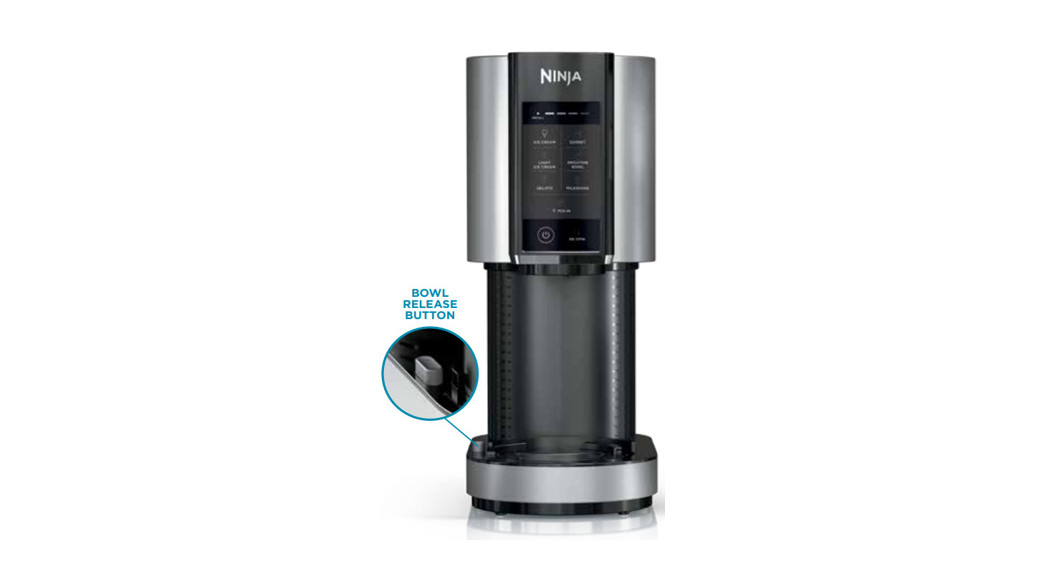
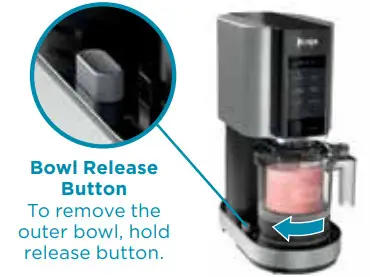
- Remove bowlWhen the program ends, hold the release button on the left of the motor base and twist the bowl handle clockwise to remove it.
- Remove lidPress the lid unlock button and twist to remove the lid.NOTE: Make sure to plug in the unit before assembly. If the programs do not illuminate when the power is turned on, make sure the unit is properly assembled. If the install light is flashing, the outer bowl needs to be properly installed. If the install light is steadily illuminated, the paddle needs to be properly installed.
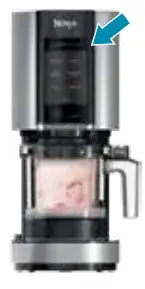
 NOTE: Make sure to plug in the unit before assembly. If the programs do not illuminate when the power is turned on, make sure the unit is properly assembled. If the install light is flashing, the outer bowl needs to be properly installed. If the install light is steadily illuminated, the paddle needs to be properly installed.
Disassembly & Cleaning
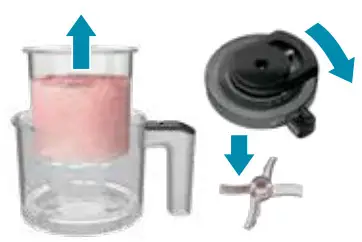
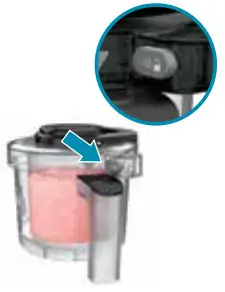
Remove tub & paddleLift the tub out of the outer bowl.Rinse the outer bowl lid to remove any sticky residue or pieces wedged in the paddle. Then remove the paddle by pressing the paddle latch on top of the lid.All parts are dishwasher safe on the top rack and can also be hand-washed.
Now you’re ready!Choose a recipe from the Recipe Guide and keep this Quick Start Guide nearby for reference.© 2021 SharkNinja Operating LLC.NINJA is a registered trademark of SharkNinja Operating LLC.NC300UK_QSG_MP_210526_Mv1
[xyz-ips snippet=”download-snippet”]