
NINJA SS300C Power Blender User Guide
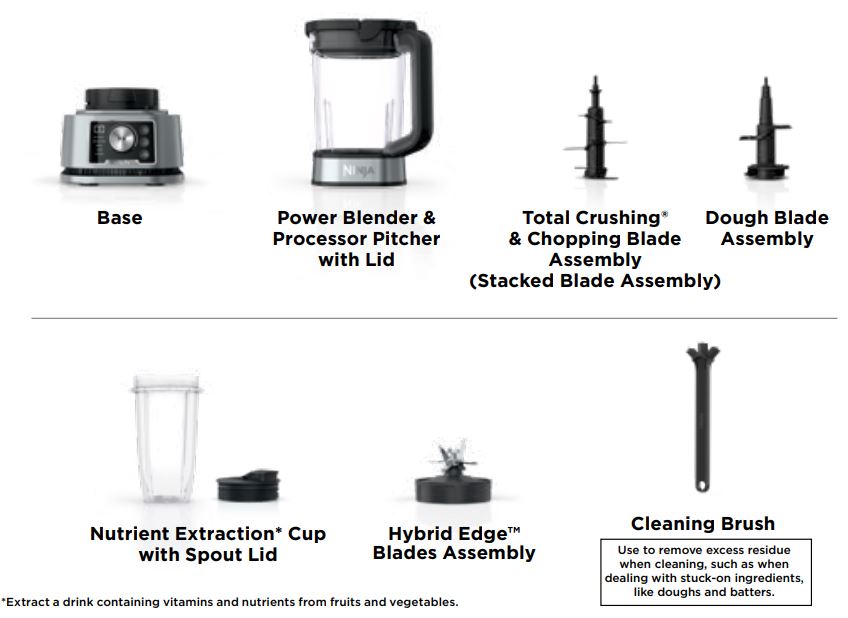
What’s in the Box
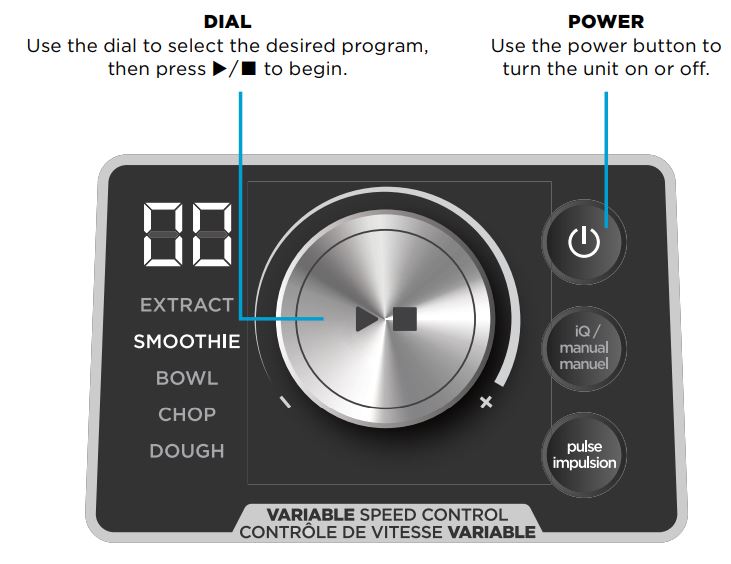
AUTO-iQ® MODE
Intelligent preset programs combine unique blending and pausing patterns that do the work for you. Once a preset program is selected, it will start immediately and automatically stop when blending is complete.
TIP: The unit can detect which container is installed on the motor base. Only the functions available for a particular container will illuminate on the control panel.
MANUAL MODE
Go manual for total control of your blending speed and textures. Dial down the speed for heavy loads like dough, or crank up the speed for smoothies. Continuously runs up to 60 seconds. Press ▶/■ at any time to end program sooner.
NOTE: In Manual mode, Auto-iQ™ programs will not illuminate on the control panel.

USING VARIABLE SPEED CONTROL AND THE POWER BLENDER & PROCESSOR PITCHER
NOTE: IF USING MANUAL SPEEDS WITH THE DOUGH BLADE ASSEMBLY, ONLY USE SPEEDS 1 OR 2.
START SLOWAlways start at a low speed (13) to better incorporate ingredients and prevent them from sticking to the sides of the vessel.
DIAL UP THE SPEEDSmoother blends call for higher speeds. Low speeds are great for chopping veggies and mixing dough, but you’ll need to ramp up for purees and dressings.
HIGH-SPEED BLENDINGBlend until your desired consistency is reached. The longer you blend, the better the breakdown and smoother the outcome will be.
Assembling the Power Blender & Processor Pitcher

Blending
PRESS THE POWER ![]() BUTTON TO TURN THE UNIT ON.
BUTTON TO TURN THE UNIT ON.
NOTE: If using manual speeds with the Dough Blade Assembly, only use speeds 1 or 2.
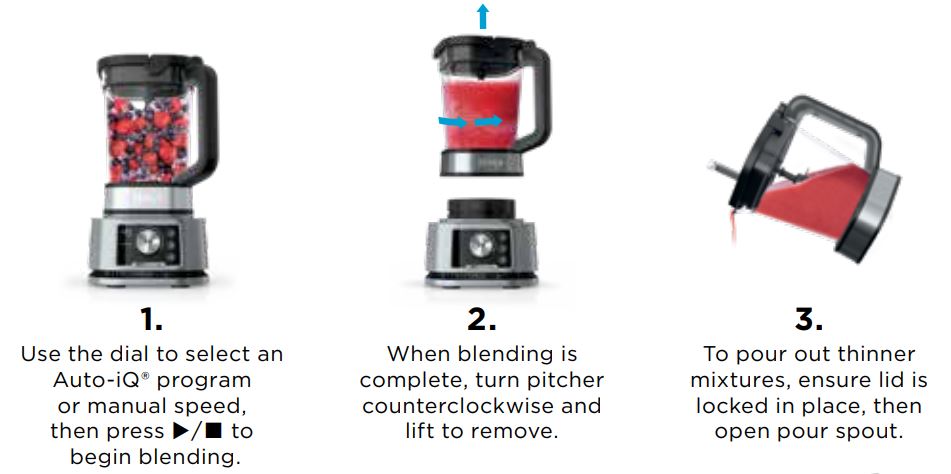
For thicker mixturesPress RELEASE button and lift handle to remove lid, then carefully lift out blade assembly before removing contents. Remove contents from blade assembly by using a spatula.
![]() WARNING: Blade assembly is sharp and not locked in place. Make sure lid is locked onto pitcher before pouring contents. If pouring without lid, carefully remove blade assembly first. Failure to do so will result in a risk of laceration. Refer to the Ninja Owner’s Guide for additional information.
WARNING: Blade assembly is sharp and not locked in place. Make sure lid is locked onto pitcher before pouring contents. If pouring without lid, carefully remove blade assembly first. Failure to do so will result in a risk of laceration. Refer to the Ninja Owner’s Guide for additional information.
Dough making 101
Loading tips for making different doughs and batters.

COOKIESUnit can make a max of 24 (28 g) cookies at a time.
- Add sugars; cubed, softened butter; eggs; and liquids (such as vanilla extract). Use the dial to select DOUGH, then press ▶/■ .
- Add all dry ingredients and run the DOUGH program again. If more mixing is needed, run on Speed 2 until combined.
- Remove dough blade and add mix-ins (such as chocolate chips, raisins, and nuts). Stir to combine.
 PIZZAS, PRETZELS, BAGELS & BREAD DOUGHSUnit can make a max of one 30 cm round pizza, 8 pretzels or bagels, or one loaf bread at a time.
- First add liquids (such as water), yeast, and oil. Then add dry ingredients. Use the dial to select DOUGH, then press ▶/■ .
- Remove dough ball and knead to combine, if needed.

BISCUITS, PIES & SCONESUnit can make a max of 8 biscuits and scones or one 30 cm round pie crust at a time.
- First add dry ingredients and cold, cubed butter or shortening. Use the dial to select DOUGH, then press▶ /■ .
- Add cold liquids (such as cold milk or water) and run the DOUGH program again. If more mixing is needed, run on Speed 2 until combined.
- Remove dough ball and knead to combine.
CAKES, BROWNIES, MUFFINS & QUICK BREADSUnit can make a max of one 30 cm round cake, one 20 cm x 20 cm pan brownies, 12 muffins, or one 20 cm x 10 cm loaf of quick bread, such as banana bread or pumpkin bread.
- Add sugars; oil or cubed, softened butter; eggs; and liquids (such as vanilla extract). Use the dial to select DOUGH, then press ▶/■ .
- Add all dry ingredients and run the DOUGH program again. If more mixing is needed, run on Speed 2 until combined.
- Add mix-ins (such as chocolate chips, raisins, and nuts). Press iQ/Manual, and, with Speed 1 selected, press ▶/■ . Blend until combined.
Food prep 101
 PREPPING VEGETABLES
- Cut both ends off ingredients and remove any outer peels or skins.
- Cut ingredients such as carrots, cucumber, celery, and zucchini in 5 cm pieces, and broccoli or cauliflower florets into 2.5 cm pieces. Cut ingredients such as onions in quarters.
 PREPPING MEAT
- Trim excess fat and connective tissue. Cut meat in 5 cm cubes.
CHOP PROGRAM
- Timed pulses and pauses give you consistent chopping results.
- Run program once for a large chop, twice for a small chop, and three times for a mince.

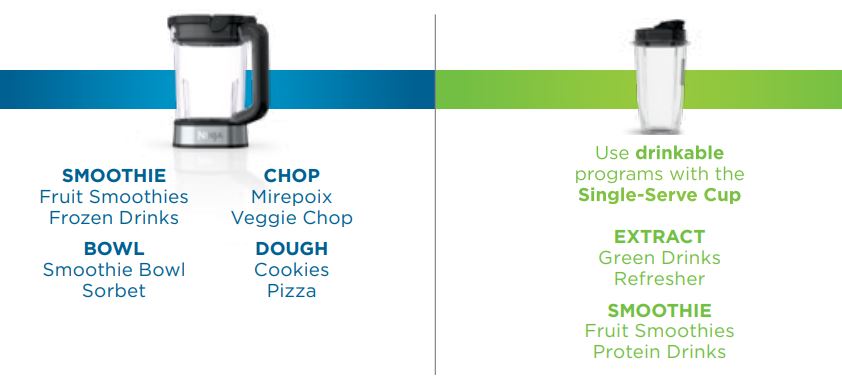
DID YOU KNOW?Smoothie bowls are thicker & spoon able, compared to smoothies which are thinner & drinkable.SMOOTHIE BOWLS FOR A CROWDUSING THE PITCHER
 With the Stacked Blade Assembly installed in the pitcher, add milk, or milk alternative such as soy, coconut, almond, or oat milk up to the 500 ml line.ALWAYS DO THIS FIRST.
 2
2
Add frozen fruit, directly from freezer, and/or acai or dragon fruit packets up to the 1300 ml line. Cut larger fruit, like bananas, in quarters.If using acai or dragon fruit packets, thaw slightly and cut in quarters.
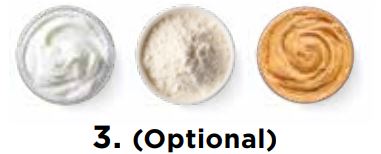 Amplify your base by adding 2 scoops of yogurt, flavor powder, protein powder, and/or nut butter.
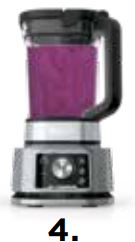 Install lid, then install pitcher on the motor base.Use the dial to select BOWL and press ▶/■ . If more blending is needed, run on Speed 10 until combined.
 After blending is complete, remove lid and blade assembly. Serve in separate bowls then add your favorite toppings, such as coconut flakes, granola, fresh bananas, berries, and agave nectar.
Assembling the Nutrient Extraction* Cup
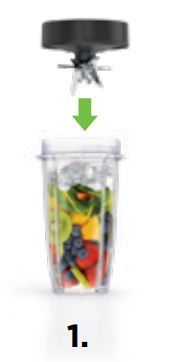 Fill container with desired contents. Screw on the blade assembly until you have a tight seal.
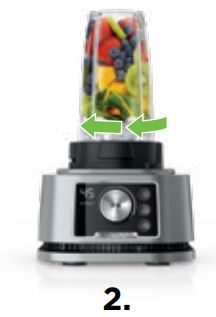 Flip container upside down and install on base. Rotate clockwise until it clicks into place.
BlendingPRESS THE POWER![]() BUTTON TO TURN THE UNIT ON.
BUTTON TO TURN THE UNIT ON.
 Use the dial to select an Auto-iQ® program or manual speed, then press ▶/■ to begin blending.
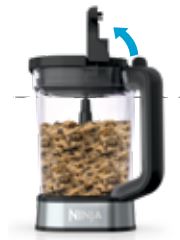
 When blending is complete, remove the container from base. Then, remove the blade assembly from container.
 Taking It To Go?Place the Spout Lid on top of the cup, and turn clockwise to seal.
NOTE: DO NOT microwave or freeze the Single-Serve Cup.
![]() WARNING: Handle the blade assembly with care, as the blades are sharp.
WARNING: Handle the blade assembly with care, as the blades are sharp.
*Extract a drink containing vitamins and nutrients from fruits and vegetables.
Cleaning
STUCK-ON INGREDIENTS IN THE PITCHER?
NOTE: For best results, use a dishwasher to remove stuck-on ingredients.
- Rinse the pitcher and blade assembly under WARM WATER after processing.
- With blade assembly installed, fill pitcher with warm water up to the DOUGH MAX line and add 1 or 2 SMALL DROPS of dish soap.
- Install the lid, and ensure the pour spout is securely closed.
- Use the dial to select SMOOTHIE and press ▶/■ .
- Once complete, empty contents and rinse under warm water. Use the included cleaning brush to remove excess residue, such as stuck-on doughs and batters.

 STUCK-ON INGREDIENTS IN THE CUP: Fill the cup halfway with warm water and add 1 small drop of dish soap and run the SMOOTHIE program. Refer to the Care & Maintenance sectionin the Owner’s Guide for more information.
 DishwasherContainers, lids, and blade assemblies are all dishwasher safe.
 Hand-WashingWash containers, lids, and blade assemblies in warm, soapy water. When washing the blade assemblies, use a dishwashing utensil with a handle. Use the included cleaning brush to remove excess residue, such as when dealing withstuck-on ingredients, like doughs and batters.
![]() WARNING: Handle the blade assemblies with care when washing, as the blades are sharp. Contact with the blades’ edges can result in laceration.
WARNING: Handle the blade assemblies with care when washing, as the blades are sharp. Contact with the blades’ edges can result in laceration.
For questions or to register your product, visit us online at ninjakitchen.com.
![]()
![]()
@ninjakitchencanada
© 2021 SharkNinja Operating LLC. AUTO-IQ, NINJA, and TOTAL CRUSHING are registered trademarks at SharkNinja Operating LLC.FOODI and HYBRID EDGE are trademarks of SharkNinja Operating LLC. SS30 0C _QSG _ E _ M P_ Mv9
References
[xyz-ips snippet=”download-snippet”]