NITECORE Wireless Charging Flashlight
Warranty Service
All NITECORE® products are warranted for quality. Any DOA / defective product can be exchanged for a replacement through a local distributor/dealer within 15 days of purchase. After that, all defective / malfunctioning NITECORE® products can be repaired free of charge within 60 months from the date of purchase. Beyond 60 months, a limited warranty applies, covering the cost of labor and maintenance, but not the cost of accessories or replacement parts.The warranty will be nullified if
- the product(s) is/are broken down, reconstructed and/or modified by unauthorized parties;
- the product(s) is/are damaged due to improper use; (e.g. reversed polarity installation)
- the product(s) is/are damaged due to battery leakage.
For the latest information on NITECORE® products and services, please contact a local NITECORE® distributor or send an email to [email protected]
All images, text and statements specified herein this user manual are for reference purpose only. Should any discrepancy occur between this manual and information specified on www.nitecore.com, Sysmax Innovations Co., Ltd. reserves the rights to interpret and amend the content of this document at any time without prior notice.
Features
- Utilizes a CREE XP-L HI V3 LED with a max output of 1,000 lumens
- Maximum peak beam intensity of 67,700cd and maximum throw of 520 meters
- An optical system combined with crystal coating and “Precision Digital Optics Technology” (PDOT)
- Highly efficient constant current circuit provides a stable output up to 1,200 hours
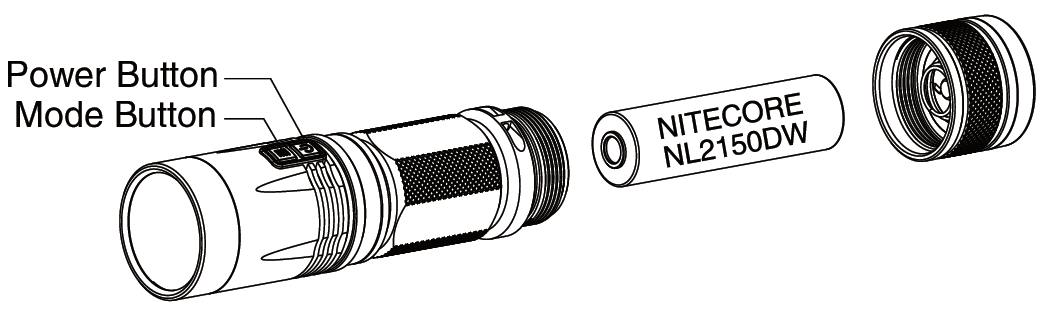
- NITECORE proprietary 21700 Li-ion battery included available with reversible insertion (NL2150DW 5,000mAh)
- Dual side switches control 5 brightness levels and 3 special modes
- Triple charging ways available
- Wall mount cradle and desktop cradle included for inductive wireless charging
- Intelligent Li-ion battery charging circuit with a USB-C port
- A power indicator beneath the side switches indicates the remaining battery power (Patent No. ZL201220057767.4)
- The power indicator can display the battery voltage (±0.1V)
- Incorporated Advanced Temperature Regulation (ATR) module (Patent No. ZL201510534543.6)
- Optical lenses with double-sided scratch resistant coating
- Constructed from aero grade aluminum alloy
- HA III military grade hard-anodized finish
- Rating in accordance with IP68 (2 meters submersible)
- Impact resistant to 1 meter
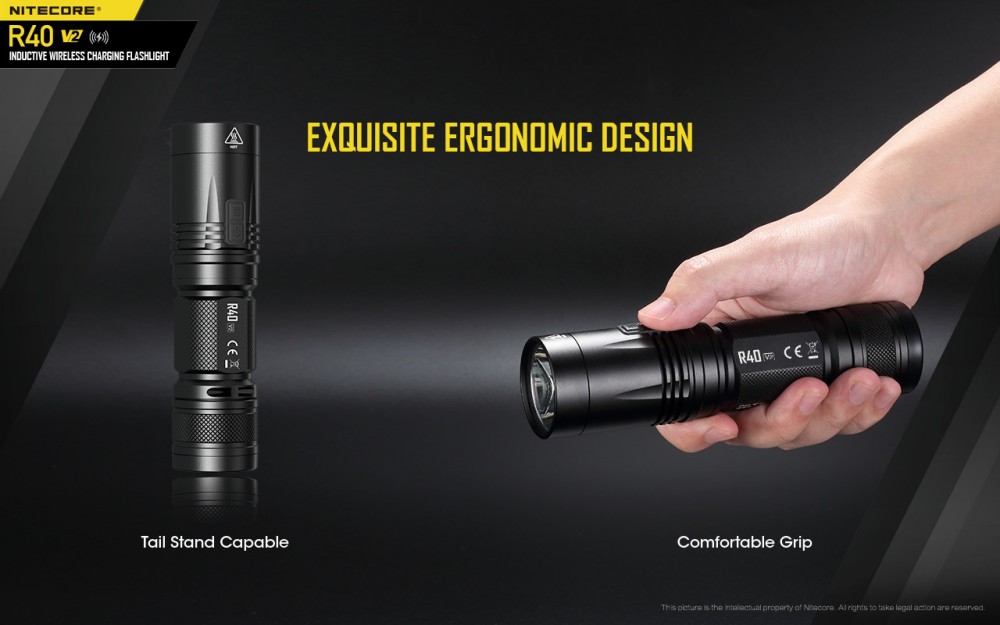
- Tail stand capability
Specifications
Length: 159mm (6.26”)Head Diameter: 40mm (1.57”)Tail Diameter: 38.6mm (1.52”)Weight: 211g (7.44oz)
Accessories
- NITECORE 21700
- Rechargeable Li-ion Battery (NL2150DW 5,000mAh)
- Holster
- Lanyard
- Spare O-ring
- AC Adapter
- Wall Mount Cradle
- Desktop Cradle
- Car Adapter
- USB-C Charging Cable
Charging Cradles Specifications
Input: DC 12-24V 1A (MAX)Output: 5V 1A (MAX)Wall Mount Cradle Dimensions: 94mm×53.5mm×57mm (3.7” ×2.11” ×2.24”)Desktop Cradle Dimensions: 58mm×58mm×38mm (2.28” ×2.28” ×1.5”)
Battery Options
NITECORE proprietary 21700 Li-ion battery (NL2150DW 5,000mAh) which is designed for R40 V2 only.
* The R40 V2 can only be powered by the NL2150DW. It is NOT compatible with conventional flat-topped or button-topped 21700 batteries.
Note: The stated data is measured in accordance with the international flashlight testing standards ANSI/PLATO FL 1-2019, using 1 x NITECORE proprietary 21700 Li-ion battery (5,000mAh) under laboratory conditions. The data may vary in real world use due to different battery usage or environmental conditions.
Battery Installation
Charging Function
Operating Instructions
Battery InstallationInsert the NL2150DW battery available with reversible insertion as illustrated, and screw to tighten the tail cap.Note: After the battery insertion, the power indicator beneath the side switches will flash to indicate the battery voltage. Please refer to the “Power Indication” section of this manual for more details.
Warnings:
- CAUTION! Possible dangerous radiation! Don’t look into the light! May be dangerous for your eyes.
- When the power level is low, please stop using the product and replace or recharge the battery to prevent damage to the battery.
- When the product is kept in a backpack or left unused for prolonged time, please remove all batteries to prevent accidental activation or battery leakage.
On / OffOn: When the light is off, short press the Power Button to turn it on.Off: When the light is on, short press the Power Button to turn it off.
Brightness LevelsWhen the light is on, short press the Mode Button to cycle through the following brightness levels: ULTRALOW – LOW – MID – HIGH – TURBO.(This access has memory function. When reactivated, the flashlight will automatically access the previous memorized brightness level.)
Direct Access to TURBOWhen the light is off, long press the Mode Button to directly access TURBO.
Direct Access to ULTRALOWWhen the light is off, long press the Power Button to directly access ULTRALOW.
Special Modes (STROBE / BEACON / SOS)
- When the light is on, long press the Mode Button to access the STROBE Mode. After the STROBE Mode is on, long press the Mode Button each time to cycle through the following special modes: BEACON – SOS – STROBE. When one of the special modes is on, short press the Mode Button to exit special modes and return to the previous brightness level; or short press the Power Button to turn off the light.
- When the light is off, double press the Mode Button to access the STROBE Mode. Short press either button to exit special modes and turn off the light.
Lockout / UnlockLockout: When the light is on/off, press and hold both buttons until the flashlight flashes once to access Lockout Mode. In this status, both buttons are unavailable to activate the flashlight.Unlock: In Lockout Mode, press and hold both buttons to exit Lockout Mode and return to the previous brightness level.
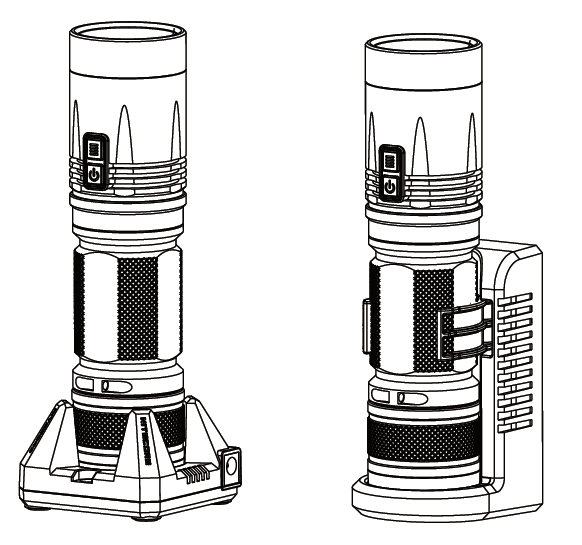
Charging FunctionThe R40 V2 has multiple charging ways including the USB charging port, wall mount cradle and desktop cradle
- USB Charging: After inserting the battery and tightening the tail cap, use the USB cable to connect an external power supply (e.g. a USB adapter or other USB charging devices) to the charging port located on the tail to begin the charging process.
- Cradle Charging: Inductive coils concealed both in the cradle and the tail cap allow wireless power transfer through an electromagnetic field. Secure the R40 V2 onto the cradle and connect the cradle to a power outlet or a cigarette lighter port to begin the charging process.
Note:
- The included AC / car adapters are designed to work with power sources with an output current of 1A or more.
- The included car adapter is compatible with cigarette lighter ports with an output voltage of 12V or 24V.
- During the charging process, the power indicator will flash slowly. When the battery is fully charged, the power indicator will be steadily turned on.
- If no battery or a damaged battery is inserted in the flashlight during the charging process, the power indicator will be turned off.
- If an unstable contact occurs (e.g. the flashlight is detached from the cradle), the power indicator will flash to show the battery voltage and then become turned off.
- The charging time for a 21700 Li-ion battery (5,000mAh) is approx. 6 hours.
- Power Indication
Power IndicationAfter the battery insertion, or the Mode Button is pressed when the light is off, the power indicator beneath the side switches will flash to show the battery voltage (±0.1V). For example, when the battery voltage is at 4.2V, the power indicator will flash 4 times followed by a 1.5-second pause and 2 more flashes. Different voltages represent the corresponding remaining battery power levels:

Location IndicationWhen the light is on, long press the Power Button to turn off the light and access Location Indication. With this function turned on, the indicator will flash once every 3 seconds to indicate its location. Reactivating the flashlight will turn off this function. The standby time is approx. 6 months with Location Indication turned on, and approx. 12 months with this function turned off.
ATR (Advanced Temperature Regulation)The integrated ATR technology regulates the output of the R40 V2 according to the working condition and ambient environment to maintain the optimal performance.
Changing BatteriesThe batteries should be replaced when the output appears to be dim or the flashlight becomes unresponsive due to low power.
MaintenanceEvery 6 months, threads should be wiped with a clean cloth followed by a thin coating of silicon-based lubricant.
![]()
References
[xyz-ips snippet=”download-snippet”]