![]()
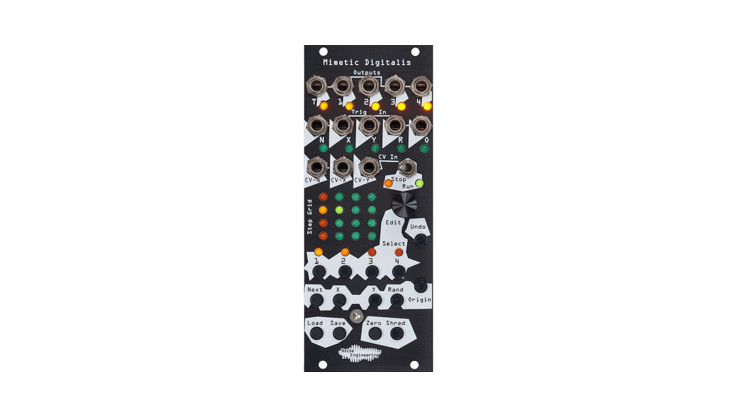
Noise EngineeringVox DigitalisIntuitive pitch CV sequencer in 4hp
Overview
| Type | Pitch sequencer |
| Size | 4HP Eurorack |
| Depth | .8 Inches |
| Power | 2×5 Eurorack |
| +12 mA | 50 mA |
| -12 mA | 5 mA |
Small, easy-to-program sequencers are a bit of a rarity. Vox Digitalis is our answer to this issue. With intuitive displays and simple controls, VD is perfect for all your pitch CV needs. Set your sequence length, dial in each note, randomize, save and load 16 sequences — VD does all the stuff the big sequencers do, just in 4hp.
Etymology
Vox — from Latin: “voice”Digitalis — from Latin “belonging to a finger”; also a plant that will kill you.“Vocal mime of death”
Design Notes
Vox Digitalis was really unique in design history. We sat down as a team to discuss the module; we knew we wanted to make a minimalist pitch sequencer but each of us had been privately pondering. Stephen had one idea, but somehow, Markus and Kris both had come to the conclusion that the form factor of another module in the pipeline (Fractio Solum) made sense. It couldn’t be shared hardware, but the core layout was similar. It took some Stephen-convincing, and some tweaking of each of those initial conceptions, but we were all quickly convinced that we could do something compelling in 4hp. From there, we had to be incredibly vigilant about feature creep. This led to some pretty heated discussions around NE HQ (we’re not generally fans of key combos. Should we make it bigger? Should we add key combos? Should we make it just do less?). In the end, we thought it would be silly to leave off useful features we could easily implement, but chose to assign only advanced functions to combos — things that you could use VD forever without ever really needing, but if you wanted them, they’d be there.
Power
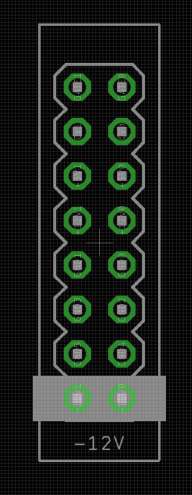
To power your Noise Engineering module, turn off your case. Plug one end of your ribbon cable into your power board so that the red stripe on the ribbon cable is aligned to the side that says -12v and each pin on the power header is plugged into the connector on the ribbon. Make sure no pins are overhanging the connector.
Line up the red stripe on the ribbon cable so that it matches the white stripe and/or -12v indication on the board and plug in the connector.
Screw your module into your case BEFORE powering on the module. You risk bumping the module’s PCB against something metallic and damaging it if it’s not properly secured when powered on.
You should be good to go if you followed these instructions. Now go make some noise!
A final note. Some modules have other headers — they may have a different number of pins or may say NOT POWER. In general, unless a manual tells you otherwise, DO NOT CONNECT THOSE TO POWER.
Warranty
Noise Engineering backs all our products with a product warranty: we guarantee our products to be free from manufacturing defects (materials or workmanship) for one year from the date of the original retail purchase (receipt or invoice required). The cost of shipping to Noise Engineering is paid by the user.Modules requiring warranty repair will either be repaired or replaced at Noise Engineering’s discretion. If you believe you have a product that has a defect that is out of warranty, please contact us.This warranty does not cover damage due to improper handling, storage, use, or abuse, modifications, or improper power or other voltage application.
Interface

Step:Number of current step. Length can be adjusted from 1-16 steps, described in Key Combos section.F/R/P:Playback mode. Selectable between Forward, Random, and Pingpong.Note:Current note. A period after the note letter indicates a sharp (e.g., c. is C#).LEDs indicate octave as follows:

Edit:Encoder edits current step note. Press and turn to jump an octave.Load:To load a previously saved sequence, press Load. VD enters Load mode. Use the encoder to select the pattern you’d like to load (displayed on the upper screen), then tap the encoder to load. To exit Load mode without loading a sequence, press load again.Save:To save a sequence, press Save. VD enters Save mode. Use the encoder to select the slot you’d like to save the sequence to (displayed on the upper screen), then tap the encoder to save. To exit Save mode without saving a sequence, press save again.Adv:Moves VD to the next step.Rst:Reset input. Responds to a rising edge of around 3v.Beat:Clock input. Responds to a rising edge of around 3v.Out:CV output. Vox Digitalis has a 4-octave range (0-4v).
Advanced features
(now you’re jammin’)Edit pattern length:Press Adv+encoder. Turn the encoder to the desired number of steps (displayed on top screen), then press the encoder to set the sequence length. To exit pattern length mode without changing length, press Adv again.Randomize current sequence:Press Load+encoder.Set all notes to C1:Press Save+encoder.
Load-Behavior Configuration
In performance situations, being able to load a sequence reliably and predictably is important. Since preferred load behavior depends on the performer, we implemented 3 different pattern-loading modes. To set the load behavior, power on VD with the corresponding button pressed and hold until VD finishes its boot sequence.Beat load mode:Hold Load on boot to set. Load a pattern and VD will change to that pattern on the next clock input, or when Adv is pressed.Measure load mode:Hold Save on boot to set. Load a pattern and VD will change to that pattern when a Rst signal is received, or when a sequence reaches its final step (last step in Forward playback, step 1 in Pendulum playback, next beat in Random playback).Immediate load mode:Hold Adv on boot to set. Instantly loads pattern when encoder is pressed when loading a sequence. Factory default behavior.
Patch Tutorial
Patch 1:Patch the CV out to an oscillator. Program in a sequence. Send a clock to Beat in and you’re off!Patch 2:VD’s sequences can be any length from 1 to 16 steps. Press Adv+Encoder to go into length edit mode and set your sequence to something unusual like 5, 7, 13… you name it. Divide your Beat clock with a divider like Integra Solum and patch an infrequent output to Measure to keep the sequence sort of in time.
Patch 3:Using a precision adder (or other sequencers with a transpose CV input), use a short sequence from VD to change chords and transpose other sequences.
[xyz-ips snippet=”download-snippet”]