
Nokia C2 Tava Quick Start Guide
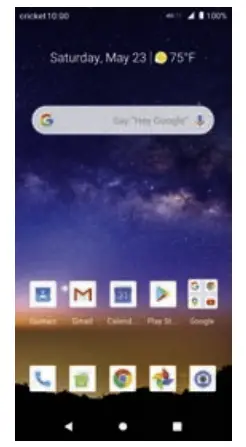
Getting to know your Nokia C2 Tava
*Google Assistant is not available in certain languages and countries.Where not available Google Assistant is replaced by Google Search. Check availability at https://support.google.com/assistant.
Phone setup
- With the phone facing down, lace your fingernail in the seam between the back cover and the display, bend the back cover open, and remove it.
- Lift and remove the battery.
- Hold the SIM card with metal contacts facing downward and the cut corner at the upper left. Slide the card into the SIM slot.
- If applicable, hold the microSD card (sold separately) with metal contacts facing downward and the cut corner at the upper right. Slide the card into the microSD slot.
- Insert the battery, making sure the gold contacts line up.
- Replace the cover on the back of the phone; making sure it is lined up before pressing it into place around all of the edges.
Warning!To avoid damage to the phone, only use the SIM included in the box or provided to you by Cricket.
Touch screen
Navigating your phone
- Use your fingertip to lightly touch the screen.
- Use quick flicks of your finger to swipe up, down, left or right on the touch screen.
- Tap the
 home key at any time to return to the main home screen.
 - Tap the back key to return to the previous screen.
- Tap recent apps key to access recently used apps.
- Tap and drag your finger from the bottom of the screen upward to access applications on your phone.
Notification panel
Access app alerts, new messages and emails, software updates and more!
- Tap and drag your finger from the top of the screen downward to see the Notifications panel.
- With the Notifications panel open, tap the top of the screen again and drag down to expand the quick settings menu.
- Tap to access the Settings menu.
Notification dots
A small dot will appear on app icons if you have a notifcation, but have not attended to it yet.
- Tap and hold the icon to display available options
- You can then tap the notification to open it or swipe to dismiss it
- Navigate to the Settings menu, then tap Apps & notifications > Notifications to turn notification dots off.
Personalize
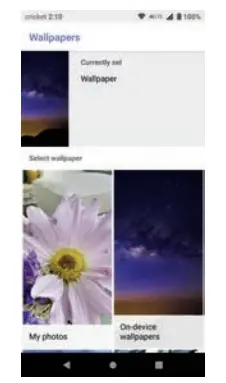
Set wallpaper
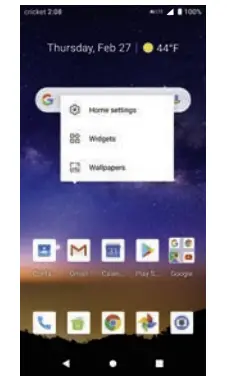
- Press and hold a blank part of the home screen and tap Wallpapers.
- Select a source for your new wallpaper, make your selection, and then tap Set Wallpaper to update your screen. You may choose whether it appears on the lock screen, homescreen, or both.
Add to home screen
- To add app shortcuts, tap and drag from the bottom of the screen to access applications. Press and hold the desired app and drag it to the home screen.
- To add widgets, press and hold a blank part of the screen and tap Widgets. Press and hold the desired widget and drag it to the home screen.
Organize home screens
- To move a widget or app shortcut press and hold it, and then drag it to a new location. To delete, drag it to the X Remove.
- To create a folder press and hold an app shortcut, drag it on top of another app, then release.
- To rename a folder, tap the folder, then tap the folder name and type a new name.
Camera and video

Take a picture
- From the home screen, tap Camera .
- Take aim and focus by tapping on the subject.
- Tap to take the picture.
Make a video
- From the home screen, tap Camera .
- To switch to the video recording mode, swipe left.
- Tap to start recording.
- To stop recording, tap .
- To go back to camera mode, swipe right.
Send a picture
- From the home screen, tap Photos .
- In Photos, tap a picture and then tap .
- Choose to send via text messaging, email, or more.
More information
On the webDetailed support information, including device specifications and troubleshooting, is available atwww.cricketwireless.com/support/devices.
On the phone
- Call Customer Care at 1-855-246-2461 or
- Dial 611 from your cell phone.
Accessories
For more information concerning accessories, please visit your local Cricket store or go towww.cricketwireless.com/shop/accessories.

Note: Store and online inventories may vary.
Product meets FCC Radio Frequency Exposure Guidelines- FCC ID 2AJOTTA-1226
This device complies with Part 15 of the FCC Rules. Operation is subject to the following two conditions: (1) this device may not cause harmful interference, and (2) this device must accept any interference received, including interference that may cause undesired operation. Registration may be required, terms of use, privacy policy and operator fees (e.g. sms/data) apply. Variations on offering may apply, check local availability. © 2020 Cricket Wireless LLC. All rights reserved. Cricket and the Cricket logo are registered trademarks under license to Cricket Wireless LLC. HMD Global Oy is the exclusive licensee of the Nokia brand for phones & tablets. Nokia is a registered trademark of Nokia Corporation. Android, Google and other related marks and logos are trademarks of Google LLC. microSD is a trademark of SD-3C, LLC. LTE is a trademark of ETSI. All other trademarks and service marks mentioned herein, including company names, product names, service names and logos, are the property of their respective owners.
QSG1218Printed in Mexico
Calls and voicemail
HD Voice
HD Voice means you can enjoy clearer conversations with reduced background noise*.
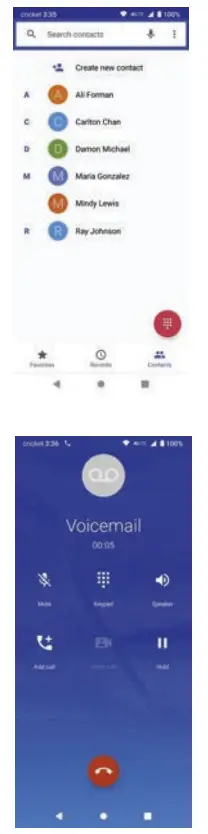
Make a call
- From the home screen, tap .
- Tap , type in a number, or tap Contacts and select a contact you want to call.
- Tap .
Check voicemail
- From the home screen, tap then tap .
- Press and hold the 1 key.
Call waiting
Call waiting lets you answer a second call while you are on an existing call. While on a call, you will hear a tone if another call comes in. Slide up to answer.
- Tap to switch between active calls.
- Tap to merge calls.
- Tap to end a conference call.
*To experience Cricket HD Voice, both callers must have a compatible HD Voice capable smartphone and make the call over Cricket’s LTE Network or a compatible network. Cricket’s LTE coverage is not equivalent to its overall network coverage. HD Voice calls made on a compatible device and on the LTE network may not experience an HD Voice connection at times of network congestion. Other carriers’ networks may interoperate with Cricket’s LTE network to support an HD Voice call.
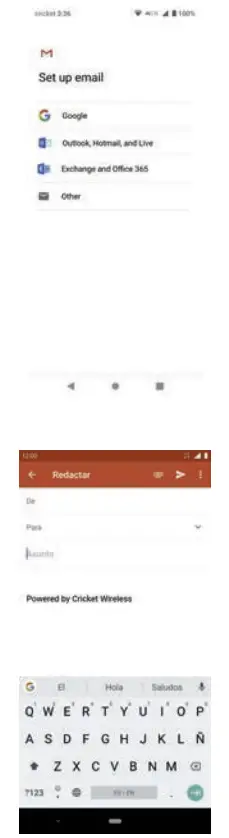 Email setup (Gmail™, etc.)
- From the home screen, tap Gmail .
- You can select the address connected with your Google account or tap Add an email address.
- After adding all the accounts, tap TAKE ME TO GMAIL.
Note: To set up corporate email, contact your IT administrator.
Create and send an email message
- From the home screen, tap Gmail .
- Tap to create a new email.
- In the To box, type in an address, or tap > Add from Contacts.
- Type in a subject and message.
- To add an attachment, tap an make your selection.
- Tap to send the message.
Text and picture messaging
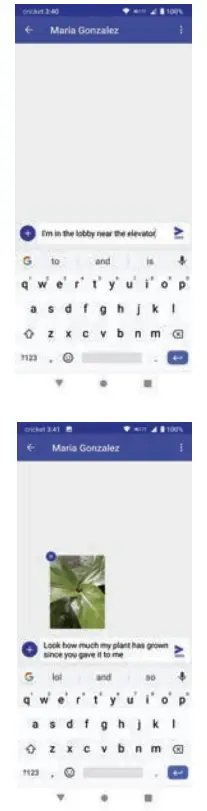 Send a text message
- From the home screen, tap Messaging .
- Tap to create a new message.
- In the To field and enter the name or number of the recipient, or select from directly the contact list below. Tap to add additional recipients.
- After choosing all the recipients, tap .
- Type your message in the text box.
- Tap to send the message.
Send a picture message
- Follow steps 1-4 above.
- Tap to attach a file.
- Tap Pictures or another file type to attach.
- Tap to send the message.
Cricket Apps & Services
These services make using Cricket even better and easier.

myCricket: Check account balance, make a quick payment, view usage and access support from the palm of your hand.
Visual Voicemail: Quickly view, access and play back your voicemail messages. Easily save important numbers to your Favorites list and respond to messages by calling back or texting.
 theSCOOP: Instant news, local weather, sports scores, entertainment and more delivered right to your phone.
Additional Features
Google PayMake payments with ease on websites, in apps, and in stores using the cards saved to your Google Account. It protects your payment info with multiple layers of security and makes it easy to send money, store tickets, or cash in on rewards.
Face Unlock
Face Unlock lets you conveniently unlock your device by simply looking at the display
Set up Face Unlock
- From the Settings menu, tap Security > Face Unlock.
- Choose a backup screen lock method and follow the steps to set up.
- Tap Add face data and follow the prompts on the screen to record your face.
 report this ad
Now you are ready to use Face Unlock. Simply hold your locked phone up to your face to unlock and access your apps and data.
References
[xyz-ips snippet=”download-snippet”]