NSS HIGH-SPEED BURNISHERS Original Instructions
IMPORTANT SAFETY INSTRUCTIONS
![]() WARNING: Failure to observe these instructions can cause personal injury to machine operator or bystanders.
WARNING: Failure to observe these instructions can cause personal injury to machine operator or bystanders.![]() WARNING: Shock or electrocution hazard.ALWAYS unplug machine before performing any maintenance or service.
WARNING: Shock or electrocution hazard.ALWAYS unplug machine before performing any maintenance or service.![]() WARNING: Shock or electrocution hazard.NEVER connect this machine to an electrical outlet that is not properly grounded. See instructions for grounding.
WARNING: Shock or electrocution hazard.NEVER connect this machine to an electrical outlet that is not properly grounded. See instructions for grounding.![]() WARNING: Fire or explosion hazard.NEVER use with flammable or combustible materials, such as gasoline, kerosene, or other fuels or volatile solvents to clean floor.NEVER operate this machine in an explosive atmosphere (grain dust, flammable liquids or fumes, etc.)
WARNING: Fire or explosion hazard.NEVER use with flammable or combustible materials, such as gasoline, kerosene, or other fuels or volatile solvents to clean floor.NEVER operate this machine in an explosive atmosphere (grain dust, flammable liquids or fumes, etc.)![]() WARNING: This product contains a chemical known to the state of California to cause cancer and birth defects or other reproductive harm.
WARNING: This product contains a chemical known to the state of California to cause cancer and birth defects or other reproductive harm.
INTENDED USE
NSS floor machines are intended for commercial use, scrubbing, buffing and burnishing floors in an indoor environment. NSS does not recommend using these machines for any other purpose.
FOR SAFETY
- ALWAYS read and understand all instructions before operating or servicing machine.
- ALWAYS use this machine ONLY as described in this manual.
- NEVER attempt to operate this machine unless you have been rained in its operation.
- NEVER allow an untrained person to operate this machine.
- NEVER operate this machine with the handle locked in the upright position.
- NEVER operate this machine with the handle loose.
- NEVER lock the switch lever in the “ON” position or attempt to defeat the automatic switch lock out. The lock out prevents accidental starting of the machine.
- ALWAYS unplug the machine when attaching pads or brushes.
- NEVER leave the machine plugged in to the electrical outlet when not in use.
- NEVER unplug the machine from an electrical outlet until after the machine is turned off.
- NEVER attempt to operate this machine if it is not working properly or has been damaged in any manner.
- NEVER disconnect or modify any switches or safety devices (circuit breaker).
- NEVER operate this machine if the cord and/or plug has been damaged, broken, cut, abraded or taped.
- ALWAYS replace the entire cord when the cord or plug is damaged in any way.
- NEVER handle the machine, cord, or plug with wet hands.
- NEVER drop or insert any object into any machine opening.
- NEVER operate this machine with any air opening blocked. Keep all air openings free of dust, lint, hair, etc.
- NEVER pull or carry the machine by its electrical supply cord, use the cord as a handle, close a door on the cord, pull the cord around sharp edges or corners, expose to heated surfaces, run machine over cord, or set heavy or sharp objects on the cord.
- NEVER unplug by pulling on the cord. To unplug the cord from the outlet, grasp the plug, not the cord.
- NEVER allow this machine to be used as a toy. Close attention is necessary when used by or near children.
- ALWAYS wear clean tennis shoes or “non-slip” shoes. Leather soled shoes will be extremely slippery.
- ALWAYS keep face, fingers, hair or any other body part or loose clothing away from any machine opening or moving part (revolving brush or pad driver).
- NEVER spray this machine with water or any liquids.
- NEVER operate the machine outdoors.
- NEVER expose the machine to rain, snow, or extreme temperatures.
- ALWAYS store this machine indoors in a dry, cool area.
- NEVER add weight to the machine. Remove all cord from the handle prior to operating.
ALL REPAIR SERVICE MUST BE PERFORMED BY AN NSS AUTHORIZED DISTRIBUTOR / SERVICE STATION USING ONLY NSS ORIGINAL EQUIPMENT PARTS.SAVE THESE INSTRUCTIONS
![]() WARNING: Improper connection of the equipment–grounding conductor can result in a risk of electric shock. Check with a qualified electrician or service person if you are in doubt as to whether the outlet is properly grounded. Do not modify the plug provided with the machine. If the outlet is not suitable for safe use; have a proper outlet installed by a qualified electrician.Always use a properly grounded 3-wire extension cord, which has male and female plugs. If 25 ft [7.6 m] extension cords are used, the electrical carrying capacity should be no less than 14-3 ST. 50 ft [15.2 m] extension cords no less than 12-3 ST.
WARNING: Improper connection of the equipment–grounding conductor can result in a risk of electric shock. Check with a qualified electrician or service person if you are in doubt as to whether the outlet is properly grounded. Do not modify the plug provided with the machine. If the outlet is not suitable for safe use; have a proper outlet installed by a qualified electrician.Always use a properly grounded 3-wire extension cord, which has male and female plugs. If 25 ft [7.6 m] extension cords are used, the electrical carrying capacity should be no less than 14-3 ST. 50 ft [15.2 m] extension cords no less than 12-3 ST.
GROUNDING INSTRUCTIONS
This machine shall be grounded while in use to protect the operator from electric shock. The machine is provided with a three-conductor cord and a three-contact grounding type attachment plug. The plug must be plugged into an appropriate outlet that is properly installed and grounded in accordance with all local codes and ordinances.The green conductor in the cord is the ground wire. Never connect this wire to other than the grounding pin of the attachment plug.Check nameplate on the machine to be sure voltage and cycle stated is the same as the electrical outlet. Do not attempt to plug a 120 volt machine into a 240 volt outlet or a 240 volt machine into a 120 volt outlet. If the machine is provided with an attachment plug as shown in Figure A. below, it is intended for use on a nominal 120 volt circuit. If a properly grounded receptacle as shown in Figure A. is not available, an adapter may be installed as shown in Figure B. if the outlet box that houses the receptacle is grounded. Be sure to fasten the grounding tab (the green colored rigid ear, lug or the like extending from the adapter) with a metal faceplate screw. If the machine is provided with an attachment plug as shown in Figure C., it is intended for use on a nominal 240 volt circuit. Changes to the attachment plug or adapters to other plug types must be done in accordance with local regulations.
NOTE: In Canada, the use of a temporary adapter may not be permitted by Canadian electrical code.
NOISE AND VIBRATION
NOISECharger 1500 Sound pressure level at Operator position. (ISO 11201): 72 dB(A) Charger 2500 Sound pressure level at Operator position. (ISO 11201): 65 dB(A)Mustang 1500 Sound pressure level at Operator position. (ISO 11201): 76 dB(A)
VIBRATIONCharger 1500 Weighted RMS acceleration value (ISO 5349): 2.13 m/s2Mustang 1500 Weighted RMS acceleration value (ISO 5349): 1.17 m/s2
MACHINE INSPECTION
- Now that the machine is unpacked remember to recycle all packing materials.
- Inspect the machine for damage or missing components. If damage is found, contact the local freight company to file a freight claim.
ASSEMBLY
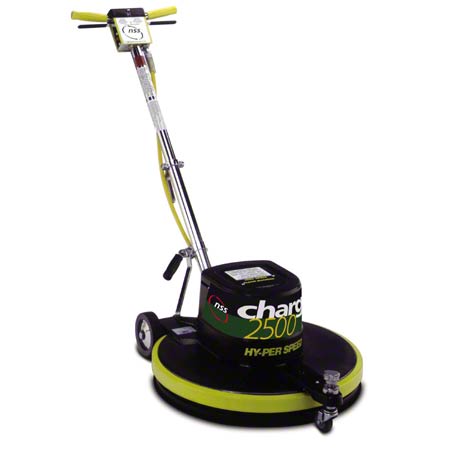
Mustang 1500 and Charger 2500
These machines are packed to enable the user to simply remove it from the carton, attach the pad or brush, plug in the machine and be ready to operate.
Charger 1500
This machine is also delivered fully assembled and ready for use. However, the handle is oriented in the storage position for shipment and must be rotated 180 degrees prior to use. To do this:
- Pull the locking lever at the base of the handle towards the operator and down.
- Rotate the handle 180 degrees so that the grips point away from the machine and tighten the locking lever by pulling it up and forward.
- If the handle does not stay locked in position with the clamp lever down, refer to the “Locking Lever Adjustment” instructions in the maintenance section.
OPERATION
Installing the Pad
Make sure machine is unplugged before proceeding.
Charger 2500 and Mustang 1500
- Lock handle in the upright position and tilt the machine back until the handle is resting on the floor and the underside of the machine is exposed.
Charger 1500 – Turn the machine over on its side.
- Remove center cut out of pad, lay the pad on the floor, and compress the center portion of the pad with your foot (this will make it easier to install the center cup).
- Remove the pad holder cup. Center pad on the driver, position the pad holder cup in the center of the pad such that the slots in the cup align with the twisters on the pad holding bracket, then push on the pad holder cup until the twisters can be turned to hold the pad.
Mustang 1500 and Charger 2500
- Remove the center lock by squeezing the wire spring clip. Center the pad on the driver. Position the center lock in the center of the pad then push on the center lock until you hear the wire spring click into place. If possible, press the center lock further until a second click is heard.
CAUTION: The speed of the Charger 2500 requires particular care in pad choice and installation. Use only pads recommended for speeds of 2500 RPM or greater. Pads must be installed concentric (centered) with the outside edge of the pad driver.Failure to follow these precautions will result in excessive machine vibration, reduced pad life, and unsatisfactory burnishing results.
Adjusting Handle Height
(Charger 2500 and Mustang 1500 only)
- With the machine in the upright position, lift up on the clamp lever (the black grip near the base of the handle) to allow the handle to move freely.
- Adjust handle height to a comfortable position, typically just below belt height.
- Push down on the lock lever with your foot.
- If the handle does not stay locked in position with the clamp lever down, refer to the “Locking Lever Adjustment” instructions in the maintenance section.
Starting the Machine
These machines are equipped with a system to prevent accidental starting that consists of a mechanical lockout on the front of the machine handle, which must be activated before the machine will start. To start the machine:
- First, check to see that the dead man, or switch lever lockout, located at the top and center of the handle is in the “OFF” (up) position and not stuck or malfunctioning in the “ON” (down) position before plugging the machine in.
- Plug the machine in.
- Grip the handles with both hands.
- Push down on the lock-out with the thumb of one hand, and with the other hand squeeze the switch lever.
CAUTION: The machine will start operating when the switch lever is squeezed.
Setting Pad Pressure (Charger 2500 Only)
Pad pressure relates to buffing performance. Too much pad pressure will give uneven results, may score the floor, and may cause the circuit breaker to trip. Too little pad pressure will result in poor burnishing performance. Since new pads are different thicknesses and all pads thin down during use, periodic adjustment of pad pressure is required.Pad pressure is adjusted using the adjustment knob on the front of the machine as follows:
- Begin by turning the adjustment knob clockwise, until the pad only slightly touches the floor.
- Run the machine and observe the gauge on the motor cover, which should show minimum pad pressure with the indicator all the way to the left.
- Turn the adjustment knob counterclockwise until the indicator is approximately centered in the green area.NOTE: Machine must be moving. Operating in one place will damage the floor.
- Continue to observe this gauge during operation and adjusting as necessary.
NOTE: If the circuit breaker on the machine trips, immediately reduce pad pressure by one full turn or more of the adjustment knob.
Running the Machine
- Floors should be dust mopped to remove surface litter and damp mopped to remove grit (preferably scrubbed with an auto scrubber), otherwise the buffer will anneal dirt into the finish.
- Start at a point nearest the electrical outlet and walk as far as the cord will let you travel. Make a 180- degree turn away from the cord and walk the machine in a path parallel to the first pass, slightly overlapping the preceding path.
- Never buff in one location for more than 5 seconds, especially if using the Charger 2500, or scoring of the floor finish or tile may result.
- Without letting go of the handle, release the switch levers to stop machine.
CAUTION: Machine pad will continue to rotate a few seconds after the switch lever is released.
Over-Load Protection
A circuit breaker is located on the right hand side of the switch box below the switch lever. The circuit breaker is designed to prevent operator induced overloads. If the circuit breaker trips, the machine is experiencing an overload situation.To prevent the circuit breaker from tripping, reduce pad pressure (Charger 2500 only), change pads more often or reduce the amount of spray cleaner, spray buff, etc. being applied to the floor. For the Mustang 1500 and Electric Charger, do not lift up on the handle, as this will also cause an over-load condition.If the circuit breaker continues to trip, do not run the machine. See the “Troubleshooting” section, or contact your authorized NSS service center.
Applications
Charger 1500 and Mustang 1500
Operations you can perform with these machines:
- High speed buffing/polishing
- Spray buffing
- Use any thick pad of any type
- Damp stripping
Operations you cannot perform with these machines:
- Wet scrubbing (flooded floor)
- Carpet shampooing
- Operating with weights added
Utilize more aggressive pads, such as the NSS “Blue” pad to help remove scuffing and surface soiling.
Charger 2500
The Charger 2500 is recommended for dry polishing or burnishing of marble or Terrazzo floors. Use mop on restorers rather than spray buff systems to restore the shine.Do not spray buff because it is time consuming, uses more pads because they become loaded with floor finish, will ruin the Velcro liner on the skirt, and can cause overloading of the machine’s circuit breaker.The blue NSS pad can be used to remove layers of wax on dry surfaces or while the floor is still wet from damp mopping with cold water or a neutral cleaner.
Operations you can perform with this machine:
- High speed buffing/polishing
- Buffing mop-on restorers (after drying)
- Buffing damp floors mopped with a neutral cleaner or plain water
Operations you cannot perform with this machine:
- Wet scrubbing
- Spray buffing
- Carpet shampooing
- Operating with weights added
Important Tips for Buffing
Floor Pads – PolishingThe selection of which floor pad to use is contingent upon several factors, including hardness of the floor finish being used, the color of the floor tile (light or dark) and the general frequency of dust mopping, wet cleaning, and high speed buffing. Given these variables, choosing the WRONG pad can lead to FAR LESS than optimum results. For example, if a swirling or smearing effect appears while buffing, the pad being used is too abrasive or dirty. A new, clean pad or a softer pad is necessary to attain a uniform level of high gloss. If you are unsure as to which pad is correct for a particular situation, consult your NSS distributor.Floor Pads – Spray Buff/Restorer ProductsWhen spray buffing or using a restorer or top-dressing type material, the pad must be a more aggressive material than, for instance, a white super speed polish pad, to remove residue and haze left by the moppedon or sprayed-on material.Cleaning ProceduresSpray Cleaning: Do not over use spray buffing or spray cleaning. Many times, floors can be just polished to achieve maximum results. Over-use of the spray buff material and the failure to change pads when dirty can limit the effectiveness. Spray clean only severely marked, high traffic areas.Restorers: Many floor treatments, when used as directed, can clean, protect, and beautify tile floors.When combined with a good foundation of finish and regular maintenance, the luster can be maintained and overall cleaning productivity improved. Floor treatment is sprayed or mopped on and then buffed. All treatments tested by NSS have responded best to high speed buffing as compared to slower speed machines.Damp Stripping: (Charger 1500 only) Wet or flood stripping should never be performed with high-speed machines, as uncontrolled splattering will result. Damp stripping of smaller constricted areas, however, can be performed quite successfully. Use a moderately abrasive floor pad and a strong solution of neutral cleaner or a weak solution of non-ammoniated stripper.
MAINTENANCE
Routine maintenance is critical to ensure proper machine operation and cleaning performance. Perform all maintenance procedures as follows:Always unplug machine before performing any maintenance. See front page for warnings.
Daily Maintenance
- Wipe off the entire machine with a clean cloth.
- Check the cord for any breaks in the wire. Breaks would most likely occur near the plug and near the handle. Also check the ground pin for breakage. If any breaks are found, the cord should be replaced immediately.
- Inspect the handle tube and handle clamp mechanism for wear, damage, obstructions or any build-up that may hinder easy movement of the handle. If the handle will not move with the handle lock in the up position, do not force movement.Adjust as directed in the “Lock Lever Adjustment” section or contact an NSS authorized service center.
- Check the dead man switch and throttle levers for proper action.
Monthly Maintenance
- Lubricate the tube handle clamp area monthly with a thin film of grease to allow ease of adjustment.
- Check the wheels for wear or damage. Replace ifneeded.
- Apply a small amount of spray lubricant to the axles. This will allow the wheels to roll freely.
- Check for loose bolts that hold the motor and gearbox to the base of the machine. Tighten if needed.
- Inspect the motor for accumulation of dirt in the vents of the motor. If vents are blocked the motor will over heat and fail. Clean out the dirt with a vacuum or with forced air.
- Check the Lock Lever to ensure it securely locks to the handle tube. If the clamp force is insufficient to keep the handle from moving, perform the Lock Lever Adjustment as follows:
- Loosen the two setscrews that hold the lock lever bolt in position.
- With the lock lever in a horizontal position, tighten the bolt counterclockwise until the bolt is snugagainst the tube clamp.
- Tighten the setscrews and test the machine.DO NOT OVER TIGHTEN.
Yearly Maintenance
- Disassemble the top of the motor to inspect the brushes for wear. Brushes should be replaced when they are worn to 3/8” [9.5mm] length, typically after 1000 hours of use.
TROUBLESHOOTING
SYMPTOM:CAUSE:SOLUTION
- Motor runs intermittently.:Loose wire. Broken or damaged cord. Bad handle switch.:Check all wire connections. Replace cord. Test continuity – replace.
- Motor not running.:Loose wires. Broken or damaged cord. Bad handle switch. Blown rectifier. Shorted armature.:Check all wire connections. Replace cord. Test continuity – replace. Replace rectifier. Replace armature.
- Motor slow speed only.:Worn carbon brushes. Shorted armature.:Replace carbon brushes. Replace armature.
- Motor runs / pad does not turn (Charger 1500 and Mustang 1500 only).:Broken or loose belt.:Replace or tighten belt.
- Wall breaker blows.:Excessive load on circuit. Pad / brush over loaded. Under sized extension cord. Improper use.:Check total load on circuit. Change pad and/or procedures. Replace / remove extension cord. Consult distributor.
- Machine wobbles or bounces.:Warped / damaged pad driver / brush. Pad not centered. Wheels worn.:Replace pad driver / brush
- Machine vibrates / buzzes.:Worn motor bearings.Wheels loose on axle.:Replace motor bearings. Shim wheels tight on axle or replace.
Repair service for this machine must be performed by an NSS authorized service center. Repairs performed by an unauthorized company will void the machine warranty. If you require assistance finding an authorized service center, contact NSS Enterprises.
NSS High-Speed Burnishers User Manual – NSS High-Speed Burnishers User Manual –
[xyz-ips snippet=”download-snippet”]