
Numark DJ2 GO2 User Guide
Box Contents
- DJ2GO2 Touch
- Mini-USB Cable
- Software Download Card
- 1/8”-to-stereo-RCA Cable
- Quickstart Guide
Setup
Items not listed under Introduction > Box Contents are sold separately.
Before you can begin using DJ2GO2 Touch with your computer, you must install a DJ software application on your computer.
- With a DJ software application installed on your computer, connect DJ2GO2 Touch to an available USB port on your computer. (If possible, use a USB port on the rear panel of your computer.)
- On your computer, open your DJ software application.
- Once the software opens, search for your music, video, and/or karaoke files.
- Once a supported file is found, load the file to one of the software decks.
- Repeat the process to assign a file to the other software deck.
Features
Top Panel
- Mini-USB Port: Plug the included mini-USB cable into this port and into the USB port of your computer to power DJ2GO2 Touch. DJ2GO2 Touch is class-compliant, so it is “plug-and-play” – no separate driver installation is necessary.
- PFL / Cue: Sends pre-fader audio to the Cue channel for monitoring.
- Cue Gain: Adjusts the audio level of the Cue channel.
- Master Gain: Adjusts the output volume of the Program mix.
- Browse Knob: Turn this knob to scroll through a list of tracks and directories/folders in the software. Press this knob to enter a directory/folder.
- Load 1 / Load 2: Press one of these buttons while a track is selected to assign it to Deck 1 or Deck 2, respectively.
- Channel Gain: Adjusts the audio level for the corresponding channel.
- Crossfader: Blends audio playing between Decks 1 and 2. Sliding this to the left plays Deck 1 and sliding to the right plays Deck 2.
- Pad Mode: This determines the function of the 4 pad bank buttons. The 4 options are:Hot Cue, Auto Loops, Manual Loops, and Sampler.
- Jog Wheel: Move the touch capacitive wheel to control the playback position and scroll throughout the current song.
- Play / Pause: Starts or resumes playback if the Deck is paused. Pauses playback if the Deck is playing. The LED will be OFF when there is no track loaded. The LED will flash when a track is paused. The LED will be ON when a track is playing.
- Buttons 1-4: These buttons send momentary MIDI messages based on the set Pad Mode. See Operation > Pad Mode Controls for more information.
- Cue: The Cue button will return and pause the track at the last set cue point. For temporary play of the cue point, hold down the Cue button. The track will play for as long as the button is held down and will return to the cue point once it has been released.Hold down Cue and Play / Pause simultaneously to start playback from the cue point.Release both buttons to allow playback to continue.
- Sync: Press to automatically match the corresponding deck’s tempo with the other deck’s tempo.
- Pitch Fader: Controls the track’s playback speed.
- 1/8” (3.5 mm) Main Output: Connect this audio output to a mixer, powered speakers, or an audio recorder.
- 1/8” (3.5 mm) Headphone Output: Connect your headphones to this audio output.
Operation
Pad Mode Controls
- Cues: This Pad Mode button switches Buttons 1-4 to Hot Cue Mode.
- Auto Loop: This Pad Mode button switches Buttons 1-4 to trigger loops (loop bar value is set in your software).
- Pad 1 – 1 beat
- Pad 2 – 2 beats
- Pad 3 – 4 beats
- Pad 4 – 8 beats
- Manual Loop: This Pad Mode button switches Buttons 1-4 to manually control looping. In Manual Loop mode:
- Pad 1 – Loop In Set Point
- Pad 2 – Loop Out Set Point
- Pad 3 – Loop On/Off
- Pad 4 – Retrigger Loop
- Sampler: This Pad Mode button switches Buttons 1-4 to Sampler Mode to trigger samples.
Beat-Matching and Mixing with DJ2GO2 Touch
Below is an example of how to mix tracks using DJ2GO2 Touch:
- Turn the Browse knob to scroll through your music library.
 BROWSE
 - Load tracks with similar BPM onto Decks 1 and 2 by pressing the Load 1 and Load 2 buttons on DJ2GO2 Touch.
- Start with the Gain knobs at the 12 o’clock position. You can adjust these for more or less signal gain after the tracks are loaded.
- In your software, ensure the Cue Mix knob is adjusted to the desired position for CUE (headphone output) and MSTR (master mix output).
- Move the crossfader all the way to the left to send the audio from Deck 1 to the main outputs. If you are listening through the headphone output, adjust the Cue Gain knob.
- Play the track that is loaded on Deck 1.
- Press the PFL button on Deck 2, and adjust the Cue Gain knob to preview the audio through the headphone output.
- Play the track that is loaded on Deck 2 to preview it in your headphones.
- While the track is playing, press the Cue button to return to the beginning of the track.
- (Auto) Press Sync on Deck 2 to auto-match its BPM with Deck 1. Press play and the songs should be in sync.
- (Manual) Move the pitch slider so the BPM in the software matches with Deck 1. Press play on the downbeat, then use the wheel to align the beats together.
- Move the crossfader on DJ2GO2 Touch toward the right to crossfade from Deck 1 to Deck 2.
 BROWSE
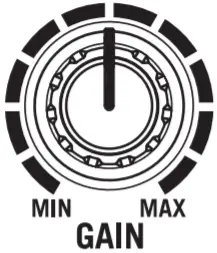

References
[xyz-ips snippet=”download-snippet”]