Nutri-Q Quest 844738 Food Processor with Blender and Grinder User Manual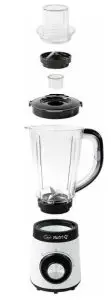
IMPORTANT: SAFETY INSTRUCTIONS
![]() READ THIS MANUAL BEFORE USING THIS APPLIANCE.
READ THIS MANUAL BEFORE USING THIS APPLIANCE.
![]() AWARNING! READ ALL SAFETY WARNINGS AND INSTRUCTIONS
AWARNING! READ ALL SAFETY WARNINGS AND INSTRUCTIONS
FAILURE TO FOLLOW THE WARNINGS AND INSTRUCTIONS LISTED BELOW MAY RESULT IN ELECTRIC SHOCK, FIRE AND/OR INJURY
SAFETY INSTRUCTIONS
- The intended use of this appliance is explained in this manual. The use of accessories other than those recommended in this manual may present a risk of personal injury.
- Always check the mains voltage corresponds to the voltage on the rating plate.
- Do not let cord hang on hot surface or over edge of table or counter.
- Do not operate any appliance with a damaged cord or plug or after the appliance malfunction or has been damaged in any manner. Return the appliance to the nearest authorized service facility for examination, repair or adjustment.
- If the supply cord is damaged, it must be replaced by the manufacturer or its service agent or a similarly qualified person in order to avoid a hazard.
- Close supervision is necessary when any appliance is used by or near children.
- Avoid contacting the moving parts.
- Keep hands and utensils out of container while blending to reduce the risk of severe injury to persons or damage to the blender. A scraper may be used but must be used only when the blender is not running.
- The use of attachments not recommended or sold by manufacturer may cause fire, electric shock or injury.
- Unplug from outlet when not in use, before putting on or taking off parts, and before cleaning. To disconnect, turn any control to “off”, then remove plug from wall outlet by grasping the plug, not the cord.
- To reduce the risk of injury, never place blade assembly on motor unit without the jar properly attached.
- 12. Do not leave the machine on unattended.
- When removing the blender from the motor unit, wait until the blades have completely stopped.
- Always operate blender with cover in place.
- Always use the appliance on a secure, dry level surface.
- Never place this appliance on or near a hot gas or an electric burner or where it could touch a heated appliance.
- Do not use outdoors.
- Do not use appliance for other than its intended use.
- Be care of potential injury from misuse.
- Care shall be taken when handling the sharp cutting blades, emptying the bowl and during cleaning.
- Be careful if hot liquid is poured into the food processor or blender as sudden steaming may occur.
- Always disconnect the appliance from the supply if it is left unattended and before assembling, disassembling or cleaning.
- Switch off the appliance and disconnect from supply before changing accessories.
- This appliance shall not be used by children. Keep the appliance and its cord out of reach of children.
- Appliances can be used by persons with reduced physical, sensory or mental capabilities or lack of experience and knowledge if they have been given supervision or instruction concerning use of the appliance in a safe way and if they understand the hazards involved.
- Children shall not play with the appliance.
HOUSEHOLD USE ONLY
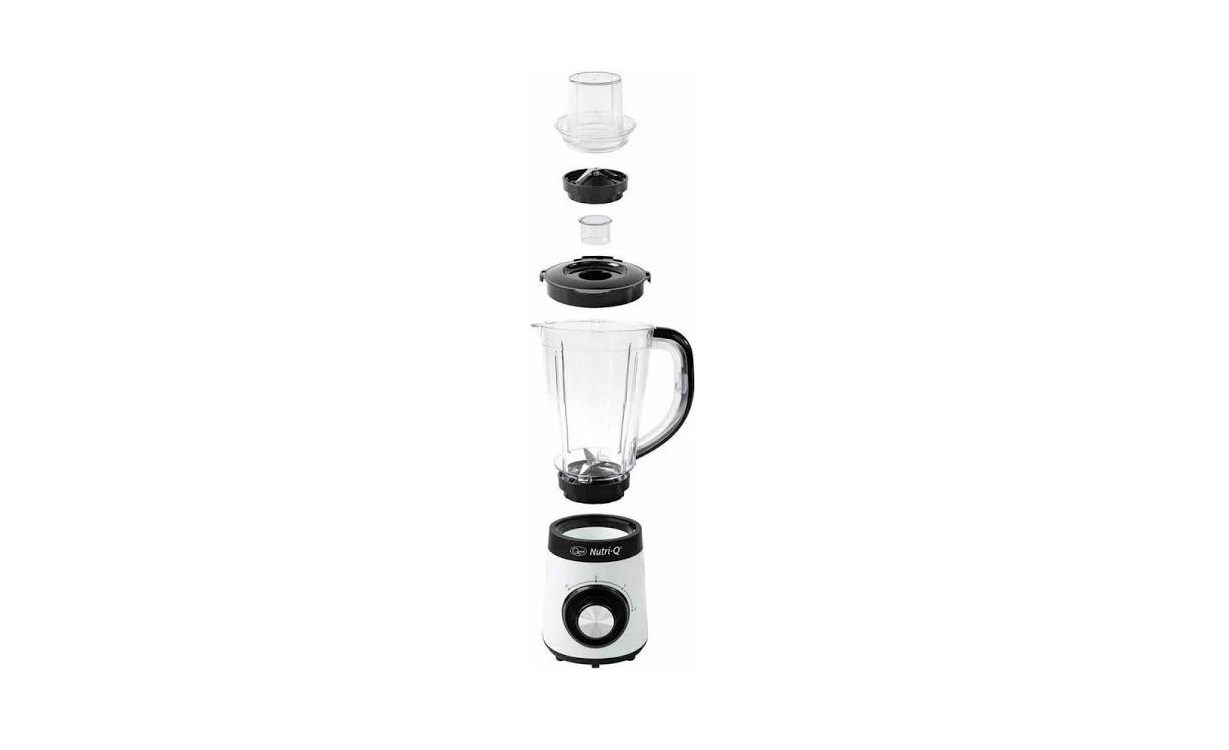
KNOW YOUR 2-IN-1 BLENDER
BEFORE THE FIRST USE
Check that all parts are complete and not damaged. Choose the appropriate attachment to perform your desired task. The blender attachment is suitable for blending fruits or vegetables or crushing ice, while the grinder attachment for grinding coffee. Clean the attachment according to the section “CLEANING AND MAINTENANCE”.
WARNING: THE BLADE IS SHARP, HANDLE WITH GREAT CARE AND ENSURE THAT YOU UNPLUG THE APPLIANCE FROM OUTLET BEFORE ASSEMBLING AND REMOVING PARTS.
BLIDIDER OPERATION
- 1. Place the Jar on the Motor Unit, Turn the jar clockwise until a click will be heard when locked into position properly. Please see Fig.1.
 Fig. 1NOTE: THERE IS A SAFETY INTERLOCK DEVICE AT THE BOTTOM OF JAR, IF TC-1E JAR IS NOT ASSEMBLED IN PLACE, THE BLENDER WILL NOT OPERATE.
 - Peel or core the fruits or vegetables and then cut it into small pieces, then put them into the jar. Usually certain amount of purified water has to be added to facilitate the smooth running of appliance. The amount of mixture should not exceed the max or min levels as indicated on the jar. The best proportion of the fruits or vegetables to water is 2 in 3.NOTE: THE BLENDER IS NOT APPLICABLE FOR BEATING EGG WHITE, MASHING POTATOES, MIXING DOUGH, EXTRACTING JUICE FROM FRUIT AND VEGETABLE.
- Replace jar cover on the jar.
- You may add ingredients into the jar through the center opening of jar cover during operation, then replace measuring cup if necessary. Let the tabs of measuring cup align with the grooves of jar cover.
- Ensure the Speed Selector is at the “0” Position, then plug into power outlet and set Speed Selector to your desired setting. You can set Speed Selector to the “P” position if want to accelerate the process of blending. The detailed information is shown in below fig. 2NOTE: MAKE SURE THE JAR COVER IS PLACED IN POSITION COMPLETELY BEFORE OPERATING, AND NEVER OPEN THE JAR COVER DURING OPERATION.
- 6. Do not run the appliance for more than 3 minutes per time. Always wait until the unit is cooled to room temperature before performing next operation cycle.
- Turn the Speed Selector to “0” Position once the mixture has been blended to your desired consistency.
- Turn the jar anti-clockwise and remove it from the motor unit, carefully remove the jar cover, then pour and serve.
 Fig. 1NOTE: THERE IS A SAFETY INTERLOCK DEVICE AT THE BOTTOM OF JAR, IF TC-1E JAR IS NOT ASSEMBLED IN PLACE, THE BLENDER WILL NOT OPERATE.
GRINDER OPERATION
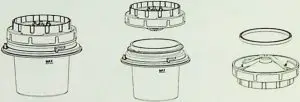
- 1. Lay the motor unit on the flat horizontal surface and make sure it is unplugged. 2. Fill the grinding bowl with coffee beans. Assemble the grinding blade assembly and grinding bowl together. Please see Fig.3NOTE: THE QUANTITY OF COFFEE BEAN THE GRINDING BOWL ALLOWS TO GRIND IS MAX 60G.3. Place the grinder attachment on the motor unit, Turn the bowl clockwise until a click can be heard. This is then locked into position properly. Please see Fig. 4NOTE: THERE IS A SAFETY INTERLOCK DEVICE AT THE BOTTOM OF BOWL, IF THE BOWL IS NOT ASSEMBLED IN PLACE, THE CHOPPER WILL NOT OPERATE.
- Ensure the Speed Selector is at the “0” Position, then plug into power outlet.
- Select the desired speed setting and the appliance will start grinding. During grinding, you can press down the Pulse button without releasing it if want to accelerate the process of grinding.
- Turn the Speed Selector to “0” Position once the coffee has been ground to your desired result.
- Disconnect from power supply once finished. Disassemble the grinder attachment from the unit. Keep the grinding bowl downward and turn it anticlockwise (see fig.5), then empty the bowl and serve.
- Do not run the appliance for more than 30seconds per time. Always wait until the unit is cooled to room temperature before performing next operation cycle.

WARNING
- Never operate the appliance continuously for more than a maximum of 3 minutes per session.
- Blades are very sharp. Handle with care.
- Do not operate without the jar cover in place.
- Do not disassemble the jar or bowl from the jar base or bowl base in general condition.
CLEANING MIAINTENANE
MAKE SURE TO DISCONNECT APPLIANCE FROM POWER SUPPLY BEFORE CLEANING FOR BLENDER
FOR BLERIDER
THE AUTO CLEAN FUNCTION CAN CLEAN THE BLENDER EASILY AND RAPIDLY IN COMPLETE SAFETY.
- Pour a little warm soapy water into the Jar and turn the Speed Selector to “1” position and press down the Pulse button without releasing it for a few seconds.
- Dismantle all detachable parts. Disassemble the Jar from the motor unit to detach the blade assembly, and remove the jar base seal ring (see fig.6). In addition, detach the jar cover seal ring from the jar cover. Rinse the jar, blade, jar cover and measuring cup under running water.Fig. 6
- Wipe the outer surface of motor unit and with a damp cloth.NOTE: DO NOT USE ABRASIVE CLEANSER AND NEVER IMMERSE MOTOR UNIT IN WATER FOR CLEANING
- Dry all parts and then assemble them. The method of assembling blender attachment is opposite to its detaching sequence. NOTE: IF ANY PROBLEM HAS BEEN ENCOUNTERED DURING USING, NEVER DISASSEMBLE THE MOTOR UNIT BY YOURSELF. THERE ARE NO USER SERVICEABLE PARTS INSIDE.
FOR GRINDER
- Detach the bowl base from the grinding blade assembly.NOTE: WHILE DETACHING, ONLY GRASP THE UNSHARP PART OF GRINDING BLADE OR WEAR GLOVE TO PREVENT ANY INJURIES.
- Immerse the blade, bowl base and grinding bowl into warm soapy water for cleaning, and then rinse them under running water.
- Wipe the outer surface with damp cloth.NOTE: NEVER IMMERSE THE MOTOR UNIT INTO WATER FOR CLEANING.
- Dry all parts thoroughly and assemble them in position
PLUG
- This appliance has been fitted with a BS UK compliant plug which should not be replaced or removed
- The plug is fitted with a UK compliant fuse link which is suitable for this type of appliance and should only be replaced by a fuse link of the same rating
- If access to the fuse link is only possible by removing the plug cover this must only be done by a suitably qualified person.
- If the plug or the mains cable of this appliance is damaged do not use and dispose of the appliance responsibly.
- This appliance is a Class 2 appliance protected by double and rein-forced insulation and does not require earthing. Class appliances are indicated by this 0 symbol marked on the appliance rating plate.
Information on Waste Disposal for Consumers of Electrical & Electronic Equipment
![]() This symbol indicates that this product should not be treated as normal household waste and it should be recycled. Please take It to your nearest collection facility or for further details contact your local council or visit www.recycle-more.co.uk.
This symbol indicates that this product should not be treated as normal household waste and it should be recycled. Please take It to your nearest collection facility or for further details contact your local council or visit www.recycle-more.co.uk.
Imported by Benross
report this adMADE IN P.R.C
[xyz-ips snippet=”download-snippet”]