
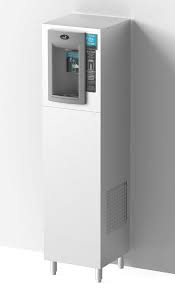
OASIS Free Standing Contactless Bottle Filler
INDEX
- PRODUCT SPECIFICATIONS
- IMPORTANT REQUIREMENTS
- SAFETY WARNINGS
- GETTING STARTED
- PROPER QUICK CONNECT FITTING CONNECTION INSTRUCTIONS
- INSTALLATION
- SET-UP GUIDE FOR DISPENSER PCB ELECTRONICS
PRODUCT SPECIFICATIONS
Dimensions:Depth 13.35”(339.0 mm)Width 12” (304.8 mm)Height 49.7” (1262.4 mm)Refrigerant: R-134aInput Voltage: 115 VAC, 60 HZ or 220/240 VAC, 50/60HZ –See Data Plate
ROUGHING-IN AND DIMENSIONAL DRAWING
IMPORTANT REQUIREMENTS
- Use only original and new parts to guarantee the reliability, optimization, and performance of the OASIS water machine.
- Always wear proper protection when performing any type of service or maintenance.
- When cleaning the unit, do not use corrosive acidic products, or metal brushes.
- Do not wash the unit using high-pressure water.
- Connect to a water supply with a pressure of 45 PSI minimum to 100 PSI maximum (3.10 bar minimum to 6.89 bar maximum ).
- WARNING: DO NOT USE WITH WATER THAT IS MICROBIOLOGICALLY UNSAFE OF UNKNOWN QUALITY.
- ATTENTION: IT IS IMPORTANT TO MAKE PROPER CONNECTIONS TO THE QUICK CONNECT FITTINGS TO AVOID LEAKS. SEE SECTION 5.
- CAUTION: DO NOT PLACE UNDUE STRESS OR SIDE LOAD ON ANY OF THE PLASTIC FITTINGS.
SAFETY WARNINGS
BEFORE YOU START USING THIS WATER DISPENSER, PLEASE READ THE FOLLOWING INSTRUCTIONS CAREFULLY.
- The unit must be connected to a 115 VAC GFCI or 230VAC power supply as listed on the equipment data label.
- The unit must be protected by a properly installed 20 amp circuit breaker. Verify that the electrical current is correct for the power of this unit, which is listed on the machine data label.
- To avoid electrical shock always unplug the unit from the electrical outlet before servicing.
- If the power supply cord is damaged, it must be replaced by a special cord or assembly available from the manufacturer or its service agent.
- This appliance must be earthed.
- Children should be supervised to ensure that they do not play with this appliance.
GETTING STARTED:
What’s Included:a. CONTACTLESS BOTTLE FILLERb. STABILIZER BRACKETc. OPTIONAL VERSAFILTER III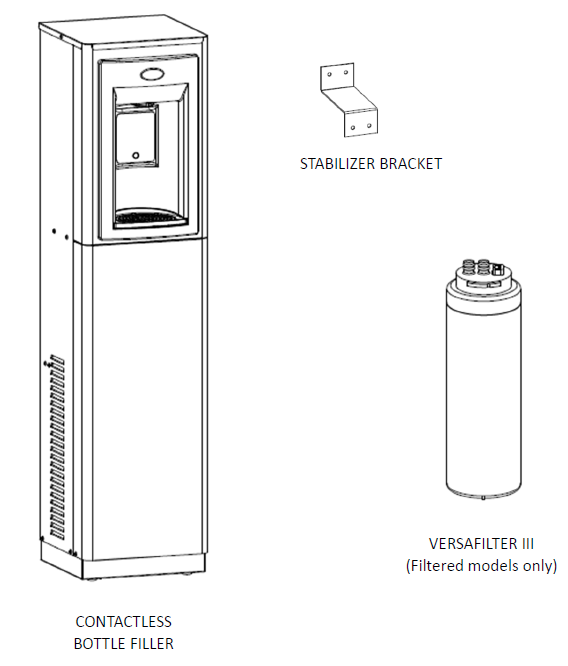
PROPER QUICK CONNECT FITTING CONNECTION INSTRUCTIONS
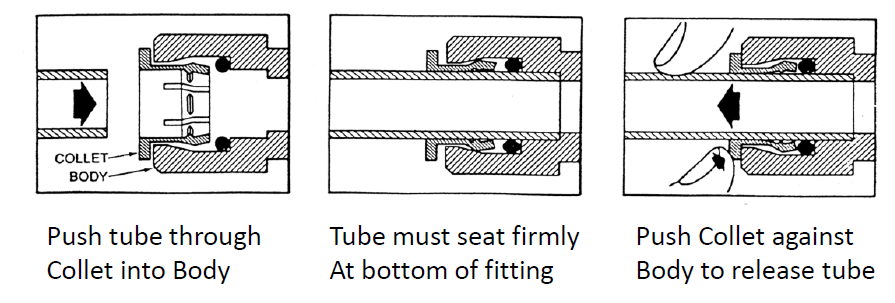
Quick-Connect Fittings
- If you need to cut the plastic tubing, be sure to cut tube ends square and straight. Do not deform the tube (i.e., cause tube to compress its diameter so it is no longer round, or it may result in a water leak at the fitting).
- Make sure the outer surface of the tube is clear of marks or scratches for a length equal to twice the tube diameter. This allows the “O” ring to seat properly against the tube (See figure below).
- Avoid sharp changes in direction when routing the tubing. Sharp turns could cause the tubing to kink, which reduces its flow capacity and or stops it completely.
- Fittings consist of two parts: a body and a collet. (See figure below).
- To install a tube, push it through the collet until it seats firmly at the bottom of the fitting.
- To remove a tube, push and hold the collet against the body while pulling the tube out. Pushing the tube into the body before pushing the collet in will aid in the removal of the tube.

INSTALLATION
STEP 1 & 2:
- Carefully unpack Water Dispenser and remove filter from the alcove (filtered models only).
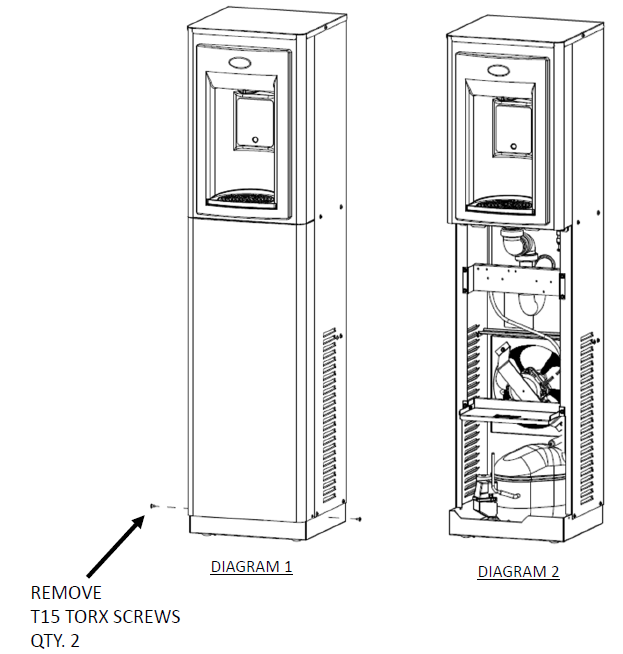
- Remove Front Panel by removing the 2 screws at the bottom of the panel on the sides. See Diagram 1 and 2.STEPS 3 through 5 (for optional filters)Note: The VersaFilter III was placed in the alcove on the front of the cooler for shipping.
- Unpack the VersaFilter III and remove the sanitary cap.
- Looking at the filter top, orient the filter so that the rectangular lug, on top of the filter faces forward.
- Push the filter up into the filter housing and rotate the filter one-quarter turn to the right until it stops turning. Refer to Diagram 3.
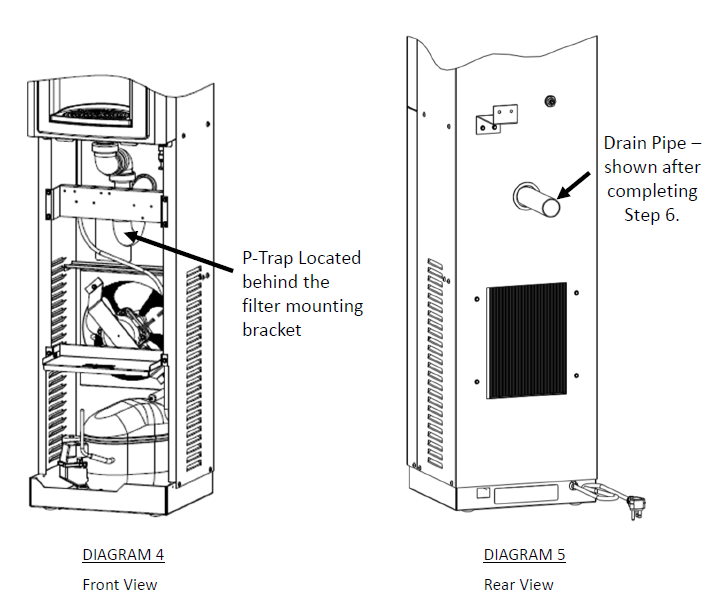
- Locate the Snap Bushing in the back of the cabinet and feed 1-1/2” OD Drain Pipe through the hole. See Diagram 4 & 5STEPS 7 through 9:
- Connecting 1/4” OD water supply tube to 1/4” quick connect fitting on the back of the unit. Refer to Section 5 for instructions on how to properly connect to quick connect fittings. IMPORTANT: Before connecting water supply to dispenser, flush building water supply.
- Connect 1-1/2” OD drain pipe to Elbow Coupling (not provided). Connect to building drain.
- Attach stabilizing bracket to the unit with screws provided. Then secure the bracket to the wall with wall anchors provided by others.STEPS 10 through 17:
- ENERGIZING UNIT: Check the available power supply against the water dispenser data plate to assure correct electrical service. This water dispenser is intended to be connected to a 20A minimum ground fault circuit interrupting (GFCI) device to meet UL requirements. Plug Power Supply Cord into outlet.
- DISPENSING/FLUSHING FILTERS (OPTIONAL)• Place a container in the alcove to activate water dispense. The flow of water will be delayed until the filter fills with water.• Flush water through the system until the water becomes clear.
- Check system for any leaks.
- Rotate the fan blade to see that it is free of obstructions.
- Place bottle in alcove to purge additional air in Cooling Tank and water lines. The Water Dispenser sensor will run for 20 seconds and shut-off. Do this 2 or 3 times until a steady stream of water dispenses.
- SETTING UP PCB ELECTRONICS: Follow instructions in Section 7 to change default settings.
- Re-install Front Panel, and 2 screws.
- Set up is complete. Enjoy!
 STEPS 3 through 5 (for optional filters)Note: The VersaFilter III was placed in the alcove on the front of the cooler for shipping.
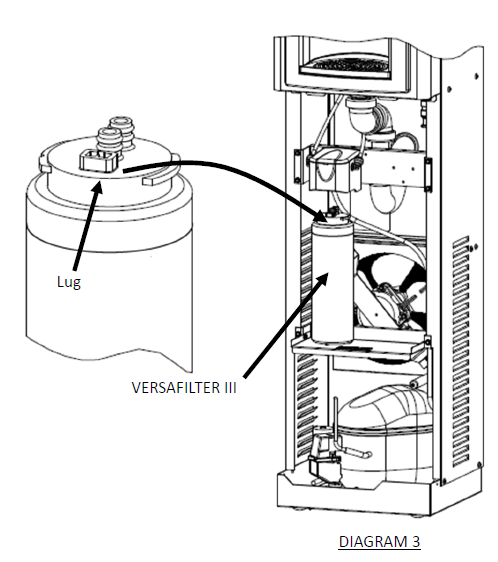
 STEPS 7 through 9:
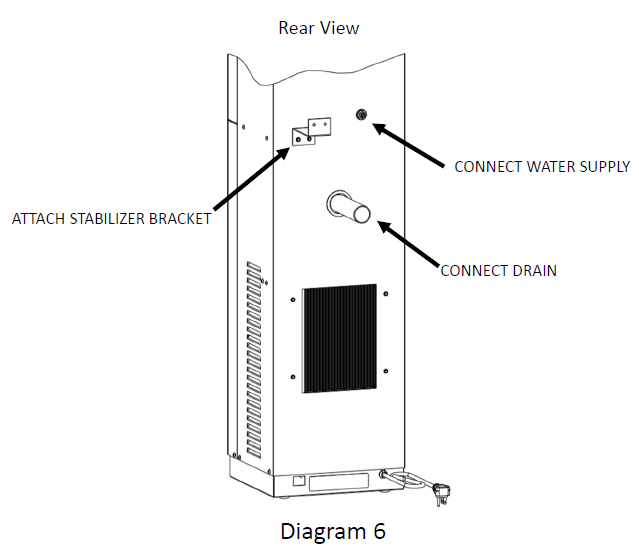 STEPS 10 through 17:
SET-UP GUIDE FOR DISPENSER PCB ELECTRONICS
Factory default program settings are:
- Units – Gallons
- Unfiltered unit
- Flow Meter = Rate Selected
- Filter Capacity = 1250 gallons [4731 liters]
- Bottle Count = 0.5L (1 Bottle)
- Flow Rate = 1.2 GPM
- 20 second maximum dispense time
Top panel will need to be removed by taking out the two screws on each side. Set aside until programming is complete. Remove wire tie bundling pushbutton inside bottle dispenser. You can then adjust program using the pushbutton through the top of the dispenser.
To change the program settings, follow these steps: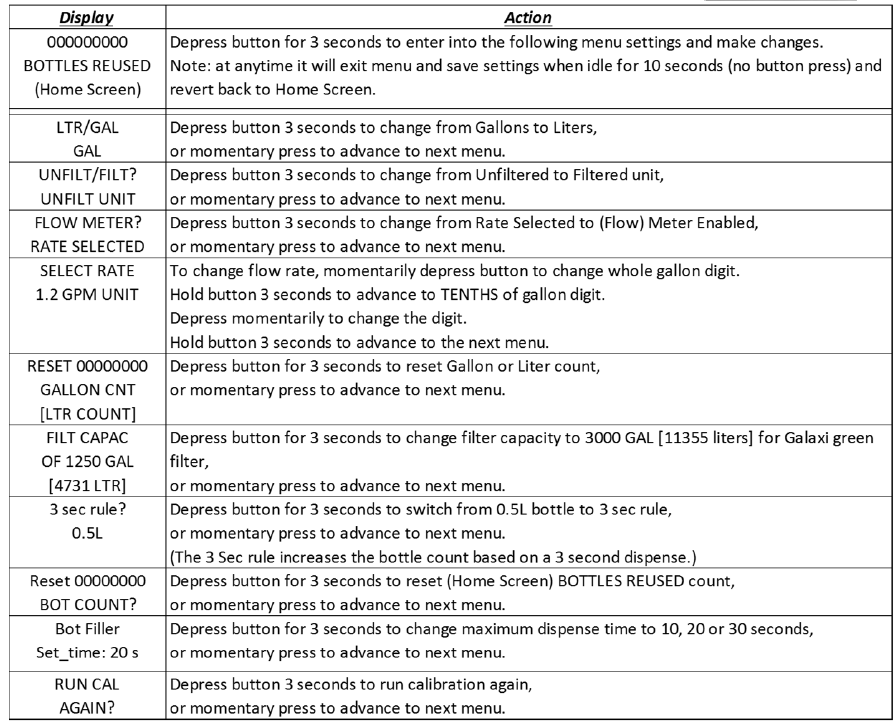
![]()
References
[xyz-ips snippet=”download-snippet”]