Instruction manual ![]()
 Omegon Pro® Neptune Fork Mount for big binocularsEngl i s h Vers i on 10.2020 Rev. A, Art.-Nr. 61983
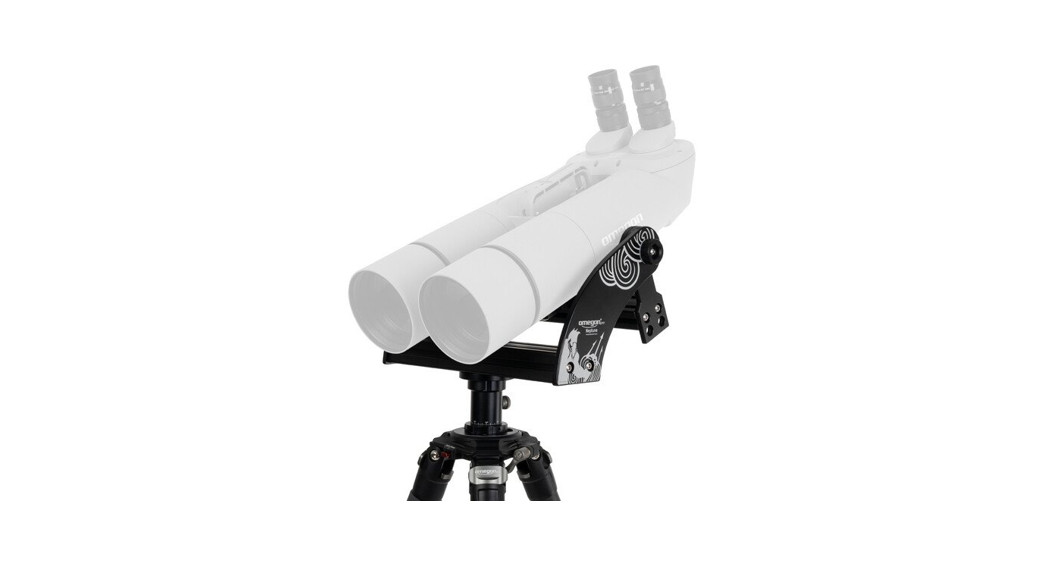
The Omegon Pro® Neptune Fork Mount for big binoculars
Congratulations on the purchase of the Omegon Pro® Neptune Fork Mount for big binoculars. If you own a pair of big binoculars of aperture bigger than 80mm then this is the ideal companion for binocular astronomy or for terrestrial observing. It provides a smooth rotation on both axes and allows you to point from -30° (below the horizon) to >90° (zenith).
What is included?
Hex key 4mm;Hex key 5mm;Neptune mount.
Main parts
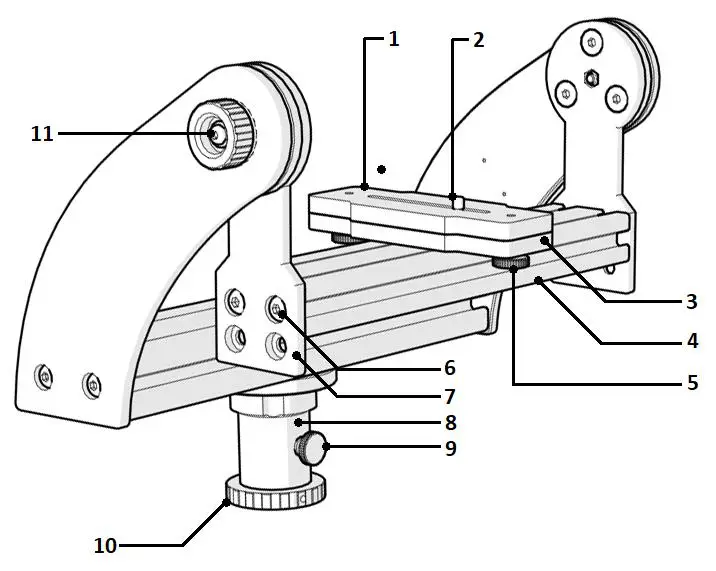
| 1. Pl a tform; | 1. Si de a rm; |
| 2. ¼”-20 D-type ca mera screw; | 2. Azi muth axis; |
| 3. Sub-platform; | 3. Fri cti on thumbscrew; |
| 4. 30×60 a l uminium profile; | 4. Ba s e to tri pod; |
| 5. Pl a tform thumbscrew (2 pieces); | 5. Al ti tude axis (2 pcs). |
| 6. Hex bol t (4 pieces); |
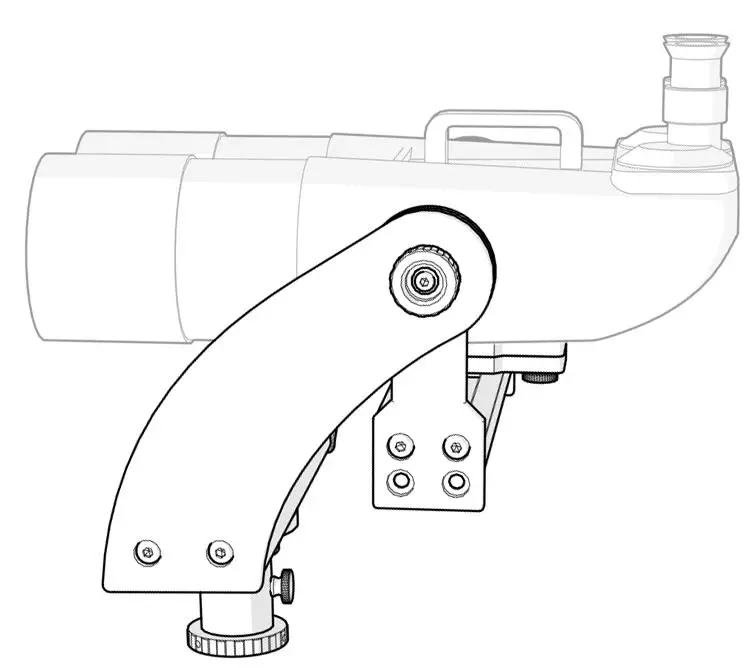
Understanding how the product works.
Fork mounts are great for short focal length telescopes and big binoculars, allowing them to point from the zenith (>90° up) to below the horizon (terrestrial view) on a solid platform. An important feature of this kind of platform is to provide smooth movement on both axes. This smoothness is important because no slow-motion controls are available. With this kind of mount, even at low magnification, it is necessary to do small pointing corrections. For these to be effective, the binoculars or telescope should be well-balanced, their centre of mass should coincide with the main horizontal a xis of the mount. The binoculars should be adjusted up-down and front-to-back. Here a e some tips to do this correctly:
Step 1. Removing the platform. Start by releasing the two platform thumbscrews #5 so that platform #1 can be removed.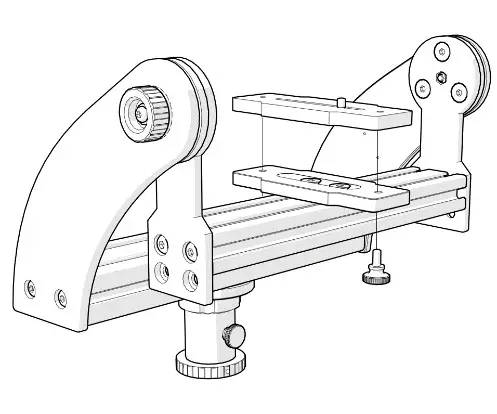
Step 2. Fixing the platform to the binoculars. Locate the ¼” D type screw #2 on Platform #1 and slide it to the centre. Fix the ¼” D type screw to the binocular’s foot/base, as shown. Use a suitable coin for a tight fit. Make sure that Platform #1 does not move or slide. Retighten if necessary.
Hint: A 5 or a 20 euro-cent coin is a very helpful tool to securely fix the binoculars!
Step 3. Installing the setup from Step 2 to the mount. Place the assembled setup from the previous step to the sub-platform #3 and tighten back the two platform thumbscrews #5.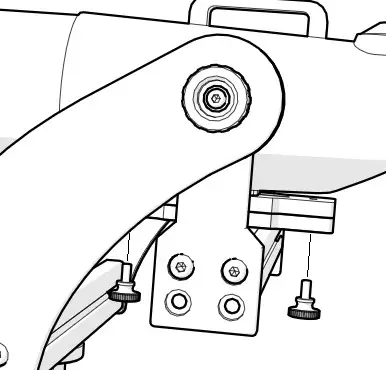
Step 4. Checking front-back balance.Place the binoculars horizontal. If the binoculars tilt to the front, they need to be a djusted to the back. If, on the other hand, the binoculars tilt to the back, they need to slide to the front.
Repeat Steps 1 to 3 if necessary.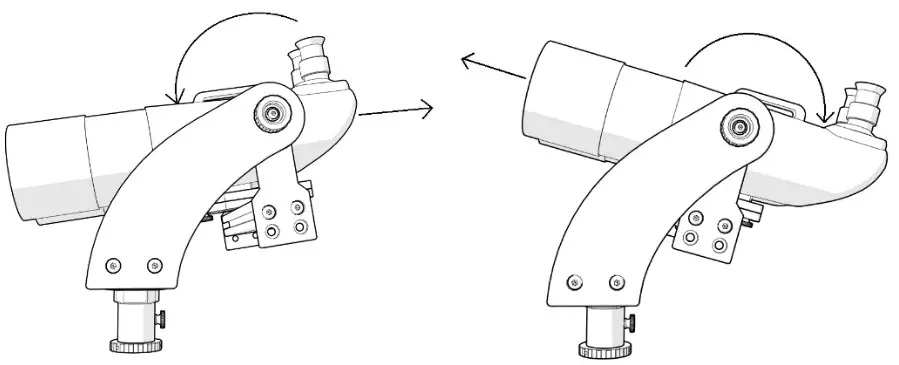
Step 5. Checking up-down balance. Before proceeding makes sure Step 4 has been successfully completed. At this point it is imperative to have the binoculars front-backba lanced.
Start by pointing the binoculars to the zenith (90°up) as shown.If the binoculars tilt to the front, they need to be moved further up (arrows pointing to the right), this usually means adding a raising block (please check in the final section, for recommended accessories). If, on the other hand, they tilt to the back, they need to be moved further down (arrows pointing to the left) this usually means switching between positions 2 to 1 (see below).How to adjust the binoculars’ up-down position?
There are two up-down positions to choose from 1 and 2. Usually, position 2 is used for smaller binoculars, up to 100mm in a perture. This is the most common position but your fork mount may have been delivered in position 1. Pl ease verify which position is required.
| Position | Binoculars’ aperture in mm |
| 1 | >110mm or hea vi er tha n us ua l |
| 2 | ≤110mm |
Use the supplied 5mm hex key to release the two hex bolts #6 on both sides (4 bolts in total ) as shown. Release each bolt from each side first, then remove it.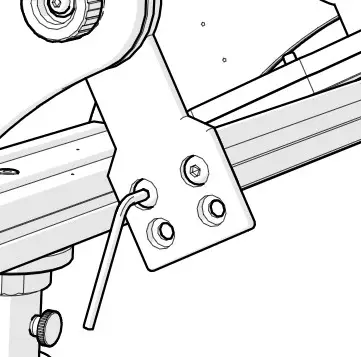 Change the 30×60 aluminum profile #4 to position 1 and lock it in place. Place the bolts to their position first and only then start re-tightening it.
 The fork mount, with the mounted binocular, should now rotate on both axes without any tilt.
Friction adjustment.
Friction on both axes can be adjusted. Usually, a smooth movement is desired. The smoother it is, the more sensitive the balance will be. We recommend using a friction level that allows both smooth movement and good balance.4.1. Adjusting friction on the AZ axis. Tighten (clockwise) or release the friction thumbscrew #9 and check how the friction changed. Pl ease notice, it is not possible to lock the azimuth axis #8. Friction can be increased or decreased but the axis will never lock.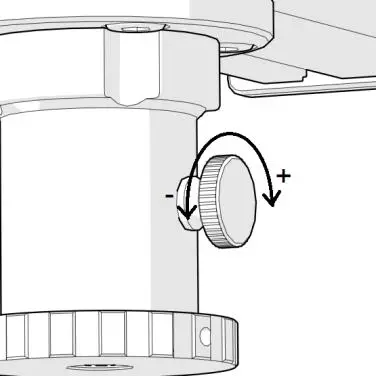 4.2. Adjusting friction on the altitude axis.Use the supplied 4mm hex key to release (slightly) the altitude axis #11. Make sure to do this on the left and right side. Verify if the friction is the same on both sides. Turning clockwise increases friction (+) while counterclockwise the friction is reduced. Try differently to get yourself familiarised with the required smoothness level and how it increases or decreases.
 5. Additional features: sliding the sub-platform.Sub-platform #3 can add an additional degree of adjustment (from to back). It slides an additional 35mm to the front and back combined. This is especially important for telescopes or binoculars that have a center of mass that is far away from its mechanical center. Release the two s crews, slide it to the required position, and retighten, ensuring it is securely fixed.
Recommended accessories.
6.1. Raising block. Raising blocks are very rarely necessary. Only when the binocular’s shape or weight is completely out of what we call the standard, will one need one ofthese blocks. They a llow to further adjust the binocular up (using position 2 a lready). Check for existing raising blocks.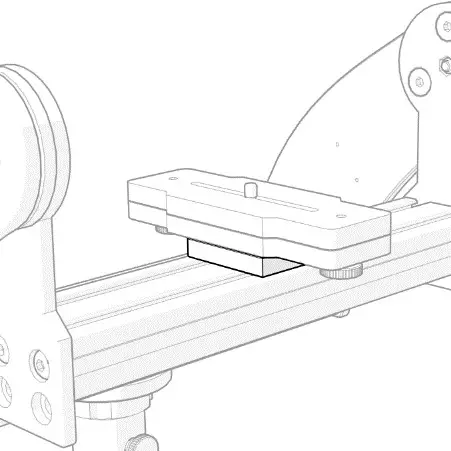
Specifications.
 report this ad
Weight: 4250g (9.4l b);Outside dimensions: 205x371x310mm;Inside width (how big can the binocular be): 290mm;Carrying Capacity: 9kg (19.8l b);Altitude range: -30° to >90°;Recommended Binocular size: up to 110mm.
Reproduction of part or all of the contents of this document in any form is expressly prohibited other than for individual us e only. Subject to modifications and errors.All text, images and labels are property of nimax GmbH.
[xyz-ips snippet=”download-snippet”]