

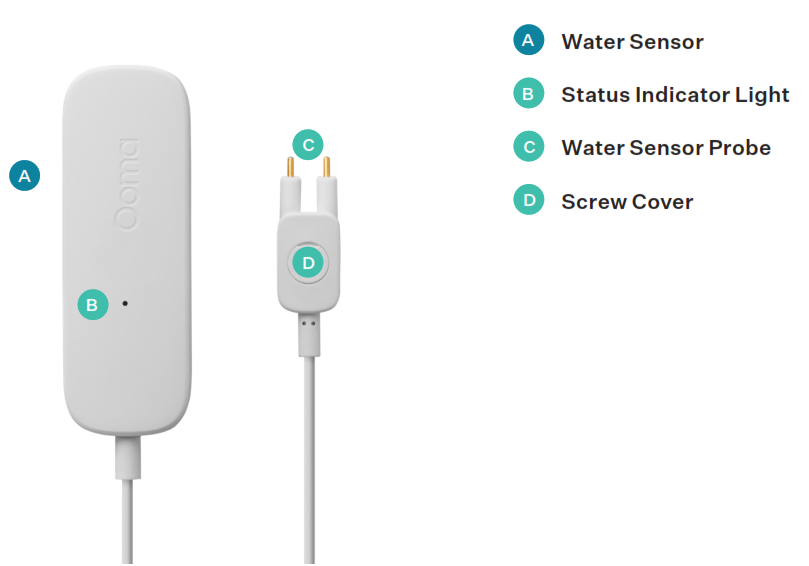
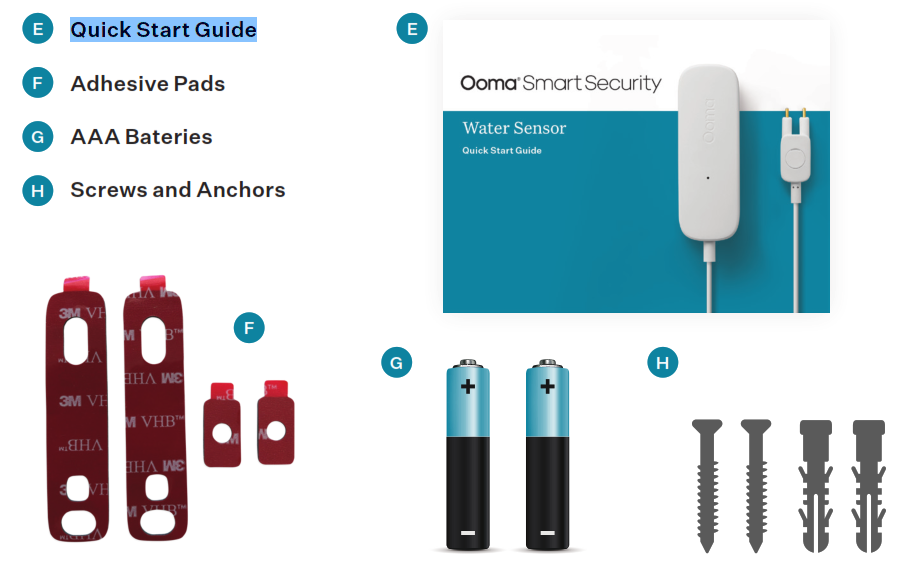
1 What’s in the Box

2 Installation and Activation
Install the AppIf you haven’t done so already, install the Ooma Smart Security app on your iOS or Android device. Visit the Apple App Store or Google Play Store and search for “Ooma Smart Security.” Download the app and install it on your device.

Activate AccountOnce you get to the login screen, press “Activate Account” and follow the steps in the app to set up your account.
3 Setting up Your Ooma Sensor
Start Pairing Process
Once you have finished setting up your account, press the “Add Sensor” button on the dashboard. Pick “Water Sensor” and follow the steps in the app.
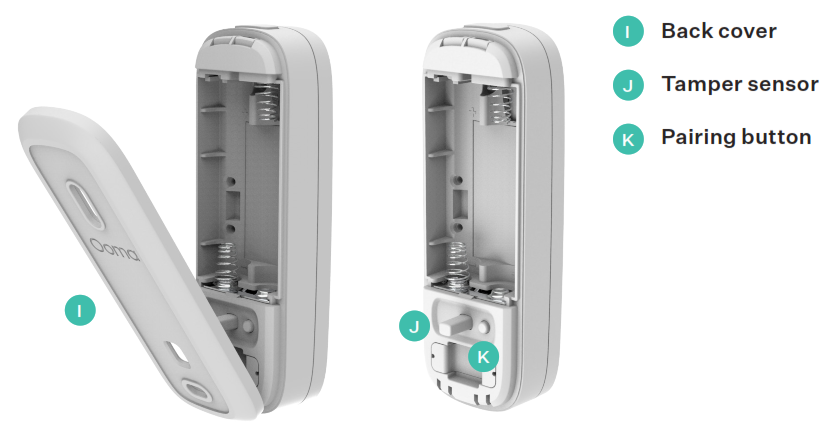
Insert BatteriesPress the latch release on the top of the sensor to remove the back cover. Insert the AAA batteries. Don’t replace the cover yet.

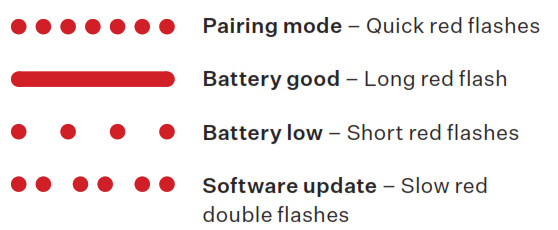
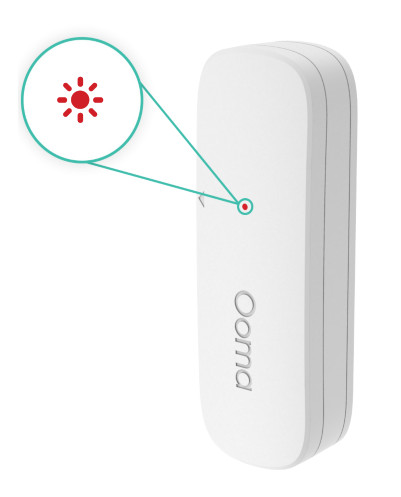
Pair Your Sensora. Stand within 10 feet of your Telo Base Station. Press and hold the pairing button for 5 seconds. Watch for the status indicator light on the front of the sensor to blink red, indicating the sensor is in pairing mode.b. Follow the steps on the mobile app to complete the pairing process.

4 Mounting Your Sensor
Preparing to Mount Your SensorAfter pairing your sensor, you can use either adhesive pads or screws to mount it.
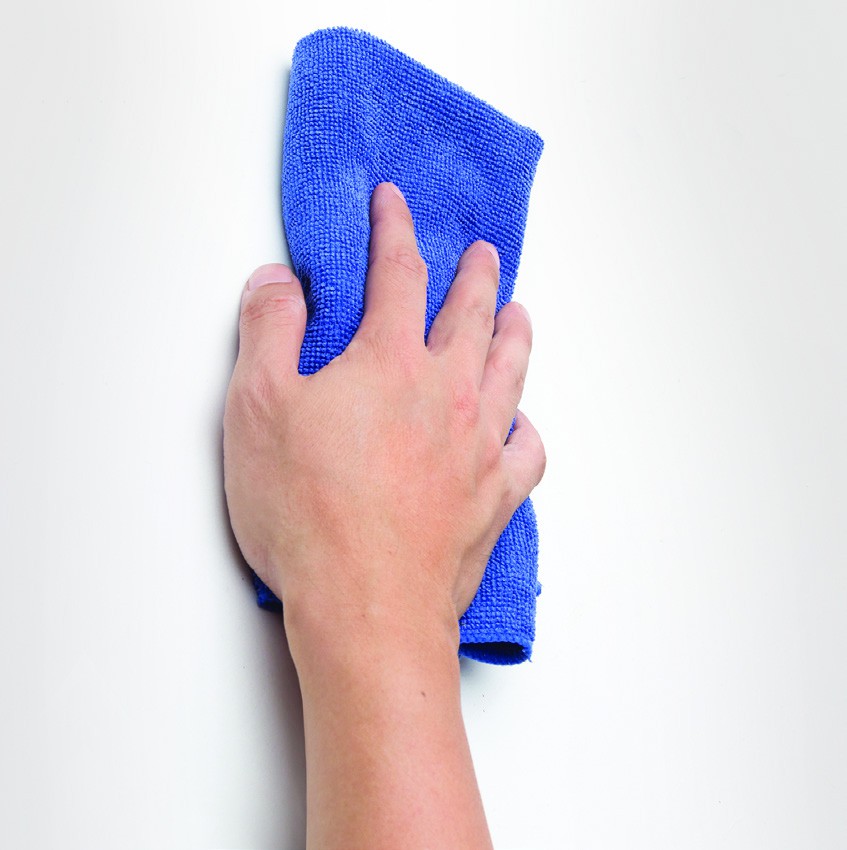
Before you begin, decide where you want the Water Sensor to be. Place the tips of the probe where you expect unwanted water to collect. Unravel the 3-foot cable to ensure that the main sensor will not get wet.Mount with Adhesive Pads (optional)a. Use a damp cloth to clean the area where you want your sensor to be so that the adhesive pads stick properly.
b. If you haven’t already, replace the sensor’s back cover. Then, peel one side of the backing off the included large adhesive pad. Align it with the recessed area on the back of the sensor and press firmly. Make sure front faces are level.
c. Peel off the other backing paper on the adhesive pad. Firmly press the adhesive onto the desired surface for 30 seconds.d. Use a small adhesive pad or screw to attach the smaller water probe where you want it to be.
Mount with Screws (optional)
a. Using the back cover as a stencil, mark the screw holes with a pencil on the mounting surface with a pencil. Use a drill to bore holes for your anchors and place them in the holes.b. Align the back cover over the screw anchors. Place screws through the gaps and tighten.c. Once the back cover is secure, place the sensor onto it.d. Use a small adhesive pad or screw to attach the water probe where you want it to be. Using the included adhesives pads or screws, mount the large device in a place where it will not come into contact with water (it is not waterproof).
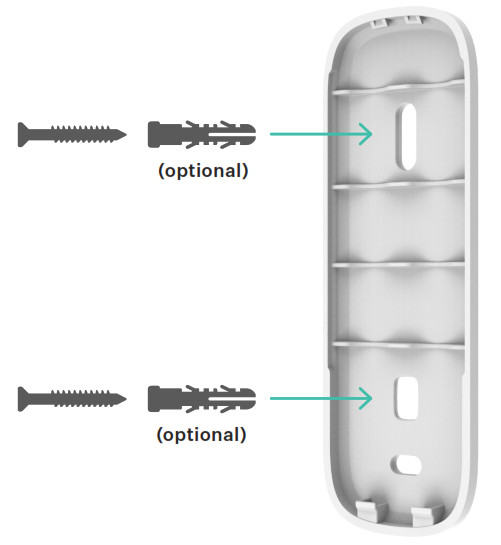

Mount the water sensor probe so that it is either standing up or laying down in a position that will allow the two gold probes to make contact with water in the event of a leak.
5 Additional Information
Checking battery levelTap the pairing button to check the battery level. A long flash indicates that the battery is good. A slow blink indicates that the battery is low.
Status indicator reference
6 Need Help?
Ooma has a wealth of available resources if you need assistance.
Support Articles and User Manuals. Access our comprehensive knowledge base at support.ooma.com/support
Community Forum. Talk with your fellow Ooma customers and our support staff at forums.ooma.comLive Customer Care. Speak with a support specialist at 1-888-629-1284
![]()
For warranty, safety, and other legal information, visit ooma.com/legalThis device complies with part 15 of the FCC rules. Operation is subject to the following two conditions: (1) This device may not cause harmful interference, and (2) This device must accept any interference received, including interference that may cause undesired operation. P/N: 700-0165-300
Ooma Water Sensor User Manual – Ooma Water Sensor User Manual –