
![]()
Karu 16Multi-Fuel Pizza OvenAssembly Manual
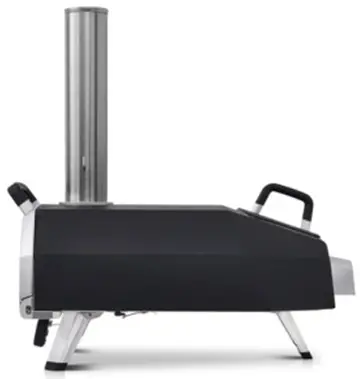
Ooni Karu 16 Pizza OvenUU-P0E400
Safety Legal Disclaimer – must be read in full, prior to use
- Ooni is designed for outdoor use only. Ooni must always be placed outdoors, away from structures, and never inside a building or a garage or in proximity to an enclosed area. The clearances around the oven to any combustible surfaces should be at least 1m from the sides and rear, and 3m from the front and above the oven. Place your Ooni on a sturdy, level, stable and non-flammable surface and keep it clear and free from flammable or combustible materials, gasoline, and other flammable vapors and liquids.
- Be aware of any local laws or regulations that may specify a required distance between outdoor cookers and any structures, or that may limit outdoor flame of any type during drought or hazardous periods.
- Do not install or use your Ooni in or on boats or recreational vehicles.
- Do not use your Ooni in high or gusty winds.
- Your Ooni is not intended to, and should never be used as a heater.
- Toxic fumes can accumulate and may cause asphyxiation.
- Your Ooni Karu 16 is a live fire device. Live fire will naturally go towards any air source, therefore, at times you will see fire coming out of the oven:a. at the back where the fire is;b. from the top of the hatch when the lid is opened;c. from the front of the oven when you open the door; ord. from the top of the chimney.We recommend you wear gloves when operating your Ooni Karu 16, to avoid any risk of burning.
- Please keep away from the Ooni’s openings and warn others around you.
- Improper installation, adjustment, alteration, service, or maintenance of your Ooni may cause injury or property damage.Therefore, do not use your Ooni unless it is completely assembled and all parts are securely fastened and tightened.
- Your Ooni should be inspected on a regular basis.
- When using the charcoal/wood burner: Add the kindling gradually to reach an optimum temperature. Adding too much kindling will enlarge the fire, risking damage to you or your Ooni.
- When using the gas burner: If the flame goes out, turn off the gas supply, remove the door and hatch and wait 5 minutes before relighting.
- When using your Ooni, there is a risk for your hands to suffer burns. Protective heat-resistant gloves should be worn at all times to avoid burns and you should never set hot items on or near combustible surfaces. DO NOT touch any metal parts when your Ooni is operating. Only touch the plastic handles to open the door and lift the fuel hatch.
- Never leave your Ooni unattended. Do not leave your Ooni unattended with the lid open while lit. Be aware of hazards (dry leaves, decking, and other combustible materials) that may be in proximity to the Ooni while it is in use as they may present a fire hazard if any sparks are allowed to come into contact.
- Keep all electrical cords away from your Ooni.
- Ooni is to be used by responsible adults only.
- Keep children, pets, and combustible items away from your Ooni at all times.
- Do not attempt to remove any parts or move your Ooni when it is hot or while cooking.
- DO NOT leave any hazardous objects such as lighters or barbecue lighting fluid next to your Ooni. Indeed, Ooni radiates heat in all directions.
- Ooni remains hot even after visible flames have died down. Allow a minimum of 2 hours for it to cool down once you are done using your Ooni. DO NOT cover the Ooni immediately after it has been used and make sure all the fire and glowing embers have disappeared from the burner before storing it.
- The approximate temperature of your Ooni (when being used) ranges from 250°F (120°C) to 1000°F (550°C).
- Ooni is safe and hazard-free when used as intended and according to safety guidelines, and will provide years of trouble-free use and enjoyment. It is the users’ responsibility to maintain the safe operation of the Ooni and to exercise reasonable standards of care at all times.
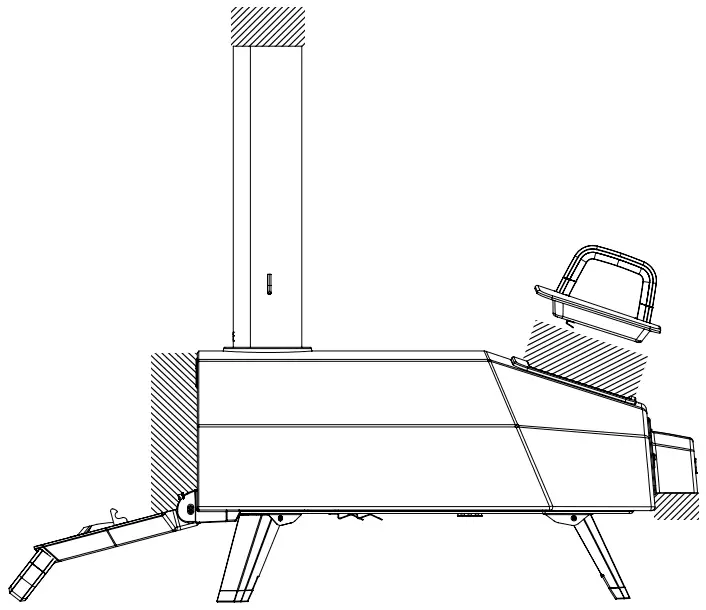
![]() Areas where fire may appear outside the oven.
Areas where fire may appear outside the oven.
WARNING! This barbecue will become very hot, do not move it during operationDo not use indoors!WARNING! Do not use spirit or petrol for lighting or re-lighting! Use only firelighters complying with EN 1860-3!WARNING! Keep children and pets awayDo not use the barbecue in a confined and/or habitable space e.g. houses, tents, caravans, motor homes, boats.Danger of carbon monoxide poisoning fatality.Do not cook before the fuel has a coating of ash.
Lighting & extinguishing – wood or charcoal
Ooni Karu 16 comes with a wood and charcoal burner as a standard. Only use charcoal that is suitable for cooking and do not cook food until the fuel has a coating of ash. When cooking with wood, use pieces of dry, non-treated hardwood (up to 23 cm / 9” long and 7.5 cm / 3”) in diameter in the burner. Add no more than 0.5kg of fuel at one time and ensure there is no more than 1.3kg in the tray at one time.To light your Ooni Karu 16 with either wood or charcoal:
- Remove the chimney cap, open the chimney ba¦e, and ceiling vent and attach the door.
- Remove the hatch and place a layer of charcoal or a small stack of wood in the charcoal/wood burner.Use a gas blowtorch or a natural fire-lighter to light the wood.
- Once there is a fire going, slowly add more fuel. Replace the hatch and let Ooni Karu 16 to preheat for 30 minutes. Add more fuel as needed. The barbecue shall be heated up and the fuel kept red hot for at least 30 minutes prior to the first cooking.
- Do not use spirit or petrol for lighting or re-lighting. Use only fire-lighters complying with EN 1860-3.
To extinguish
- Let the fire burn down naturally and leave Ooni Karu 16 to cool. Do not remove ashes until Ooni Karu 16 has cooled completely.
Power to the device3 x Supplied 1.5V AAA batteries are used to power the Pizza Oven Digital Thermometer Remove the four screws on the back panel of the Pizza Oven Digital Thermometer to access battery compartment.
Thermometer instructions
Ooni Karu 16 comes with a battery-powered Pizza Oven Digital Thermometer as standard.Use the front-mounted Pizza Oven Digital Thermometer for accurate and immediate temperature readings in Celsius (°C) or Fahrenheit (°F).
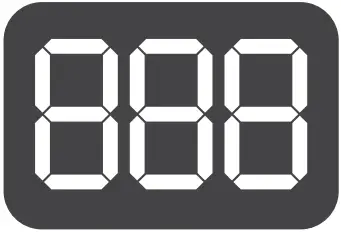 |
Power onPress the Ooni button until ‘888’ appears on the screenPower offPress and hold the Ooni button until the display goes blank/off.The thermometer will automatically power off after 3.14 hours. |
 |
Change unit of measureSingle press the Ooni button to cycle between Celsius (C) and Fahrenheit (F). |
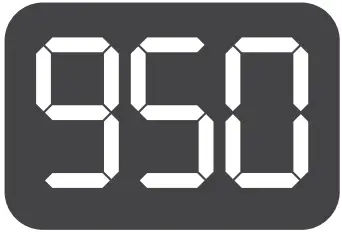 |
TemperatureThe temperature will be displayed in the unit of measurement you selected. |
 |
Max temperatureMaximum internal temperature reached, open Karu 16 door to reduce the temperature within the oven. |
 |
ErrorThis will display if the thermometer cable has not been connected to the Jack Bracket |
Exploded view and parts list
Parts list
- Main body
- Door
- Cordierite stone baking boards
- Digital Thermometer
- Chimney
- Chimney cap
- Fuel grate and fuel tray
- Fuel hatch
- Draft defender plate
- Thermometer bracket
- Jack bracket
- Allen key
- Phillips head screwdriver
FixingsA. Thermometer bracket screwB. Thermometer thumb nutC. Door hinge screwD. Draft defender plate screwE. Washer
Step by stepStep 1 – Unfold the legs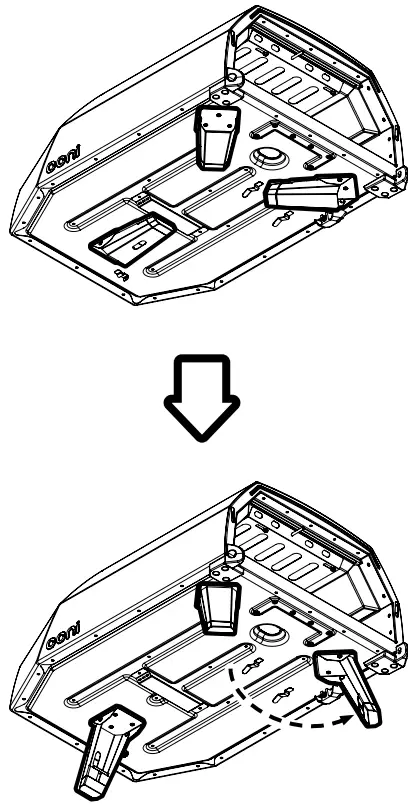
Step 2 – Attach the thermometer bracket to the floor
Step 3 – Insert the batteries into the Digital Thermometer
Remove 4x Phillips head screws counter-clockwise from the battery cover
Insert 3x AAA batteries provided and reinsert 4x Phillips heads screws clockwise.![]() Secure but do not over-tighten
Secure but do not over-tighten
Step 4a – Attach the Digital Thermometer![]()
Step 4b – Attach the Digital Thermometer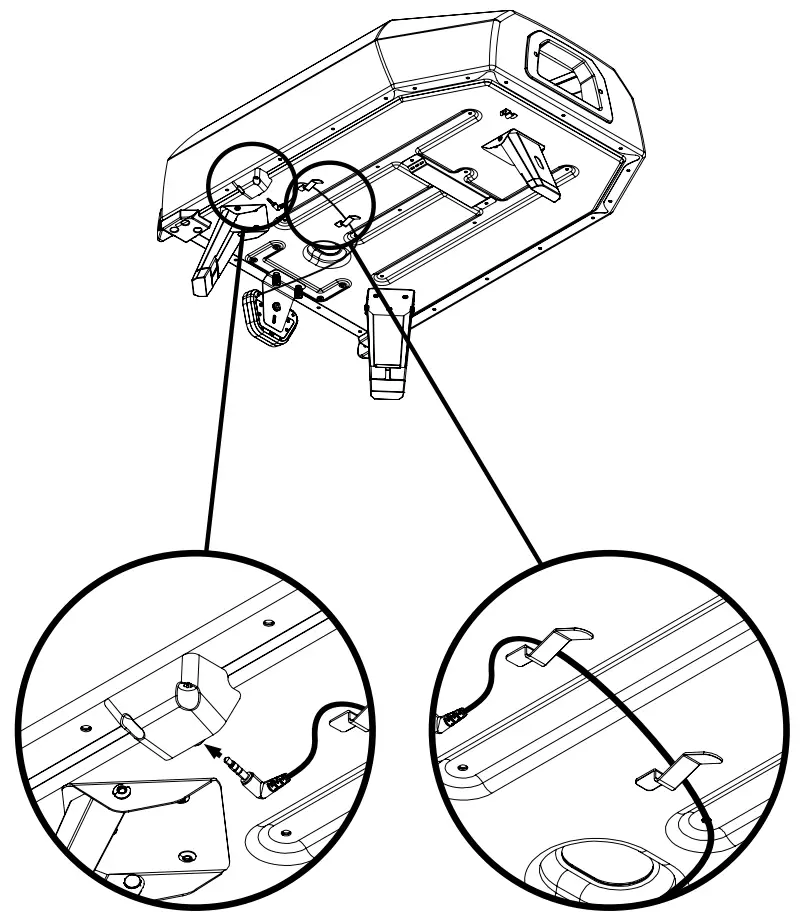
Step 5 – Insert Cordierite stone baking boards
Step 6 -Insert fuel tray and fuel grate
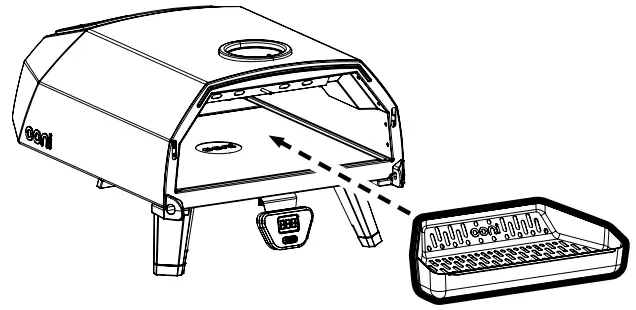
![]() The Ooni logo on the grate must face towards the front of the oven
The Ooni logo on the grate must face towards the front of the oven
Step 7a – Attach the door![]()
![]() Ensure the door hook is correctly positioned over the door pins in the oven body.
Ensure the door hook is correctly positioned over the door pins in the oven body.
Step 7b – Attach the door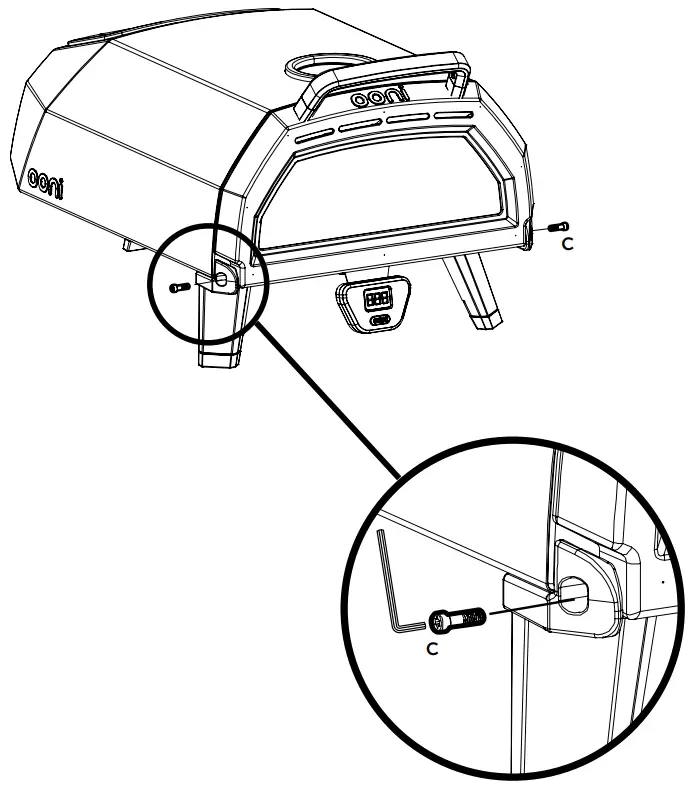
![]() Secure but do not over-tighten
Secure but do not over-tighten
Step 8 – Attach chimney and fuel hatch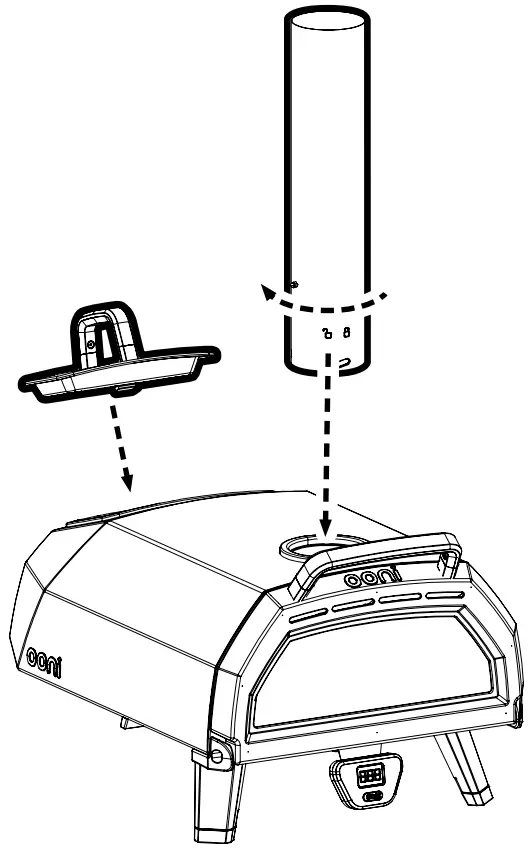
Step 8 – Attach chimney and fuel hatch
![]() Secure but do not over-tighten
Secure but do not over-tighten
Step 10 – Open ceiling vent and chimney baffle before lightning Chimney ba¦e should be vertical.Ceiling vent should be to the left.![]()
ooni.com© 2021 OoniOoni is a registered trademark of Ooni Ltd.All rights reserved.
References
[xyz-ips snippet=”download-snippet”]