
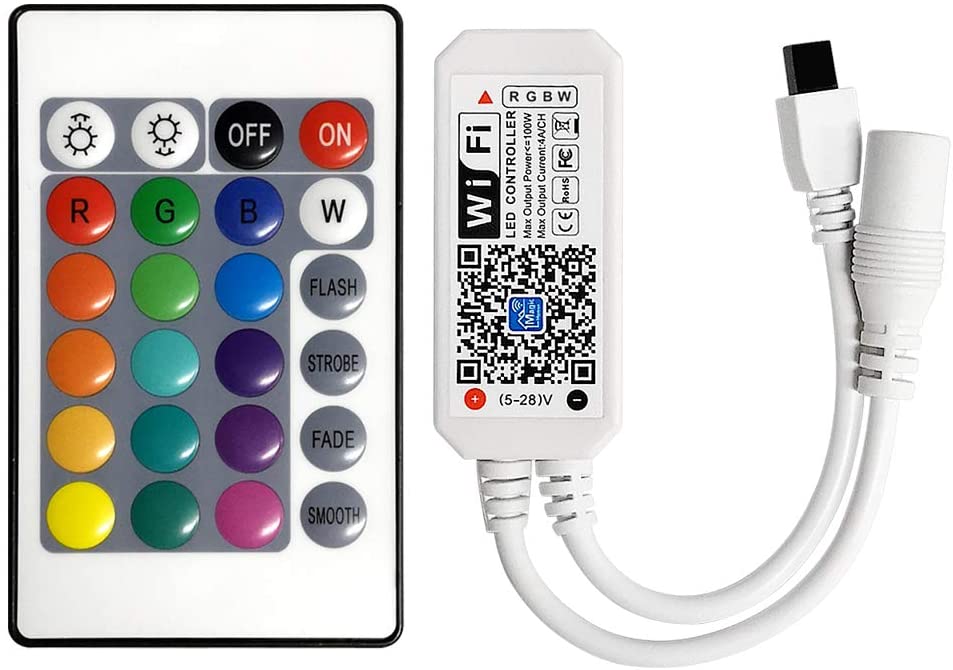
OSIDEN Wi-Fi+IR 24Keys RGB LED Controller
Product Parameter:
Category LED ControllerDomination Principle WiFiAPP Magic Home ProLanguage Chinese, EnglishOperation Platform Android 4.0 or IOS 9.0 or higherLED Drive Type Constant voltage: MOSFETChannels GRBInput Voltage DC(5-24)VMax Output Power 144WWork For LED Strip or other constant voltage lightsConnect Method Common AnodeWorking Temperature -20-55℃Control Distance Visible distance 60MCertification CE, RoHS, FCCWarranty 1 YearNet Weight 43gDimension (L*B*H) 53MM*24MM*11MM
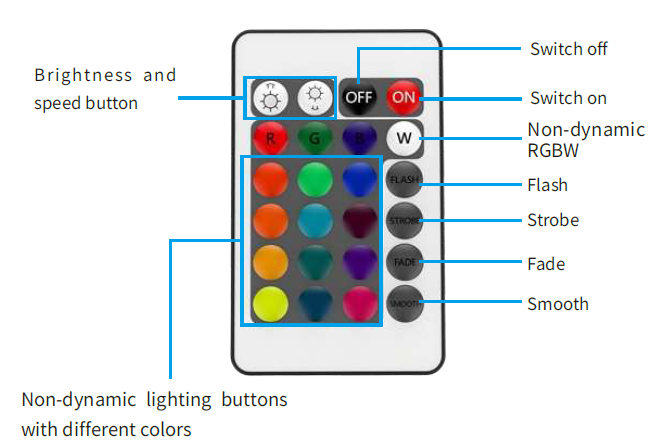
Instruction of Remote Controller
24-key infrared control instruction: (For controllers with infrared function)
- The default setting of the WIFI controller is 3 channels in the sequence of RGB (sequence of GRBW for GRBW version, GRBWC for GRBWC version). If you want to change the output channel, the steps are as follows: unplug the controller power and then plug in again. When the light up, long press the key B for 2 to 3s, the flickering white light means you’ve successfully changed the output channel to BRG; Similarly, long press key G will change the channel to GRB sequence; long press key R to RGB sequence.
- In RGBW version, press W key for RGB and white light; long press W key for 2 seconds will switch to W channel.
APP interface instruction
a) Support 16 million color control and brightness adjustment
You can adjust both the color RGB(Red/Green/Blue) as well as the brightness of the color. It’s likewise possible in this function to adjust and store 5 own created colors and brightness levels. You can save this, if you press long on the“ DIY” button.
The adjusted color/brightness will be stored and displayed in the“ DIY” button. You can recall the color/brightness if you press shortly on one of the five DIY buttons.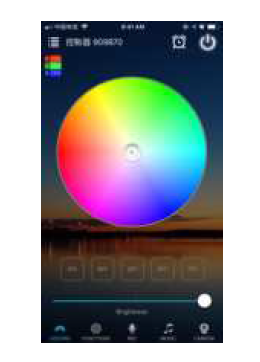
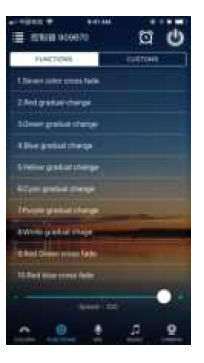
b) Dynamic Mode in Function interface
20 Programmed build-in dynamic mode including colorful gradual change, cross fade jump change and strobe flash for your choices.Speed can be set.
Support for customised colours and preservation
In DIY function, you can select your favorite colors and gradual, jump or strobe between the functions. Press the menu“ customs” and then“ Add new Mode”. By briefly pressing one of the selection rectangles you can change the color. By pressing long, you can delete the color. It can be defined in a sequence up to 16 different colors. After setting the color,speed and award of the user mode name, press“ save” on the top right. Now you see your personal role in the selection mode. You can create unlimited changing modes and they can always be edited or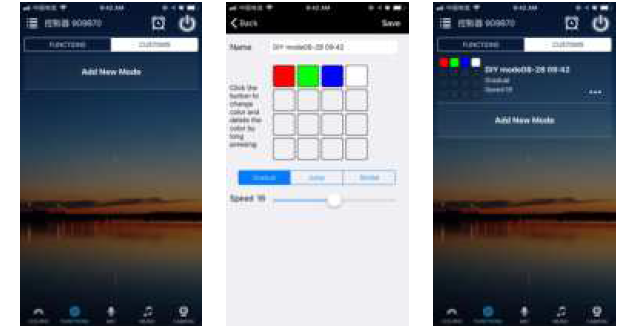
c) Microphone function
Click/ go to“ Mic” interface of the APP. In this function the connected LED light lights up depending on the volume/noise from the outside like a microphone. This also works when playing music or there is a noise from outside, the light will begin“ dancing” base on different rhythm. The microphone sensitivity can be adjusted by the slider.
d) Music Function
- Select your music songs in your smartphone and play them, lighting will dance based on rhythm
- 4 styles for choice: NORMAL for default music style, ROCK for rock & roll music style, JAZZ for jazz music style, CLASSICAL for classical music style.
- iOS system needs to download music from iTunes or copy audio files from computer’s iTunes to iPhone
- Android system needs to download the music to phone for use.

e) Background color function of camera
In this function, you can select a color with the smartphone or tablet where you point the camera of your smartphone or tablet to an object. The selected color will be display from the connected LED light in the RGB spectrum. This can be done manually transmitted to the LED light with“ Manual”“ Capture color” or switch to “Auto” and the LED light will show immediately the color which has been selected on the camera.
f) Group Function:control all the LED lights at the same time
- Create group(s) and add the LED lights into group(s).
- You can control the LED lights with color change, brightness change, turn on/turn off etc.
- You can rename group(s) to make them easier for use
g) Timer function
The LED lights will be turn on or turn off automatically according to the timer you set.
The controller has a build in timer function. To do so, press on the top right, next to ON/OFF, switch the clock icon. Then the selection menu will be shown with time, Repeat (Mon-Sun), ON/OFF switch and the optional Model (color setting, Brightness and gradient program.) The timer will not operate when the power supply is interrupted. In this case, start the APP to resynchronize.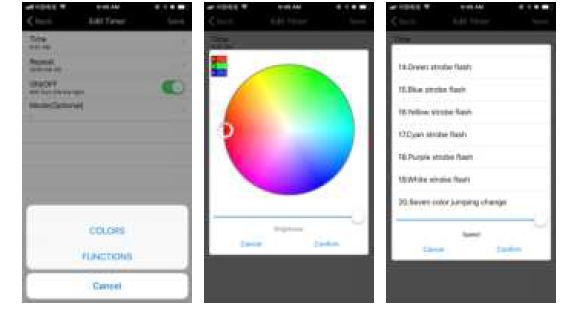
ATTENTIONS
- Please use the product in a dry environment.
- Please use the input voltage at 5-24V DC voltage, must not connect into 220VAC directly.
- The product is requested common anode connection. The wrong connection will cause a malfunction.
[xyz-ips snippet=”download-snippet”]