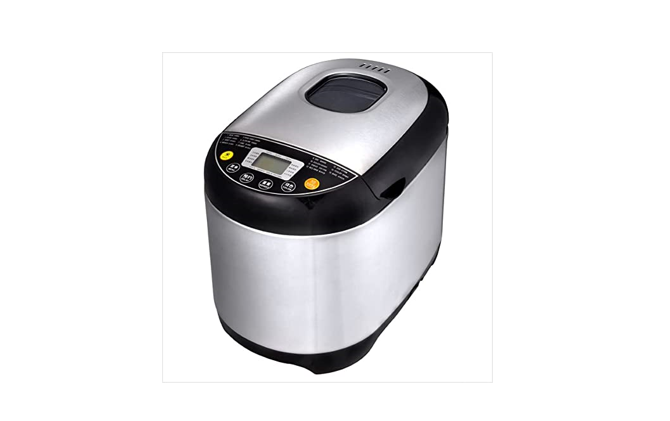
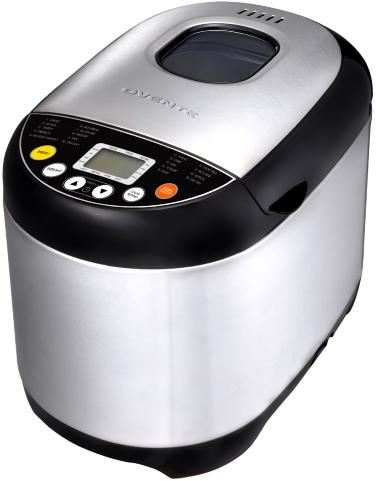
![]() MULTI-FUNCTION BREAD MAKERBRM5020 SERIES
MULTI-FUNCTION BREAD MAKERBRM5020 SERIES
Before use, please read this manual thoroughly and save it for future reference.
IMPORTANT SAFEGUARDS
 When using your Bread Maker, basic safety precautions should always be followed to prevent the risk of fire, burns, or other injuries or damages.
- Please keep the instruction manual, guarantee certificate, sales receipt, and, if possible, the carton with the inner packaging.
- Before connecting the bread maker, check whether the voltage indicated at the bottom corresponds to your local mains voltage.
- Close supervision is necessary when any appliance is used by or near children. Children should be supervised to ensure that they do not play with the appliance.
- This bread maker is not intended to be used by persons (including children) with reduced physical, sensory or mental capabilities. This bread maker is not for persons with a lack of experience and knowledge unless they have been given supervision or instructions concerning the use of the bread maker by a person responsible for their safety.
- Do not touch hot surfaces. Always use oven mitts to handle the hot bread pan or hot bread.
- Do not put your hand inside the chamber after the bread pan is removed. The heating unit will still be hot.
- To protect against electric shock do not immerse the cord, plugs, or bread maker in water or other liquid.
- Unplug from outlet when not in use and before cleaning. Allow cooling before putting on or taking off parts, or before cleaning.
- Do not operate any appliance with a damaged cord or plug or after the appliance malfunctions, or is dropped or damaged in any manner. If themains cord is damaged, contact Customer Support on 1-855-926-2626 immediately.
- The use of accessory attachments not recommended by the appliance manufacturer may cause injuries.
- Do not use outdoors or for other than its intended use.
- Do not let cord hang over edge of table or counter or touch hot surfaces.
- Do not place on or near a hot gas or electric burner, or in a heated oven.
- Extreme caution must be used when moving an appliance containing hot food.
- Never switch on the bread maker without properly placed bread ingredients inside.
- Never hit the bread pan on the top or edge to remove the bread, as this may damage the bread pan.
- First plug the cord into the bread maker, then plug it into the wall outlet. To disconnect, turn off all controls (START/STOP) and then remove the plug from the wall outlet.
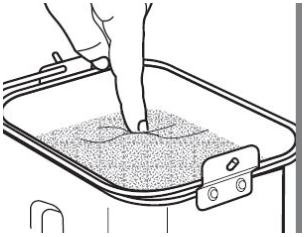
- When viewing the status of your bread through the tempered glass viewing window, do not lean in too close.
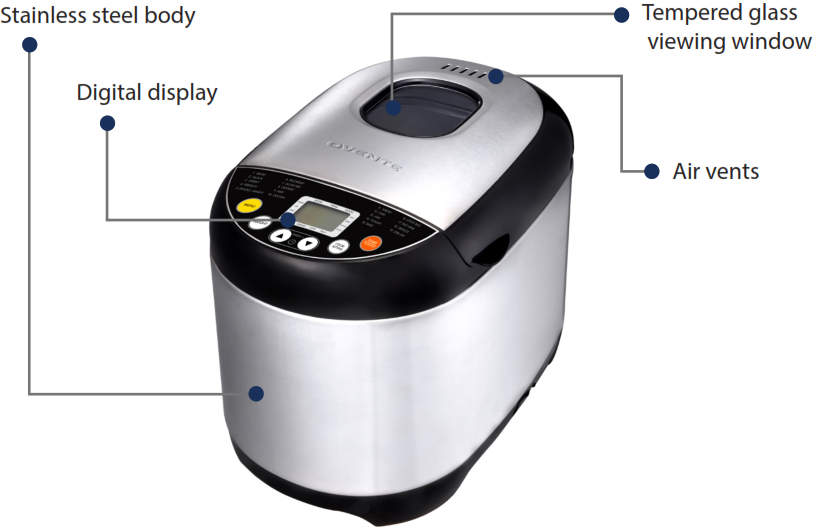
 USING YOUR BREAD MAKER
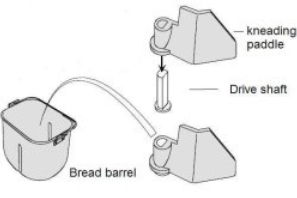
- Twist the bread pan counterclockwise and lift the handle to separate the bread pan from the chamber.

- Push the kneading paddle onto the drive shaft inside the bread pan.
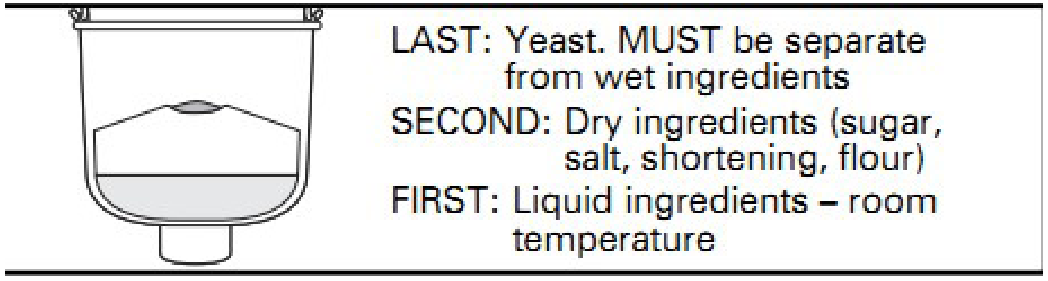
- Add the ingredients into the bread pan in the order shown here.
- Make a small indentation on the top of the flour with your finger; add yeast into the indentation. Make sure the yeast does not come into contact with salt or liquids as it will prematurely activate the yeast.TIP: Pre-measure all ingredients, including add-ins (nuts, raisins) prior to starting
- Place the bread pan into the bread maker and make sure it is firmly locked in place by turning it clockwise. Close the lid. NOTE: Bread pan must lock into place for proper mixing and kneading.
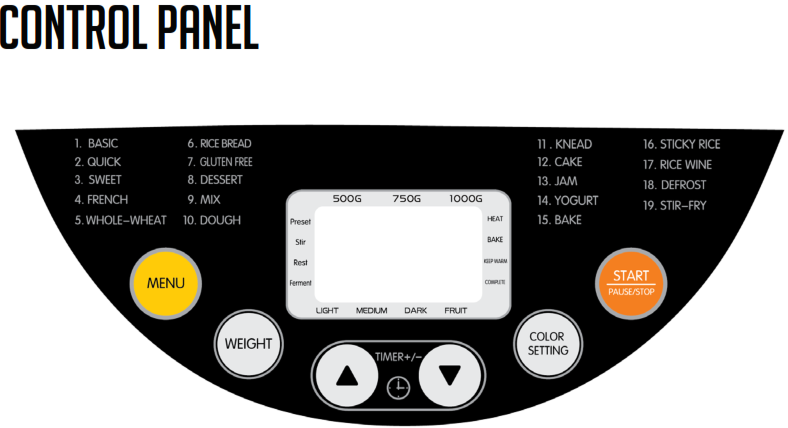
- Plugin the bread maker. It will beep and the LCD display will default to Program 1. The arrows will point to 750g and MEDIUM as they are the default settings.
- Press MENU until your desired program is displayed. Once you find it, press START/STOP.
- Press WEIGHT to move the arrow to 500g, 750g, or 1000g. Note: This button is only available for Programs 1-7.
- Press COLOR SETTING to select your desired setting, Light, Medium, or Dark crust. Note: This button is only available for Programs 1-7. TIMER
- Use the delay timer feature to start the bread maker at a later time. Press or to increase the cycle time shown on the LCD display. Add up to 15 hours (including the delay time and bread-making program).NOTES:* Set the delay timer after first selecting MENU, WEIGHT, and COLOR SETTING.* Do not use the delay timer function with recipes that include dairy or other perishable ingredients, such as eggs, milk, cream, or cheese.* The total selected time should include the delay time and the baking time. After the baking program is complete, it will shift to the Keep Warm setting for one hour.* The delay function is not available for Program 13.
- The kneading paddle will begin to mix your ingredients. If the delay timer was activated, the kneading paddle will not mix ingredients until the program is set to begin.
- For add-ins (fruits, nuts, raisins), the unit will beep ten times. Open the lid and pour in your add-ins. This function is only available in Programs 1-7.
- Once the process is complete, the unit will beep ten times and shift to the Keep Warm setting for 1 hour. Press START/STOP for 3 seconds to stop the process and the Keep Warm setting will end. Unplug the power cord and then open the lid using oven mitts.
- Once the bread is ready, twist the bread pan counterclockwise and lift the handle to separate the bread pan from the chamber. Caution: bread pan and bread may be very hot! Handle with care.
- Using oven mitts, turn the bread pan upside down (with the handle folded down) onto a wire cooling rack or clean the cooking surface and gently shake until bread falls out. If stuck, use a non-stick spatula to gently loosen the sides of the bread from the bread pan.
- Let the bread cool for about 20 minutes before slicing with a sharp knife.
- If the kneading paddle remains in the bread, gently pry it out using a spatula or small utensil. The bread is hot; don’t use your hands to remove the kneading paddle.
- Note: Store remaining bread in a sealed plastic bag for up to three days at room temperature. To store for a long time, place the sealed plastic bags in the refrigerator for up to 10 days.TIPS: One of the most important steps of making good bread is the proper measurement of ingredients. Measure each ingredient carefully and add to your bread pan in the order shown in the diagram on page 5. For accuracy and best taste, it is strongly suggested that you use the provided measuring cup or measuring spoon.
 TIP: Pre-measure all ingredients, including add-ins (nuts, raisins) prior to starting
QUICK REFERENCE GUIDE: To start a program: press the START/STOP button once; the display will light up, and the colon in the time display will flash. All buttons except START/STOP are inactivated once a program has begun. To pause a program: press START/STOP for 0.5 seconds. If you don’t do anything within three minutes, the program will continue processing until its completed time. To cancel a program: press START/STOP for 3 seconds; the unit will beep to confirm the program has been switched off. This feature helps prevent any unintentional disruption to the operation of a program. To remove your freshly baked bread: press the START/STOP button to end the baking cycle. Exercise caution as the baking pan and bread will still be extremely hot.
POWER INTERRUPTIONIn the event of a 10-minute power outage, the selected program will continue automatically, without you needing to press START/STOP. However, if the interruption time is longer than 15 minutes, the unit will not continue running and the LCD display will revert to the default setting. If the dough has started rising, discard the ingredients in the bread pan and start over. If the dough has not entered the rising phase when the power cord is removed from the outlet, press the START/STOP button to restart the program.
WARNING DISPLAY – ![]() This warning means the temperature inside the bread pan is too high. Press START/STOP to stop the program, unplug the power cord, open the lid, and let the machine cool down for 10-20 minutes before restarting.WARNING DISPLAY –
This warning means the temperature inside the bread pan is too high. Press START/STOP to stop the program, unplug the power cord, open the lid, and let the machine cool down for 10-20 minutes before restarting.WARNING DISPLAY –![]() This warning means the temperature sensor is disconnected. Press START/STOP to stop the program and unplug the power cord. Please call Customer Support on 1-855926-2626 for assistance.KEEP WARM: After the baking program you selected is complete, the bread machine will beep 10 times and shift to the Keep Warm setting for one hour. The display will say “0:00”. After an hour
This warning means the temperature sensor is disconnected. Press START/STOP to stop the program and unplug the power cord. Please call Customer Support on 1-855926-2626 for assistance.KEEP WARM: After the baking program you selected is complete, the bread machine will beep 10 times and shift to the Keep Warm setting for one hour. The display will say “0:00”. After an hour![]() will be shown on the LCD display. To cancel the Keep Warm process, press START/STOP button for 3 seconds.TIP: Removing your bread immediately after the baking program is complete will prevent the crust from becoming darker.
will be shown on the LCD display. To cancel the Keep Warm process, press START/STOP button for 3 seconds.TIP: Removing your bread immediately after the baking program is complete will prevent the crust from becoming darker.
AVAILABLE PROGRAMS
- Basic bread – for white or mixed bread; consists of mostly basic bread flour.
- Quick bread – kneading, rising, and baking time are shorter than for basic bread. Quick bread are made with baking powder and baking soda that are activated by moisture and heat. For perfect quick bread, place all liquids in the bottom of the bread pan and dry ingredients on top. During the initial mixing of quick bread batters, dry ingredients may collect in the corners of the pan; it may be necessary to use a rubber spatula to mix them.
- Sweetbread – or bread with additives such as fruit juices, grated coconut, raisins, dried fruits, chocolate or added sugar. Due to a longer phase of rising the bread will be light and airy.
- French bread – for light bread made from fine flour. Normally the bread is fluffy and has a crispy crust. This is not suitable for baking recipes requiringbutter, margarine, or milk.
- Whole-wheat bread – for baking of bread containing significant amounts of whole-wheat. This setting has a longer preheat time to allow the grain to soak up the water and expand. It is not advised to use the delay function as this can produce poor results. Whole-wheat usually produces a thick, crispy crust.
- Rice bread – mix cooked rice into the flour with 1:1 to make the bread.
- Gluten-free bread – Gluten-free flours require longer baking times for the uptake of liquids and have different rising properties.
- Dessert – kneading and baking those foods with more fat and protein.
- Mix – stir to let the flour and liquids mix thoroughly.
- Dough – this program prepares the dough for buns, pizza, etc. to be baked in a conventional oven. There is no baking in this program.
- Knead – kneading only, no rising or baking. Used for making dough for pizzas etc.
- Cake – kneading, rising, and baking occurs, but rise with the aid of soda or baking powder.
- Jam – use this setting for making jams from fresh fruits and marmalades from oranges. Do not increase the quantity or allow the recipe to boil over the bread pan into the baking chamber. Should this happen, stop the machine immediately and remove the bread pan carefully. Allow to cool and then clean thoroughly.
- Yogurt – ferment fruit to make the yogurt.
- Bake – for additional baking of bread because a load is too light or not baked through. In this program, there is no kneading or resting.
- Sticky rice – kneading and baking a mixture of polished glutinous rice.
- Rice wine – rising and baking the polished glutinous rice.
- Defrost – for defrosting frozen food before cooking.
Stir-fry – kneading and baking dried fruit or vegetables.CONVERSION TABLE
|
Grams (g) |
Ounce (oz) |
|
500g |
17.63oz |
| 750g | 26.45oz |
| 1000g | 35.27oz |
PARTS & FEATURES
Accessories:1. Measuring cup,2. Dough hook to remove kneading paddle,3. measuring spoon,4. Kneading paddle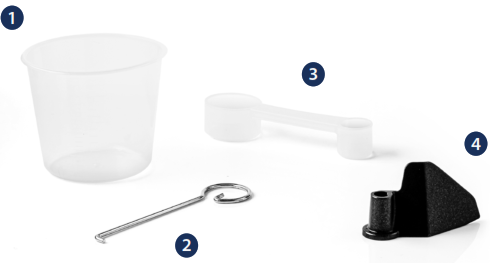
CARE & MAINTENANCE
- Disconnect the power before cleaning. Do not immerse the cord, plug, or housing in any liquid. Allow bread maker to cool down completely before cleaning.
- To clean the kneading paddle: If the kneading paddle is difficult to remove from the bread, add water to the bottom of the bread pan and allow to soak for up to 1 hour. Wipe the paddle thoroughly with a clean, damp cloth. Both the bread pan and kneading paddle are dishwasher-safe.
- To clean the bread pan: Remove the bread pan by twisting it counterclockwise and lifting up the handle to separate it from the chamber. Wipe the inside and outside of the pan with a damp cloth. Do not use any sharp utensils or abrasive cleaners, to avoid scratching or damaging the heating element tube. The bread pan must be dried completely before installation.
- Note: The bread pan and kneading paddle are dishwasher-safe. The outside of the bread pan and base may become discolored. This is normal.
- To clean the housing and top lid: After use, allow the unit to cool completely. Use a damp cloth to wipe the lid, housing, baking pan chamber, and interior of the viewing window. Do not use any abrasive cleaners. Never immerse the housing in water for cleaning.
- Note: It is suggested not to disassemble the lid for cleaning.
- Before the bread maker is stored, ensure that it has completely cooled down, is clean and dry, and the lid is closed.TECHNICAL SPECIFICATIONSVoltage: 120V Wattage: 550W Hertz: 60Hz
TROUBLESHOOTING
| PROBLEM | CAUSE |
SOLUTION |
| Odor or burning smell | *Flour or other ingredients have spilled into the baking chamber. | *Stop the bread maker and allow to cool completely. Wipe excess flour from the baking chamber with a paper towel. |
| Ingredients not blending; can smell motor burning | *Bread pan or kneading paddle may not be installed properly. *Too many ingredients. | *Make sure kneading paddle is set all the way on the shaft. *Measure ingredients accurately. |
| “HHH” displays when the START/STOP button is pressed | *Internal temperature of bread maker is too high. | *Allow unit to cool down in between programs. Unplug unit, open lid, and remove the bread pan. Allow to cool 1530 minutes Before beginning new programs. |
| The viewing window is cloudy or covered with condensation | *May occur during mixing or
rising programs. |
*Condensation usually disappears during baking programs. Clean window well in between uses. |
| Kneading paddle comes out with the bread. | *Thicker crust with dark crust setting. | *It is not uncommon for the kneading paddle to come out
with the bread loaf. Once the loaf cools, remove the paddle with a spatula. |
RECIPES
Gluten-Free Bread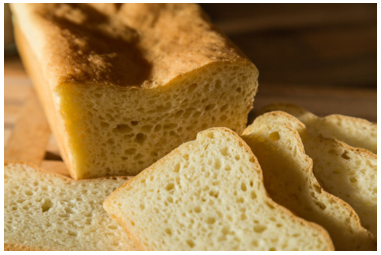
- 3 cups all-purpose gluten-free flour
- 1/4 cup unsalted butter (for dairy-free use margarine)
- 1/2 cup honey
- 1¾ tsp rapid or instant yeast
- 2 eggs, beaten
- 1 tsp salt
- 11/2 cups warm milk (for dairy-free use cashew, almond or coconut milk)
Directions:
- Add ingredients in the order shown in the diagram on page 5 into the bread pan; insert pan into bread maker.
- Select setting #7 (Gluten-Free) and push start. The kneading process will start.
- Afterward, there will be one rise for the dough. Then it bakes the bread.
- After baking is done, remove the bread pan and slide the bread onto a cooling rack. Let it cool for 20 minutes and then remove the kneading paddle.
French Directions: (Baguette)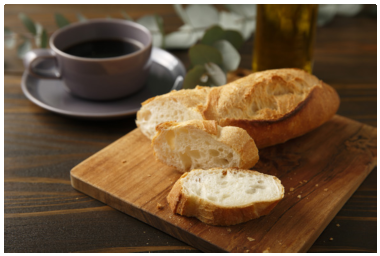
Ingredients:
- 1 1/3 cups warm water
- 11/2 tbsp. olive oil
- 11/2 tsp. salt
- 2 tbsp. sugar
- 4 cups all-purpose flour or bread flour
- 2 tsp. yeast
Directions:
- Put the warm water into the bread pan. Ensure the kneading paddle is in place. Add the olive oil, salt, and sugar. Add the flour, covering the liquid. Make a small indentation on top of the center of the flour, but not deep enough to reach the liquid. Add the yeast to this indentation. Adding the ingredients in this order is important because it keeps the yeast away from the liquid ingredients until it is time to knead them together (liquid ingredients will prematurely activate the yeast).
- Insert the bread pan into the bread maker and select setting #4 (French) and push start.
- When it’s done remove the bread pan and take out the baguette.
- Let it cool for 10 minutes and then slice with a sharp bread knife.
- Slather it with softened or whipped butter, dip it into soup, or use it to make bruschetta.
Chocolate Pound Cake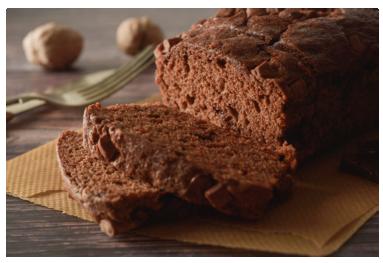
Ingredients:
- ¾ cup margarine, melted
- 11/2 cups sugar
- 2 large eggs
- 1 (1.4 oz) sugar-free, fat-free instant
- chocolate pudding
- 1/2 cup pecans, chopped
- 1 (7oz) chocolate bar, chopped
- 11/4 cups 2 percent fat-free milk
- 1/4 cup honey
- 1/3 cup unsweetened cocoa powder
- 2 cups all-purpose flour
- 11/2 tsp. baking powder
- 1 tsp. baking soda
- 1/4 tsp. salt
- 1 tsp. vanilla extract
Directions:
- Add ingredients into bread pan and insert into bread maker.
- Select setting #12 (Cake) and push start.
- When it’s done remove the bread pan, take out the cake and allow it to cool.
Jam
Prep Time: 15 mins, Cook Time: 1 hr 20 mins
Ingredients:
- 3 cups diced strawberries (or your fruit of choice)
- 3/4 cup granulated sugar
- 1 tbsp. lemon juice
- 2 tbsp. pectin (optional)
Directions:
- Cut strawberries in half and mash with a potato masher or fork.
- Add fruit, sugar, lemon juice, and pectin (if using) into the bread pan.
- Select setting #13 (Jam) and push start.
- Once the cycle has ended, pour the jam into a bowl and pulse once or twice with an immersion blender.
- Pour into jars and let cool before putting on lids and refrigerating.
- The jam will thicken in the fridge but if you prefer a thicker consistency, add the pectin.
OVENTE WARRANTY
 OVENTE WARRANTY
LIMITED ONE (1) YEAR WARRANTYAt Ovente, we aim to make your life easier by producing top-quality housewares, designed with you in mind. We have pledged to uphold all our offerings to the highest standards, and we back all our bread makers with a one-(1) year warranty from the date of purchase from an authorized retailer. This warranty covers defects in workmanship and materials. It does not include damage due to abuse, misuse, commercial use, accidents or natural wear and tear. In case of replacement, shipping and handling fees may apply.LIMITATIONSThe warranty stated above is the only warranty applicable to this product. Other expressed or implied warranties are hereby disclaimed. No verbal or written information given by the manufacturer, its agents, or employees shall create a guarantee or in any way increase the scope and duration of this warranty. Repair or replacement as provided under this warranty is the exclusive remedy of the consumer. The manufacturer shall not be liable for incidental or consequential damages resulting from the use of this product. Any implied warranty of merchantability or fitness for a particular purpose on this product is limited to the applicable warranty period set forth above except to the extent prohibited by law. Proof of purchase may be required to validate the order. Promotional items may not be covered under any warranty. Consumer rights may vary from state to state.
For product support email or call 1-855-926-2626. Visit us at ovente.com
![]() facebook.com/ovente
facebook.com/ovente ![]() @oventeTweets
@oventeTweets  @Ovente
 ![]() youtube.com/ovente
youtube.com/ovente
References
[xyz-ips snippet=”download-snippet”]