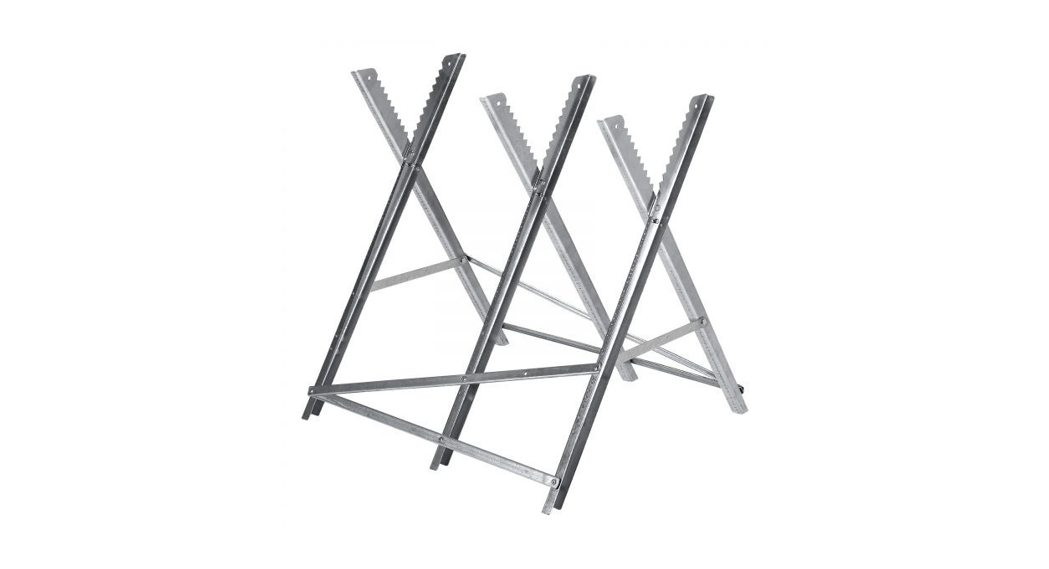
CHAINSAWCUTTING STANDØ250mmINSTRUCTION MANUAL
SPECIFICATIONS
| Working Heights:Length:Logs:Load Capacity:Weight: | 3 (600, 640, 680mm)800mm approx.Ø250mm approx.150kg7.3kg |
STANDARD EQUIPMENT
2 x Legs A, B, & C
2 x Cross Struts D & E
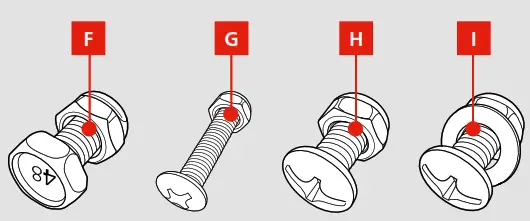
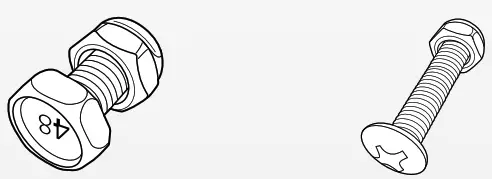 3 x F Bolt & Nut M8x142 x G Screw & Nut M6x288 x H Screw & Nut M6x122 x I Screw, Nut & Washer M6x12
PLHA-001
3 YEAR REPLACEMENT WARRANTY*
WARRANTY
IN ORDER TO MAKE A CLAIM UNDER THIS WARRANTY YOU MUST RETURN THE PRODUCT TO YOUR NEAREST BUNNINGS WAREHOUSE WITH YOUR BUNNINGS REGISTER RECEIPT. PRIOR TO RETURNING YOUR PRODUCT FOR WARRANTY PLEASE TELEPHONE OUR CUSTOMER SERVICE HELPLINE:
Australia: 1800 069 486New Zealand: 0508 069 486
TO ENSURE A SPEEDY RESPONSE PLEASE HAVE THE MODEL NUMBER AND DATE OF PURCHASE AVAILABLE. A CUSTOMER SERVICE REPRESENTATIVE WILL TAKE YOUR CALL AND ANSWER ANY QUESTIONS YOU MAY HAVE RELATED TO THE WARRANTY POLICY OR PROCEDURE.
The benefits provided under this warranty are in addition to other rights and remedies which are available to you at law.Our goods come with guarantees that cannot be excluded at law. You are entitled to a replacement or refund for a major failure and for compensation for any other reasonably foreseeable loss or damage. You are also entitled to have the goods repaired or replaced if the goods fail to be of acceptable quality and the failure does not amount to a major failure.Generally you will be responsible for all costs associated with a claim under this warranty, however, where you have suffered any additional direct loss as a result of a defective product you may be able to claim such expenses by contacting our customer service helpline above.
3 YEAR REPLACEMENT WARRANTY*
Your product is guaranteed for a period of 36 months from the original date of purchase. Ifa product is defective it will be replaced in accordance with the terms of this warranty. Warrantyexcludes consumable parts, for example, valve adapters and accessories.*This product is intended for DIY use only and the replacement warranty covers domestic use.
WARNINGThe following actions will result in the warranty being void.
- If the tool has been operated on a supply voltage other than that specified on the tool.
- If the tool shows signs of damage or defects caused by or resulting from abuse, accidents or alterations.
- Failure to perform maintenance as set out within the instruction manual.
- If the tool is disassembled or tampered with in any way.
- Professional, industrial or high-frequency use.
OZITO Australia/New Zealand (Head Office) 25 Fox Drive, Dandenong South, Victoria, Australia 3175.
KNOW YOUR PRODUCT
CHAINSAW CUTTING STAND
| A. Leg A x 2B. Leg B x 2C. Leg C x 2D. Cross Strut D x 2E. Cross Strut E x 2 | F. M8x14 Bolt & Nut x 3G. M6x28 Screw & Nut x 2H. M6x12 Screw & Nut x 8I. M6x12 Screw, Nut & Washer x 3J. Safety Catch |
ONLINE MANUALScan this QR Code with your mobile device to take you to the online manual.
 http://www.ozito.com.au/products/PLHA-001
SETUP & PREPARATION
- ASSEMBLY
 WARNING! WEAR SAFETY GLOVES – TAKE CARE THAT YOU DO NOT INJURE YOURSELF ON SHARP CORNERS OR EDGES.
 - Assembly of the StandThe legs are constructed by assembling each half of the structure and then joining them together.Tools for assembly (not included): Phillips screwdriver, M10, M13 & M14 spanners.1. Lay three legs on the ground, parallel to each other with teeth facing up.2. Place cross strut E over each leg, aligning the holes with the lower holes on each leg.Note: Leg C is positioned off centre to the left, this will allow correct alignment with the second half when joining them together.
- Lay cross strut D over E and all three legs.
- Once aligned, insert G screw from the outside and tighten nut on the inside (only hand tight at this initial stage).
- Using H screw and nut loosely fastening the remaining legs and cross struts together.
- Once all the legs and cross struts are joined together and the fasteners are assembled, use a spanner and screwdriver to tension the fasteners to complete this half of the structure
- Repeat the exact process, steps 1-6 for the other side, however, leg C is positioned off-center to the right, this will allow correct alignment with the first half when joining them together.The two halves can now be joined together to complete the stand.
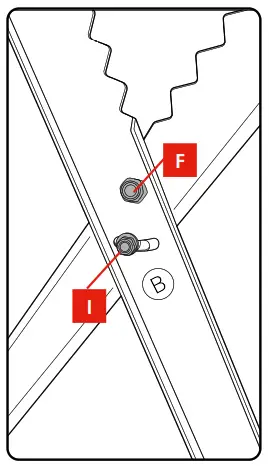
- Place each side of the structure back to back and join each half together using both F & I fasteners as shown. Only tighten to the point where the chainsaw cutting stand can still be adjusted/folded.
OPERATION
2. SETUP
WARNING! ONLY USE ON LEVEL, NON-SLIP GROUND WARNING! THE SAFETY CATCH HAS TO BE SECURELY LATCHED BEFORE USE.
Height SettingsThe chainsawing trestle can be used in 3 different height settings.The height is set with the safety catch which must always be latched at the same height on both ends.![]()
Supporting Timber
- The serrated edges provide a stable non-slip area to support when cutting timber.
- Ensure the wood you want to saw is securely placed between the serrated edges.
![]()
3. CHAINSAW CUTTING HINTS & TIPS
WARNING! WEAR SAFETY GLASSES AND HEARING PROTECTION. FURTHER PROTECTIVE EQUIPMENT FOR THE HEAD, HANDS, LEGS, AND FEET IS RECOMMENDED. ADEQUATE PROTECTIVE CLOTHING WILL REDUCE PERSONAL INJURY BY FLYING DEBRIS OR ACCIDENTAL CONTACT WITH THE SAW CHAIN.
- Do not force the saw into the cut. Apply only light pressure whilst running the chain.
- If the saw chain gets caught in the cut, do not try to remove it by twisting the guide bar or pulling forcibly. Use a lever or wedge to open up the cut so that the saw chain is freed.
- Keep your left arm with the elbow locked in a “straight arm” position to withstand any kickback force.
- While cutting, always:– Run the chainsaw motor at full speed. This makes the job safer, as there is less chance of pull-in or kick-back.– Position your body to the left of the chainsaw so if it kicks back uncontrollably, it goes over your right shoulder, never stand in the cutting line of the saw.– Keep a firm grip with your left hand on the front handle, with your thumb securely below the handle.
- Press the bucking spikes against the timber ensuring the chain is not making contact with the material being cut.
- Start cutting by holding the chainsaw by the front handle and raising the rear handle.
- If you cannot cut the timber in a single stroke, apply light pressure to the front handle and continue sawing, draw the chainsaw back a little then apply the bucking spikes a little lower and finish the cut by raising the rear handle.
- Withdraw the chainsaw from the cut while the chain is still running.
MAINTENANCE
WARNING! WEAR SAFETY GLOVES – TAKE CARE THAT YOU DO NOT INJURE YOURSELF ON SHARP CORNERS OR EDGES.CleaningWipe away any dirt or dust from the stand on a regular basis.StorageThe chainsaw cutting stand can be folded down for storage in minimum space. When folding or unfolding the chainsaw cuttingstand, be careful not to pinch your fingers or other body parts.Note: Ozito Industries will not be responsible for any damage or injuries caused by the repair of the product by an unauthorizedperson or by mishandling of the product.
DESCRIPTION OF SYMBOLS
| Ø | Diameter | mm | Millimeter |
| Kg | Kilogram | Warning | |
| Wear gloves | Read Instruction Manual |
CARING FOR THE ENVIRONMENT
![]() Power tools that are no longer usable should not be disposed of with household waste but in an environmentally friendly way. Please recycle where facilities exist. Check with your local council authority for recycling advice.
Power tools that are no longer usable should not be disposed of with household waste but in an environmentally friendly way. Please recycle where facilities exist. Check with your local council authority for recycling advice.
![]() Recycling packaging reduces the need for landfill and raw materials. Reuse of recycled material decreases pollution in the environment. Please recycle packaging where facilities exist. Check with your local council authority for recycling advice.
Recycling packaging reduces the need for landfill and raw materials. Reuse of recycled material decreases pollution in the environment. Please recycle packaging where facilities exist. Check with your local council authority for recycling advice.
SPARE PARTS
Spare parts can be ordered from the Special Orders Desk at your local Bunnings Warehouse.For further information, visit www.ozito.com.au or contact Ozito Customer Service:Australia 1800 069 486New Zealand 0508 069 486E-mail: [email protected]
GENERAL SAFETY WARNINGS
- Keep work areas clean. Cluttered work areas can cause accidents.
- Consider work area environment. Keep the work area well lit.
- Keep children away. Do not allow children, visitors, or animals to come near the work area.
- Do not overreach. Keep proper footing and balance at all times.
- Stay alert. Watch what you are doing. Use common sense. Do not operate a saw mounted to the stand when youare tired.
- Users. This appliance is not intended for use by a person (including children) with reduced physical, sensory or mental capabilities, or lack of experience and knowledge unless they have been given supervision or instruction concerning use of the appliance by a person responsible for their safety. Children should be supervised to ensure that they do not play with the appliance.
CHAINSAW CUTTING STAND SAFETY WARNINGS
WARNING! This appliance is not to be used by persons (including children) with reduced physical,sensory or mental capabilities, or lack of experience and knowledge, unless they have been given supervision or instruction.Young children should be supervised to ensure that they do not play with the appliance.
- Ensure to wear safety gloves and all other essential safety equipment when working on the chainsaw cutting stand!It is also imperative to follow the safety instructions issued with the chainsaw!
- Take care that you do not injure yourself on sharp corners or edges.
- Place the chainsaw cutting stand on a level, non-slip surface.
- Do not overload the chainsaw cutting stand (max. 150 kg, Ø 200 – 250mm).
- The wood you want to see must always rest securely on the chainsaw cutting stand.
- The wood you want to saw is allowed to project beyond the chainsaw cutting stand only to the point where tipping is impossible.
- Be aware of overbalancing. When a large piece is cut from one end of a job, the remaining piece may be heavy enough to over-balance the chainsaw cutting stand
- Each time before use, check that all screws are securely and correctly fastened.
- Keep work areas clean. Cluttered work areas can cause accidents.
- Consider work area environment. Keep the work area well lit.
- Do not overreach. Keep proper footing and balance at all times.
- The Chainsaw Cutting Stand must be used only for its prescribed purpose. Any use other than those mentioned inthese instructions will be considered a case of misuse. The manufacturer shall not be liable for any damage or injury resulting from such cases of misuse.
- The manufacturer shall not be liable for any changes made to the tool nor for any damage resulting from suchchanges.
- Do not force the saw into the cut. Apply only light pressure whilst running the chain.
- While cutting, always – Position your body to the left of the chainsaw so if it kicks back uncontrollably, it goes over your right shoulder, never stand in the cutting line of the saw.
References
[xyz-ips snippet=”download-snippet”]