panacom G64 Wireless Gamepad GM-8264 User Manual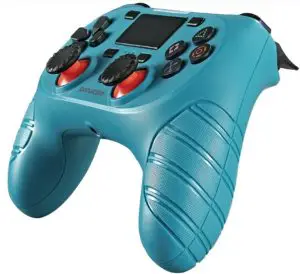
Wireless Controller for GM-8264
Preface
- Thank you for choosing our product. For bringing you with pleasant gaming experience, please read this user guide and all safety instructions carefully to ensure safe and proper use.
- The instructions in this user guide are based on the def-ault settings of the device. 3) All pictures, statements and text information in this guide are for references only, actual product prevails. Updates are subject to change without prior notice,these updates will be edited in a new version guide.
- Available functions and additional services may vary due to different devices, software or service providers.
- Official software update or source code change or other irresistible factors may cause some games can’t be operated with this product, our company won’t take any responsibility on it and we reserve the right of final interpretation.
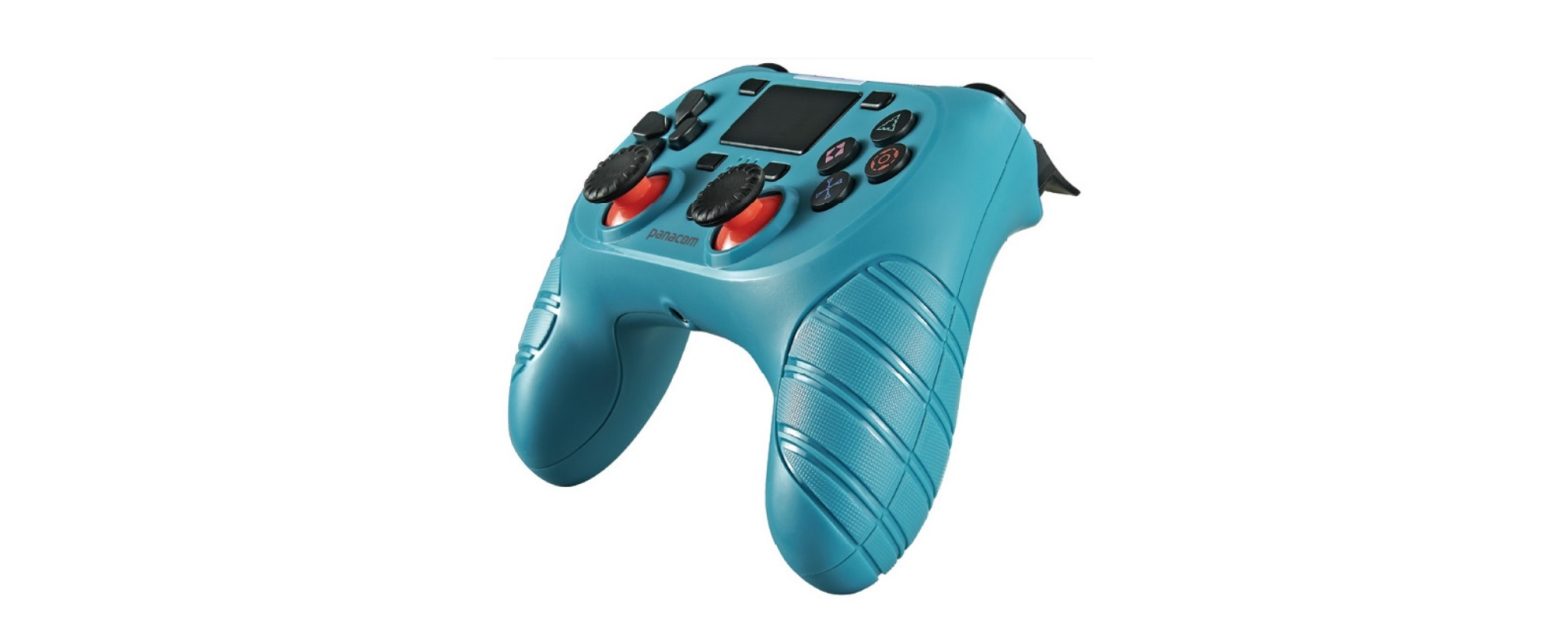
Product brief introduction
- This hand shank is mainly compatible with the console game console. 2) High performance wireless connection technology is adopted, it provides stable signal without delay or line drop within 8m. It’s with strong anti-interferenceperformance and won’t be affected easily by other wireless devices.
- Built-in with a rechargeable lithium battery, the joystick is with charging display and low power display functions.
- Built-in with colorful LEDs indicating joystick channels for players, differentLED color indicates different joystick.
- Built-in with two asymmetrical motors in left and right providing double-shock function.
- Built-in with 3D accelerating sensor and Gyro sensor providing with 6-axis sensing function.
- Configured with a 3.5mm jack for earphone and speaker input thus audio signal can be output in gaming. AXU expansion port is reserved.
- Touch panel and panel button functions are supported by this joystick.
- This joystick can be upgraded through updated software by connecting with PC.
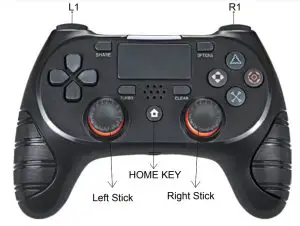
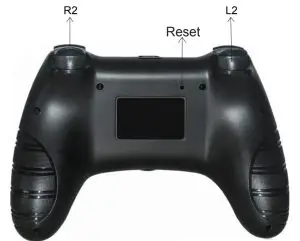
- HOME button: Short press to display main interface and switch applications; long press to end application, log off/power off console and display operable items.
 Four functional buttons control character’s actions in games. 3) D-Pad: Up, down, left and right, direction options.4) Left and Right sticks: Control character’s movement and entire screen direction. 5) “SHARE” share key and “OPTIONS” option key: when connecting tothe Console host, use the share and option buttons respectively. The “SHARE” key corresponds to the “SELECT” key and the “OPTIONS” key corresponds tothe “START” key.Note: Button function may vary from game to game due to different games, actual operation prevails.
Connecting and using instruction
- Connecting with console
- P4 host power into the interface, plug the data cable into the host USB port, the handle connected to the cable, and then press the handle end of the small house menu button, the handle LED lights flash, when a single color LED on the handle, indicating that the connection was successful. Then unplug the cable.The handle is auto-matically connected to the main engine.
- Handle color LED indication status description: show player status, press the small house key, LED light bar will light in blue, red, green, pink order, configureeach controller, as player login order identification.
- You can use up to four wireless handles at the same time. The number of devices that can be connected at the same time varies from device to device.
- When the console controller cannot connect to the host, it indicates that the maximum number of wireless devices that can be connected to the host has been exceeded. Unregister unwanted devices from the list of connected devices.In the console Host (Settings) > [Device] > [Wireless Device] option, select the device you want to unregister, press the OPTIONS button, andthen select [Delete Device]. You can follow the instructions on the screen.
Low power and charging indication
- Low power indication: When a joystick battery power is over 3.6V, the joystick LED indicator is solid bright; when the power is at 3.3-3.6V, the indicator would blink at 2.5Hz frequency; when the power is lower than 3.3V, the joystick would be in sleep state.
- Charging indication: When a joystick is connecting to a PS4 console via wireless connection, insert a USB charging cable between the joystick and console, the LED of the joystick would blink slowly at 0.5Hz frequency; when the joystick is connected to a power supply instead of a con-sole, the orange LED of the joystick would fade up and fade away during charging, the LED indicator goes off after fully charged.
Features & specifications
- Wireless BT connection.
- Support gaming console & Windows system.
- Double shock function.
- Rechareable Battery.
- 3.5mm headset jack/Micro USB.
- Full charge time: 4-6h
- Net weight: 0.245 kg
Packing lisA wireless controller, 1m charging cable and a user guide.
Precautions
- Please don’t store this product in damp or high temperature place;
- Do not knock, beat, pierce, or try to disintegrate this product so as not to damage it unnecessarily.
- Don’t discard it with garbage as this product is with a lithium battery built-in;
- Don’t use this product near fire or heat sources; 5) If unauthorized and non-professional personnel dissembled this product and caused damage, this product is not within the scope of after-sales warranty.
INTERNATIONAL WARRANTY
Terms and Conditions
- Panacom warrants the operation of this product to be free from any manufacturing and/or material defect for a period of 6 months from the date of purchase by the user.
- This warranty is limited to the repair and/or replacement of this product, according to our own criterion, free of charge within the stipulated term and it does not extend to consequential or incidental damages to other products that may be used with this unit.
- The warranty shall be voided in the following cases:a) repair or attempt to repair by third parties not authorized by the company.b) in case of performing any type of cut in connection cables, plugs, connectors, or other adapters different from the original ones provided by the company.
- To make this warranty effective, you shall contact the Authorized Service Center of your country and they shall carry out the pertinent procedure. In order to start the necessary procedure to get said warranty, you shall hand in the Original Purchase Invoice where the purchase date, dealer name and product identification shall be stated clearly.
- Transportation, freight, stay and/or insurance expenses, if any, are not covered by this warranty.
REPAIR SERVICETo ask for customer service please call 0810-888-7262.

References
[xyz-ips snippet=”download-snippet”]