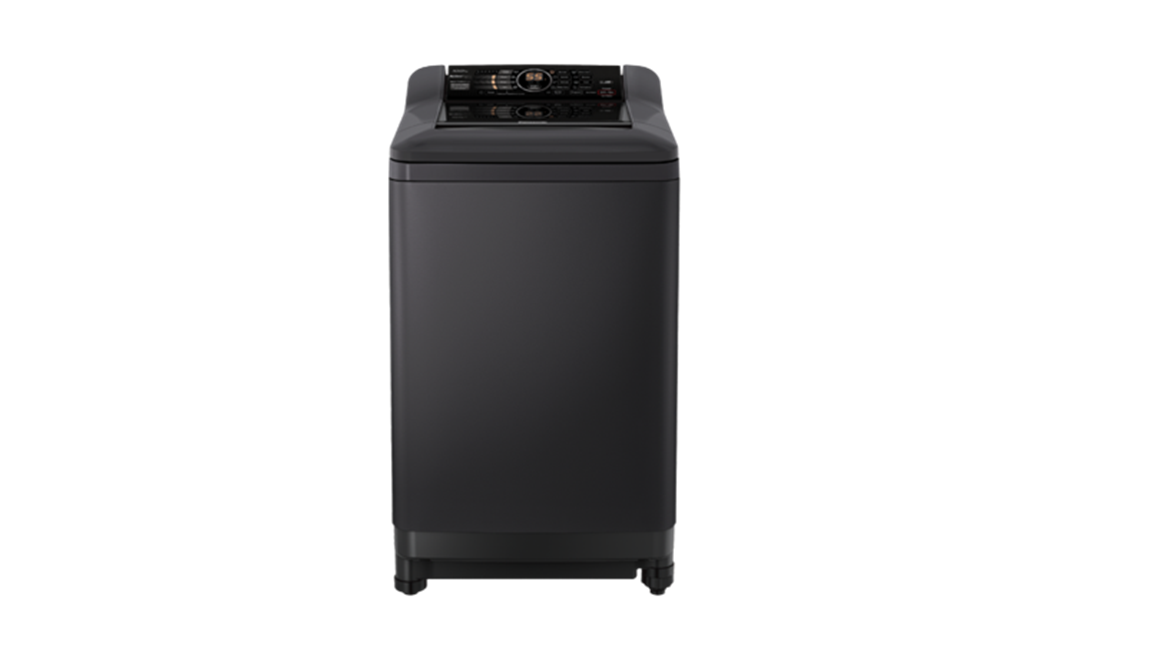
NA-F100A4 Fully Automatic Washing Machine
Operating & Installation InstructionsFully Automatic Washing Machine (Domestic use)Model No. NA-F100A4 NA-F90A4 NA-F80A4
Thank you for purchasing this product. – Read these instructions carefully for optimumperformance and safety before use. – Keep this manual for future reference.
Contents
Safety Precautions
2
Part Names
3
Operation Panel
4
Variety of Programs
5
Detergent
6
Washing
7
Washing Options
8
· Delicate · Blanket · Air Dry (90 min) · Wash / Rinse / Spin
Convenient Functions 10
Maintenance
10
Installation
12
Troubleshooting
14
Error Display
15
Specifications
16
AWW9901C3901 A0218-1080(M)Printed in Vietnam 08-2020
Safety Precautions
Read and follow these safety precautions.
WARNING
May cause serious injury or death.Never do the following about the power plug and cord.(To prevent fire or electric shock) Do not plug in or unplug the power cord with wethands. Do not hold or pull on the cord when removing theplug from the socket. Do not use a power cord or plug that is damaged.If the power cord is damaged, it must be replaced by the manufacturer, its service agent or similarly qualified persons to avoid a hazard.Observe the following about the power plug and cord.(To prevent fire or electric shock) Use a socket that satisfies the rating requirementsolely for this appliance. Do not use a plug adaptor or extension cord. Always fully insert the power plug into the socket. Wipe the power plug periodically with a dry cloth. (Accumulated dust collects moisture, which may cause insulation failure, resulting in fire.) Unplug the power cord before cleaning.Never disassemble, repair or modify the appliance yourself.In case of malfunction or failure (burnt odour smell, fume, etc.), immediately stop use, unplug the power cord, and ask your nearest service centre for repair.
Do not allow children to use on their own.This appliance is not intended for use by persons (including children) with reduced physical, sensory or mental capabilities, or lack of experience and knowledge, unless they have been given supervision or instruction concerning use of the appliance by a person responsible for their safety.Children should be supervised to ensure that they do not play with the appliance.Keep away from fire. Do not put flammable materials or clothes with such things attached in the tub. Keep them away from the appliance.(To prevent explosion or fire) For example: Kerosene, gasoline, benzine/thinner,alcohol, etc.Do not touch the tub until it completely stops.(To prevent injury) If the tub does not stop within 15 seconds whenthe lid is opened during spin process, switch off the appliance immediately and call a service person.Provide a ground.(To prevent electric shock if electricity leakage occurs) To establish a ground, ask a service person to dothe grounding work.Keep magnets and magnetized objects away from the operation panel.The tub may rotate even when the lid is open, resulting in injury.
2
Safety Precautions
CAUTION
Part Names
Detergent inlet Operation
(P. 6)
Panel (P. 4)
Lint filter
Lid
(P. 10)
May cause injury or
property damage.
Tub
Power cord and plug(P. 13)
Do not wash, rinse, or spin waterproof sheets or clothes.(To prevent injury, damage to the main unit, walls, floor or laundry, or water leakage if the appliance falls over or oscillates extremely while spinning) Raincoats, wet suits, etc.Observe the followingLocate away from direct sunlight or heat. (To prevent malfunction or deformation)New hose-sets supplied with the appliance are to be used and old hose-sets should not be reused.Be careful not to get your fingers caught when opening and closing the lid.Do not insert your hands or feet under the main unit. (To prevent injury by rotating parts.)Do not climb or put heavy objects on the appliance. (To prevent deformation and breakage resulting in injury)If the lid is broken, immediately stop using the appliance. (To prevent deformation and breakage resulting in injury)Do not connect to the hot water supply. Do not directly pour hot water of 50 ºC or higher intothe tub. Do not obstruct the openings of the bottom face withcarpet, etc.Turn off the water faucet after operation.(To prevent water leakage)This appliance is only suitable for textiles labelled washing machine washable.
Pulsator
Softener inlet(P. 6)
Adjustable leg(P. 13)
External drain water hose (P. 12)
Water supply valve(P. 13)Accessories
Water supplyhose (1)
Water tap adaptor (1)
External drain waterhose (1)
Bottom cover (1)
Screw (1)For the bottom cover
Part Names
3
Operation Panel
Change water levelDuring the wash process, press “Water Level” to change the water level. Some water amounts cannot be selecteddepending on the program. When the remaining time is displayed,press “Water Level” to check the water amount.
Water level/ Detergent volume
remaining time
guideline
After starting operation, indicates the water level according to the amount of laundry.
Water level (L) Detergent 1)
72 2)
55
47
38
27
14
1) : 1 scoop of detergent 2) NA-F100A4: 72 LNA-F90A4: 69 L NA-F80A4: 66 L
· Operation panel of NA-F100A4
After approx. 5 seconds, indicates the approximate remaining time (min).
Wash / Rinse / Spin(P. 9)
Start/Pause Child Lock lamp (P. 10)
Power Off/On Program selection (P. 5)
PresetSet the time to finish washing (in hours). ( lights.)e.g.) 8 hours laterSetting range: 2 – 24 hours later, in one-hour increments. (1 – 24 hours later for the “Speedy” program 3 – 24 hours later for the “Soak” program)Not available for the following programs: “Delicate”, “Blanket”, “Tub Hygiene”, “Air Dry”
NOTEIn case of a power failure during operation, operation will resume from the point where it was stopped when the power is recovered (Auto Restart).The power turns off automatically if you do not press “Start/Pause” within 10 minutes after power-on.
4
Variety of Programs
Purpose
Everyday clothes
Daily washingSpeedy washing for light soil
Delicates
Washing delicates gently
Clothes for babies &
Rinsing
people with sensitive skin thoroughly
Saving water
Heavily soiled clothes
Presoaking to wash
Blankets
Program
Maximum capacityNA-F100A4 NA-F90A4 NA-F80A4
Normal (P. 7)
10.0 kg 9.0 kg 8.0 kg
Speedy (P. 7)
10.0 kg 9.0 kg 8.0 kg
Delicate (P. 8)Baby-care(P. 7)Water Save(P. 7)Soak (P. 7)
4.2 kg 4.2 kg 4.2 kg 10.0 kg 9.0 kg 8.0 kg 10.0 kg 9.0 kg 8.0 kg 10.0 kg 9.0 kg 8.0 kg
Blanket (P. 8)
4.2 kg 4.2 kg 4.2 kg
Operation Panel
Variety of Programs
Preventing black mould and smell
Tub drying Tub cleaning
Drying synthetic fibre clothes
Air Dry (P.9)Tub Hygiene(P. 11)Air Dry (P. 9)
2.0 kg 2.0 kg 2.0 kg
NOTE “Normal” program and “Water Save” program are recommended for a normally soiled load at the rated capacity of this washing machine.
Wash separately for clothes losing colour easilyWash separately lint producers1) from lint collectors2) 1) Lint producers: towel, sweater, etc. 2) Lint collectors: polyester pants, fleece jacket, etc.
Laundry preparation and check
Pre-laundry checkTo prevent damage to clothes, malfunction and drainage failure Remove coins, pins, paper clips, nails,etc. Fasten buttons and close zippers. Do not wash items (such as paperdiapers) other than laundry. Reverse clothes likely to pill. Use a brush to remove pet andhuman hair, sand, etc. Tie strings, etc.
Use laundry nets for delicatesUnderwire brassiere, lacy clothes, lingerie and stockingsDo not overpack. Put the zipper’s slider into the cover.(To prevent damage to clothes andthe main unit) Do not use the “Air Dry” program.(To prevent uneven drying andwrinkles)
5
Detergent
Put in detergent, bleach and softener according to the water level displayed.Follow the instructions on each package.Softener inletSoftener
DetergentDo not put detergent directly into the tub.Detergent may remain undissolved.
Detergent inletDetergent/BleachTurn the tub by hand if it is difficult to put in the detergent inlet. (P. 10)Attach the detergent inlet cover if it comes off. If the detergent inlet cover is wet, wipe itbefore use. (Wet cover can cause detergent clumps.)
The level of foaming depends on conditions such as load size, degree of soiling, detergent type, and water hardness.
BleachDo not use whiten bleach (chlorine bleach) for coloured clothes to prevent loss of colour.After using chlorine bleach, wash the tub with the “Tub Hygiene” program without bleach. (P. 11)Do not use bleach for the “Delicate” program.
Softener
Softener is automatically released during the final rinse process.To add softener during operation, press “Pause” first.Close the cover securely after the softener is put in. When using concentrated softener, dilute it withwater before putting it in.
Concentrated softener
Water
NOTESoftener cannot be used with the “Water Save” program.Do not use separated or solidified softener.
6
WashingPreparation: Check if the washing machine is properly installed. (P. 12) Turn on the water faucet. · Operation panel of NA-F100A4
Detergent
Washing
Timer preset
3
1 After loading laundry Turn the power on.The “Normal” program is selected when the power is turned on.
2
Select a program. (P. 5)Press the button repeatedly until the desired program lights up.
Timer preset
3
Start.The pulsator moves without water and measures the amount of laundry (approx. 5 seconds).
Water level indication (approx. 5 seconds)
Remaining time indicationTo check the water amount Press “Water Level”.
4 According to the water amount indication Put in detergent. Approx. 20 seconds after the water amount is displayed, water supply begins.
2
1
5 Close the lid.
Operation ends with beeps.
Set how many hours later to finish operation. (P. 4)
2 minutes after start, all indications except
turn off.
To confirm after the timer has been set, press
.
To cancel or change, press
.
The hours that can be set differ depending on
the program.
After pressing “Start”You can change the water level until the end of the wash process.You can change each of the “Wash”, “Rinse” and “Spin” operation contents until the end ofthe wash process. Press “Pause” beforehand. You cannot change the program.
7
Washing Options· Operation panel of NA-F100A4
Select “Delicate” / “Blanket” / “Air Dry”
DelicateUse this program to gently wash delicate clothes and stylish garments.
Load laundry evenly. Load lighter items first and pressthem from above. Use laundry nets for delicateunderwear only. Amount that can be washed atone time:
Water level 55 L 47 L
Capacity 4.2 kg 3.0 kg
BlanketWashable blankets · Material: 100 % synthetic fibre or 100 % cotton · Weight: 4.2 kg or less · Blankets with a machine-washable tag attachedPut a blanket in the net and load it in the tub.
Roll
The zipper part
should face up.
(To prevent
damage to the net)
NOTEDo not use bleach. Use liquid delicate detergent. After operation ends, take out clothes immediately.(To prevent wrinkles and colour staining)
NOTEUse liquid detergent. The water amount indication shows the maximumand cannot be changed.
8
Air Dry (90 min)Water is removed from clothes by the air blown from the tub rotation.Clothes that can be dried · Material: Synthetic fibre · Weight: 2.0 kg or less1 After loading clothes and closing the lid Turn the power on.
2
Select program “Air Dry”.
3
Start.
After 90 minutes, drying ends with beeps.NOTEClothes may not be sufficiently dried depending on the amount and type of clothes, the temperature, and the installation condition of the washing machine.Since no heater is used for this function, you may feel that clothes are cold and half dry.
Wash / Rinse / SpinPreparation: Turn on the water faucet.1 After loading laundry Turn the power on.
2
According to your purposeChange process settings.Change the water level as necessary.
3 After closing the lid Start.
Operation ends with beeps.
ProgramNormal Speedy Delicate Baby Care Water Save Soak Blanket Tub Hygiene
Contents of Programs
Total time (approx.)60 min 35 min 45 min 65 min 90 min 120 min *2 60 min 140 min *2
Wash12 min 3 min 9 min 12 min 12 min (Soak 60 min) + 12 min 12 min (Soak 60 min) + 12 min
Rinse *12 times Refill 2 times2 times Refill 2 times3 times 2 times Refill 2 times Refill 2 times
Spin5 min 3 min 1 min 7 min 5 min 5 min 3 min 30 min
NOTETotal time is approximate. (When the standard water supply rate is 15 L / min)Total time may increase depending on low water pressure, bad draining conditions, and the amount and type of clothes.
*1 “Refill” mentioned in this item means to fill the tub with water and then rinse laundry while supplying water.*2 Remaining time of 90 minutes or less will be displayed.
Washing Options
9
Convenient Functions Maintenance
Cancelling end buzzer
1
Pressing down, press.
Then hold on for
3 seconds.
2 short beeps
To reset, do the same procedure.
4 short beeps
Setting Child LockTo prevent children from falling into the tub and drowning, if the lid is opened while the washing machine is operating, this function sounds a buzzer until it is closed. Not closing it within 10 seconds flushes the water out. This function does not lock the lid and buttonoperations. When water is drained forcibly, “U 99” is displayed.(P. 15)1 After closing the lid Turn the power on.
2
Press and hold for
5 seconds.
2 short beeps
Lint filterAfter each operationLint filter1 Remove the filter.2 Open the filter and remove lint.If lint is difficult to remove, soak and wash the filter in water.3 Attach the filter in its original position.
4 short To cancel, do the same procedure. beeps
Turning the tub by hand
If it is difficult to reach the detergent or softener inlet.
1
Turn the power on.
2 When a clicking sound is heard Turn the tub within 20 seconds. (Clockwise only)
NOTE If there is water in the tub, the tub cannot be turned.10
1
2
3
4
Click
NOTEDo not wash laundry without the filter. (To prevent damage to clothes)Turn the tub by hand if it is difficult to remove the filter. If the filter is broken, purchase a new one at nearestPanasonic Service Centre. Separate clothes following instruction (P. 5) beforeoperation so that lint can be collected by the filter.
Convenient Functions
Water supply filterIf water does not flow smoothly
NOTEDo not throw away or puncture the filter to avoid damaging feeding valve.Please clean the feeding valve frequently if there is impurities in water supply such as mold, iron, etc.Follow the procedure below to prevent splashing of water.1 After turning off the water faucet Turn thepower on.
2
Start.
3 After approx. 40 seconds Turn the power off.
4 Loosen the nut and remove the hose.
5 Remove the filter and remove dirt on the filter.Water supply filter6 Reattach the filter to its original position.
TubOnce a week <Air Dry>1 After operation ends Run the “Air Dry” program without loading laundry. (P. 9)
Once a month <Tub Hygiene>Preparation: Turn on the water faucet.1 Without loading laundry Turn the power on.
2
Select program “Tub Hygiene”.
3
Start.
When the tub is filled with waterPause.
4 Put bleach in the tub. Use whiten bleach (chlorine bleach).
5 After closing the lid Start.
Approx. 200 ml
After approx. 2 hours and a half, tub cleaning ends.Main unit, lidIf stained with detergent or softenerWipe with a soft cloth.(To prevent damage to resin parts or metal corrosion) For heavy soil, wipe with a neutral kitchen detergent. Do not splash water.
Maintenance
11
Installation
1. Check the location.Avoid the following locations forinstallation.· Locations with a possibility of freezing · Damp locations or locations where it may beexposed to rain, etc. (To prevent electric shock or fire) · Uneven or unstable locations (on blocks, timbers, a table with wheels, etc.)2. Attach the bottom cover.1 Insert the bottom cover along the guides.2 Fix with a screw.
Water tap adaptor
Water supply valve screw
Water supply hose
Screw
Bottom cover
External drain water hose
3. Attach the external drain water hose.
1 Connect.
Elbow Do not direct the elbow upward.
Insert all the way.
2 Slide the hose bandin the arrowdirection.Slide all the way until it stops.
Hose band
NOTE Do not put thehose tip under water.Do not raise the hose higher than 10 cm above the floor.Do not extend the overall length to more than 3 m.
10 cm or less3 m or less
12
Make sure to ask a service person for installation. Do not install by yourself. If the installation, test run and inspection of the washing machine are not carried out following this installationmethod, Panasonic will not be liable for any accident or damage caused.
4. Connect the water tap adaptor and water supply hose.
Water faucetWater tap adaptorWater supply hoseCAUTIONTighten the nut firmly. Do not twist, squash, modifyor cut the hose.
1 2
Connect the water tapadaptor to the water faucet.1 Turn part A to the left until approx.4 mm of the thread becomes visible.2 Loosen the 4 screws. 3 Connect to the faucet and tightenthe screws.4 Turn part A to the right and tightensecurely. (To prevent water leakage)Connect the watersupply hose to the watertap adaptor.Insert the hose into the adaptor while pushing down the lever, and hook the claw of the lever on the flange of the adaptor.
3
Connect the watersupply hose to the watersupply valve screw.1 Hold the elbow and tighten the nut. 2 Check that the elbow is not loose.
ScrewThread Claw Lever
Part A Flange
Nut ElbowWater supply valve screw Water supply hose
5. Connect the power plug and grounding wire.Ask a service person to do the grounding work. In case of a 2-pin power cord, establish a ground.6. Check that the washing machine is level. If the washing machine wobbles1 Turn the adjustable legknob to the left to loosen.
2 Turn the adjustable legto eliminate wobble.
3 Turn to the rightto tighten.
To raise To lower
7. Perform a trial operation.Check that there is no water leakage, abnormal sounds or error display.
Installation
13
Troubleshooting
Time
Main unit
Wash
Symptoms
Points to be checked
Time indication increases or does not change Operation time is longer than the time indication. Operation does not stop even after the preset time.No operationCannot change process settings (after start-up).No water supplyWater is supplied in the middle of wash process. The water level is too high for the amount of laundry.
Time indication is approximate. Remaining time is corrected during operation and displayed.The operation time may be longer if laundry is concentrated on one side or the water supply or drainage is not good.(P. 15 “U 11” “U 14”)Power failure? Is the lid closed completely? Has the power fuse blown or the breaker tripped? Is the power plug inserted completely? Is the water faucet turned on? Did you press “Start”? Is the timer preset?Process settings can be changed during wash process by pressing “Pause”. To change the program or settings after the end of wash process, turn the power off and on again.Is the water faucet turned on? Water outage? Is the water supply filter clogged with dirt? (P. 11)If the water level drops, water is added automatically. With a large amount of laundry, water is added several timesautomatically.If laundry is wet or there is water in the tub before operation, the water level may be higher.
The water level is too low With light clothes (of synthetic fibre, etc.), the water level may be for the amount of laundry. lower.
Operation started with rinse, but water is not supplied. Operation suddenly changes to rinse process in the middle of spin. Only spin is desired, but operation starts with rinse. Irregular rotation during spin Power failure/ The breaker has tripped.Water outageOperation stops in the middle of wash or rinse process.
If there is no water in the tub, water is supplied after spin. If there is water in the tub, water is supplied after water discharge.If clothes are concentrated on one side of the tub, the washing machine automatically corrects unevenness by starting rinse process. (Place clothes as evenly as possible.)The tub rotation speed is adjusted to reduce foaming during spin.Operation will resume from the point where it was stopped when the power is recovered (Auto Restart).When water supply is recovered, remove the water supply hose, release turbid water from the faucet, and then start the washing machine.Is the lamp flashing? The pulsator occasionally stops to soak clothes while the lamp keep flashing. This is not abnormal.
Rinse/Spin
Others
14
Error Display
The buzzer sounds and “U”/”H” and a number are alternately displayed. Cancel Child Lock (P. 10) if it is set.
Error display
Points to be checked
Water cannot drain.
Check the drain water hose for the following abnormalities:Is it crushed? Is it clogged with lint? Is the hose tip under water? Is it partially raised higher than 10 cm above the floor? (P. 12) Is the total length longer than 3 m (including the extension hose)? (P. 12) When the above problems are solved, you can resume operation by opening andclosing the lid.
The lid is open.
Did you try to run the washing machine with the lid open? Close the lid.
Spin or “Air Dry” is not possible.
Are clothes concentrated on one side of the tub? Distribute the clothes evenly and close the lid.Is the washing machine installed on an unstable or inclined surface?You can resume operation by opening and closing the lid.
Water cannot be supplied.
Is the water faucet turned on? Water outage? Is the water supply filter clogged with dirt? (P. 11) You can resume operation by opening and closing the lid.
Water has been forcibly drained.
Water has been forcibly drained because the lid was open for 10 seconds or more with Child Lock (P. 10) set. Unplug the power cord and plug it in again after 5 seconds.
Inspection is required.
Turn off the water faucet just to be safe. Then, report the error displayed (2-digit number after “H”) to a service person. Unplug the power cord.
Troubleshooting
Error Display
15
Specifications
Rated voltage Rated frequency Rated power consumption Standard water amount Maximum capacity (Dry cloth)Product dimensionsProduct weight Pressure of tap water
NA-F100A4470 W 72 L 10.0 kg 595 mm (W) x 651 mm (D) x 1035 mm (H)36 kg
NA-F90A4 220 – 240 V50 Hz 460 W 69 L9.0 kg
NA-F80A4430 W 66 L 8.0 kg
595 mm (W) x 651 mm (D) x 1015 mm (H)
0.01 – 1 MPa
35 kg
http://www.panasonic.com © Panasonic Appliances Vietnam Co., Ltd. 201816
Arahan Pengendalian & PemasanganMesin Basuh Automatik Sepenuhnya (Kegunaan domestik)
No. Model
NA-F100A4
NA-F90A4
NA-F80A4
Terima kasih kerana membeli produk ini. – Untuk mendapatkan prestasi dan keselamatan yang optimum,sila baca arahan ini dengan teliti sebelum menggunakan. – Simpan manual ini untuk rujukan pada masa akan datang.
Kandungan
Langkah Berjaga-jaga Keselamatan
2
Nama Bahagian
3
Panel Operasi
4
Pelbagai Program
5
Detergen
6
Membasuh
7
Pilihan Membasuh
8
· Delicate (Halus) · Blanket (Selimut) · Air Dry (90 min)(Kering Udara (90 min)) · Wash (Basuh) / Rinse(Bilas) / Spin (Perah)
Fungsi Menyenangkan 10
Penyenggaraan
10
Pemasangan
12
Penyelesaian Masalah 14
Paparan Ralat
15
6SHVL¿NDVL
16
AWW9901C3901 A0218-1080(M)Dicetak di Vietnam 08-2020
Langkah Berjaga-jaga Keselamatan
Sila baca dan ikut langkah berjaga-jaga keselamatan ini.
AMARAN
Boleh mengakibatkan kecederaan serius atau kematian.Jangan lakukan perkara berikut terhadap palam dan kord kuasa(Untuk mencegah kebakaran atau kejutan elektrik) Jangan pasang atau cabut palam menggunakantangan yang basah. Jangan pegang atau tarik kordnya apabila hendakmenanggalkan palam kuasa. Jangan gunakan kord atau palam kuasa yangrosak. Jika kord kuasa rosak, ia mesti diganti oleh pengilang, wakil servisnya, atau orang yang berkelayakan bagi mengelakkan bahaya.Patuhi perkara berikut berhubung palam dan kord kuasa(Untuk mencegah kebakaran atau kejutan elektrik) Gunakan soket khas yang memenuhi keperluankadaran untuk mesin basuh ini. Jangan gunakan penyesuai palam atau kord pemanjangan. Sentiasa cucukkan palam kuasa sehingga santak ke dalam soket. Lap palam kuasa secara berkala menggunakan kain yang kering. (Habuk yang terkumpul akan memerangkap lembapan, yang boleh menyebabkan kegagalan penebatan, lalu mengakibatkan kebakaran.) Cabut kord kuasa sebelum membersihkannya.Jangan ungkai, baiki atau ubah suai sendiri mesin basuh ini.Sekiranya mesin mengalami pincang tugas atau gagal berfungsi (bau terbakar, berasap, dll.) sila berhenti menggunakannya serta-merta, cabut talian kuasa dan hubungi pusat perkhidmatan terdekat anda untuk dibaiki.
Jangan benarkan kanak-kanak menggunakannya sendirian.Perlengkapan ini bukan untuk kegunaan individu WHUPDVXNNDQDNNDQDNDQJNXUDQJNHXSDDDQ¿ zikal, deria atau mental, atau kurang pengalaman atau pengetahuan, kecuali jika mereka telah diberikan penyeliaan atau arahan berkaitan penggunaan perlengkapan ini oleh individu yang bertanggungjawab keatas keselamatan mereka.Kanak-kanak harus diperhatikan untuk memastikan yang mereka tidak bermain dengan perlengkapan ini.Jauhkan daripada api. Jangan masukkan benda yang mudah terbakar atau pakaian yang mempunyai barangan sedemikian ke dalam tab. Jauhkan dari mesin basuh.(Untuk mencegah letupan atau kebakaran) Contohnya: Minyak tanah, petrol, benzina/pencair,alkohol, dll.Jangan sentuh tab sehingga ia betul-betul berhenti.(Untuk mencegah kecederaan) Jika tab tidak berhenti dalam masa 15 saat apabilapenutup dibuka semasa proses memerah, matikan mesin basuh dengan segera dan hubungi juruservis.Pastikan anda menyediakan tempat pembumian.(Untuk mencegah kejutan elektrik jika kebocoran arus elektrik berlaku) Untuk menyediakan tempat pembumian, hubungipekerja servis untuk melakukan kerja pembumian.Jauhkan magnet dan objek bermagnet dari panel operasi.Tab boleh berputar walaupun penutup terbuka, dan mengakibatkan kecederaan.
2
Nama Bahagian
AWAS
Inlet detergen (H. 6) Panel Operasi (H. 4)
Penapis rumbai(H. 10)
Penutup
Langkah Berjaga-jaga Keselamatan
Mengakibatkan
kecederaan atau
Tab
kerosakan harta
benda.
Kord dan palam kuasa(H. 13)
Nama Bahagian
Jangan basuh, bilas atau perah kain atau pakaian yang kalis air.(Untuk mencegah kecederaan, kerosakan kepada unit utama, dinding, lantai atau kain basuhan, atau kebocoran air jika mesin basuh tergolek atau berputar terlalu laju semasa berpusing) Baju hujan, sut basah, dll.Perhatikan perkara berikutJauhi mesin daripada cahaya matahari terik atau haba. (Untuk mencegah pincang tugas atau kecacatan bentuk)Anda hendaklah menggunakan set hos baru yang dibekalkan dengan mesin basuh ini dan jangan gunakan semula set hos yang lama.Berhati-hati agar jari anda tidak tersepit semasa membuka dan menutup penutup.Jangan masukkan tangan atau kaki anda ke bawah unit utama. (Untuk mencegah kecederaan jika tersentuh bahagian yang berputar)Jangan panjat atau letakkan benda berat di atas mesin basuh. (Untuk mencegah ia berubah bentuk dan pecah, lalu mengakibatkan kecederaan)Jika penutupnya rosak, berhenti menggunakan mesin basuh dengan serta-merta. (Untuk mencegah ia berubah bentuk dan pecah, lalu mengakibatkan kecederaan)Jangan sambungkan kepada bekalan air panas. Jangan curah air panas bersuhu 50 ºC atau lebihterus ke dalam tab. Jangan halang bukaan muka bawah dengan karpet, dll.Tutup paip air selepas operasi selesai.(Untuk mencegah kebocoran air)Mesin basuh ini hanya sesuai untuk tekstil yang dilabelkan sebagai boleh dibasuh dengan mesih basuh.
PulsatorKaki boleh laras(H. 13)
Inlet pelembut(H. 6)Hos air saliran luar(H. 12)
Injap pembekal air(H. 13)Kelengkapan
Hos
Penyesuai pili Hos air
pembekal air (1)
saliran luar
air (1)
(1)
Penutup bawah (1) Skru (1)Untuk penutup bawah
3
Panel Operasi
Tukar jumlah airSemasa proses membasuh, tekan “Water Level (Paras air)” untuk menukar jumlah air. Beberapa jumlah air tidak boleh dipilihbergantung kepada program. Apabila masa yang tinggal dipaparkan,tekan “Water Level (Paras air)” untuk memeriksa jumlah air.
Jumlah air / baki masa
Garis panduan isi padu detergen
Selepas memulakan operasi, ia menunjukkan jumlah air mengikut jumlah basuhan.
Jumlah air (L) Detergen 1)
72 2)
55
47
38
27
14
1) : 1 sudu detergen 2) NA-F100A4: 72 LNA-F90A4: 69 L NA-F80A4: 66 L
· Panel operasi NA-F100A4
Selepas kira-kira 5 saat, ia menunjukkan anggaran baki masa (min).
Basuh / Bilas / Perah(H. 9)
Mula/Jeda Lampu Kunci Kanak-kanak (H. 10)
PratetapanTetapkan masa untuk menyiapkan pencucian (dalam jam). ( lampu.)
Kuasa Hidup / Mati Pemilihan program (H. 5)
cth.) 8 jam kemudianJulat tetapan: 2 – 24 jam kemudian, dalam tokokan satu jam. (1 – 24 jam kemudian untuk program “Speedy (Cepat)”, 3 – 24 jam kemudian untuk program “Soak (Rendam)”)Tidak boleh dipilih untuk program-program berikut: “Delicate (Halus)”, “Blanket (Selimut)”, “Tub Hygiene (Kebersihan Tab)”, “Air Dry (Kering Udara)”
NOTASekiranya bekalan kuasa terputus semasa operasi, apabila kuasa pulih, operasi akan bersambung semula dari mana ia berhenti Auto Restart (Auto Hidup Semula).Kuasa akan mati secara automatik jika anda tidak menekan “Start (Mula) / Pause (Jeda)” dalam masa 10 minit selepas kuasa hidup.
4
Pelbagai Program
Panel Operasi
Tujuan
Program
Kapasiti maksimumNA-F100A4 NA-F90A4 NA-F80A4
Pakaian harian
Basuhan harianBasuhan cepat untuk kotoran ringan
Normal (Biasa)(H. 7)Speedy (Cepat)(H. 7)
10.0 kg 9.0 kg 8.0 kg 10.0 kg 9.0 kg 8.0 kg
Pakaian halus
Membasuh item halus dengan lembut
Delicate (Halus) 4.2 kg 4.2 kg 4.2 kg(H. 8)
Pakaian untuk bayi &
Membilas
mereka yang berkulit sensitif sebersih-bersihnya
Baby Care (Penjagaan bayi) (H. 7)
10.0 kg 9.0 kg 8.0 kg
Menjimatkan airPakaian sangat kotorSelimut
Prarendam untuk membasuh
Mencegah kulapuk dan bau busuk
Pengeringan tab Pencucian tab
Mengeringkan pakaian gentian sintetik
Water Save (Jimat Air) (H. 7)
10.0 kg 9.0 kg 8.0 kg
Soak (Rendam)(H. 7)
10.0 kg 9.0 kg 8.0 kg
Blanket (Selimut) 4.2 kg 4.2 kg 4.2 kg(H. 8)
Air Dry (Kering Udara) (H.9)
Tub Hygiene (Kebersihan Tab) (H. 11)
Air Dry (Kering Udara) (H. 9)
2.0 kg 2.0 kg 2.0 kg
NOTA Program “Normal (Biasa)” dan program “Water Save (Jimat Air)” disyorkan untuk beban dengan kotoran biasa pada kapasiti terkadar mesin basuh ini.
Persediaan dan pemeriksaan basuhan
Basuh berasingan untuk pakaian yang kehilangan warna dengan mudahBasuh pakaian berasaskan kain tiras1) berasingan dengan pengumpul kain tiras2) 1) Pakaian berasaskan kain tiras: tuala, baju panas, dll. 2) Pengumpul kain tiras: seluar poliester, jaket bulu biri-biri, dll.
Pemeriksaan sebelummembasuhUntuk mencegah kerosakan kepada pakaian, pincang tugas dan kegagalan penyaliran Keluarkan duit syiling, klip kertas,paku, dll. Pasangkan butang dan tutupkan zip. Jangan basuh benda-benda (lampinkertas) selain daripada kain basuhan. Terbalikkan pakaian yang mudahberbulu. Buang bulu haiwan dan orang, ataupasir, dll. dengan menggunakan berus. Ikatkan tali, dll.
Menggunakan jaring dobiuntuk kain halus/lembutColi berdawai, pakaian berenda, pakaian dalam dan sarung kakiJangan masukkan berlebihan. Selitkan pemegang zip ke dalampenutupnya. (Untuk mencegah kerosakan kepada pakaian dan unit utama) Jangan gunakan program “Air Dry (Kering Udara)”. (Untuk mencegah pengeringan tidak sekata dan kedutan)
Pelbagai Program
5
DetergenMasukkan detergen, peluntur dan pelembut mengikut jumlah air yang dipaparkan.Ikut arahan di setiap bungkusan.Inlet pelembutPelembut Kain
DetergenJangan masukkan detergen terus ke dalam tab.Detergen mungkin tidak akan melarut.
Inlet detergenDetergen / PelunturPusingkan tab dengan tangan jika ia sukar untuk memasukkan detergen ke dalam inlet. (H. 10)Pasang penutup detergen/peluntur inlet jika ia terbuka.Jika penutup inlet detergen/peluntur basah, lap sebelum digunakan. (Penutup yang basah boleh menyebabkan detergen bergumpal.)
Tahap berbuih bergantung kepada keadaan seperti saiz beban, takat kekotoran, jenis detergen, dankekerasan air.
PelunturJangan gunakan bahan peluntur memutihkan (peluntur klorin) untuk pakaian yang berwarna bagi mengelakkan kehilangan warna.Selepas menggunakan peluntur klorin, cuci tab dengan program “Tub Hygiene (Kebersihan Tab)” tanpa peluntur. (H. 11)Jangan gunakan peluntur untuk program “Delicate (Halus)”.
Pelembut
Pelembut akan dituang secara automatik semasa proses membilas terakhir.Untuk menambah pelembut semasa operasi, tekan “Pause (Jeda)” dahulu.Tutup penutupnya dengan ketat selepas memasukkan pelembut.Apabila menggunakan pelembut pekat, cairkannya dengan air sebelum memasukkannya.
Pelembut
pekat
Air
NOTABahan pelembut tidak boleh digunakan dengan program “Water Save (Jimat Air)”.Jangan gunakan pelembut terasing atau pepejal.
6
MembasuhPersediaan: Periksa untuk menentukan mesin basuh sudah dipasang dengan betul. (H. 12) Buka pili air. · Panel operasi NA-F100A4
Detergen
Membasuh
Pratetapan pemasa
3
1 Selepas memuatkan kain basuhan Hidupkan kuasa.Program “Normal (Biasa)” dipilih apabila kuasa dihidupkan.
2
Pilih program. (H. 5)Tekan butang berulang kali sehingga lampu program yang diingini menyala.
Pratetapan pemasa
3
Mulakan.Pulsator bergerak tanpa air dan mengukur jumlah basuhan (kira-kira 5 saat).
Penunjuk jumlah air (kira-kira 5 saat)
Penunjuk baki masaUntuk memeriksa jumlah air 7HNDQ³:DWHU/HYHO (Paras air)”.
4 Mengikut penunjuk jumlah air Masukkan detergen. Lebih kurang 20 saat selepas jumlah air dipaparkan, air mula dibekalkan.
2
1
5 Tutup penutup.
Operasi tamat dengan bunyi `bip’.
Tetapkan berapa jam kemudian operasi perlu tamat. (H. 4)
2 minit selepas dimulakan, semua penunjuk
kecuali dimatikan.
Untuk mengesahkan selepas pemasa
ditetapkan, tekan
.
Untuk membatalkan atau menukar, tekan Jam yang boleh ditetapkan adalah berbeza-
beza, bergantung pada programnya.
Selepas menekan “Start (Mula)”Anda boleh menukar paras air sehingga tamatnya proses membasuh.Anda boleh menukar kandungan setiap operasi “Wash (Basuh)”, “Rinse (Bilas)” dan “Spin (Perah)” sehingga tamatnya proses membasuh. Tekan “Pause (Jeda)” dahulu.Anda tidak boleh menukar programnya.
7
Pilihan Membasuh· Panel operasi NA-F100A4
Pilih “Delicate (Halus)” / “Blanket (Selimut)” / “Air Dry (Kering Udara)”
Delicate (Halus)Gunakan program ini untuk membasuh pakaian halus dan bergaya dengan lembut.
Muatkan basuhan dengan sekata. Muatkan item yang ringan terlebihdahulu dan tekannya dari atas. Hanya gunakan jaring untukpakaian dalam yang halus. Jumlah cucian yang boleh dibasuhpada satu-satu masa:
Paras Air 55 L 47 L
Kapasiti 4.2 kg 3.0 kg
NOTAJangan gunakan peluntur. Gunakan detergen cecair yang lembut. Selepas pembasuhan selesai, keluarkan pakaiandengan segera. (Untuk mencegah kedutan dan turun warna)
Blanket (Selimut)Selimut boleh basuh· Bahan: Gentian sintetik 100 % atau / Kapas 100 % · Berat: 4.2 kg atau kurang · Selimut yang mempunyai tag boleh dibasuhdengan mesin
Masukkan selimut ke dalam jaring dan muatkannya ke dalam tab.
Gulung
Bahagian berzip harus menghadap ke atas. (Untuk mencegah kerosakan kepada jaring)
NOTAGunakan detergen cecair. Penunjuk jumlah air menunjukkan jumlah maksimumdan tidak boleh ditukar.
8
Air Dry (90 min) (Kering Udara (90 min))Air disingkirkan daripada pakaian dengan tiupan udara daripada putaran tab.Pakaian yang boleh dikeringkan· Bahan: Gentian sintetik · Berat: 2.0 kg atau kurang1 Selepas memuatkan pakaian ke dalam tab dan menutup penutupHidupkan kuasa.
2
Pilih “Air Dry (Kering Udara)”.
3
Mulakan.
Selepas 90 minit, pengeringan tamat dengan bunyi `bip’.NOTABasuhan mungkin tidak cukup kering bergantung pada jumlah dan jenis pakaian, suhu dan keadaan pemasangan mesin basuh.Memandangkan tiada alat pemanas digunakan untuk fungsi ini, anda mungkin berasa bahawa cucian sejuk dan tidak cukup kering.
Wash (Basuh) / Rinse (Bilas) / Spin (Perah)Persediaan: Buka pili air.1 Selepas memuatkan kain basuhan Hidupkan kuasa.
2
Mengikut tujuan andaTukar tetapan proses.Tukar paras air mengikut keperluan.
3 Selepas menutup penutup Mulakan.
Operasi tamat dengan bunyi `bip’.
Kandungan Program
Pilihan Membasuh
Program
Jumlah masa (anggaran)
Wash (Basuh)
Rinse (Bilas) *1 Spin (Perah)
Normal (Biasa) Speedy (Cepat) Delicate (Halus) Baby Care (Penjagaan bayi) Water Save (Jimat Air) Soak (Rendam) Blanket (Selimut) Tub Hygiene (Kebersihan Tab)
60 min 35 min 45 min 65 min 90 min 120 min *2 60 min 140 min *2
12 min 3 min 9 min 12 min 12 min (Rendam 60 min) + 12 min 12 min (Rendam 60 min) + 12 min
Dua kali Isi semula 2 kaliDua kali Isi semula 2 kaliTiga kali Dua kali Isi semula 2 kali Isi semula 2 kali
5 min 3 min 1 min 7 min 5 min 5 min 3 min 30 min
NOTAJumlah masa adalah anggaran. (Apabila kadar bekalan air standard adalah 15 L / min)Jumlah masa mungkin meningkat bergantung kepada tekanan rendah air, keadaan penyaliran buruk, dan jumlah dan jenis pakaian.
*1 “Isi semula” disebut dalam item ini bermakna untuk mengisi air ke dalam tab dan kemudian membilas muatan sambil membekalkan air.*2 Baki masa 90 minit atau kurang akan dipaparkan.
9
Fungsi Menyenangkan Penyenggaraan
Membatalkan pembaz akhir
1
Menekan ke bawah, tekan.
Kemudian tahan selama 3 saat. 2 bippendek
Untuk menetapkan semula, lakukan prosedur yang sama.
4 bip pendek
Menetapkan Child Lock (Kunci Kanak-kanak)Untuk mencegah kanak-kanak daripada terjatuh ke dalam tab dan lemas, jika penutup terbuka semasa mesin basuh beroperasi, fungsi ini akan membunyikan pembaz sehingga penutup ditutup. Jika penutup tidak ditutup dalam masa 10 saat, air akan disalirkan keluar. Fungsi ini tidak mengunci penutup dan operasi butang. Jika air disalirkan secara paksa, “U 99” akandipaparkan. (H. 15)1 Selepas menutup penutup Hidupkan kuasa.
2
Tekan dan tahan selama
5 saat.
2 bip pendek
Penapis rumbaiSelepas setiap operasiPenapis rumbai1 Tanggalkan penapis.2 Buka penapis dan keluarkan rumbai.Jika rumbai sukar dikeluarkan, rendam penapis di dalam air dan cuci.3 Pasangkan semula penapis ke kedudukan asalnya.
Untuk membatalkan,
4 bip
lakukan prosedur yang sama. pendek
1
2
Memusing tab dengan tangan
Jika ia sukar untuk mencapai inlet detergen atau pelembut.
3
1
Hidupkan kuasa.
4
Klik
2 Apabila bunyi klik kedengaran Pusingkan tab
NOTA
dengan dalam masa 20 saat.
Jangan membasuh tanpa penapis. (Untuk mencegah kerosakan kepada pakaian)Pusing tab dengan tangan jika sukar untuk
(Mengikut arah jam sahaja)
menanggalkan penapis.
Jika penapis rosak, beli yang baharu di Pusat Servis
NOTA
Panasonic yang berdekatan.
Jika terdapat air di dalam tab, tab tidak dapat dipusing. Asingkan pakaian mengikut arahan (H.5) sebelum operasi
10
supaya kain tiras dapat dikumpulkan oleh penapis.
Penapis bekalan airJika air tidak mengalir dengan lancarNOTA Jangan buang atau bocorkan penapisbagi mengelakkan kerosakan injap suapan. Sila bersihkan injap suapan dengan kerap jika terdapat kekotoran dalam bekalan air seperti kulat, karat, dll. Ikuti prosedur di bawah bagi mencegah air memercik.1 Selepas menutup pili air Hidupkan kuasa.
2
Mulakan.
3 Selepas kira-kira 40 saat Matikan kuasa.
4 Longgarkan nat dan tanggalkan hos.
5 Tanggalkan penapis dan keluarkan kotoran pada penapis.Penapis bekalan air6 Pasangkan semula penapis ke kedudukan asalnya.
Tab
Sekali seminggu <Air Dry (Kering Udara)>1 Selepas pembasuhan selesai Jalankan program “Air Dry (Kering Udara)” tanpa memuatkan basuhan. (H. 9)
Sekali sebulan <Tub Hygiene (Kebersihan Tab)>Persediaan: Buka pili air.1 Tanpa memuatkan kain basuhan Hidupkan kuasa.
2
Pilih program “Tub Hygiene (Kebersihan Tab)”.
3
Mulakan.
Apabila tab berisi airJeda.
4 Masukkan peluntur ke dalam tab.
Gunakan bahan peluntur
memutihkan (bahan peluntur
klorin).
Anggaran 200 ml
5 Selepas menutup penutup Mulakan.
Selepas lebih kurang 2 jam, pencucian tab tamat.Unit utama, penutupJika ada kotoran sisa detergen atau pelembutLap dengan kain lembut.(Untuk mencegah kerosakan kepada bahagian resin atau kakisan logam) Untuk kotoran degil, lap dengan pencuci neutraluntuk dapur. Jangan percikkan air.11
Penyenggaraan
Fungsi Menyenangkan
Pemasangan
1. Periksa lokasi.Elakkan lokasi berikut untukpemasangan.· Lokasi di mana terdapat kemungkinan pembekuan· Lokasi yang basah atau lokasi yang mungkin terdedah kepada hujan, dll. (Untuk mencegah kejutan elektrik atau kebakaran)· Lokasi yang tidak rata atau stabil (di atas blok, kayu, meja beroda, dll.)2. Pasangkan penutup bawah.1 Sisipkan penutup bawah di sepanjang garisannya.2 Pasangkan dengan skru.Skru
Skru injap bekalan air Penyesuai pili airHos pembekal air
Penutup Bawah
Hos air saliran luar
3. Pasangkan hos air saliran luar.
1 Sambungkan.
NOTAJangan letakkan hujung hos di bawah air.
Siku Jangan halakan sesikunya ke atas.
Masukkan sehingga santak.
2 Masukkan pengikat hos mengikut arah anak panah. Masukkan sehingga santak.
Pengikat hos
Jangan naikkan hos melebihi 10 cm di atas lantai.Jangan tambah panjang keseluruhan kepada lebih daripada 3 m.
12
10 cm atau kurang3 m atau kurang
Pastikan anda meminta juruservis melakukan pemasangan. Jangan pasang sendiri. Sekiranya pemasangan, ujian jalanan dan pemeriksaan mesin basuh tidak dijalankan mengikut kaedahpemasangan ini, Panasonic tidak akan bertanggungjawab atas sebarang kemalangan atau kerosakan yang disebabkan olehnya.4. Sambungkan penyesuai pili air dengan hos bekalan air.
Pili airPenyesuai pili airHos pembekal airAWASKetatkan nat dengan rapi. Jangan pintal, penyek, ubahsuai atau potong hos.
1 Sambungkan penyesuai pili air ke pili air.
1 Pusing bahagian A ke kirisehingga kira-kira 4 mm bebenang Skru
skru kelihatan.
2 Longgarkan 4 skru.
3 Sambungkan pili air dan ketatkan
skrunya.
Bebenang
4 Pusingkan bahagian A ke kanan
dan ketatkan dengan kukuh.
Pencengkam
(Untuk mencegah kebocoran air) Tuil
2 Sambungkan hos bekalan air ke penyesuai pili air.
Bahagian A Bebibir
Dengan menekan tuil ke bawah,
masukkan hos ke dalam penyesuai
dan cangkukkan pencengkam tuil
Nat
pada bebibir penyesuai.
3 Sambungkan hos bekalan air ke skru injap
Siku
bekalan air.
1 Pegang sikunya dan ketatkannatnya.2 Periksa bahawa sikunya tidaklonggar.
Skru injap bekalan airHos pembekal air
5. Sambungkan palam kuasa dan wayar pembumian.Minta juruservis untuk melakukan kerja pembumian. Sekiranya ia mempunyai kord kuasa 2 pin, sila bumikan.6. Periksa bahawa mesin basuh berdiri tanpa bergoyang-goyang. Jika mesin basuh bergoyang-goyang1 Pusing tombol kaki boleh laraske kiri untuk melonggarkannya.
Pemasangan
2 Pusingkan tombolkaki boleh laras untuk menghentikan mesin basuh daripada bergoyang-goyang.Untuk menaikkan
3 Pusing ke kanan untukmengetatkannya.Untuk merendahkan
7. Jalankan operasi percubaan.
Periksa jika ada kebocoran air, bunyi yang luar biasa atau mesej ralat.13
Penyelesaian Masalah
Masa
Unit utama
Basuh
Gejala
Perkara perlu diperiksa
Penunjuk masa meningkat atau tidak menurun Masa operasi lebih lama daripada penunjuk masa. Operasi tidak berhenti walaupun masa pratetapan sudah berlalu.Tiada operasiTidak dapat menukar tetapan proses (selepas memulakan).Tiada bekalan airAir dibekalkan semasa proses membasuh. Paras air terlalu tinggi untuk jumlah cucian. Paras air terlalu rendah untuk jumlah cucian.
Petunjuk masa adalah anggaran sahaja. Baki masa diperbetulkan semasa operasi dan dipaparkan.Masa operasi menjadi lebih lama jika basuhan berlonggok ke satu sisi atau bekalan air atau saliran tidak baik keadaannya.(H. 10 “U 11” “U 14″)Kegagalan kuasa? Adakah penutupnya tertutup sempurna? $GDNDK¿XVNXDVDWHUEDNDUDWDXSHPXWXVOLWDUGLDNWLINDQ” Adakah palam kuasa dicucukkan dengan sempurna? Adakah pili air dibuka? Sudahkah anda menekan “Start (Mula)”? Adakah pemasa pratetapan?Tetapan proses boleh diubah semasa proses membasuh dengan menekan “Pause (Jeda)”. Untuk menukar program atau tetapan selepas penghujung proses membasuh, matikan dan hidupkan semula kuasa.Adakah pili air dibuka? Adakah bekalan air terputus? Adakah penapis bekalan air tersumbat oleh kotoran? (H. 11) Apabila paras air menurun, mesin mengisi air secara automatik. Dengan jumlah cucian yang banyak, air dibekalkan beberapa kalisecara automatik.Jika cucian basah atau jika terdapat air di dalam tab sebelum operasi, paras air mungkin lebih tinggi.Dengan pakaian ringan (gentian sintetik, dll.), paras air mungkin lebih rendah.
Operasi bermula dengan proses bilas, namun, air tidak dibekalkan.Operasi tiba-tiba bertukar kepada proses bilas semasa proses perah. Hanya perah diingini, namun, operasi bermula dengan bilas.Putaran tidak tetap semasa perahBekalan kuasa terputus / Pemutus litar aktif.Bekalan air terputus
Sekiranya tiada air di dalam tab, ar dibekalkan selepas perah. Sekiranya terdapat air di dalam tab, air dibekalkan selepas air sediaada dibuang.Jika pakaian berkumpul di satu sisi tab, mesin basuh akan membetulkan ketaksamarataan itu secara automatik dengan memulakan proses bilas. (Letakkan pakaian dengan sekata yang boleh.)Kelajuan putaran tab dilaraskan bagi mengurangkan buih semasa perah.Apabila kuasa pulih semula, operasi akan bersambung semula dari mana ia berhenti “Auto Restart (Auto Hidup Semula)”.Selepas bekalan air pulih, tanggalkan hos bekalan air, singkirkan air keruh dari pili air, dan kemudian mulakan mesin basuh.
Operasi berhenti pada
Adakah lampu berkelip?
pertengahan proses
3HQGHQXWNDGDQJNDODEHUKHQWLXQWXNPHUHQGDPSDNDLDQVDPELO
membasuh atau membilas.
lampu terus berkelip. Ini bukanlah luar biasa.
Bilas / Perah
Lain-lain
14
Paparan Ralat
Pembaz berbunyi dan “U” / “H” dan nombor dipaparkan bersilih ganti. Batalkan Kunci Kanak-Kanak (H. 10) jika ia telah ditetapkan.
Paparan ralat
Perkara perlu diperiksa
Air tidak boleh disalirkan keluar.
Periksa hos air saliran untuk menentukan keabnormalan berikut:Adakah ia dihimpit? Adakah ia tersumbat oleh rumbai? Adakah hujung hos di bawah air? Adakah sebahagiannya dinaikkan melebihi 10 cm di atas lantai? (H. 12) Adakah panjang keseluruhannya melebihi 3 m (termasuk hos pemanjangan)?(H. 12)Apabila masalah di atas sudah diselesaikan, anda boleh menyambung semulaoperasi dengan membuka dan menutup penutup.
Penutup terbuka.
Adakah anda menjalankan mesin basuh dengan penutupnya terbuka? 7XWXSSHQXWXSQD
Perah atau “Air Dry (Kering Udara)”tidak boleh dipilih.
· Adakah pakaian berkumpul di satu sisi tab?$JLKNDQSDNDLDQGHQJDQVHNDWDGDQWXWXS penutupnya.Adakah mesin basuh dipasang di atas permukaan yang tidak stabil atau senget?$QGDEROHKPHQDPEXQJVHPXODRSHUDVL dengan membuka dan menutup penutupnya.
Air tidak boleh dibekalkan.
Adakah pili air dibuka? Adakah bekalan air terputus? Adakah penapis bekalan air tersumbat oleh kotoran? (H. 11) $QGDEROHKPHQDPEXQJVHPXODRSHUDVLGHQJDQPHPEXNDGDQPHQXWXSSHQXWXSQD
Air disalirkan keluar secara paksa.
Air disalirkan keluar secara paksa memandangkan penutup telah terbuka selama 10 saat atau lebih dengan fungsi Kunci Kanak-kanak (H. 10) ditetapkan. &DEXWSDODPNXDVDGDQFXFXNNDQQDVHPXODVHOHSDVVDDW
Pemeriksaan diperlukan.
Matikan paip air untuk tujuan keselamatan. Kemudian, laporkan mesej ralat yang dipaparkan (nombor 2 digit selepas “H”) kepada juruservis. Cabut kord kuasa.
Penyelesaian Masalah
Paparan Ralat
15
6SHVL¿NDVL
Voltan terkadar Frekuensi terkadar Penggunaan kuasa terkadar Jumlah air standard Kapasiti maksimum (Pakaian kering)Ukuran produkBerat produk Tekanan air paip
NA-F100A4470 W 72 L 10.0 kg 595 mm (W) x 651 mm (D) x 1035 mm (H)36 kg
NA-F90A4 220 – 240 V50 Hz 460 W 69 L9.0 kg
NA-F80A4430 W 66 L 8.0 kg
595 mm (W) x 651 mm (D) x 1015 mm (H)
0.01 – 1 MPa
35 kg
 report this ad
http://www.panasonic.com © Panasonic Appliances Vietnam Co., Ltd. 201816
References
[xyz-ips snippet=”download-snippet”]