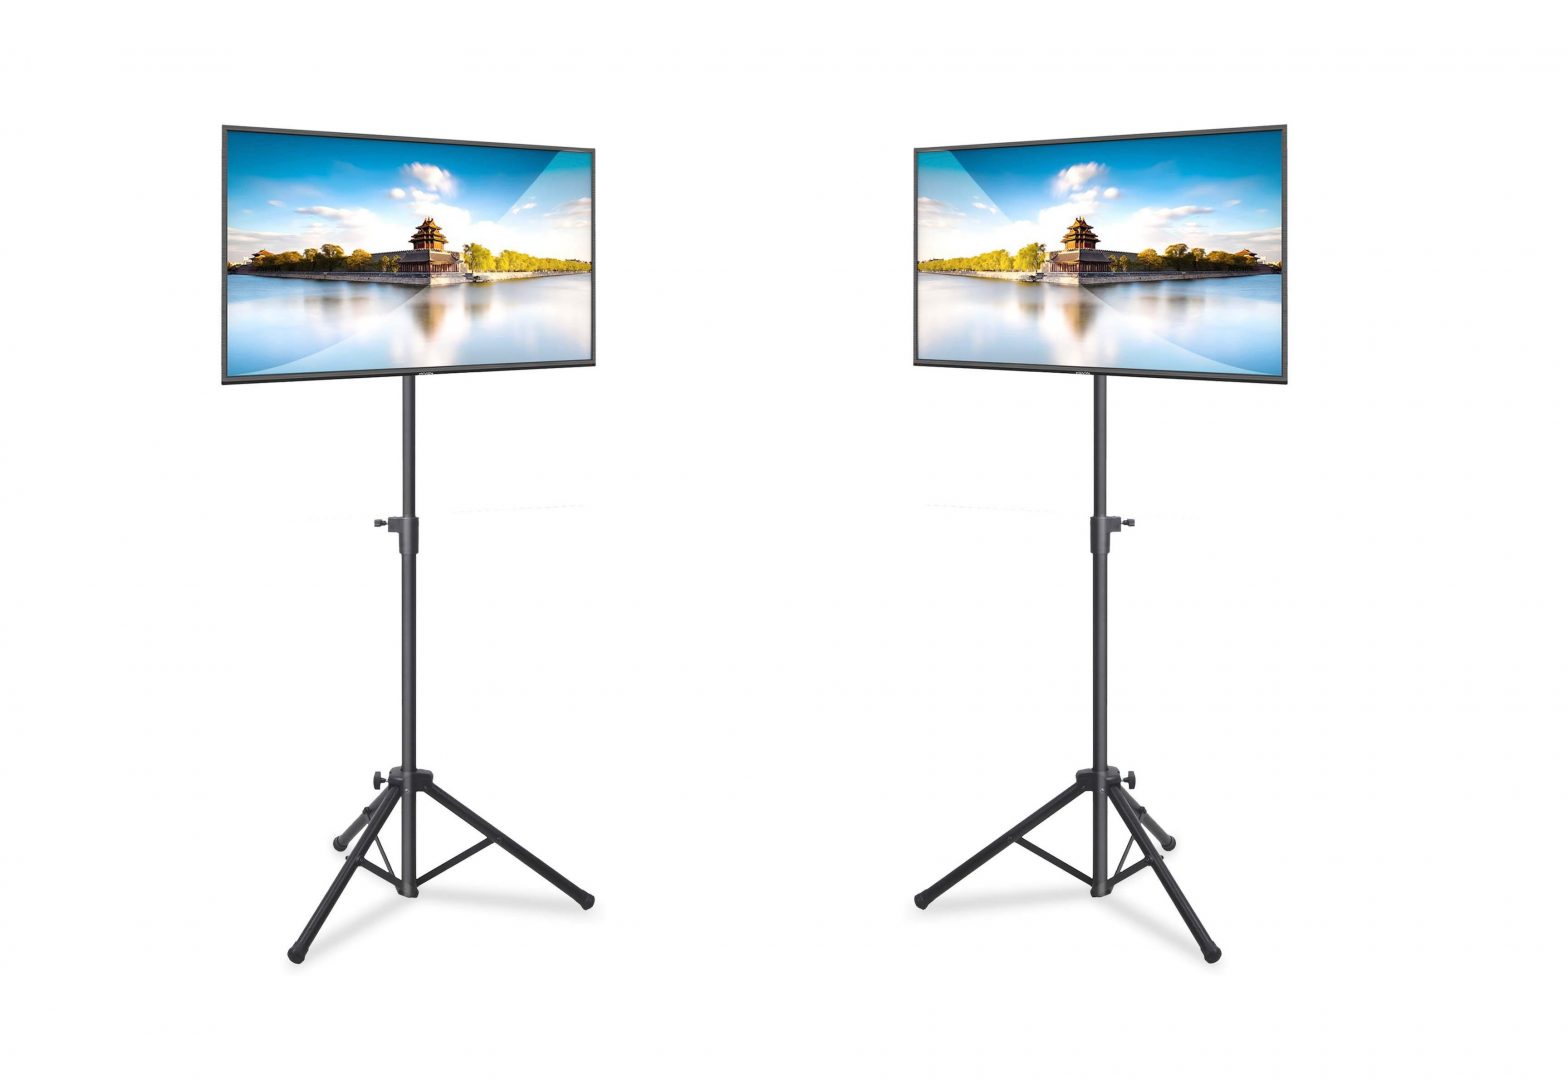
PERLESMITH TV Tripod Stand Instruction Manual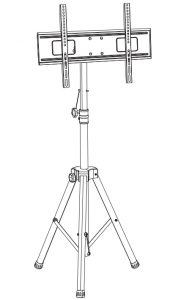 Model:PSTM2
Thank you for choosing this Perlesmith product! At Perlesmith we strive to provide you with the best quality products and services in the industry. Please share your experience of our product with others at www.perlesmith.com/pages/reviews if you are satisfied. Should you have any issues, please don’t hesitate to contact us.
Technical Support:1-800-556-6806 Mon-Fri 10am – 5pm (PST) (USA) (CAN)Other Info: [email protected] (US/CA/DE/UK/FR/IT/ES/AU)
Website: www.perlesmith.com
Important Safety Instructions
- Check to assure that all components were received undamaged. Do not use damaged or defective parts. lf you require replacement parts, contact customer service at [email protected].
- Install and operate this product with care. Please read this instruction before beginning the installation, and carefully follow all instructions contained herein. Use proper tools during installation.
- If you do not understand the instructions or have any concerns or questions, please contact customer service at [email protected].
- Do not use this product for any purpose that is not explicitly specified in this manual. Do not exceed weight capacity. We cannot be liable for damage or injury caused by improper mounting, incorrect assembly or inappropriate use.
TIP OVER WARNING
SERIOUS OR FATAL CRUSHING INJURIES CAN OCCUR FROM TIP OVER.TO HELP PREVENT TIP OVER:
- NEVER ALLOW CHILDREN TO CLIMB, STAND, HANG, OR PLAY ON ANY PART OF TV OR TV STAND.
- USE TIP OVER RESTRAINT OR ANCHOR STAND TO WALL USE OF TIP OVER RESTRAINTS MAY ONLY REDUCE, BUT NOT ELIMINATE RISK OF TIP OVER.
Check the VESA Pattern of TV before the Installation
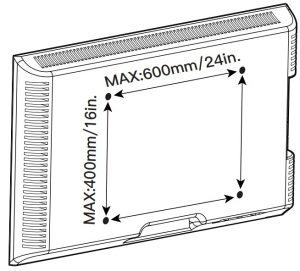
100mm ≈ 4in.200mm ≈ 7 7/8in.300mm ≈ 11 3/4in.400mm ≈ 15 3/4in.600mm ≈ 23 6/10 in.
Minimum VESA pattern: 200mm/8 in.(W)x100mm/4in.(H)
If your TV VESA is greater than 600×400 mm/24×16 in. or less than VESA 100x100mm/4x4in., this TV tripod stand is NOT compatible.
If this TV tripod stand is NOT compatible, please contact customer service at [email protected] to find a compatible product.
Parts List
 I (x1)Pole Assembly
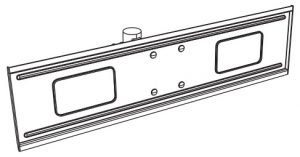 J (x1)Head Assembly with TV Plate
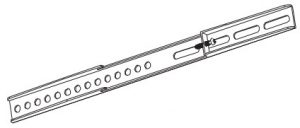 K (x2)TV Bracket
Hardware List
 Cable TieL(x3)
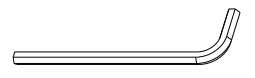 Allen KeyM(x1)
 WrenchN(x1)
 M4x30mm BoltA(x4)
 M6x15mm BoltB(x4)
 M6x30mm BoltC(x4)
 M8x15mm BoltD(x4)
 M8x50mm BoltE(x4)
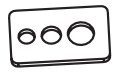 Washer with 3 HolesF(x4)
 φ8.5x18x5mm SpacerG(x8)
 φ8.5x18x10mm SpacerH(x8)
STEP 1 Adjust the Height of Pole
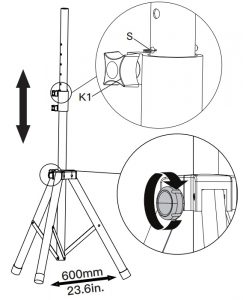
Warning:After adjusting the pole to desired height, insert the latch [S] to the holes on the upper pole. Fasten the knob [K1] to hold upper pole.
CAUTION:DISTANCE BETWEEN EACH FOOT MUST BE 600mm/23.6in.
- Loosen the lower knob.
- Adjust the distance between each feet to be 600mm/23.6in.
- Tighten the lower knob
CAUTION:INJURIES, PLEASE TAKE OFF TV SET BEFORE MAKING HEIGHT ADJUSTMENT
STEP 2 Secure the Head Assembly with TV Plate to Pole Assembly
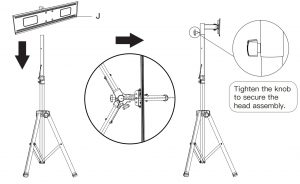
Note: It is recommended to align the center of the TV plate with one foot of the tripod stand
STEP 3 Secure the TV Brackets to Your TV
FLAT BACK TV (UNIVERSAL TV PLATE)Screwdriver (Not included)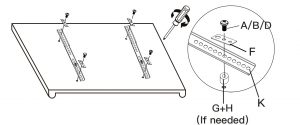
ROUND BACK TV (UNIVERSAL TV PLATE)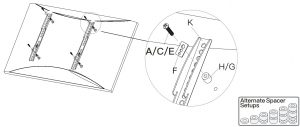
First, make sure the diameter of the bolt (A-E) fits your TV. Then, please see the diagram above. You will need to thread the bolts into the TV using the correct washers (F) the and spacers (G or H) if necessary with a screwdriver (Not included). Please make sure the TV brackets (K) are vertically centered and level with each other.
STEP 4 Secure the TV onto the Plate

 You may need assistance with this step.
STEP 5 Adjust Level and Tilt Angles
Warning: Do not over-loosen the nuts or bolts to prevent the TV from falling down.
Level Adjustment
- Loosen the four nuts [N].
- Level your TV.
- Retighten both nuts [N] to hold TV in place.
Tilt Adjustment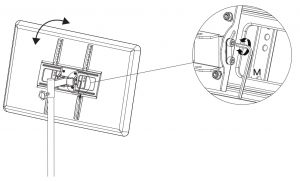
- Loosen the two level bolts.
- Adjust the TV to the desired tilting angle.
- Fasten the bolts to hold the tilting angle of the TV.
STEP 6 Manage the Cables
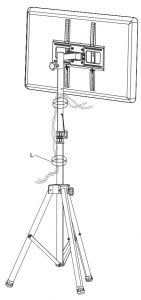
Cable organizers [L] are used for cables management
References
[xyz-ips snippet=”download-snippet”]