Playknowlogy Robotics car kit Owner's Manual

What is Arduino?
Arduino is an open-source electronics platform based on easy-to-use hardware and software. Arduino boards can read inputs – light on a sensor, a finger on a button, or a Twitter message – and turn it into an output – activating a motor, turning on an LED, publishing something online. You can tell your board what to do by sending a set of instructions to the microcontroller on the board. To do so you use the Arduino programming language (based on Wiring), and the Arduino Software (IDE), based on Processing.
What is UNO?
The Uno is on the ATmega328. It has 14 digital input/output pins (of which 6 can be used as PWM outputs), 6 analogue inputs, a 16 MHz ceramic resonator, a USB connection, a power jack, an ICSP header, and a reset button.
It contains everything needed to support the microcontroller; simply connect it to a computer with a USB cable or power it with a AC-to-DC adapter or battery to get started.
Software
Connect your UNO board with your computer. Connecting UNO and your PC by a blue USB cable, and if connected correctly you will see the green power LED light up and another orange LED is blinking.
We need to figure out which channel COM is currently communicating between PC and UNO. Following the path: Control panel | Hardware and Sound | Devices and Printers | Device Manager | Ports (COM & LPT) | Arduino UNO (COMx).
See the picture on the next page. Find your Serial COM number and write it down as the COM port may vary from time to time. In this case for demonstration purposes we’re using COM 4.

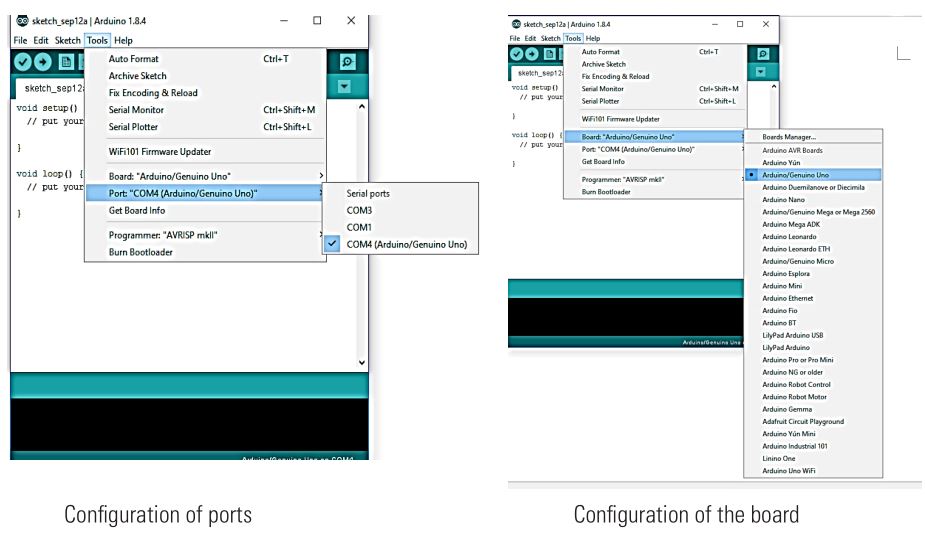
Firstly, let’s tell IDE where to find our Arduino port and which board you are currently using: The following instruction (pics below) shows the details:
Test this code to see that the connection is working. Following the path by File | Examples | 01. Basics | Blink. A new code window will pop up, press the arrow symbol to upload. You will notice the orange LED is blinking almost every second. This indicates that the code you just uploaded is working as intended.

Upload the Arduino 2 Wheel Drive code (shown above) to your UNO. This code makes it possible for the car to drive around.
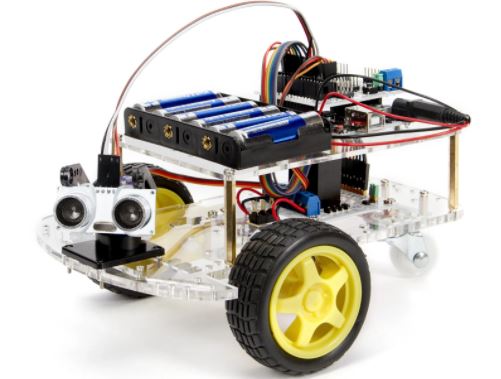
1. Arduino Sensor Shield2. Playknowlogy Uno R33. L298N Motor Driver Board4. Ultrasonic Sensor5. Rubber Wheels (2pcs)6. DC Motors (2pcs)7. Ultrasonic holder8. Metal Pivot Wheel9. Acrylic board (2pcs)10. USB Cable11. SG90 Servo12. Rocker switch (Optional)13. 6 x AA battery holder14. 20 cm female-female jumper cables (20 pcs)

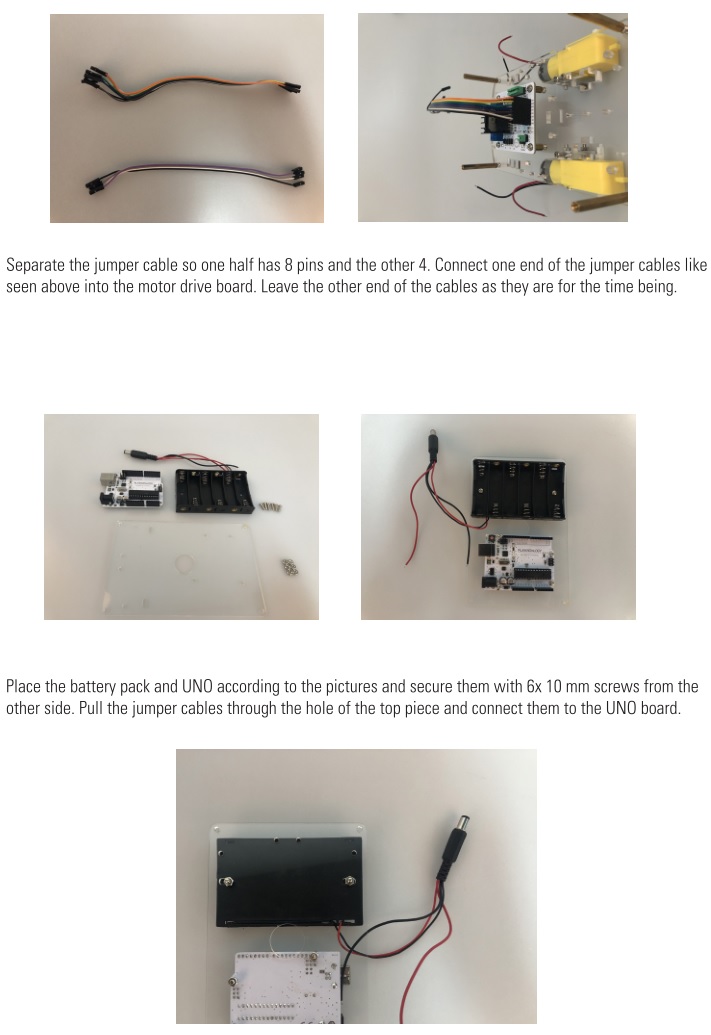
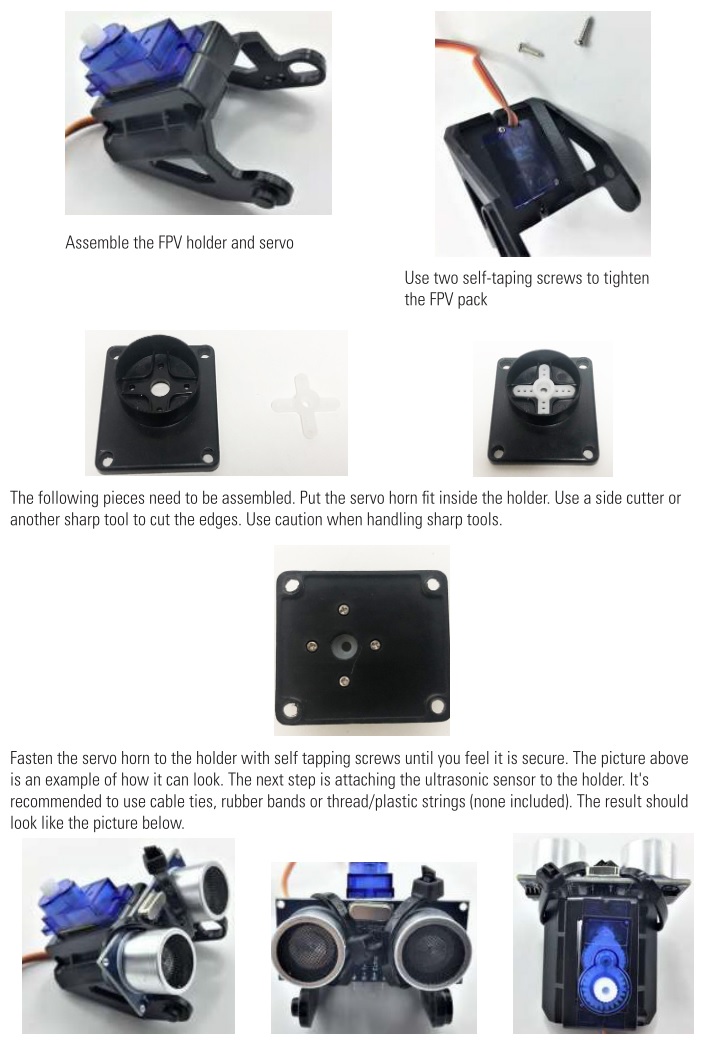
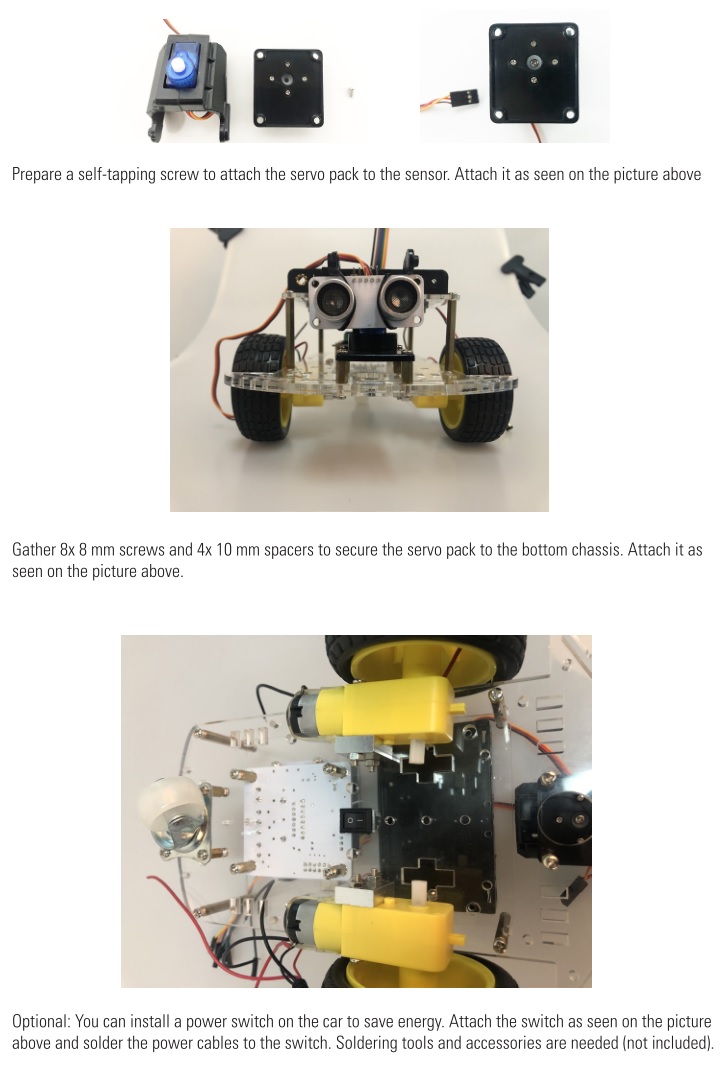
Sensor installationThe ultrasonic sensor acts as the eyes for the robotic car. In the following steps we’ll go through how to install the the sensor and servo.
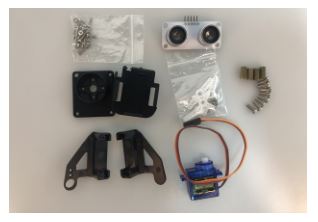
Above are the required components needed for these steps.
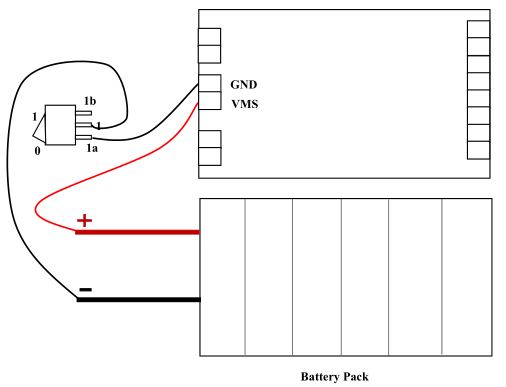
The following diagram shows how to connect the power switch to the battery pack and the L298N board. Caution: Do not have the UNO Board connected to your computer at the same time as the L298N motor board as the module can drain a large amount of power from the USB port and burn it out. Always disconnect the battery pack from the device before connecting it via USB.
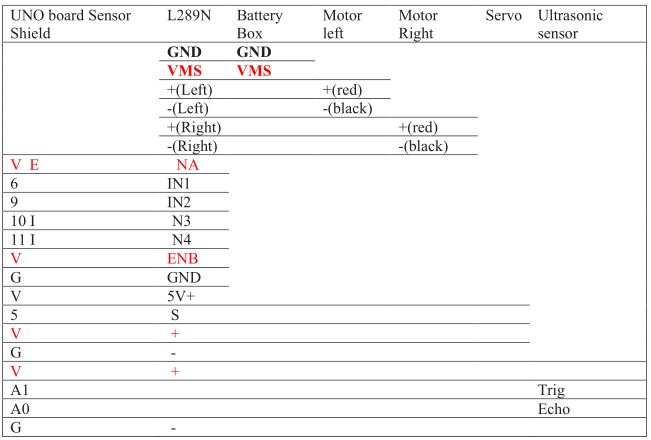
Wire connectionThe final step is to connect all the modules together via the wires. The following diagram shows the connection map. Take it slow and easy, you can also see the second connection table.
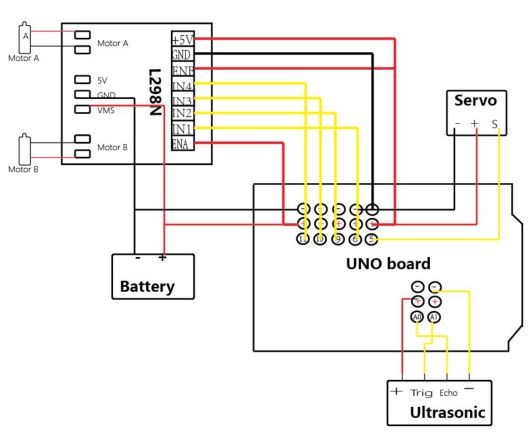
When all the wires are connected it’s time to go. Activate the car and see if it needs any adjustments. After seeing how the car acts according to the written code you can learn a lot by making small alterations in the code.
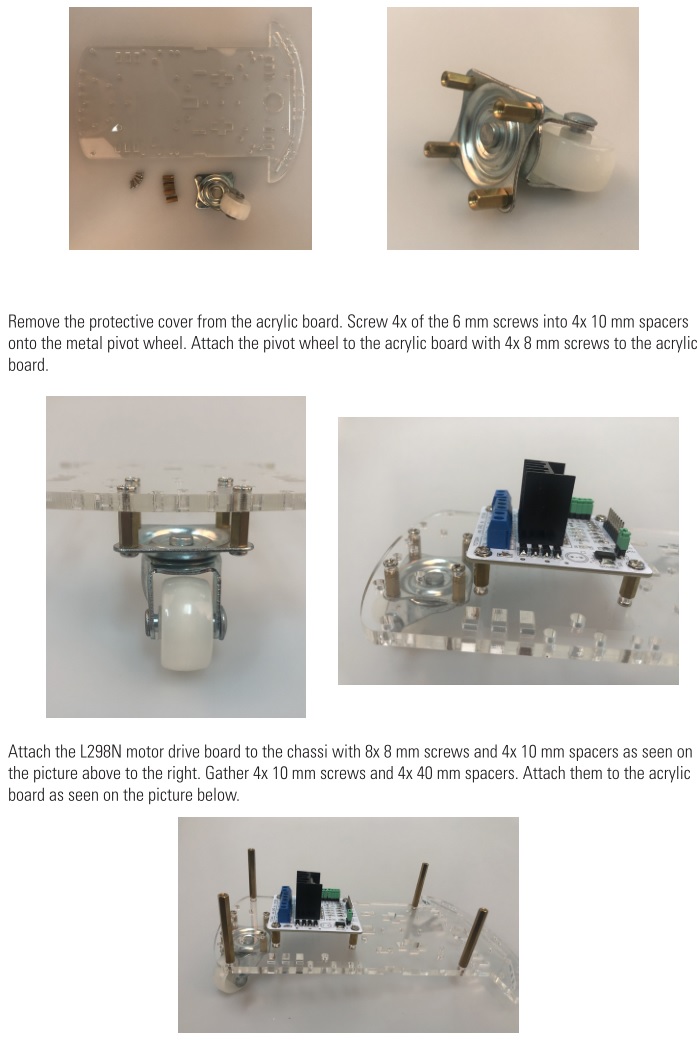
![]()
www.playknowlogy.seBox 50435 MalmöSweden2020-03-26
References
[xyz-ips snippet=”download-snippet”]