PSD300Quick Start Guide
17-07-2FQ1010-C
![]()
![]() A detailed walkthrough of the software applicationhttps://plustek.com/products/network-scanners/ecWIN_manual.html
A detailed walkthrough of the software applicationhttps://plustek.com/products/network-scanners/ecWIN_manual.html
Assemble, Connect and Install
- Open the cover and remove all packaging materials.
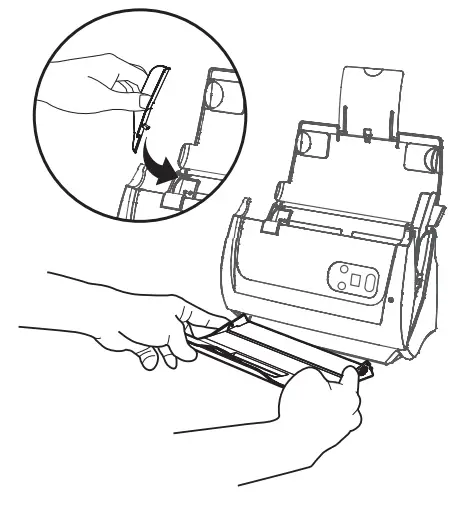
- Install the ‘extended paper width slider’ and ‘output tray (stacker)’ as indicated in the illustration.
- Close the cover until you hear it click into place.

- Install the driver and software application from the installation disk or download and run installation from the support page.https://www.plustek.com/psd300
- The software application will launch once the installation is completed. Check the bottom left corner for scanner model ‘Plustek PSD300’ to confirm.Note: Refer to the ‘Troubleshoot’ section, if you have trouble getting the scanner connected to the application.
Scan
- Fan the stack of paper well to avoid paper jams and misfeeds.

- Load your original facedown, top edge first.
Click on any of the job buttons on the software application to start scanning.
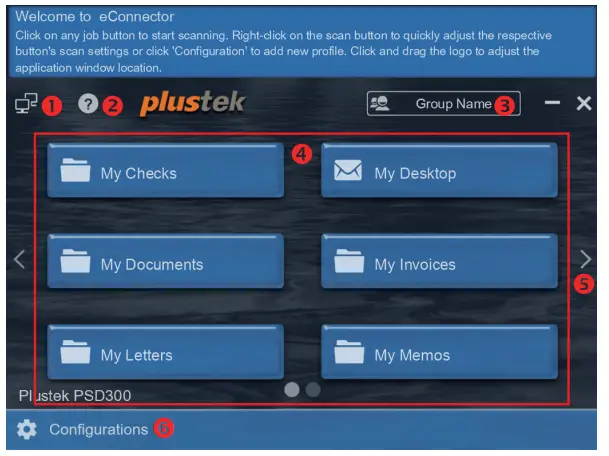
- Internet Availability
- Online User’s Guide
- Click to view the full list and scroll/click to access a particular group.
- Click on a job button to scan. Right-click to quickly adjust the scan profile and settings.
- Click on the left/right arrows or scroll to view and access other pages.
- Create accounts, job buttons, and scanning profiles, as well as configure system settings.
Click on “Configurations” > Choose an account type > Create a new account.Follow the screen instruction to set up. (Please refer to the online guide for more info)
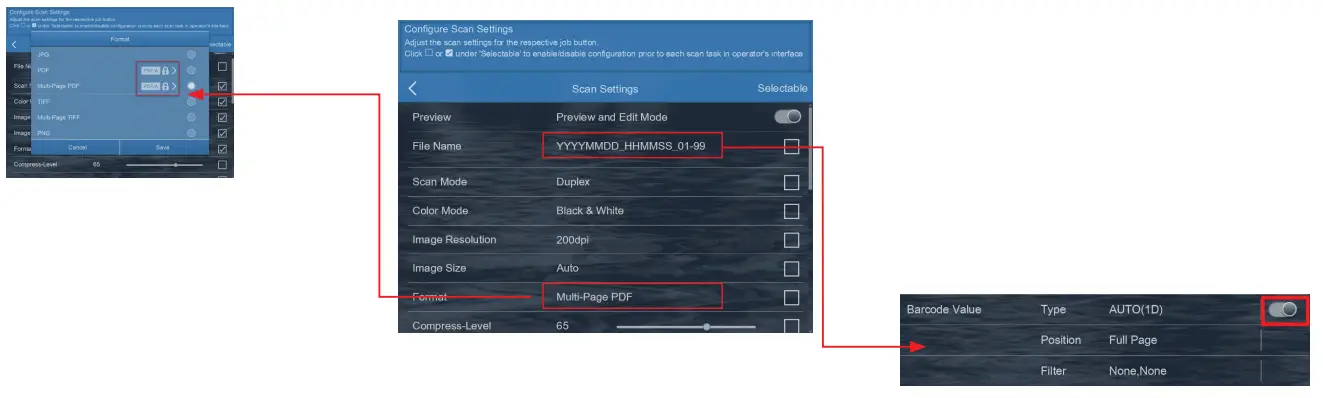
Click’Scan Settings’to modifies or configures scan modes (e.g. resolution or other advanced image processing).Click ( ![]() ) to enable and save scan images to the respective destination. To set up specific details, click (
) to enable and save scan images to the respective destination. To set up specific details, click ( ![]() ) to configure.
) to configure.

Manual Splitting Documents
 Manual Splitting Documents
When scanning in multiple PDFs or TIFF files, separating can be done manually. A small color bar will appear on the top of the scan, simply click between the two images, to separate into a different file, for about a second, the color bar will change color, indicating separation is complete. To remove, simply click the area again.
Note:PSD300 can scan up to 50 sheets/batch and continuous scans in batches with software.Recommend maximum scans not exceed 1,000 images and perform no more than 500 split files.

Custom File Format or File Name
Change File FormatSelect the file saving format in the popup dialog.Available file formats: JPG, PDF, TIFF, PNG, Multi-Page PDF, and Multi-Page TIFF.
Click on![]() to:
to:
- Enable PDF/A function to preserve the static visual appearance of electronic documents.
- Enable Searchable PDF function to perform OCR for the text within the scanned document function by ABBYY FineReader 12 Sprint® to turn scanned image into readable and editable text.
- Enable ‘Encryption’ to configure View/ Allow Print/ Edit/ or Copy of the scanned document rights.
Automatically Rename via BarcodeActivate ( ![]() ) ‘Barcode Value’ and click on the ‘Type’ to configure the type of barcode for the scanned document.Note:
) ‘Barcode Value’ and click on the ‘Type’ to configure the type of barcode for the scanned document.Note:
- Must use 300dpi or above to scan when the function is enabled.
- When scanning in various 1D barcode types, select AUTO(1D) to proceed. Refer to the online manual for more info.
- Slow scanning speed and image processing may occur when renaming with the barcode function are enabled.
Troubleshooting
Find more instructions Click on ![]() the button to access the online user’s guide.
the button to access the online user’s guide.
① My scanned image is different from the original, what should I do?

Please follow the instruction below:
- Wipe the indicated area in RED with the cleaning cloth included with the product.
- Perform scanner calibration from the Calibration Wizard or under Configuration > System Settings > Device Information > Calibration interface.

② What should I do when the application displays a message that my scanner is not connected?
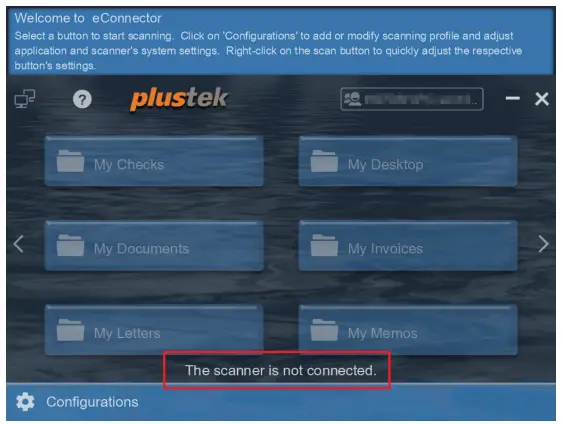
Please follow the instruction below:
- Check your scanner connections. Refer to section 1 (Assemble, Connect, and Install).
- Check if the power switch on the back of the scanner is switched on.
- Check if the scanner went into sleep mode (Orange LED indicator) by pressing on any button on the scanner panel. The LED indicator should be GREEN.
- Update Windows scanner driver. Go to Device Manager > Imaging devices > Duplex ADF Scanner (K78) > Driver > Update Driver.
③ How do I synchronize the connector job buttons to the scanner’s hardware buttons?
Please follow the instruction below:Click on Configurations > System Settings > Scanner Button SettingsClick > to add or ![]() to configure an existing button.Synchronize up to 9 buttons. Once synchronization is complete, use the scanner scan button to ‘Start Scanning’ as well as the ‘Next’ step function.
to configure an existing button.Synchronize up to 9 buttons. Once synchronization is complete, use the scanner scan button to ‘Start Scanning’ as well as the ‘Next’ step function.
Technical Support
 Technical Support
USA/Canada: Service Hours (Except National Holiday): MON-FRI, 9:00 – 17:30 PST | (714) 670-7713 | https://plustek.com/usa/support/Online chat support is available. Real U.S. technical support experts, only a click, call, or email away!
References
[xyz-ips snippet=”download-snippet”]