
MVP-3MICRO DIRECTIONAL SHOTGUN MICROPHONEFOR DSLR, SMARTPHONES AND PORTABLE RECORDERSPRODUCT MANUAL
THANK YOU FOR CHOOSING POLSEN.
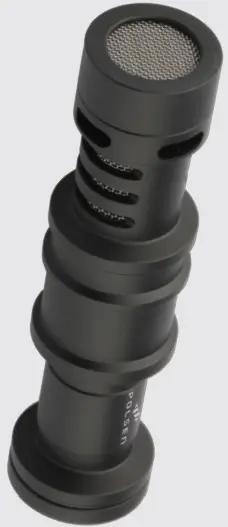
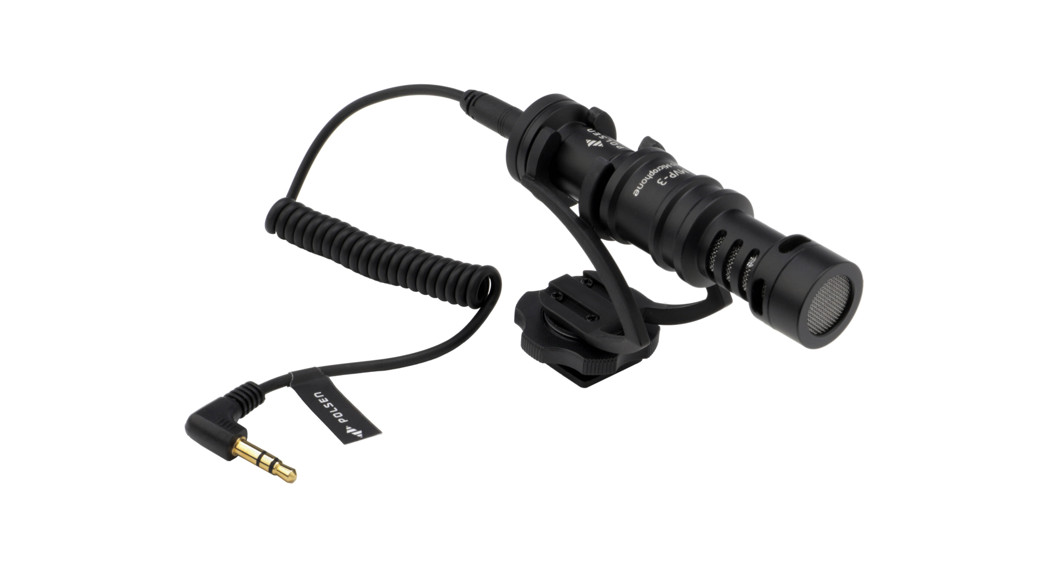
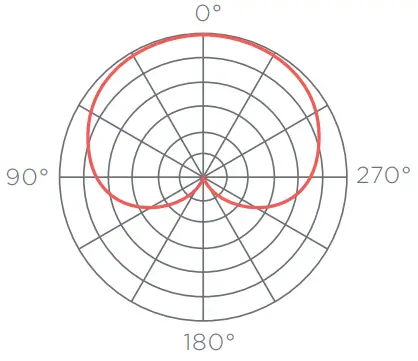
The Polsen MVP-3 Micro Shotgun Microphone boasts a lightweight and compact yet rugged all-metal design that’s perfect for live and in-the-field recordings like mobile journalism, vlogging, and run & gun productions. The MVP-3 can be mounted on a camera’s shoe mount or onto a tripod, and it plugs into a DSLR, smartphone, or portable recorder’s 1/8-inch audio input jack to deliver professional-quality sound.The microphone’s cardioid polar pattern and shotgun design optimize the microphone to focus on the subject while rejecting off-axis sound and noise. To minimize handling noise and any vibrations that might affect your recording, the MVP-3 comes with its own shock mount. Anti-interference design assures an audio signal that’s free of buzz and hum from EM or RF interference.
PRECAUTIONS
- Please read and follow these instructions, and keep this manual in a safe place.
- Keep this product away from water and any flammable gases or liquids.
- Use only the batteries recommended in this manual.
- Do not attempt to disassemble or repair this product yourself.
- Handle this product with care. · Clean this product with only a soft, dry cloth. · Make sure that this product is intact and that thereare no missing parts. · To avoid damaging the product, remove the battery during long periods of nonuse. · All images are for illustrative purposes only.
OVERVIEW
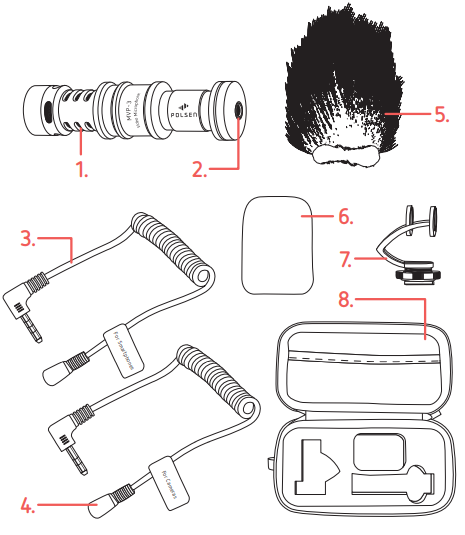
- Microphone ports
- 1/8 in. audio connector
- Smartphone audio cable
- Camera audio cable
- Wind muff
- Foam windscreen
- Shock mount
- Carry case
THE WINDSCREENS
The MVP-3 comes with a foam windscreen to reduce wind noise in a light breeze, and a wind muff for minimizing wind noise in moderate breezes. Fit the windscreen or wind muff onto the microphone by rotating the windscreen while gently pushing it onto the microphone barrel. Make sure that the windscreen or wind muff covers all the ports on the sides of the microphone barrel.
DSLR MOUNTING AND OPERATING THE MVP-3
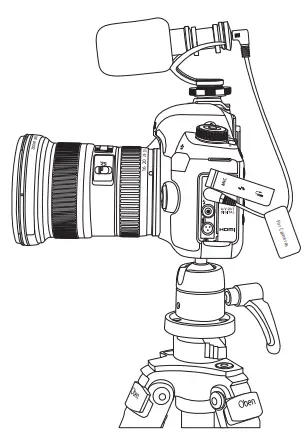
- Rotate the shock mount’s locking wheel counterclockwise to loosen it.
- Slide the mounting foot all the way into your camera’s hot shoe.
- Rotate the locking wheel clockwise until secure.
- If needed, place the foam windscreen or wind muff onto the microphone, and press the MVP-3 into the shock-mount suspenders.
- Plug the smartphone audio cable or the camera audio cable into the microphone’s 1/8 in. output, and plug the other end to the 1/8 in. audio input jack on the recording device or camera.
TRIPOD USE
The shock mount is equipped with a 1/4-20 socket for mounting the MVP-3 onto a tripod.
- Screw the shock mount onto a tripod’s 1/4-20 stud until it’s secure.
- Fit the desired windscreen on the microphone, and place the MVP-3 into the shock mount.
 SMARTPHONE USE
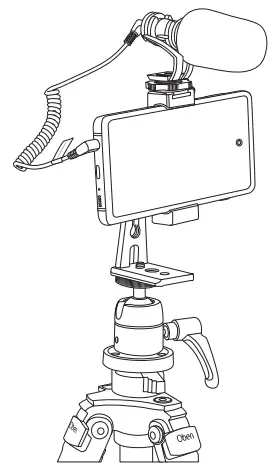
Insert the smartphone into a smartphone video rig or handheld rig, and mount the MVP-3 onto an available shoe mount or 1/4-20 stud.
FREQUENCY RESPONSE
CARDIOID POLAR PATTERN
 TROUBLESHOOTING
| Problem | Solution |
| The sound is distorted. |
|
| The sound is too low. |
|
SPECIFICATIONS
| Transducer | Electret condenser |
| Polar Patterns | Cardioid |
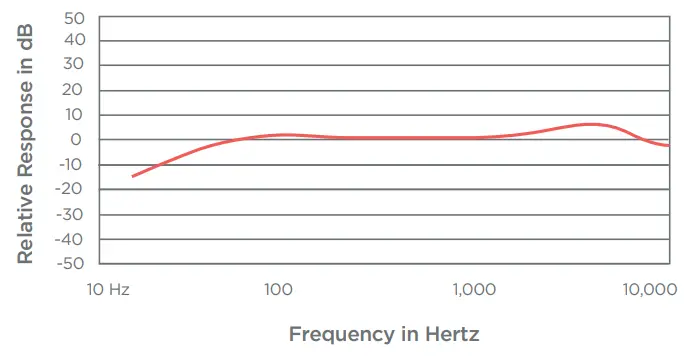
| Frequency Response | 60 Hz to 20 kHz |
| Signal-to-Noise Ratio | >75 dB |
| Maximum SPL | >105 dB |
| Sensitivity | -33 dB ±2 dB |
| Connector | 1/8 in. (3.5 mm) female |
| Power Requirement | 1 to 10 V plug-in power |
| Microphone Dimensions | Length: 3.3 in. (8.5 cm)Diameter: 0.8 in. (2.1 cm) |
| Weight | 1.2 oz. (34.2 g) |
References
[xyz-ips snippet=”download-snippet”]

 SMARTPHONE USE
 TROUBLESHOOTING