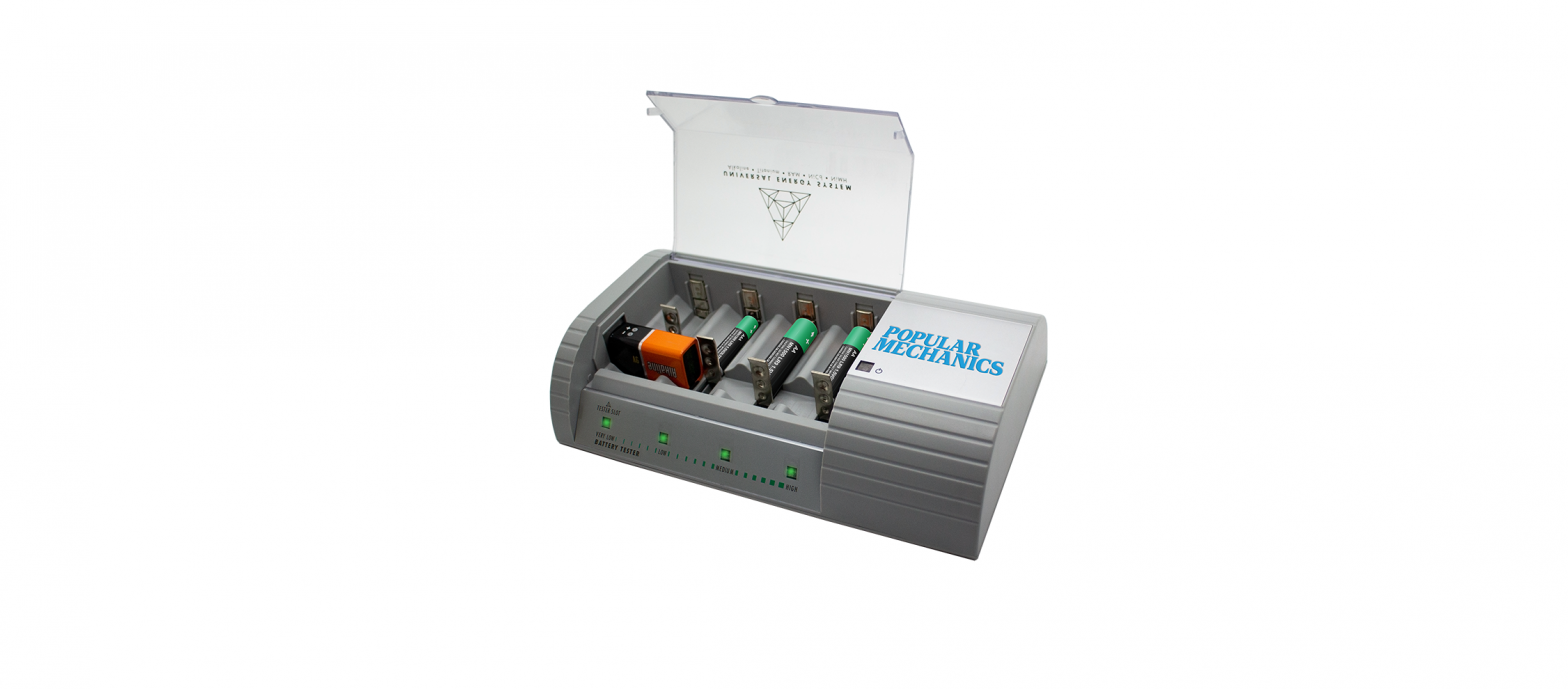
POPULAR MECHANICS P913N622 Battery Recharger User Guide
Rechargeable Battery Types:
- Alkaline
- Titanium
- RAM (Rechargeable Alkaline Manganese)
- NiCd
- NiMHDo Not Charge:
- Carbon Zinc
- Lithium
- Battery with no type printed on it
- Batteries labelled as SUPER HEAVYDUTY or GENERAL PURPOSE
WARNINGS
- Test every battery before recharging to make sure they are not beyond the point of return (no green light). Refer to manual for Tester Function steps
- Alkaline cells should be disposed of promptly if they are rejected by the charger (green light turns off after flashing) or their service life is very short after recharge.
- Please do not connect the 6V cable clips to any other types of batteries except 6V dolphin/lantern batteries as recommended.
- After batteries are charged, test them individually in the battery tester slot before use.
- Only batteries that show the same voltage strength should be used togeth-er. Mixing weak or partially charged with fully charged batteries will result in your device not functioning properly or not powering on at all. Also remember not to use different battery types together (eg: Alkaline with rechargeable).
- Each slot has 3 battery contact position, bottom, middle and upper. For best results, high capacity (over 2200mAh) NiMH AA batteries should be recharged on the upper contact position.
Do not try to put one battery on top of another in a single slot.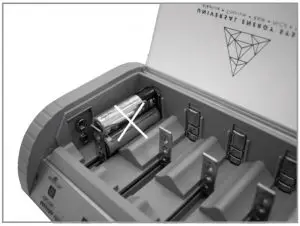
When charging a 9V battery, do not place another battery in the first (far left) slot. When charging a 6V battery, do not place another battery in the fourth (far right) slot.

STEP 1: TURNING THE CHARGER ON
- Extend the power cable stored in the base compartment.
- Plug the charger into a proper indoor electrical outlet and turn on the power, the red LED lights up indicating the charger is active and ready for use.
STEP 2: CONNECTING THE BATTERIES TO THE CHARGER
- Place used batteries to be charged into the charger slots according to their different sizes as follows and ensure all batteries are connected correctly to the charger. Pay attention to battery polarities.
- AAAA, AAA, AA, C, D, N batteries can be inserted in any of the four main slots.
- 9V battery should only be plugged into the 9V terminals provided (the far-left slot).
STEP 2 CONT’D: CONNECTING THE BATTERIES TO THE CHARGER
- 6V dolphin/lantern battery should be connected to the charger via the pair of cable clips provided, which can be extended out from the base storage compartment. Please ensure that the RED clip is connected to the POSITIVE(+) terminal of the battery and the BLACK clip is connected to the NEGATIVE(-) terminal of the battery. If wrongly connected, our built-in reverse protection circuitry will activate, and the charge current will be cut out. (GREEN light not flashing).
STEP 3: OBSERVING THE CHARGERS STATUS
- Once batteries are firmly in contact with the charger’s metal plates, the charger’s indicator lights will be activated straight away, showing the different status as follows:
STEP 3 CONT’D: OBSERVING THE CHARGERS STATUS
- RED LIGHT ON – Power is ON and the charger is ready for use.
- GREEN LIGHT FLASHING – Battery is being charged.
- GREEN LIGHT ON – Charging completed, and battery is ready for use. GREEN LIGHT OFF – Faulty or No battery present or improper battery connection.
- GREEN LIGHT TURNS OFF AFTER FLASHING – Battery is faulty, exhausted and or is no longer rechargeable. Prompt dispose of these batteries to avoid eventual battery leakage.
[xyz-ips snippet=”download-snippet”]