![]() DECK 750INSTRUCTION MANUAL
DECK 750INSTRUCTION MANUAL
Make sure that you read and understand this manual completely before using this system. This manual shall be available for everyone assembling, disassembling, or loading the Power Dynamic Deck750.For health and safety reasons people assembling, disassembling, transporting, and maintaining the stage deck should wear adequate Personal Protection Equipment like gloves, hardheads, and safety shoes. Elements weighing 20 kg or more shall be carried by at least 2 persons.
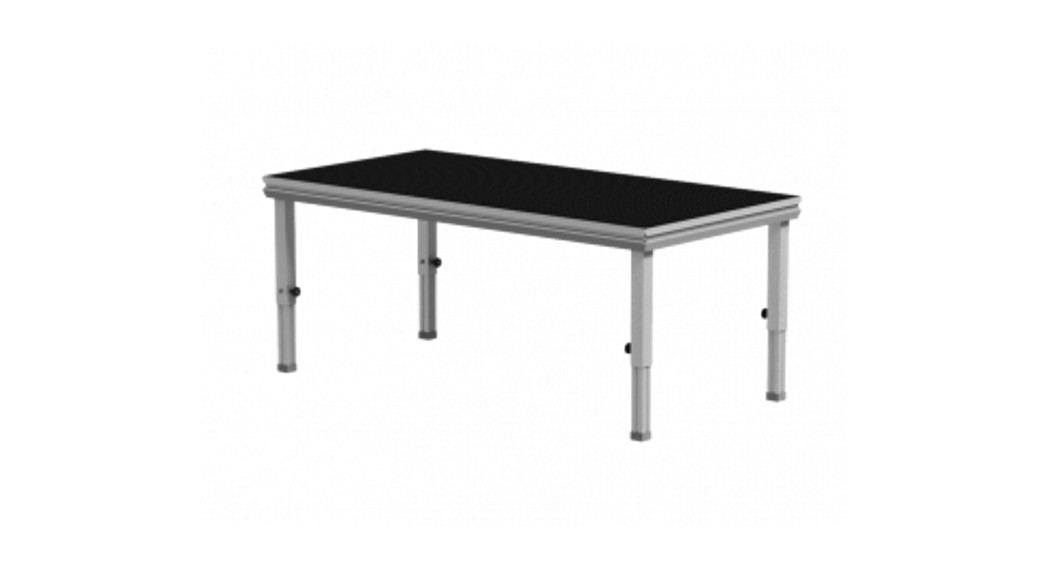
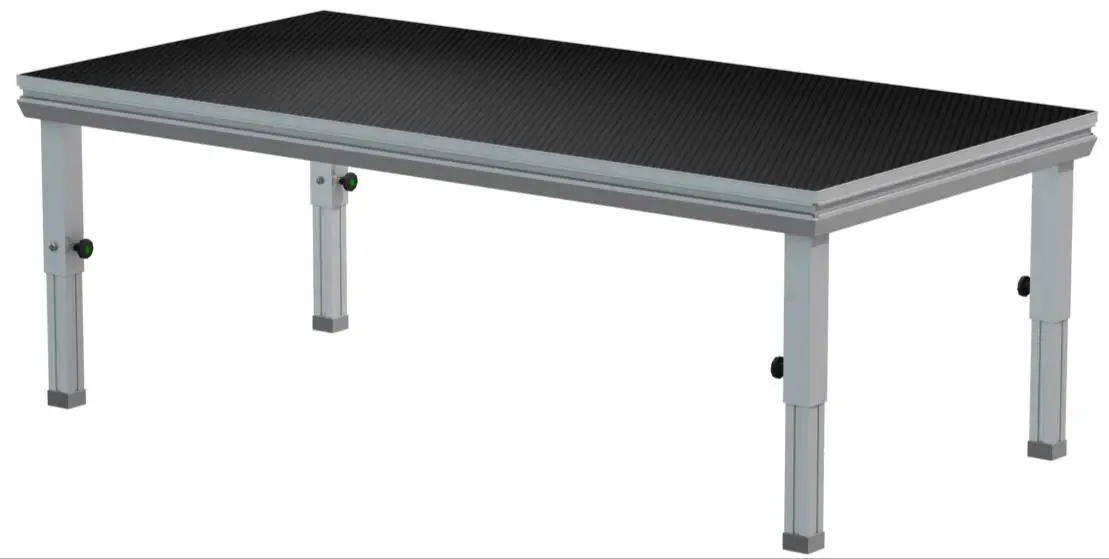
SCOPEDECK750 is a modular framework with different types of topping to be used as a raised platform for purposes of displaying, performances, etc.
LIMITATIONS OF USEDue to its natural action, the plywood may shrink and expand depending on its humidity and ambient temperature. It should be used at a humidity level between 22% and 42% and a temperature between 18 and 26°C.
ASSEMBLY INSTRUCTIONS
Tools required:
- Open-end spanner 13
- Spirit level
NOTE: Please check all connections such as deck to deck clamp, leg to leg clamp, and the overall stability of the system before loading.
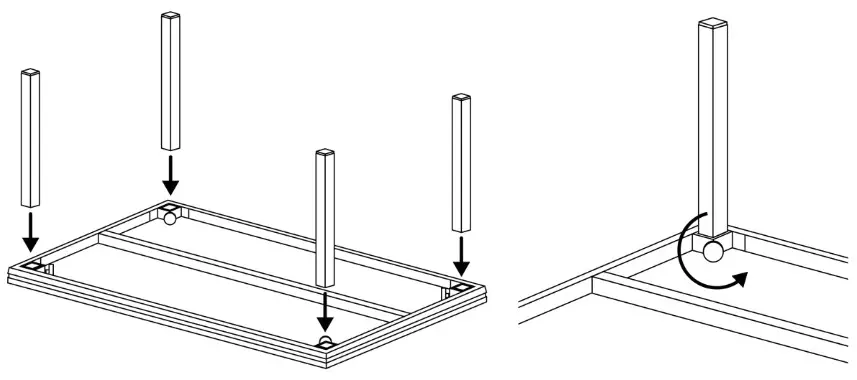
FIXED LEG ASSEMBLY
- Put the required leg type in the leg adapter at the underside of the deck frame.
- Tighten the leg by tightening the knob.
- Do this at all 4 corners.
- Tip the deck over.
TELESCOPIC LEG ASSEMBLY
IMPORTANT! After leveling the stage height fasten the securing self-locking nuts as shown on the diagram.
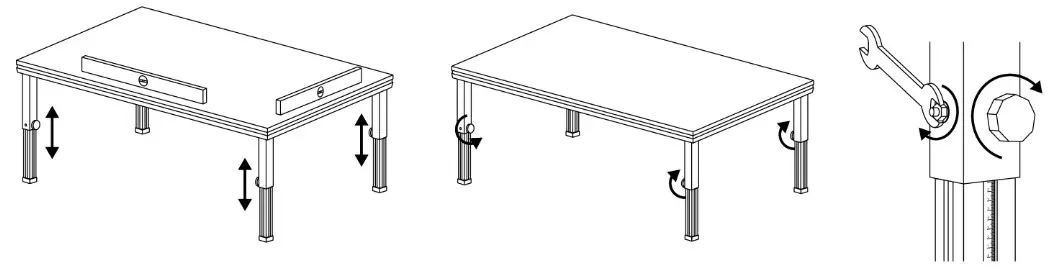
 WARNING! It is forbidden to use the stage decks without securing the legs with self-locking nuts!ATTENTION! Please make sure that the complete unit is stable and well assembled before using it.
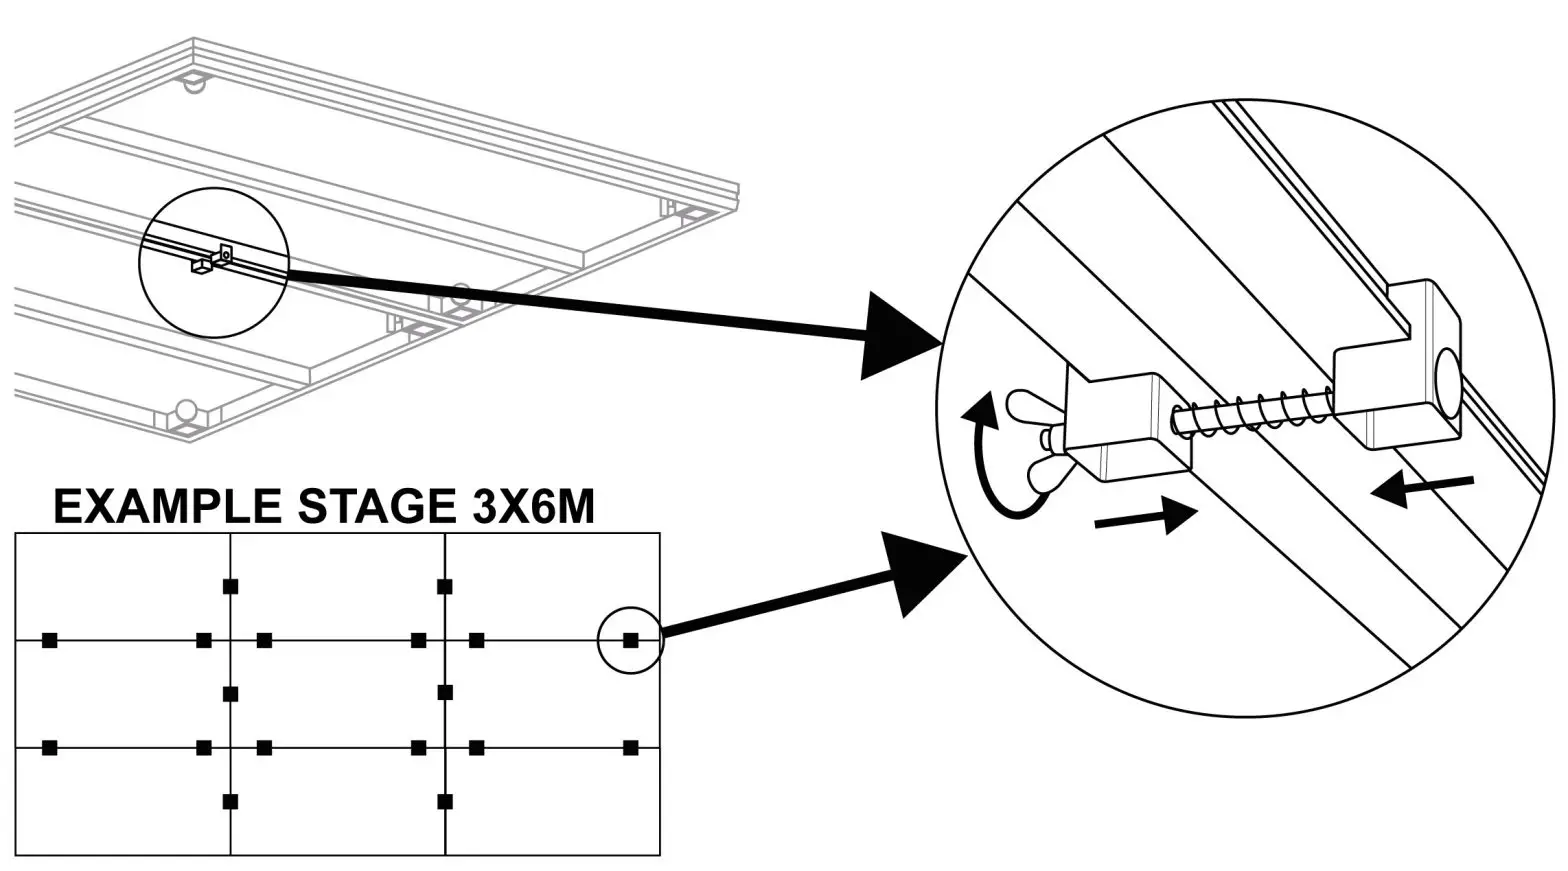
DECK LEVELLER INSERT
Align the stage decks with deck leveler insert and use 3 pieces on a 2x1m stage. Place 1 piece of deck leveler insert on the one-meter side and 2 pieces on the 2-meter side.
CAUTION! The height difference between the stage decks should not exceed 2mm to avoid tripping.
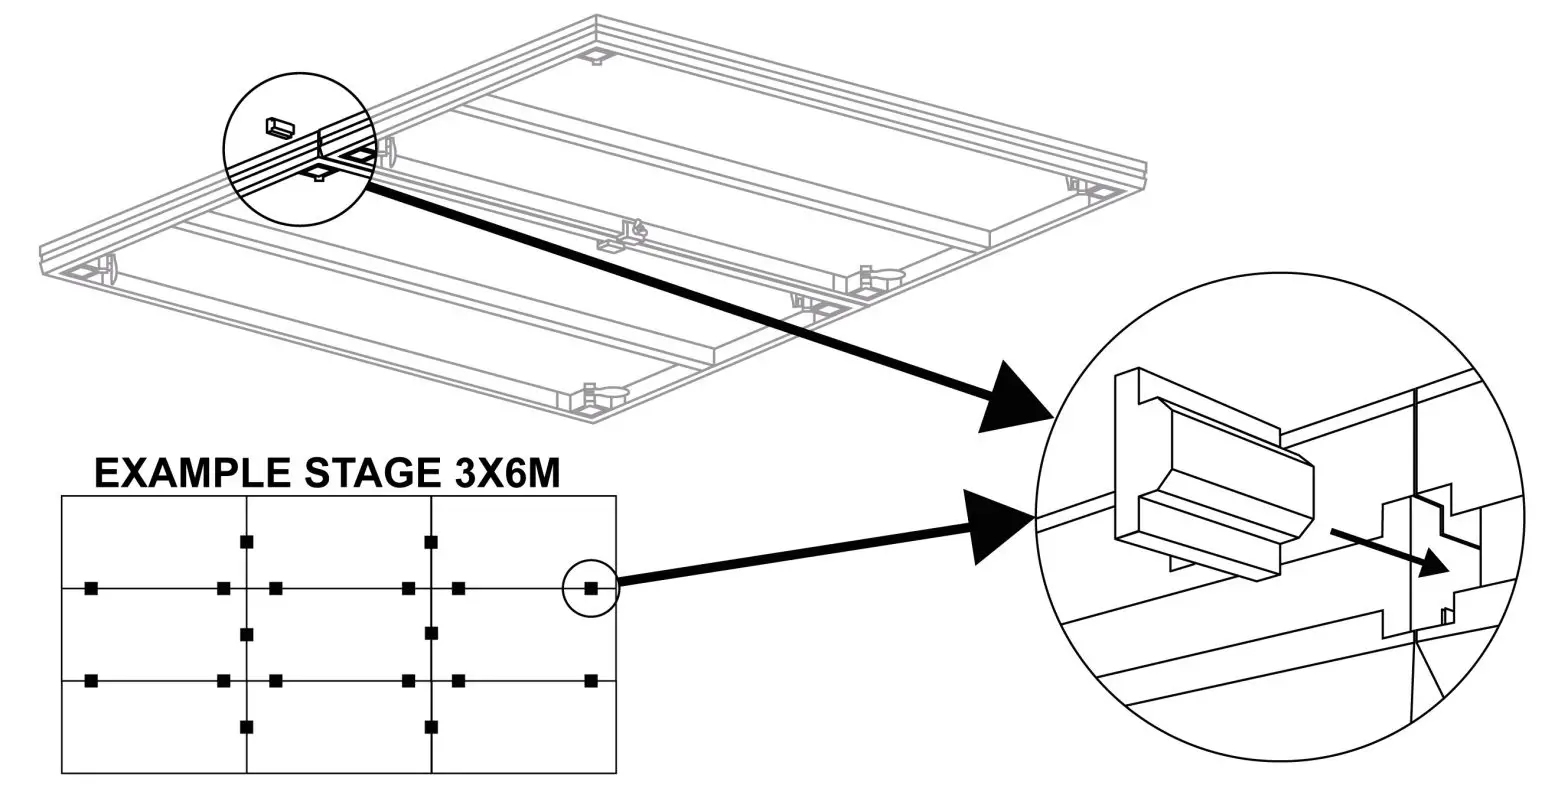
DECK TO DECK CLAMP
- Connect each stage deck with a deck clamp.
- Use 3 clamps per stage deck. Place 1 piece of deck clamp on short and 2 pieces on long meter side.
- Repeat this as often as necessary.
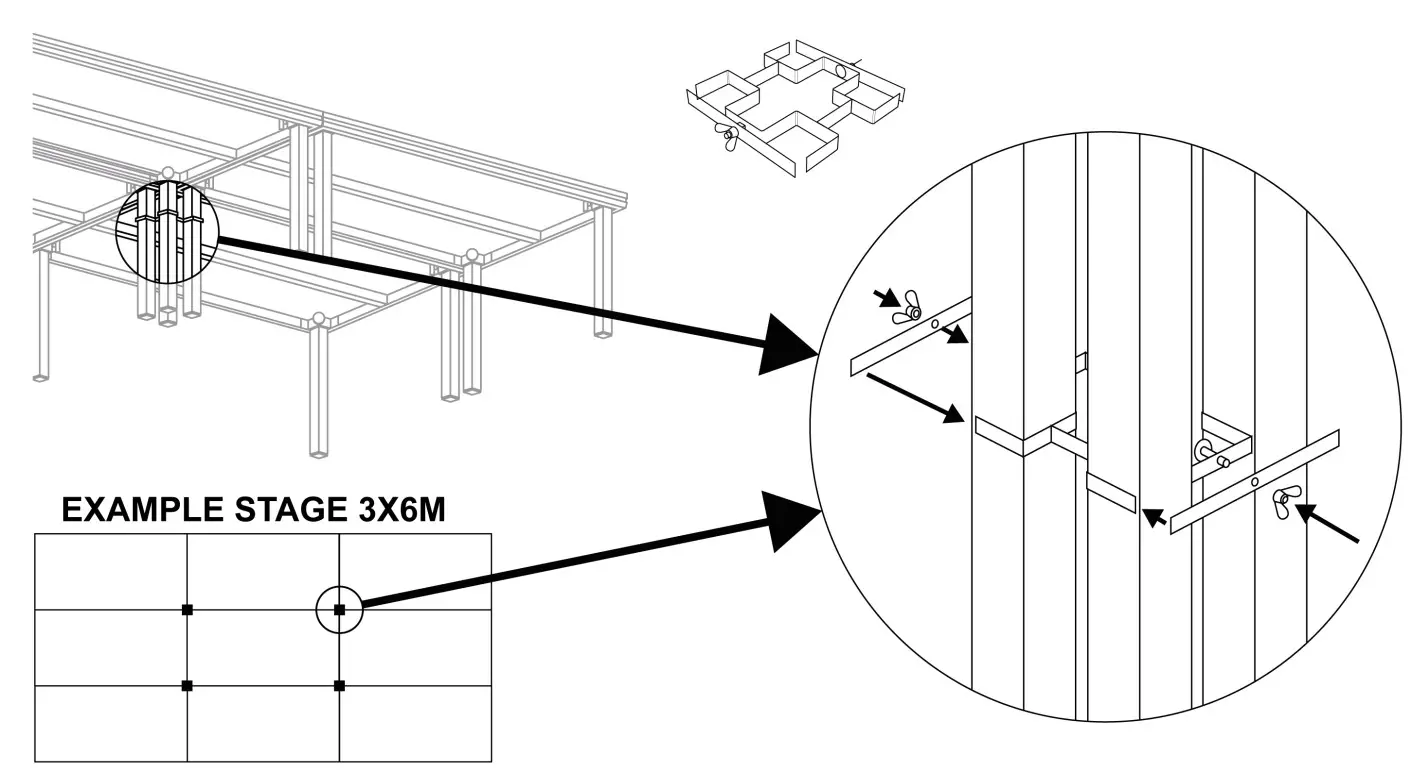
LEG TO LEG CLAMP 2 FEET
Use a single clamp for two legs, position it a maximum of 20cm below the stage deck.

LEG TO LEG CLAMP 4 FEET
Use a single clamp for four legs, position it a maximum of 20cm below the stage deck.
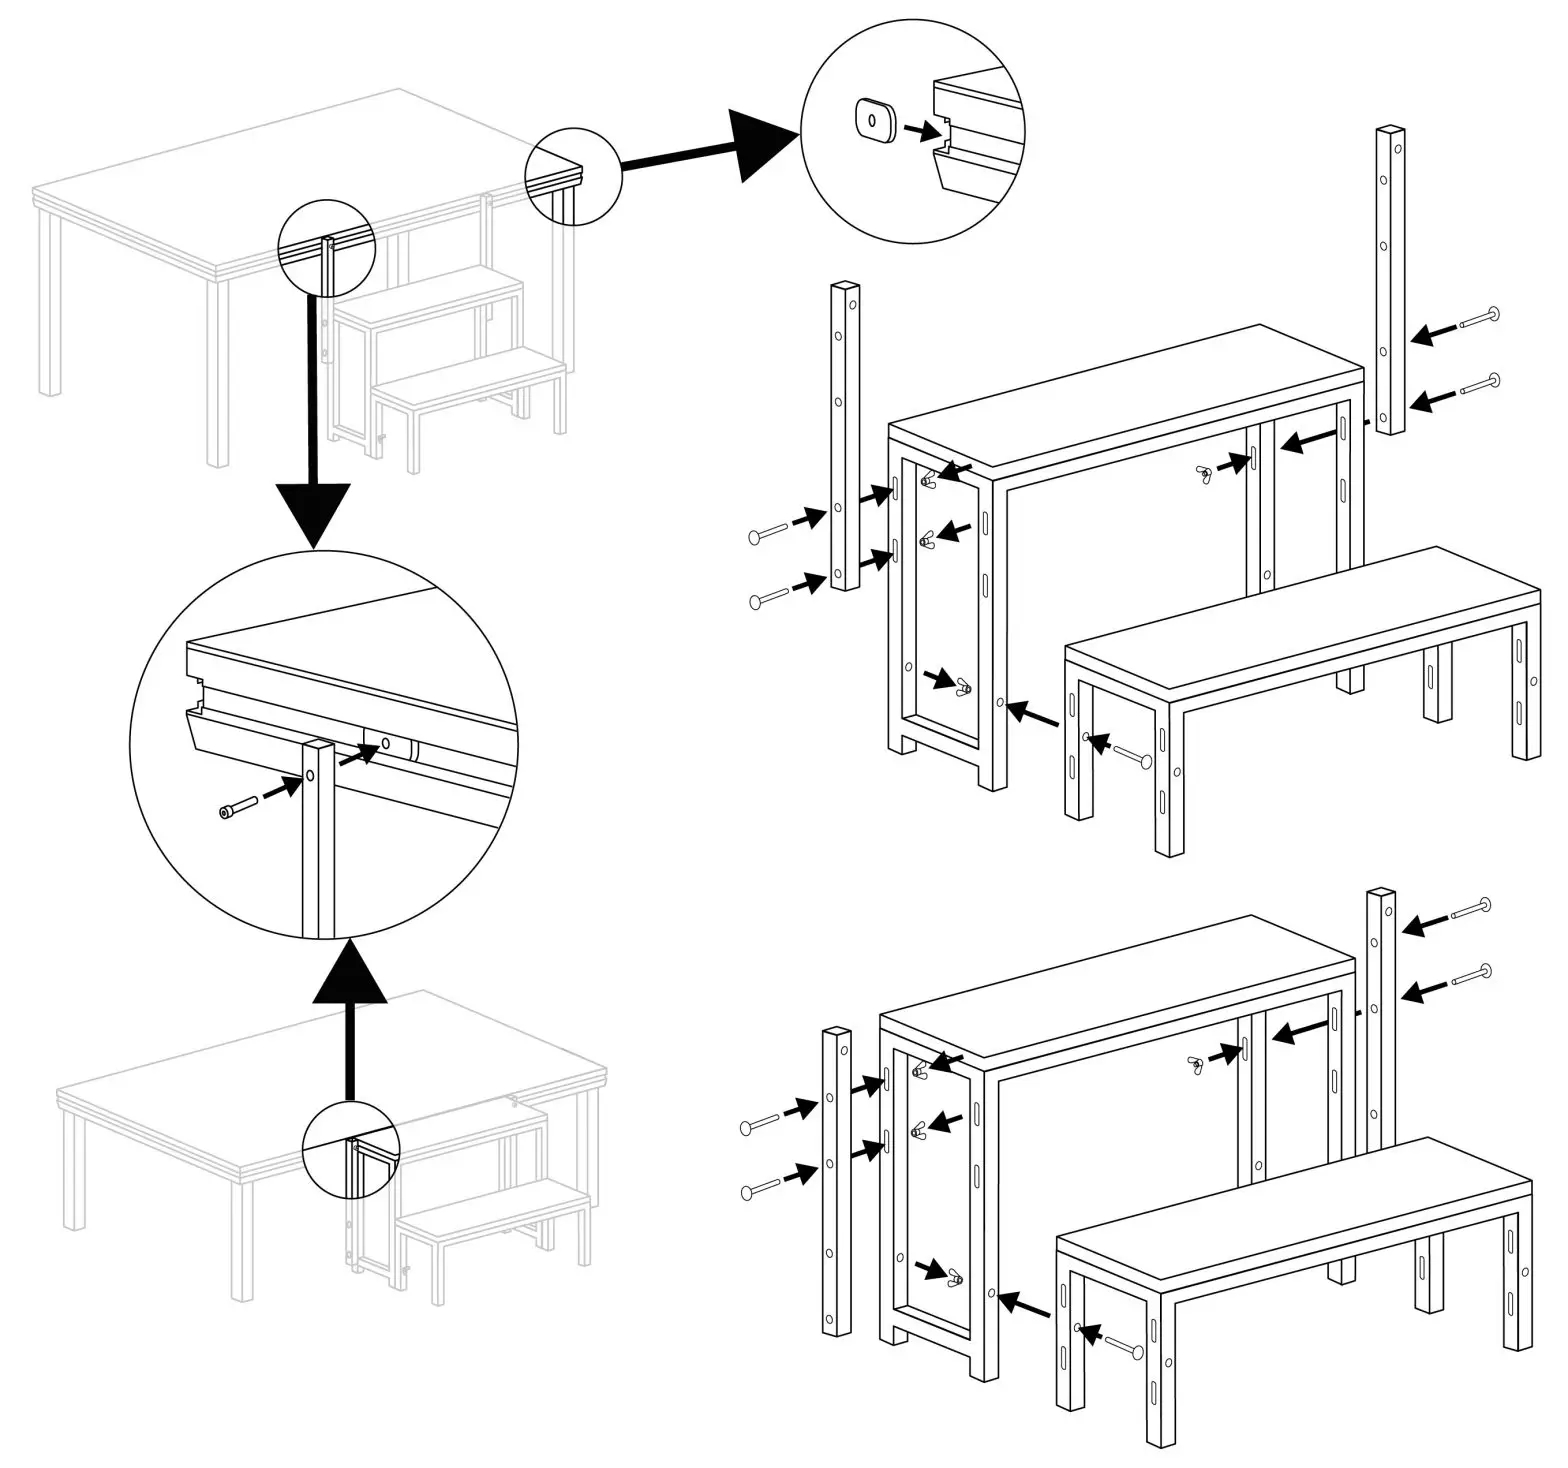
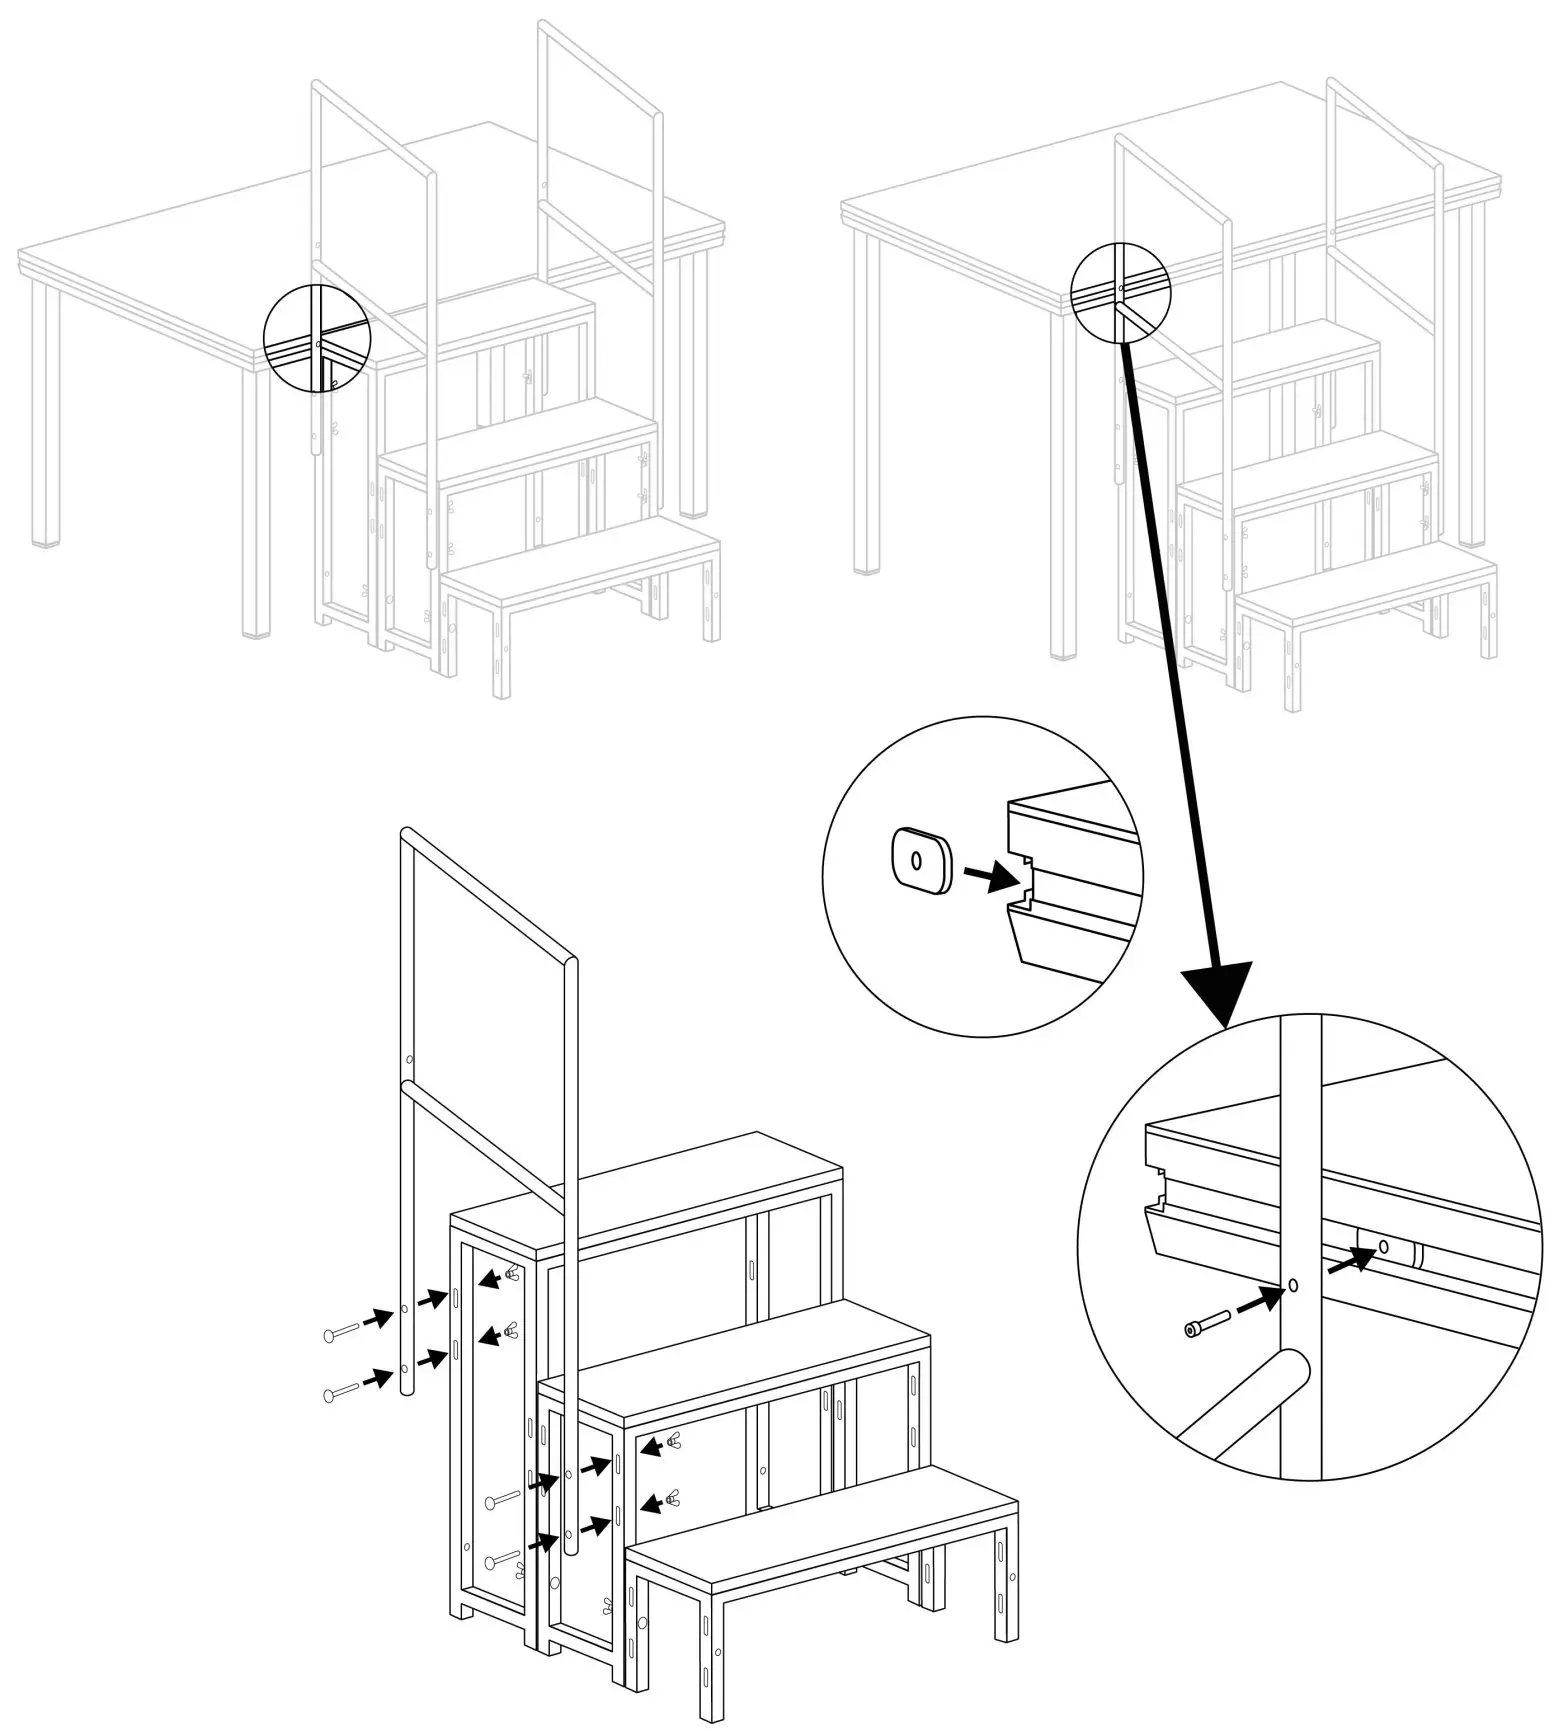
MODULAR STAIRS
Install the steps modular according to the below diagram, using the supplied screws and accessories.
MODULAR STAIR HANDRAIL
Install the modular stair handrail to the modular steps and connect with the stage deck as shown on the below diagram.
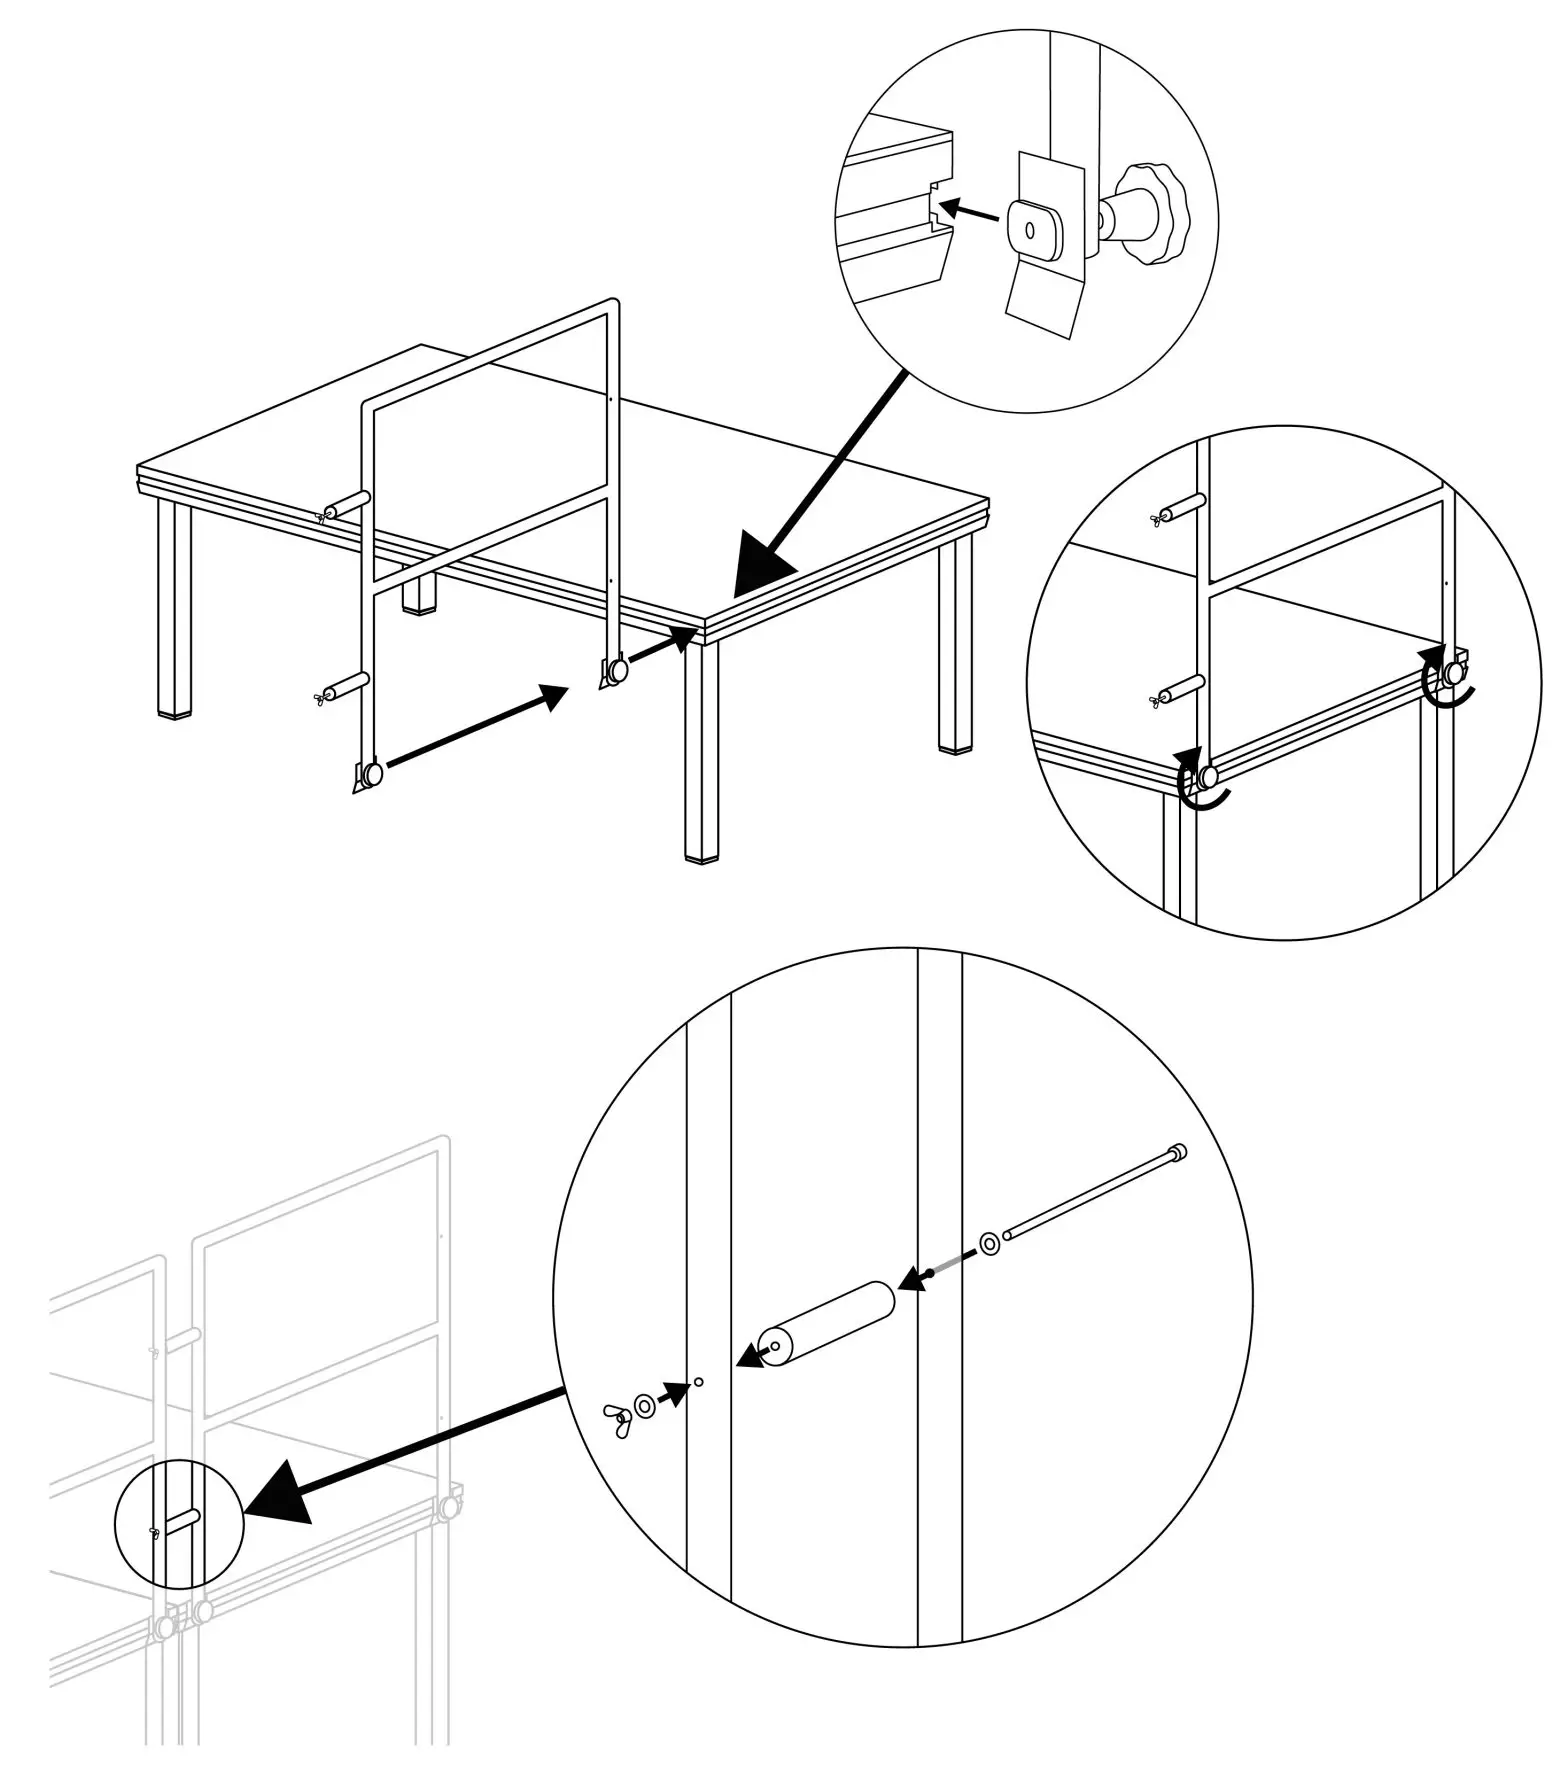
HANDRAILS
Install railings according to the above diagram, sing the supplied screws and accessories, and handrail correction (straight or corner).
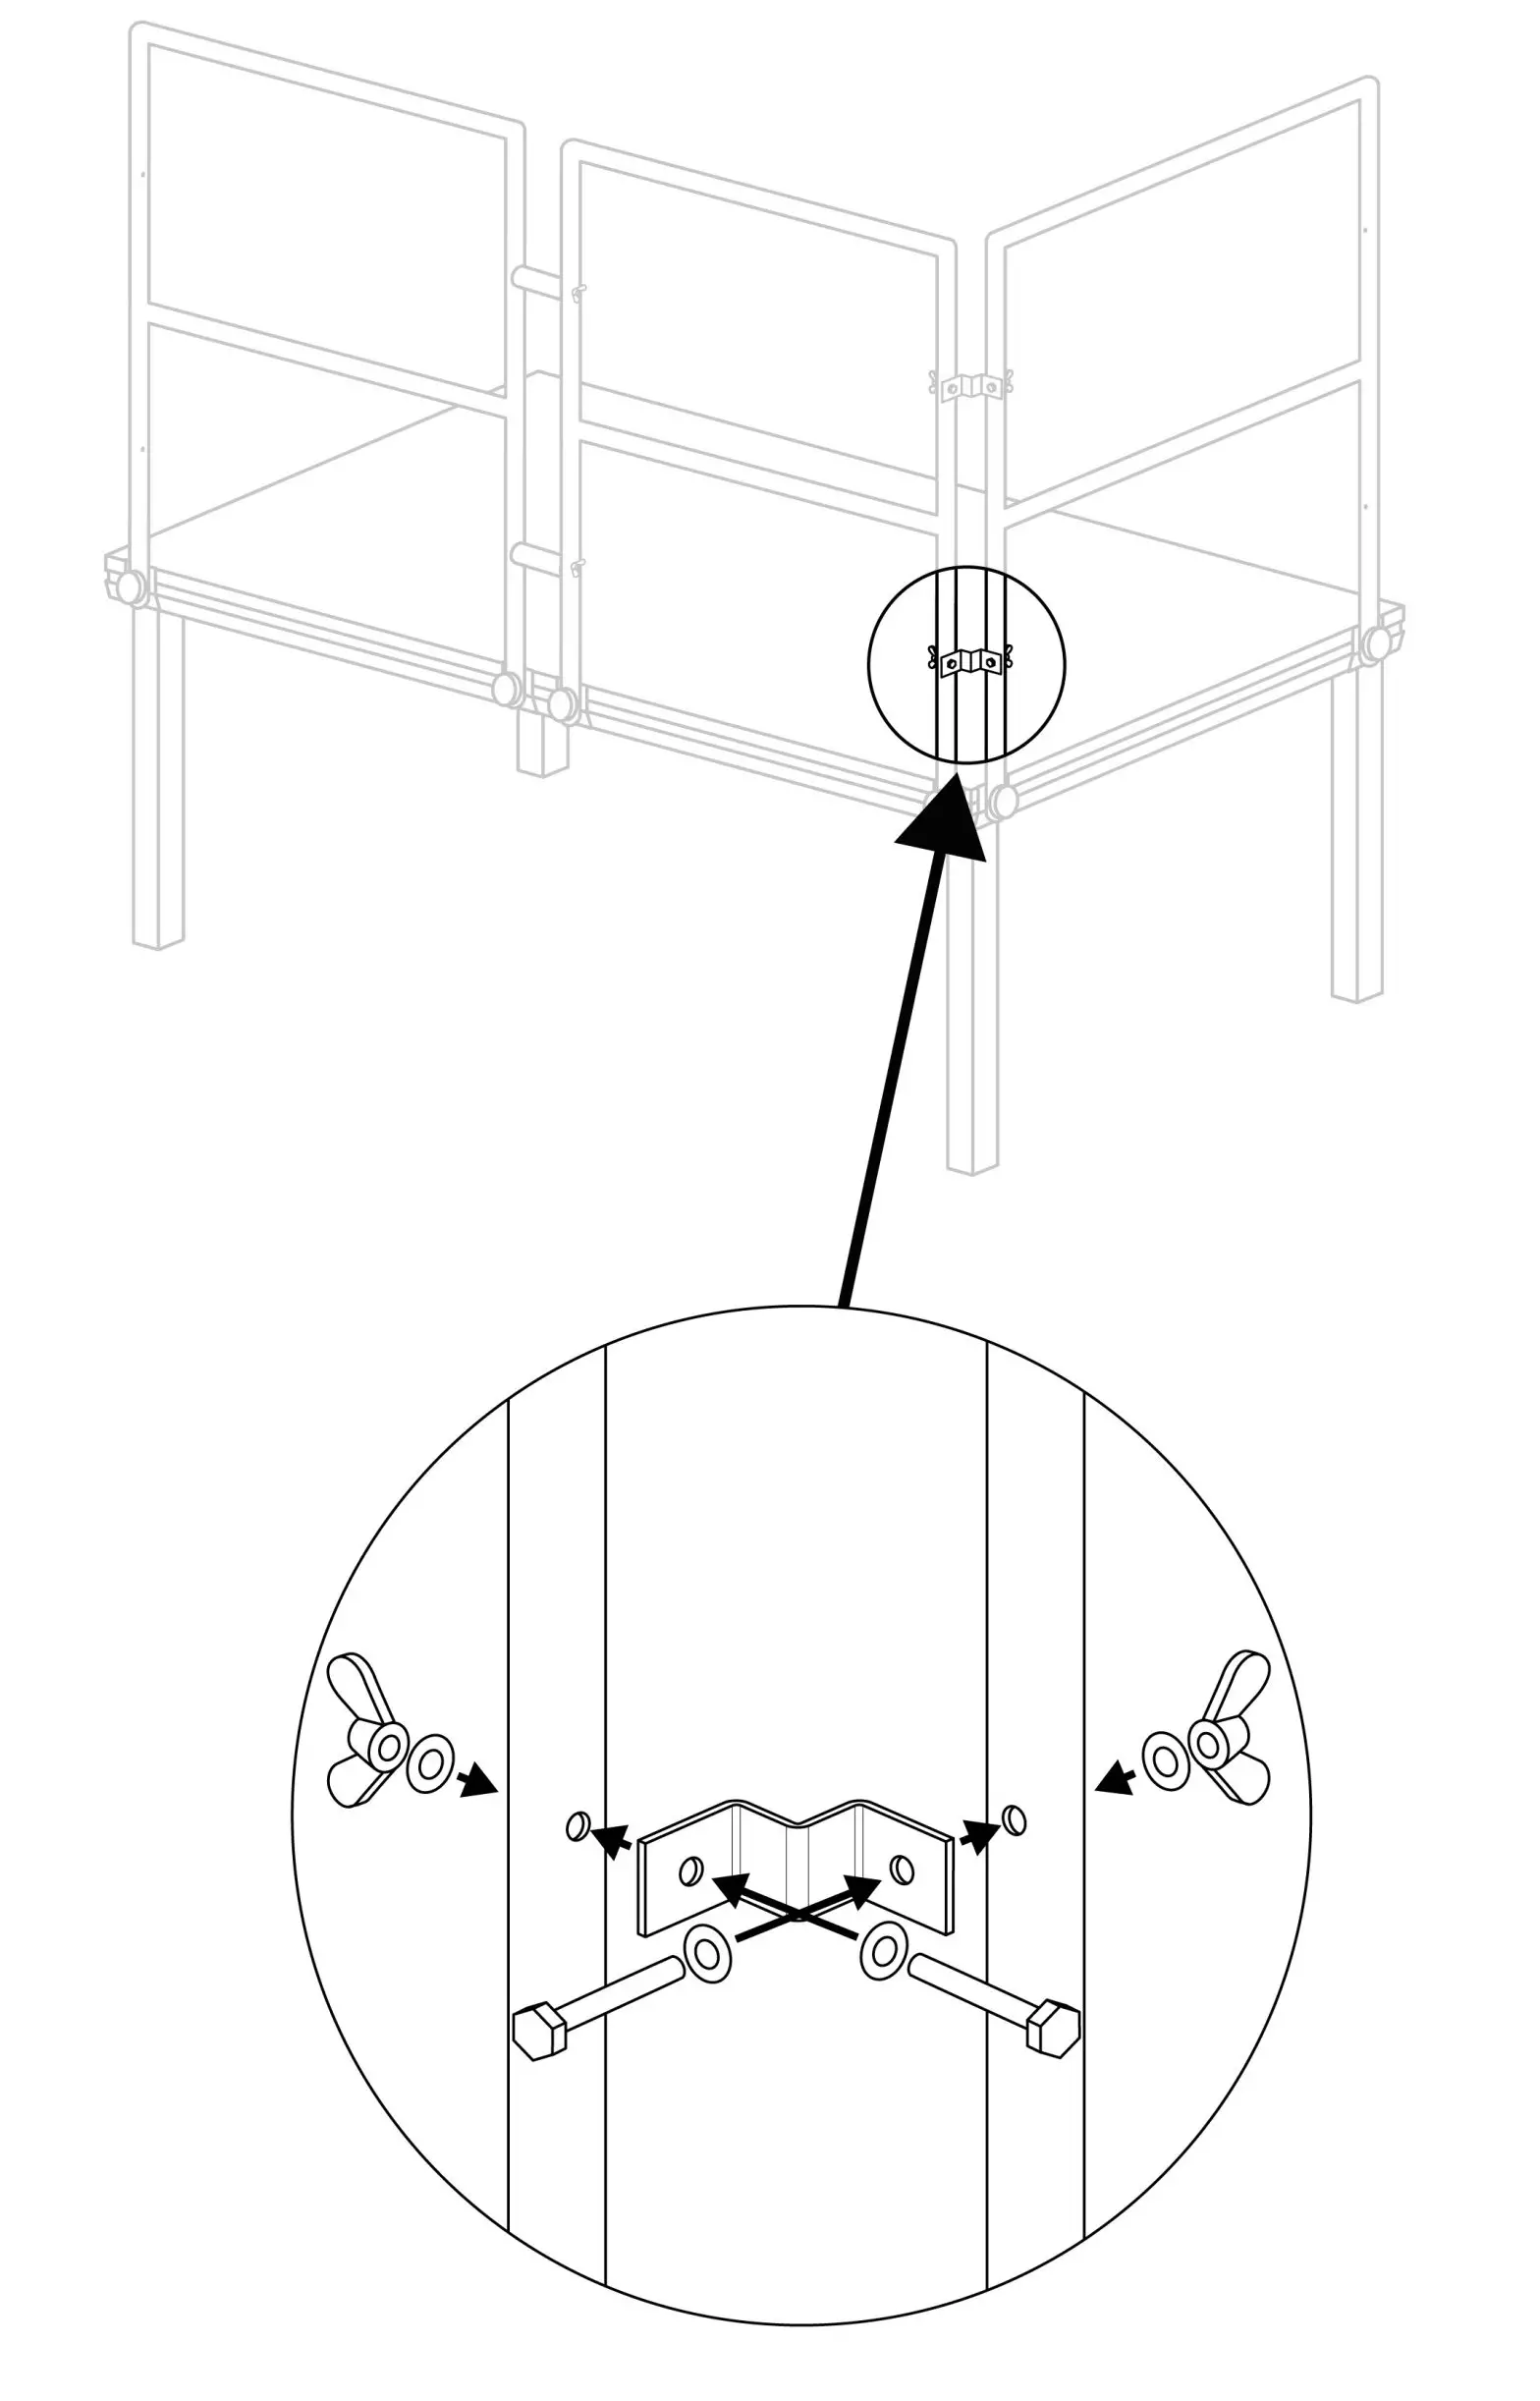
HANDRAILS CORNER CONNECTION
Connect the handrails on the corner with a handrail corner connection as shown on the below diagram.
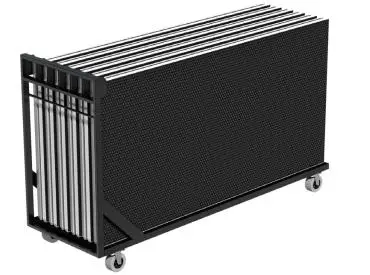
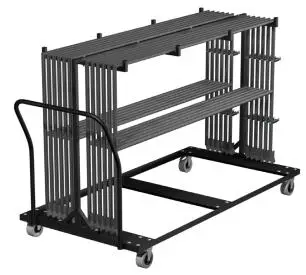
TRANSPORT AND STORAGE
Transport all components from one place to another on pallets, dollies or flight cases. Store all components so that they are free from dust and environmental influences.
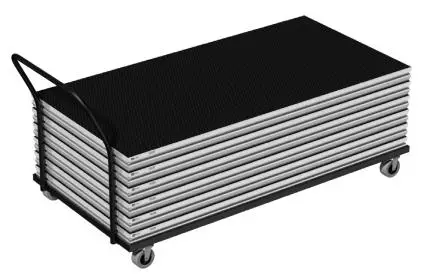
- Platform trolley – for transport and storage in a horizontal position.

- Platform trolley – for transport and storage in vertical position.
- Handrail trolley
MAINTENANCE
- Keep the system free of dust.
- Clean all parts with a damp cloth and warm water. Avoid cleaning materials and chemical liquids.
DO AND DON’T
Do!
- Check to ensure the stage floor is properly aligned and completely level.
- Check the application conditions of your stage, as the type of use is directly related to safety issues like handrails.
- Brace your staging legs when needed for stability.
- Make sure all stage elements are interconnected.
- Take notice of local regulations for stages and allowed purposes.
- Store stage deck upside down to decrease setup time.
- Maintain your stage deck at regular intervals.
- Make sure your construction is properly grounded.
Don’t!
- Use materials in poor condition, the payload might be reduced substantially.
- Apply loads before knowing their exact weight and size.
- Exceed the maximum allowable load.
- Use unfinished stage deck top board in outside conditions.
- Exceed the maximum building height of the stage or its support frame.
- Use the hang-on profile without reducing the maximum allowable payload.
- Build your stage on unstable ground.
- Use stage deck elements as ballast for your roof without using the proper support frame.
TECHNICAL SPECIFICATION
Frame: Aluminum (EN AW-96005 T6)Finish: PlywoodUniformly distributed load: 750kg/m2Point load F1: 300kgPoint load F2: 300kgIn compliance with: DIN EN1991-1 (Eurocode1)DIN EN1995 (Eurocode1)DIN EN1999 (Eurocode1)DIN 15921
* The point load should be applied to a minimum area of 50x50mm* Point load to be placed as indicated on the below drawing.* 1 Point load total allowed
 report this ad
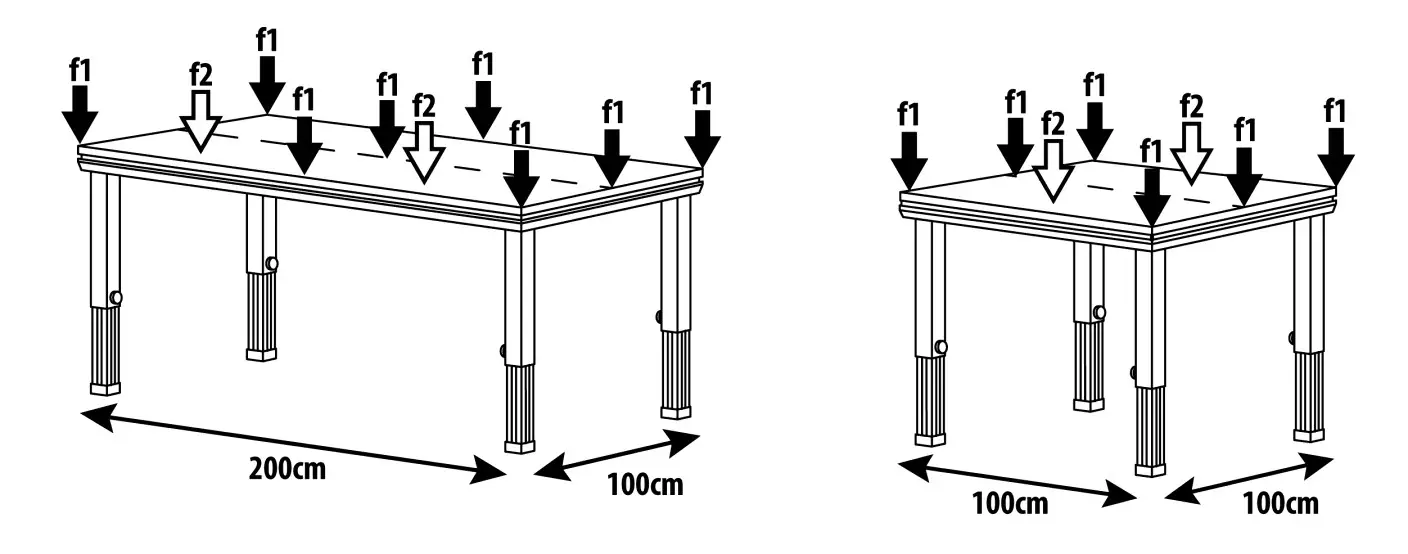
The specifications are typical. The actual values can slightly change from one unit to the other. Specifications can be changed without prior notice.
Specifications and design are subject to change without prior notice.www.tronios.comCopyright © 2021 by Tronios The Netherlands
References
[xyz-ips snippet=”download-snippet”]