Digital Power Supply Case (S06A) Assembly Instruction
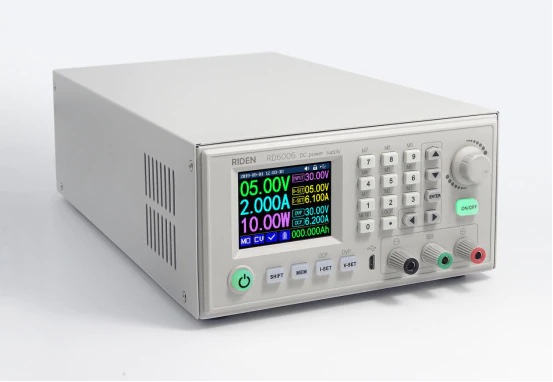
This case is suitable for RD6006
Date:2019.9.16
Dear users, thank you for purchasing the digital power supply accessory-metal case produced by Hangzhou Ruideng Technology Co., Ltd. In order to let you know more about the full function of this product, get a better experience and avoid misuse. Please read this instruction carefully before assembly. Keep it for future reference.
ATTENTION: Since the assembly process involves voltage that exceeds the human body’s safety, non-professionals should not operate, you must do insulation and protective measures during the assembly process, and check the wiring several times for safety, please place the product at a place that children and old people cannot get.
Please use the switch power supply we recommend, and if you use other power source, check if the positions of fixing holes are suitable or not.

1. Notes
- Read this instruction carefully before assembly, if you still have question, please contact us.Since the assembly process involves voltage that exceeds the human body’s safety, non-professionals should not operate, you must do insulation and protective measures during the assembly process, don’t forget to check the wiring several times for safety, and place the product at a place which children and old people can not get.
- This case is made of cold-rolled steel plate and the surface is sprayed. When assembling and using, prevent it from scratching by sharp objects, and avoid direct sunlight and humid environment.
- Avoid short circuit when assembling, connect the electrode correctly.
- NEVER connect the cables with the power ON.
- Try to avoid vibration and fall.
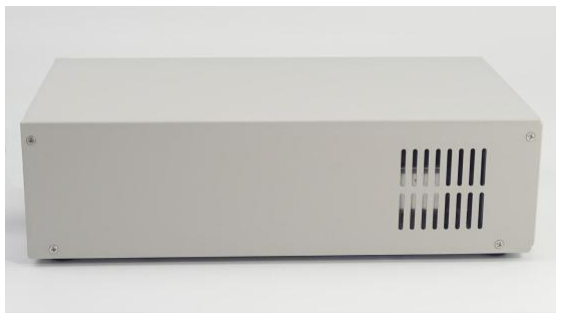
2. Product Dimension

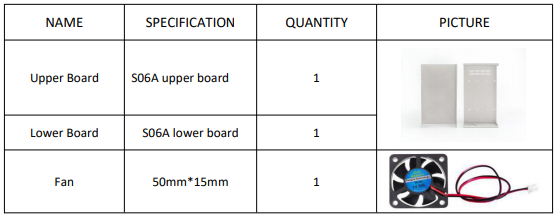
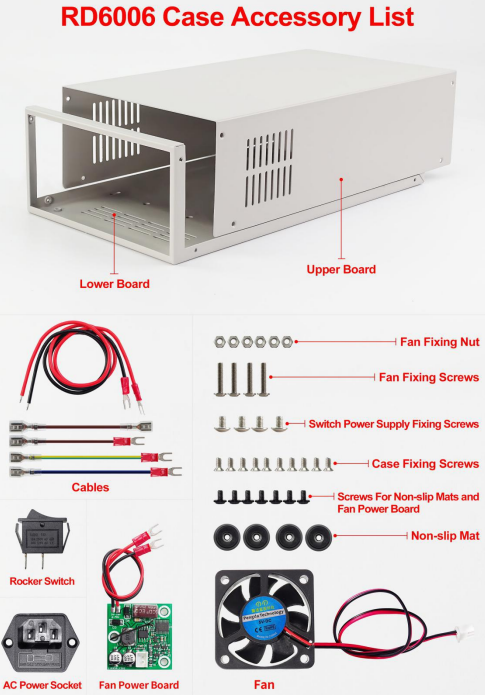
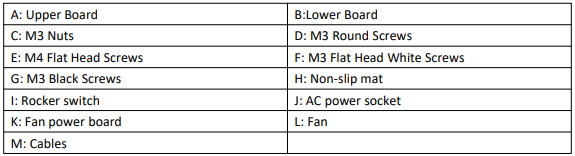
3. Accessory List


4. Accessory Picture
5. Assembly Procedure
5.1 Assembly Preparation
- RD6006 digital power supply*1, S06A case*1, 60V6A switch power supply*1
- Tools, accessory(DC power supply, 3 pin plug cable, multimeter, screw driver, test pencil…)
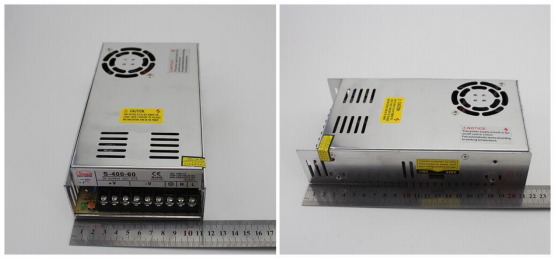
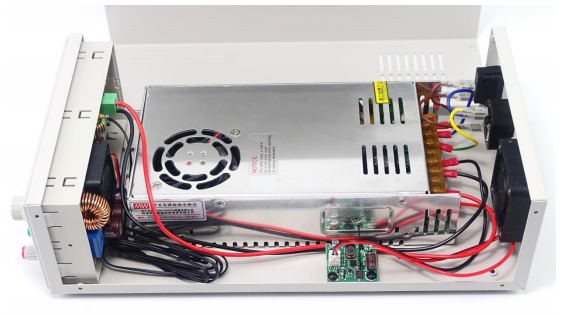
- Proper assembly environmentIt is recommend to use a 400W 60V switch power supply as shown below.
5.2 Assembly step
Note: The case material is a bit soft and may be slightly deformed during transportation. If there is a gap during the assembly, please straighten it before assemble it. If you find the temperature inside the case is high. You can install the fan of the 60V switch power supply in the opposite way, the heat dissipation is better in this way.
① Check the accessories: check if the accessories of S06A are same as accessory list or accessory picture.
② Check RD6006: connect the longest cable to the input interface of RD6006, and then adjust input power supply to 12v/1A to power on RD6006, and set 5V/1A output on RD6006, turn on the output to see if the output is normal or not.
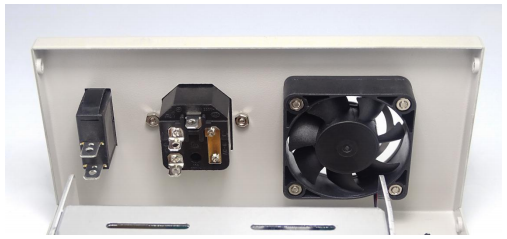
③ Back board assembly: install the rocker switch, AC power socket and fan on the lower board.
④ Install the switch power supply: install the switch power supply on the lower board.

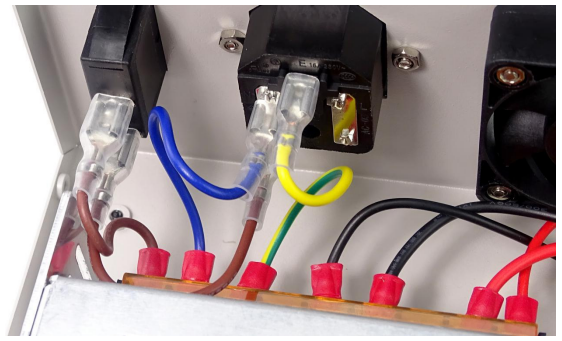
⑤ Connect cables to switch power supply: (dangerous, non-professionals should not operate)
Use the brown cable to connect the rocker switch and the live wire (L) of the switch power supply; then use the brown cable to connect the rocker switch and the live wire (L) of the AC power socket; Use the blue cable to connect the neutral wire (N) of AC power socket and the neutral wire (N) of switch power supply; Use a yellow-green two-color cable to connect the ground wire (E) of AC power socket and the ground wire (〨) of switch power supply.
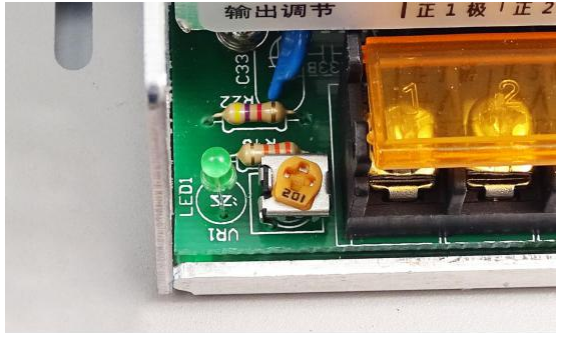
⑥ switch power supply test:
check the wring again and power on the switch power supply, and use test pencil to check the power and insulation status. Then use multimeter to check if the 60V output is normal, then use screw driver to adjust the output of the switch power supply to 65V.
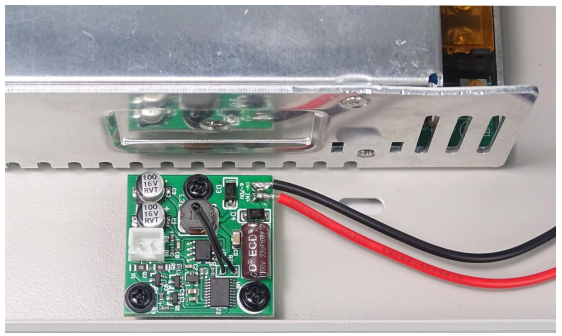
⑦ Install the fan power board: install the fan power board to the corresponding position.
⑧ Install RD6006: install RD6006 on the front side and connect the external sensor.
⑨ Connect the rest cables: connect the input of RD6006 to the output of switch power supply, and connect the input of fan power board to the output of switch power supply, connect the fan cable to fan power board.
⑩ Power on and test
Connect power cable and turn on the switch, the fan start to work.
(Note:Temperature-controlled fan, when the RD6006 is powered on below 40℃, it will work for 3 seconds and then stop, and it will run at low speed below 40℃-50℃, run at medium speed below 50℃-60℃, run at full speed when the temperature exceeds 60℃)
⑪ Install the screws of the case
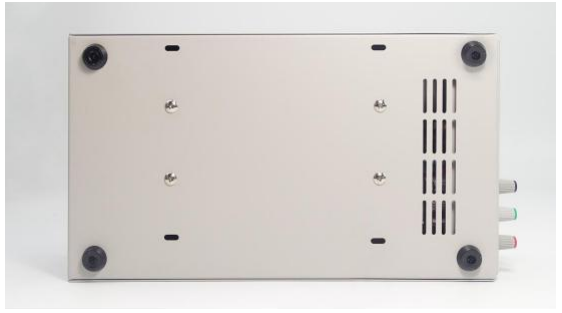
⑫ Install the foot pads.
⑬ Final energization test
Digital Power Supply Case (S06A) Assembly Instruction Manual – Digital Power Supply Case (S06A) Assembly Instruction Manual –
[xyz-ips snippet=”download-snippet”]