
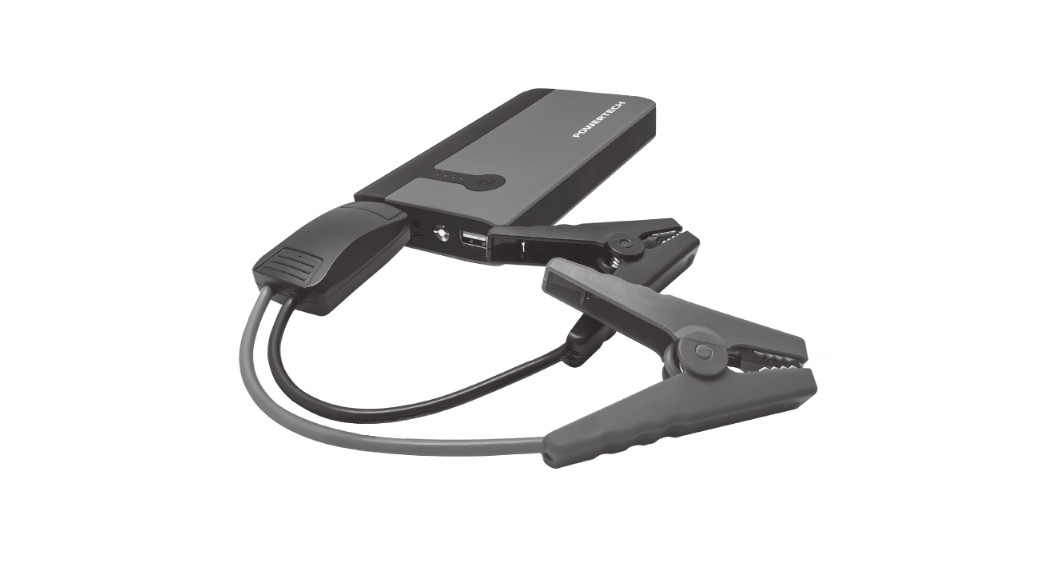
Jump Starter and Powerbank
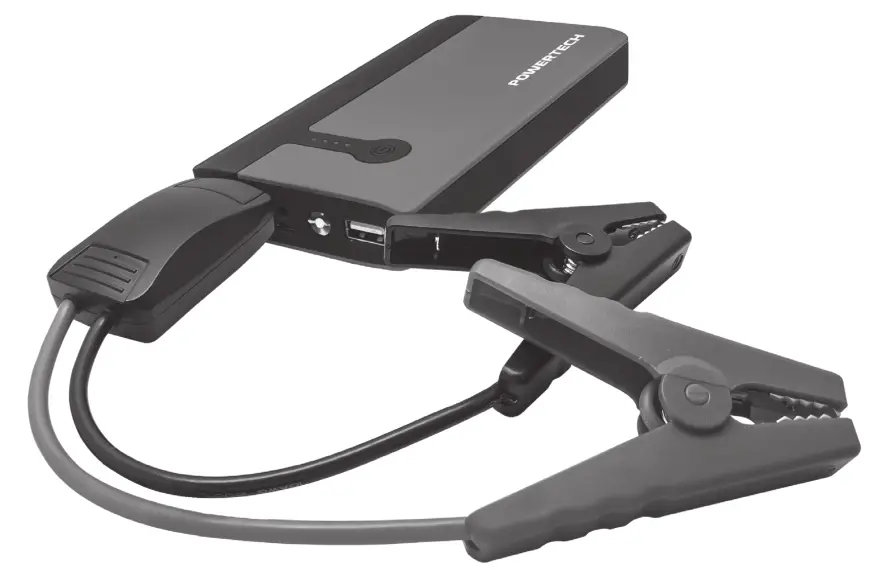
Instruction Manual
Product Specifications
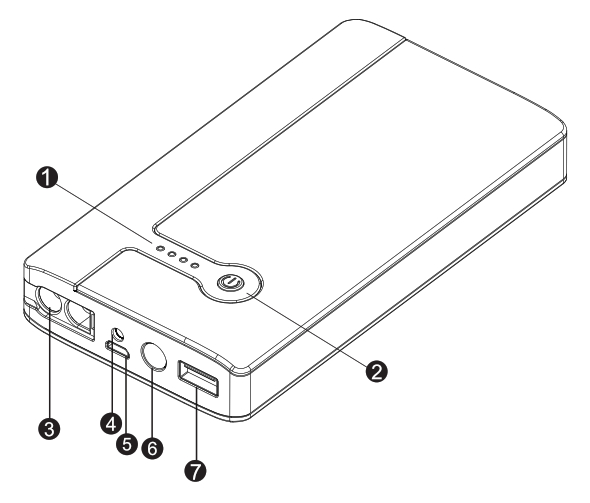
- LED Indicator
- Power Button
- 12V Output
- Charging Port 15V/1A
- Charging Port 5V/1A
- LED
- USB Output
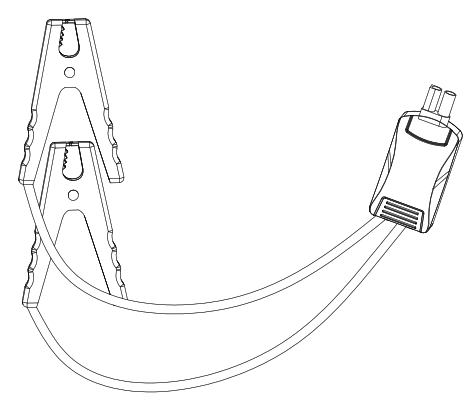
Smart Battery Clamp
| No. | Items |
Technical Specification |
| Electrical Performance | Output Low Voltage Protection | < 10.SV(±0.2V) |
| Input High Voltage Protection | >12.7V(±0.2V) | |
| Start condition | The car battery <Jump Starter Battery (0.5V-1.0V) | |
| Minimum Start Voltage | >2V | |
| Polarity Reverse Voltage | z•O.SV | |
| Start Current | 180A±20% | |
| Peak Current | 400A±20% | |
| Start Time | 30s±2% | |
| Protection Performance | Short Circuit | Support |
| Polarity Reverse | Support | |
| Input Low Voltage Protection | Support | |
| Input High Voltage Protection | Support | |
| Reverse Charging Protection | Support | |
| Over Current Protection | Support |
Smart Battery Clamp performance
| No. | Item |
Details Description |
| 1 | Start Status | Green tight On (30S) |
| 2 | Start Time | 305
The Starting time is> 30S,The Red light will keeping flashing, the output cuts off automatically. |
| 3 | Reverse Charging | The Red light will keeping flashing, The buzzer will be sound, when removing the battery clamp from car battery and jump starter unit, the clamp will return normal |
| 4 | Short Circuit Protection | The Red light will keeping flashing, The buzzer will be sound, when the short Circuit went off, the clamp will return the test status automatically |
| 5 | Polarity Reverse Protection | The Red light will keeping flashing, The buzzer will be sound, when removing the battery clamp, the clamp will return the test status automatically |
| 6 | Input High Voltage
Protection |
The Red light will keeping flashing, The buzzer will be sound, when the high voltage went off, the clamp will return the test status automatically |
| 7 | Input Low Voltage
Protection |
The Red light will keeping flashing, The buzzer will be sound, when the low voltage went off, the clamp will return the test status automatically |
| 8 | Over Current Protection | The Red and Green light will keeping flashing, The buzzer will be sound, the clamp will return normal.(Inspect time <5$) |
OPERATING INSTRUCTIONS
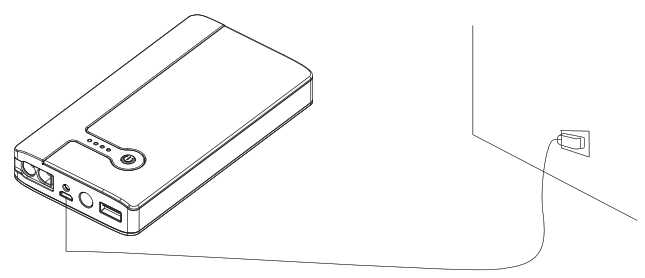
CHARGING YOUR MB3763You can charge your MB3763 one of two ways:
- Using the supplied 240volt mains charger.
 OR
OR - Using the supplied 12volt car/ cigarette charger.
 0 Charging takes 3- 5 hours using either charging option.
OPERATION INSTRUCTIONS:
TURNING ON YOUR JUMP STARTER:Prior to using the Jump Starter, please ensure that the device is switched ON first. Simply locate and press the Power button to turn on the unit.
STARTING YOUR VEHICLE:Please ensure that your Jump Starter is no less than 50% charged. If it is below 50%, you may not be able to jump-start your vehicle.
- Connect the jumper leads to your Jump Starter.
- Connect the + (Red clamp) to the + terminal on your car battery.
- Connect the + (Black clamp) to the – terminal on your car battery.
- Turn the key/ignition on to start the vehicle.
- Once your vehicle has started, disconnect the jumper leads as soon as possible.
NOTE:
- After starting your vehicle, remove the Jump Starter as soon as possible.
- DO NOT connect the 2 clamps together.
- DO NOT disassemble the Jump Starter.
TURNING ON YOUR MB3763Turning on your MB3763 jump starter for the below functions is a 1-step process:
- Press the round power button.
- Your MB3763 is now ready to use.
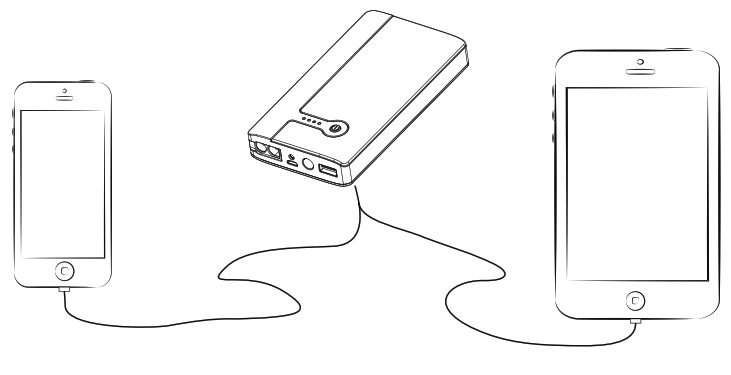
CHARGING DIGITAL DEVICES VIA USB
- You can either use the provided USB break-out lead or your own USB cable suitable for your digital device.
- Connect either cable to the Mb3763.
- If using the provided USB break out lead, select the correct connection for your device.
EXAMPLE BELOW:
HOW TO USE THE LED TORCH
- Press and hold the round power button for 3 seconds. The LED torch will turn on.
- Press the round button again will activate the strobe function.
- Press the round button again will activate the SOS function.
CHARGE INDICATOR
- Press the round power button to check the charge status of the MB3763. Each blue-light represents a 25% charge.
- When charging. the 1st light will flash until charged, then the 2nd and so on. until fully charged.
- The lights will stop flashing once the MB3763 is fully charged.
TROUBLESHOOTING
If you are unable to troubleshoot, please stop using the Mb3763 And contact us.
|
PROBLEM |
CAUSE |
SOLUTION |
| The power capacity is showing 100% butthe unit did not fully charge. | The indicator light of the device indicates 4 lights. stop charging.This means the unit is in a semi-state of charge due to long-term storage. | Pull out the charging plug and reconnect. |
| Nothing happens when I press theround power button | The unit is in low voltage protectionmode and cannot be turned on. | Insert the charger plug into the 12V 2amp socket to activate. |
WARNING
1. After starting your vehicle, remove the Jump Starter as soon as possible.2. DO NOT connect the 2 clamps together.3. DO NOT disassemble the Jump Starter.
![]() Do not use the product in the bathroom or near water.
Do not use the product in the bathroom or near water.![]() Do not remodel or dismantle the device.
Do not remodel or dismantle the device.![]() Keep the device away from children.
Keep the device away from children.![]() Do not reverse the input or output connections.
Do not reverse the input or output connections.![]()
![]()
![]()
![]()
![]()
![]()
![]()
![]()
![]()
![]()
![]()
![]()
![]()
![]()
![]()
![]()
![]()
![]()
![]()
![]()
![]()
![]()
![]()
![]()
![]()
![]()
![]()
![]()
![]()
![]()
![]()
![]()
![]()
![]()
![]()
![]()
![]()
![]()
![]()
![]()
![]()
![]()
![]()
![]()
![]()
![]()
![]()
![]()
![]()
![]()
![]()
![]()
FREQUENTLY ASKED QUESTIONS:
- How do I turn off my Jump Starter? The device has smart detection, in the case, there is no load or charging is finished, the MB3763 will turn itself off.
- How long does a full charge take? A full charge can take between 3-5 hours using either 240V or 5V charging options.
- How many times can I Jumpstart my vehicle in one charge? This depends on different engine displacements. The Jump Starter can start a vehicle up to 10 times on one charge.
- If not being used how long can I store my Jump Starter? It is recommended to charge the Jump Starter once every 3 months. 5. Why won’t my Jump Starter start my car? Ensure the unit is charged above 50%. Ensure the clamps are secure and not connected incorrectly. Ensure the battery terminals are cleans and free from corrosion. If corroded, clean the terminals and reconnect the Jump Starter as per the instructions in this manual.
Warranty card
We offer a 12-month warranty startingfrom the date of purchase.
Warranty conditions: Please show this completed warranty card to obtain warranty service. We offer a 12-month warranty starting from the date of original purchase and covers normal use as set out in this manual.Warranty does not cover the following:Incorrect use of the device or its components.Dismantling of the device or components.Product labels or markings were removed.Exposure to extreme temperatures
| Model No. | Series No. |
| Purchase Date | Repair Date |
| Customer Name | Tel |
| Customer Address | |
| Sales Unit | |
| Description of Malfunctions | |


Distributed by:Electus Distribution Pty. Ltd. 320 Victoria Rd, Rydalmere NSW 2116 Australia www.electusdistribution.com.auMade in China

[xyz-ips snippet=”download-snippet”]

 OR
OR 0 Charging takes 3- 5 hours using either charging option.