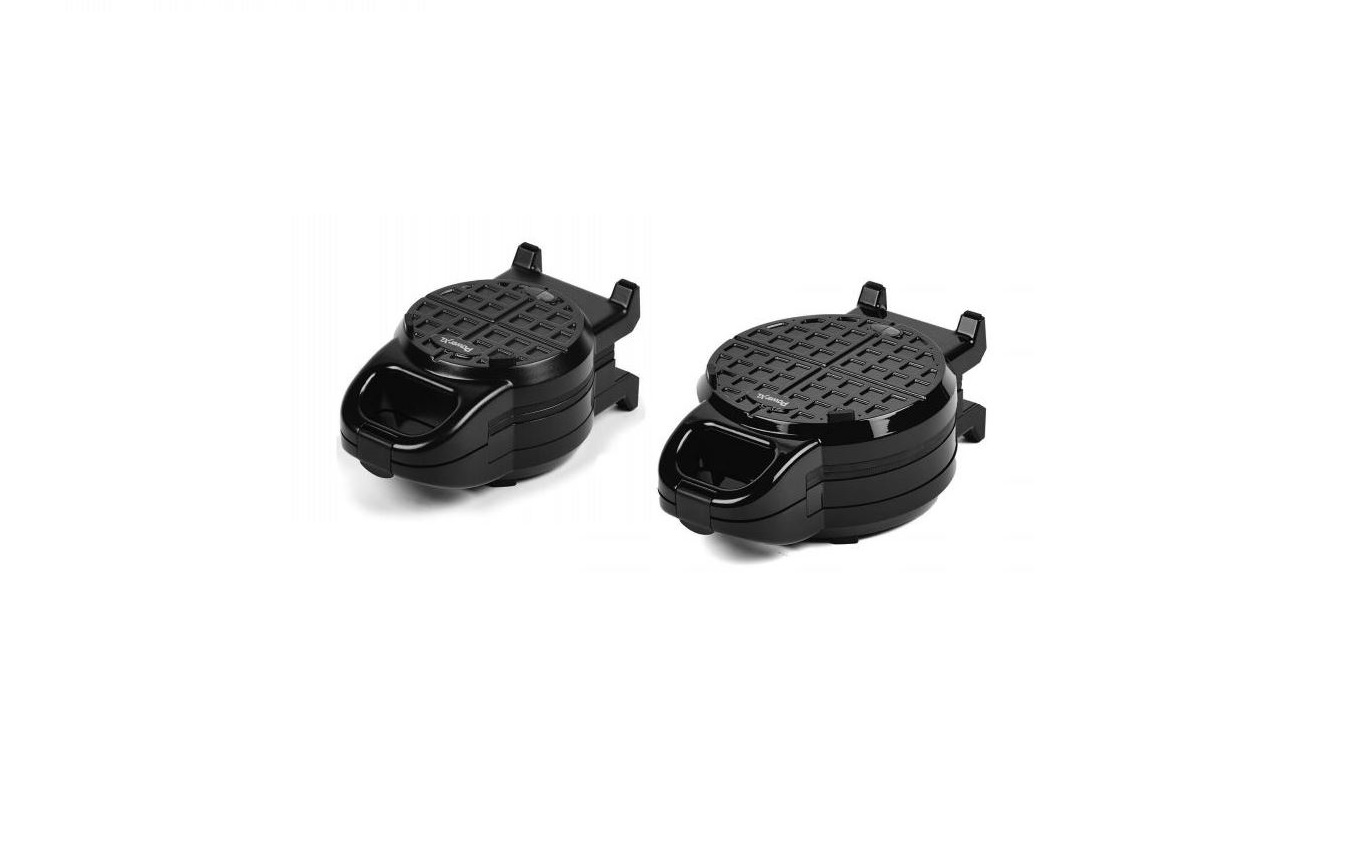
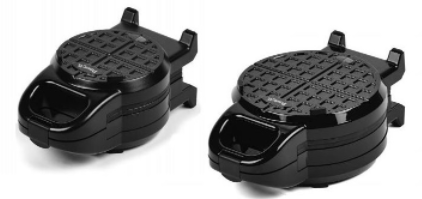
PowerXL ESWM02 Stuffed Wafflizer Plus
When using electrical appliances, basic safety precautions should always be followed. Do not use the PowerXL Stuffed Wafflizer Plus™ until you have read this manual thoroughly.
Visit TristarCares.com for tutorial videos, product details, and more.
BEFORE YOU BEGIN
The PowerXL Stuffed Wafflizer Plus™ lets you cook Belgian-style waffles stuffed with all your favorite foods and fillings for endless possibilities of custom meals and treats. But before you begin, it’s very important that you read this entire manual, making certain that you are completely familiar with this appliance’s operation and precautions.
IMPORTANT SAFEGUARDS
WARNING: When using electrical appliances, always follow these basic safety precautions.
- Read all instructions before using the appliance.
- This appliance has a two-prong plug. This plug is intended to fit into a polarized outlet only one way. DO NOT ATTEMPT to modify the plug in any way.
- Use this appliance only for its intended use as described in the manual.
- DO NOT use corrosive chemicals on this appliance.
- This appliance is not intended for use by people (including children) with reduced physical, sensory, or mental capabilities or lack of experience and knowledge unless they have been given supervision or instruction concerning use of the appliance by a person responsible for their safety.
- DO NOT operate this appliance if it has a damaged cord or plug, if it is not working properly, or if it has been damaged or dropped.
- NEVER use with an extension cord. A short power supply cord (or detachable power-supply cord) is provided to reduce the risk from becoming entangled in or tripping over a longer cord.
- Unplug the appliance when not in use.
- Keep the power cord away from water and heated surfaces.
- DO NOT let the power cord hang over the edge of a table or counter.
- TO AVOID ELECTRICAL SHOCK, DO NOT put liquid of any kind into the Main Unit Housing containing the electrical components.
- Keep the appliance and its Power Cable OUT OF THE REACH of children when the appliance is in operation or during the cooling process.
- WEAR OVEN MITTS when handling hot components or touching hot surfaces
- Should the appliance emit black smoke, UNPLUG IMMEDIATELY and wait for smoking to stop before handling the appliance.
- This appliance should be serviced only by qualified service technicians. Contact Customer Service using the information located on the back of this manual.
- While cooking, the internal temperature reaches several hundred degrees Fahrenheit. NEVER place hands inside the appliance unless it is thoroughly cooled.
- When cooking, do not place the appliance against a wall or near other appliances. DO NOT place anything on top of the appliance.
- DO NOT store or use this appliance outdoors.
- DO NOT place or use this appliance near water, such as near or above a kitchen sink or similar locations. Never submerge this appliance in water.
- DO NOT place your appliance on a cooktop, even if the cooktop is cool, because you could accidentally turn the cooktop on, causing a fire, damaging the appliance, your cooktop, and your home.
- DO NOT operate this appliance on or near combustible materials, such as tablecloths or curtains.
- Before using your new appliance on any countertop surface, check with your countertop manufacturer or installer for recommendations about using appliances on your surfaces. Some manufacturers and installers may recommend protecting your surface by placing a hot pad or trivet under the appliance for heat protection. Your manufacturer or installer may recommend that hot pans, pots, or electrical appliances should not be used directly on top of the countertop. If you are unsure, place a trivet or hot pad under the appliance before using it.
- DO NOT place anything inedible inside the appliance or place the appliance in any container or small, confined space while the appliance is heated or in operation.
- Always operate the appliance on a horizontal surface that is level, stable, and noncombustible.
- DO NOT leave this appliance unattended while in operation.
- DO NOT use raw food as filling: pre-cook fillings if necessary. Raw fillings, such as meats, chicken, and eggs, will not be cooked completely in this appliance. Raw fillings should be cooked before using them as a filling in this appliance. See the recipe guide for detailed instructions.
- Do not attempt to force the appliance closed. If there is too much batter or filling inside, remove as needed.
- DO NOT attempt to dislodge food or unlatch or open the appliance while in operation.
- DO NOT use sharp utensils (knives or forks) to extract food from the appliance. These implements can damage the appliance’s protective nonstick coating.
- Always unplug the appliance after use and then allow the appliance to cool for 30 minutes before handling, cleaning, or storing.
- When cleaning the appliance’s interior, use only mild, nonabrasive soaps or detergents applied with a sponge or soft cloth.
- This appliance is not intended for operation with any external timers or remote-control systems.
- This appliance is for home use only. If the appliance is used improperly or for professional or semi-professional purposes or if it is not used according to the instructions in the user manual, the guarantee becomes invalid and Tristar will not be held liable for damages.
Electric PowerIf the electrical circuit is overloaded with other appliances, your new appliance may not operate properly. This appliance should be operated on a dedicated outlet.
Shut-OffTo shut off this appliance you will need to unplug it from the electrical outlet.
Electromagnetic FieldsThis appliance complies with all standards regarding electromagnetic fields. If handled properly and according to the instructions in the user manual, the appliance is safe to use based on scientific evidence available today.
WARNING: For California Residents
This product can expose you to Di(2-ethylhexyl)phthalate, which is know to the State of California to cause cancer and birth defects or other reproductive harm.For more information go to www.P65Warnings.ca.gov.
Parts & Accessories
NOTE: Unpack all contents from the packaging. Contents vary by model. Check all packaging material carefully for parts. Please remove any clear or blue protective film on the components.Optional items may be sold separately.
Front Indicator LightsThe red Indicator Light will illuminate immediately after plugging the appliance into a 120V dedicated outlet and will stay lit as long as the appliance is plugged in. The green Indicator Light illuminates when the appliance has preheated. The green Indicator Light cycles on and off during the cooking cycle, indicating that the appliance is maintaining its temperature.
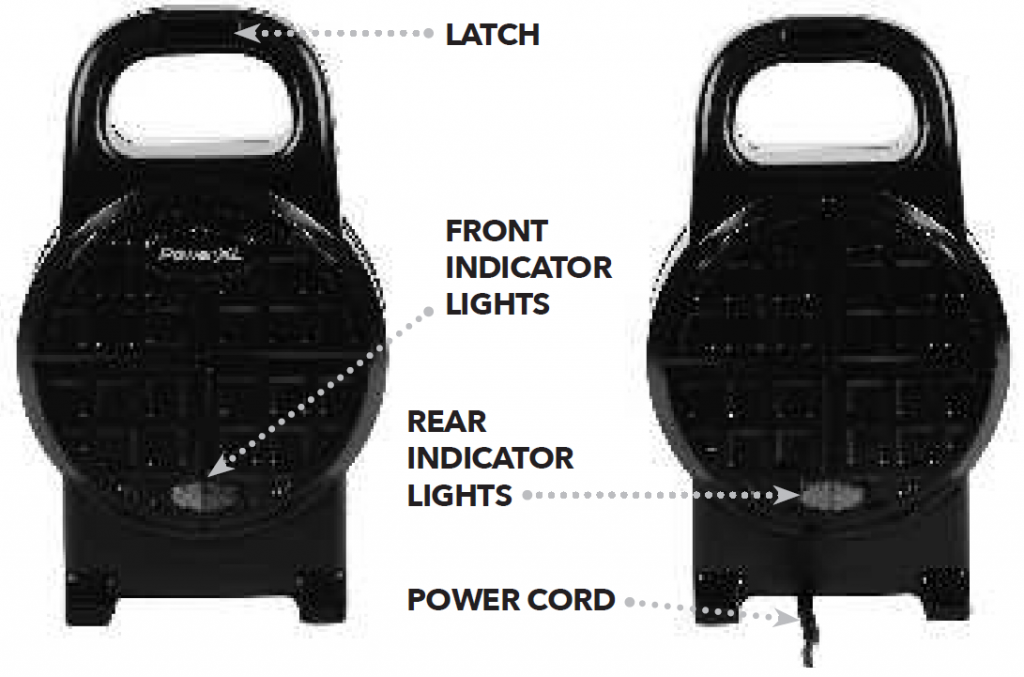
Rear Indicator LightsThe rear Indicator Lights are red and will illuminate as soon as the appliance is plugged in and will stay lit as long as the appliance is plugged in.
Appliance Specifications
| ModelNumber | SupplyPower | RatedPower | CookingSize | ExternalDimensions |
| ESWM02 | AC 120V 60Hz | 700W | 5″ diameter | 10.6″ x 6.5″ x 4.7″ |
General Operating Instructions
Before First Use
- Read all material, warning stickers, and labels.
- Remove all packing materials.
- Wipe the outside of the appliance with a warm, moist cloth and mild detergent.
- Clean the inside of the appliance with warm water, a mild detergent, and a nonabrasive cloth or sponge. Never submerge the appliance in water or wash in a dishwasher.
- Rinse the appliance with a clean, damp cloth. Use a clean, dry cloth to dry the appliance interior. Do not leave standing water in the appliance.
- Let the appliance run for a few minutes to burn off the manufacturer’s protective coating of oil (a slight odor or smoking might occur during this process; this is normal):
- Locate the appliance on a dry, level, stable, heat-resistant surface.
- Ensure the appliance is closed, latched, and rotated onto its side so that the dual red/green Indicator Lights are facing straight upward.
- Plug the power cord into a 120V dedicated outlet. The red Indicator Light should light up to indicate the appliance is preheating.
- Wait for the appliance to finish preheating, indicated by the adjacent green Indicator Light lighting up.
- L et the appliance run for 3 minutes. Then, unplug the appliance.
- Wipe the appliance off with a damp cloth or sponge to remove any residue.
Using the Appliance
- Place the appliance on a dry, level, stable, heat-resistant surface.
- Ensure the appliance is closed, latched, and rotated onto its side so that the dual red/green Indicator Lights are facing straight upward.
- Plug the power cord into a 120V dedicated outlet. The red Indicator Light will light up to indicate the appliance is preheating.
- Wait for the appliance to finish preheating, indicated by the adjacent green Indicator Light lighting up.
- Unlatch and open the appliance, being careful not to touch the interior. Add the first layer of batter, which should be as little as needed to cover the waffle prongs on the bottom of the appliance (Fig. i). After sitting for a few seconds, the batter will begin to rise a little.

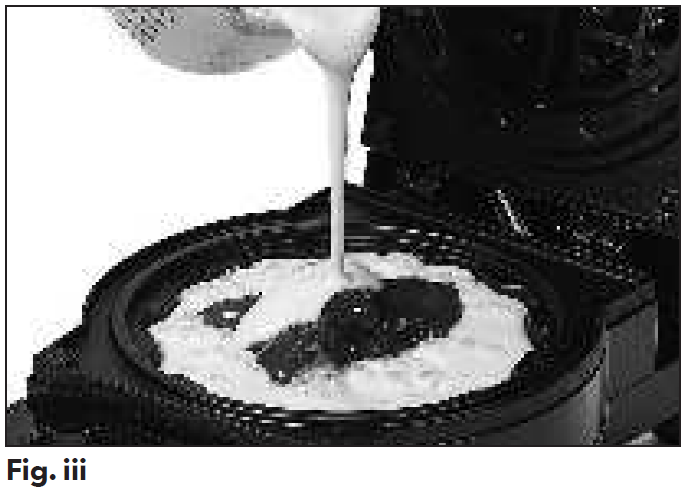
- Center the filling over the first layer of batter (Fig. ii) and cover with the remaining batter, filling up to about three quarters of the way to the top (Fig. iii). DO NOT fill all the way to the top; this is overfilling and will cause leaking during the cooking process.
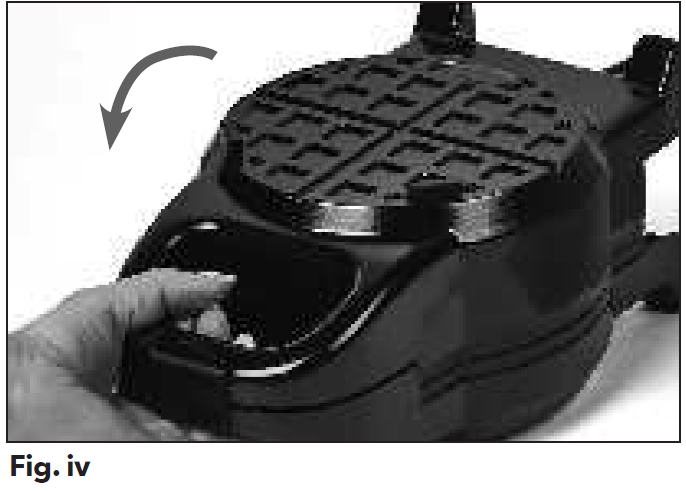
- Close and latch the appliance. Then, use the handle to flip the appliance over (Fig. iv). After 5–7 minutes, the appliance can be opened to check on the status of the food. The appliance can be closed again to continue the cooking process for more well-done food. DO NOT try to open the appliance during the cooking process. Steam can build up while the batter is cooking.
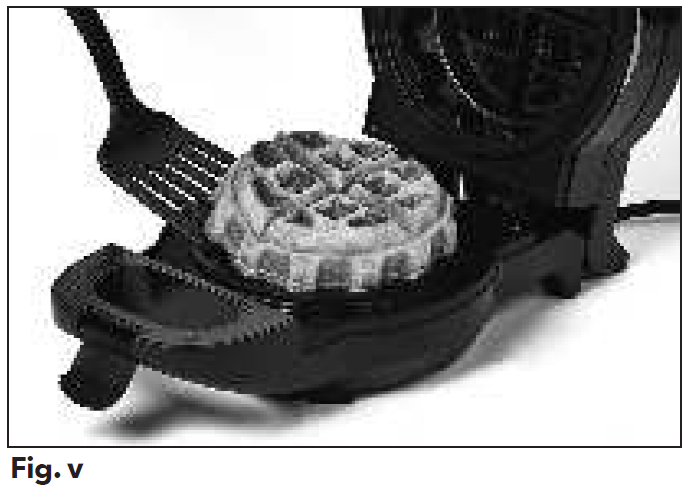
- When the food is done cooking, it can be removed from the appliance. Wear oven gloves/mitts before handling to protect against escaping steam. Unlatch and open the appliance. Then, use plastic/wooden/rubber utensils to carefully lift the waffle onto a plate. Do not use sharp metal utensils that may scratch the nonstick coating in the appliance (Fig. v).
- Unplug the appliance and let it cool before cleaning the appliance (see the “Care & Cleaning” section).


Cooking Guidelines & Tips
Tips
- Wearing oven mitts/gloves can protect against accidental contact with the heated surfaces and escaping steam when unlatching the appliance.
- Fillings such as meats, chicken, and eggs should be cooked and frozen foods should be thawed before using them to make waffles. The cooking time is not long enough and the cooking temperature is not hot enough to adequately cook uncooked food or heat frozen food used for filling.
- The first layer of batter added should be as little as needed to cover the waffle prongs on the bottom of the appliance. After sitting for a few seconds, the batter will begin to rise a little. Then, add your filling (centered in the middle of the batter). The filling should not be placed near the edges of the batter. After the filling is added, cover it with the remaining batter, close the lid, and flip the appliance.
- If using canned fruits that are in syrup or vegetables that are in liquid (not pie filling), drain as much liquid as possible before using as a filling.
- If your filling is a more solid food, like diced ham, scrambled eggs, or nuts, you can add your filling and press it down into the batter with the back of a spoon. Be sure to cover the filling with the second layer of batter.
- The 5-inch appliance can hold approximately 1 cup of batter for an unstuffed waffle. The 7- inch appliance can hold approximately 1 ½ cups of batter for an unstuffed waffle. Stuffed waffles use less batter. The batter should only fill to about three quarters of the way to the top of the inside of the appliance. Expect the batter to expand during the cooking process.
- For maximum food safety, the U.S. Department of Agriculture recommends 165° F/74° C for all poultry; 160° F/71° C for ground beef, lamb, and pork; and 145° F/63° C, with a 3-minute resting period, for all other types of beef, lamb, and pork. Also review the USDA Food Safety Standards.
- To prevent scratching the coating, use only nonmetallic utensils. Do not lift or cut food in the appliance using sharp utensils, such as forks and knives, which can scratch the cooking surface.
- Do not use steel wool or other metal pads. They could leave coarse scratches. Always rinse thoroughly and dry immediately with a soft towel.
- Never stand the appliance up vertically while cooking. Only stand up the appliance for storage.
Troubleshooting
If Your Appliance Is Not Working Correctly
- Make sure the power cord is plugged into a dedicated outlet.
- The appliance may not be able to draw enough operating power from the outlet. Try switching the power cord to an outlet that has no other appliances attached to it.
- If the appliance cannot be latched shut, make sure there is nothing blocking or impeding the closure in anyway. Additionally, make sure there is not too much food or batter in the appliance.
- If the fillings have not been cooked or heated completely: Ensure that fillings are precooked if necessary and heated before adding them to the appliance.
Care & Cleaning
- Clean the appliance after each use. Unplug the power cord from the outlet and be certain the appliance is thoroughly cooled before cleaning. DO NOT soak or submerge the appliance in water or wash in a dishwasher.
- Wipe the outside of the appliance with a warm, moist cloth and mild detergent.
- Clean the inside of the appliance with warm water, a mild detergent, and a nonabrasive cloth or sponge.
- Rinse the appliance with a clean, damp cloth. Use a clean, dry cloth to dry the appliance interior. Do not leave standing water in the appliance.
Storage
- Unplug the appliance and let it cool thoroughly.
- Make sure the appliance is clean and dry.
- Place the appliance in a clean, dry place. The appliance may stand vertically for convenient storage.
Frequently Asked Questions
Does the appliance need time to heat up?Yes. The appliance will preheat automatically when plugged into an electrical outlet.The green Indicator Light illuminates when preheating is finished and cooking can begin.
How hot does this appliance get?The temperature range is 302° F–374° F (150° C–190° C).
How will I know when cooking is complete?Check your food after 5–7 minutes.
How much waffle batter do I need?The 5-inch appliance can hold approximately 1 cup of batter for an unstuffed waffle. The 7-inch appliance can hold approximately 1 ½ cups of batter for an unstuffed waffle. Stuffed waffles use less batter. The batter should only fill to about three quarters of the way to the top of the inside of the appliance. Expect the batter to expand during the cooking process.
Can I make a waffle with no filling?Yes. You will need approximately 1 cup of batter for the 5-inch appliance or 1 ½ cups of batter for the 7-inch appliance. Quantities of batter may vary depending on your recipe and the batter used.Stuffed waffles will use less batter. Never fill the interior of the appliance above three-quarters capacity. Refer to the recipe guide for examples of the amounts of batter used with different fillings.
Why did batter leak out of the sides during the cooking cycle?Too much batter was added.
Why are there gaps in my waffle or why is my filling not covered?Not enough batter was added before or after adding the filling.
Why is the waffle not crispy?You can leave your waffle in the appliance longer to cook it more, making it crispier.
Can I use gluten-free or keto waffle batter in this appliance?Yes. Gluten-free flour can be used to make batters to use in the appliance. Follow your recipe.
Can I use puréed fruit like applesauce in place of oil in the batter recipes?Yes, waffles can be made successfully using puréed fruit as a substitute for oil.
When I lift the baked waffle, the waffle separates and only the top half of the waffle comes out. What I am doing wrong?The waffle may have too much filling, the filling might not be centered, the waffle has not been baked long enough, or not enough batter has been used. Make sure the filling is centered so that the edges of the waffle can seal when it cooks. Bake the waffle for another 30 seconds to 1 minute to allow the waffle to cook through.
How do I stop operation/cool the appliance?You must unplug the appliance to stop the heating process and allow at least 30 minutes to cool.
What happens if the appliance still does not work after I have tried all the troubleshooting suggestions?Never attempt home repair. Contact Customer Service and follow the procedures set forth by the manual. Failure to do so could render your guarantee null and void.
Guarantee
90-Day Money-Back Guarantee
The PowerXL Stuffed Wafflizer Plus is covered by a 90-day money-back guarantee. If you are not 100% satisfied with your product, return the product and request a replacement product or refund.Proof of purchase is required. Refunds will include the purchase price, less processing and handling. Follow the instructions in the Return Policy below to request a replacement or refund.
Replacement Guarantee PolicyOur products, when purchased from an authorized retailer, include a 1-year replacement guarantee if your product or component part does not perform as expected, the guarantee extends only to the original purchaser and is not transferable. If you experience an issue with one of our products within 1 year of purchase, return the product or the component part for replacement with a functionally equivalent new product or part. The original proof of purchase is required, and you are responsible to pay to return the unit to us. In the event a replacement unit is issued, the guarantee coverage ends six (6) months following the receipt date of the replacement unit or the remainder of the existing guarantee, whichever is later. Tristar reserves the right to replace the unit with one of equal or greater value.
Return PolicyIf, for any reason, you would like to replace or return the product under the money-back guarantee, your order number can be used as the return merchandise authorization number (RMA). If the product was purchased in a retail store, return the product to the store or use “RETAIL” as the RMA. Return your product to the address provided below for a replacement, which will incur no additional processing and handling fees, or for the refund of your purchase price, less processing and handling. You are responsible for the cost of returning the product. You can locate your order number at www. customerstatus.com. You can call customer service at 973-287-5106 or email [email protected] for any additional questions. Pack the product carefully and include in the package a note with (1) your name, (2) mailing address, (3) phone number, (4) email address, (5) reason for return, and (6) proof of purchase or order number, and (7) specify on the note whether you are requesting a refund or replacement. Write the RMA on the outside of the package.
Send the product to the following return address:PowerXL Stuffed Wafflizer PlusTristar Products500 Returns RoadWallingford, CT 06495If the replacement or refund request has not been acknowledged after two weeks, please contact Customer Service at 973-287-5106.
RefundRefunds requested within the money-back guarantee timeframe will be issued to the payment method used at purchase if the item was purchased directly from Tristar. If the item was purchased from an authorized retailer, proof of purchase is required, and a check will be issued for the item and sales tax amount. Processing and handling fees are non-refundable.
We are very proud of the design and quality of our PowerXL Stuffed Wafflizer PlusTM.
This product has been manufactured to the highest standards. Should you have any questions, our friendly customer service staff is here to help you.For parts, recipes, accessories, and everythingPowerXL, go to tristarcares.com or scan this QR codewith your smartphone or tablet:
To contact us,email us at [email protected]or call us at 973-287-5106.
![]()
References
[xyz-ips snippet=”download-snippet”]