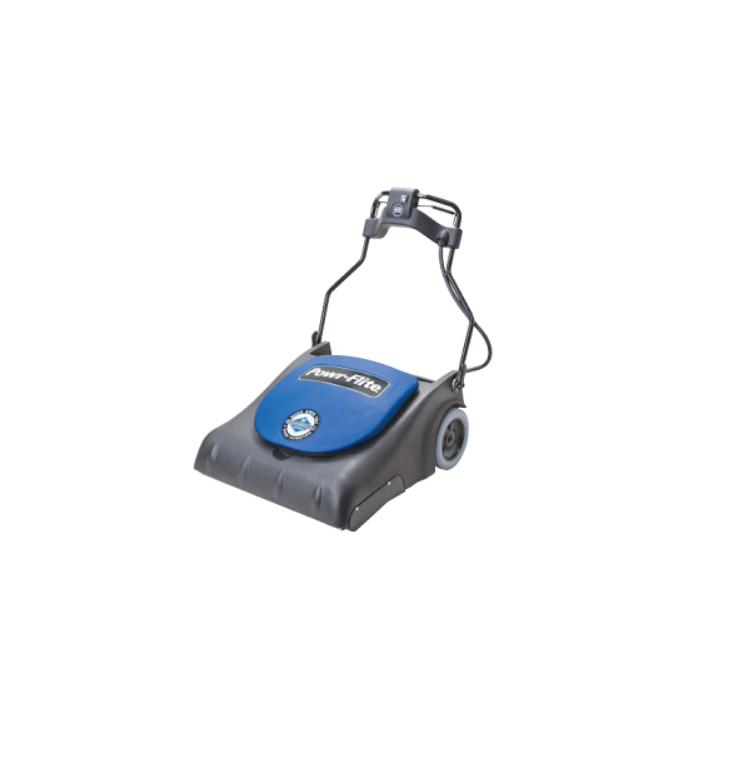
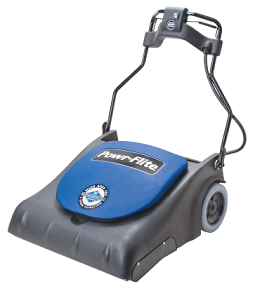
Powr-Flite Wide Area Vacuum Instruction Manual
IMPORTANT SAFETY INSTRUCTIONS
When using an electrical wide area vacuum cleaner, basic precautions should be followed.READ ALL INSTRUCTIONS BEFORE USING VACUUM CLEANER.
WARNING!
To reduce the risk of fire, electric shock or injury:Do not leave machine unattended when plugged in. Unplug from outlet when not in use and before changing bags or attempting any maintenance or adjustment.Do not use outdoors or on wet surfaces.Use only as described in this manual. Use only manufacturer’s recommended attachments.Do not use with damaged cord or plug. If machine is not working as it should, has been dropped, damaged, left outdoors, or dropped into water, return it to a service center.Do not pull or carry by cord, use cord as a handle, close a door on cord, or pull cord around sharp edges or corners. Do not run machine over cord. Keep cord away from heated surfaces. Do not unplug by pulling on cord. To unplug, grasp the plug not the cord. Do not handle plug or machine with wet hands.Keep hair, loose clothing, fingers, and all parts of body away from openings and moving parts.Do not put any object into openings. Do not use with any opening blocked; keep free of dust, lint, hair, and anything that may reduce air flow.Turn off all controls before unplugging.Connect to a properly grounded outlet only. See Grounding Instructions.Do not put hands under base. Rotating parts could cause injury. Always keep hands feet and loose fitting clothing away from moving parts to prevent possible injuries. Use care to keep electrical supply cable from contacting moving parts, such as floor brushes.Risk of explosion: Use this machine only in a well ventilated area, free from any flame or match. Do not use machine in areas where flammable and/or explosive vapors or dust are present.Make sure voltage and frequency at the wall power receptacle correspond with that indicated on name plate before plugging in machine. A 15 amp circuit is recommended. Connect only to a dedicated individual branch circuit.Never use a device to lock the switch lever in the ON position.Do not use without dust bag and/or filters in place.Do not allow to be used as a toy. Close attention is necessary when used by or near children.Do not use to pick up flammable or combustible liquids, such as gasoline, or use in areas where they may be present.Do not pick up anything that is burning or smoking, such as cigarettes, matches, or hot ashes.
SAFETY PRECAUTIONS
BEFORE OPERATING MACHINEWARNING: Failure to adhere to these instructions could result in serious bodily injury or property damage.Read this manual completely before attempting to operate machine. This manual has important information for the use and safe operation of the machine. Keep this manual on file and handy.
GROUNDING INSTRUCTIONS
This appliance must be grounded. If it should malfunction or breakdown, grounding provides a path of least resistance for electric current to reduce the risk of electric shock. This machine is equipped with a cord having an equipment-grounding conductor and grounding plug. The plug must be inserted into an appropriate outlet that is properly installed and grounded in accordance with all local codes and ordinances.WARNING: Improper connection of the equipment-grounding conductor can result in a risk of electric shock. Check with a qualified electrician or service person if you are in doubt as to whether the outlet is properly grounded. Do not modify the plug provided with the appliance-if it will not fit the outlet, have a proper outlet installed by a qualified electrician.This appliance is for use on a nominal 115 volt circuit and has a grounding plug that looks like the plug illustrated in sketch A. Make sure that the appliance is connected to an outlet having the same configuration as the plug. No adaptor should be used with this appliance.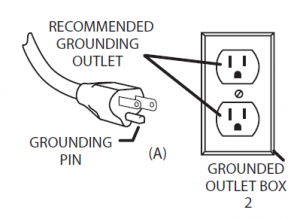
MACHINE SPECIFICATIONS
| Model |
PF2030 |
|
Voltage / Frequency |
115 V / 60 Hz |
|
Brush Motor rating |
1/4 hp / 2 A |
|
Total power consumption` |
14 A |
|
Vacuum motor rating |
1512W / 12.6 A |
|
Bag capacity – dry |
45.5 qt. / 43 L |
|
Airflow |
226 cfm / 384 m3/h |
|
Vacuum – water lift at sealed orifice |
71 in / 1804 mm |
|
Filtration – HEPA |
99.97% @0.3 micron |
|
Vibration at controls |
< 2.5 m/s2 |
|
Brush width |
30 in / 762 mm |
|
Cable length |
75 ft. / 23 m |
|
Weight (including cord) |
74 lb. / 33.6 kg |
|
Noise level |
69.9 dB(A) |
|
Construction class |
I |
|
Protection |
IP20 |
|
Machine dimensions |
Folded: 33” X 31” X 19”/838 x 787 x 483 mm
Operating Position: 33” X 31” X 39”/838 x 787 x 961 mm |
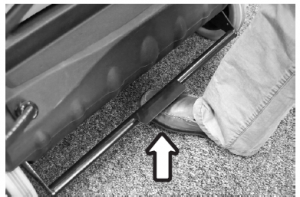
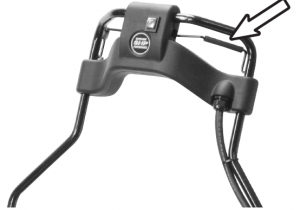
HANDLE ADJUSTMENT
- Loosen handle lock lever and adjust handle to comfortable operation height
- Tighten lever to lock handle in place.

BAG INSTALLATION
- Position the handle in normal operating position.
- Open bag compartment lid and rest it on the handle.
- Unzip cloth bag and install paper bag inside.
- Attach both bag openings together onto vacuum intake housing.
- Make sure bag is properly deployed inside machine housing.
- Completely close zipper on cloth bag and close lid of machine.ATTENTION: Never operate machine without cloth bag. Always use cloth and paper bags together.

BRUSH HEIGHT ADJUSTMENT
- This machine has 5 brush adjustment levels.
- To raise brush height level: lift up height adjustment bar until desired brush height is attained.
- To lower brush height level: push down on height adjustment bar until desired brush height is attained.

OPERATION OF MACHINE
- Plug power cord into properly grounded power outlet.
- Click the on/off switch on to the ON position to turn on machine.
- To operate brush squeeze the brush start triggers.
- Adjust brush height for proper pick-up.
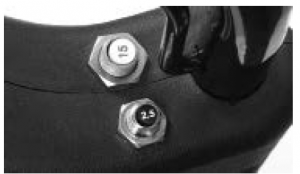
CIRCUIT BREAKER
Your new wide area vacuum comes equipped with two manual circuit breakers, a 15 amp breaker for the vacuum motor and a 2.5 amp breaker for the brush motor. If the machine does not turn on you will need to check the circuit breakers.
To reset circuit breakers:
- Unplug the wide area vacuum cleaner
- Check machine for the following: Full bag, obstructions, clogged filters, clogged brush, brush height set too low, etc.
- Press the affected circuit breaker button to reset.
- Resume operation
MACHINE MAINTENANCE
 CAUTION: Unplug the vacuum cleaner before performing the following steps
- Keep machine and all accessories clean and in good operating condition.
- Change vacuum bags and filters as recommended to maintain optimum cleaning efficiency.
- Always use genuine bags, filters and parts, as use of other products may result in poor cleaning or filtration performance. OEM filtration products are designed for maximum performance.
- Have machine checked periodically by an authorized service representative.
- Store machine carefully in dry area.
- For optimum cleaning performance and safety, follow your owner’s manual.
- After each use, carefully wrap power cord around handle and check cord for wear or damage. If cord is damaged, have power cord replaced by an authorized service representative immediately
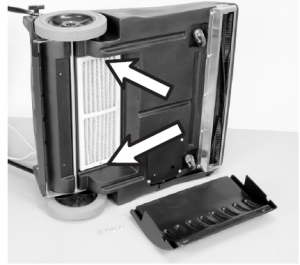
EXHAUST FILTER REPLACEMENT
- Carefully turn machine on its side and remove exhaust cover from bottom of machine.
- Remove the two nuts holding filter onto machine.
- Replace filter in proper position and tighten nuts.
- Reinstall exhaust cover.*Replace exhaust filter every 6 months.
BELT ADJUSTMENT AND REPLACEMENT
- Remove belt cover on left side of machine.
- Loosen the motor belt adjusting screws on motor bracket.
- Remove belt.
- Install new belt and reposition motor to eliminate excess slack.
- Once proper tension is set, tighten motor adjusting screws.
- Replace belt cover on side of machine.

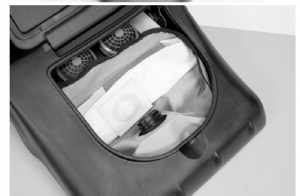
VACUUM MOTOR FILTERS
- Position the handle in normal operating position.
- Open Wide Area Vacuum lid and rest it on the handle.
- Remove clamp with a screwdriver to gain access to filter
- Remove plastic cap covering the motor
- Remove plastic retainer in cap
- Replace filters in their original positions.
- Reinstall plastic retainer in cap
- Reinstall cap onto motors
- Reinstall clamp.*Replace the vacuum motor filter every 6 months.

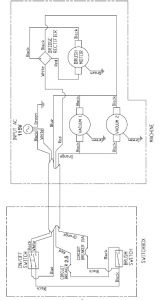
ELECTRICAL DIAGRAM
For warranty information go to www.Powr-Flite.com
Read More About This Manual & Download PDF:
References
[xyz-ips snippet=”download-snippet”]