 electric cooker
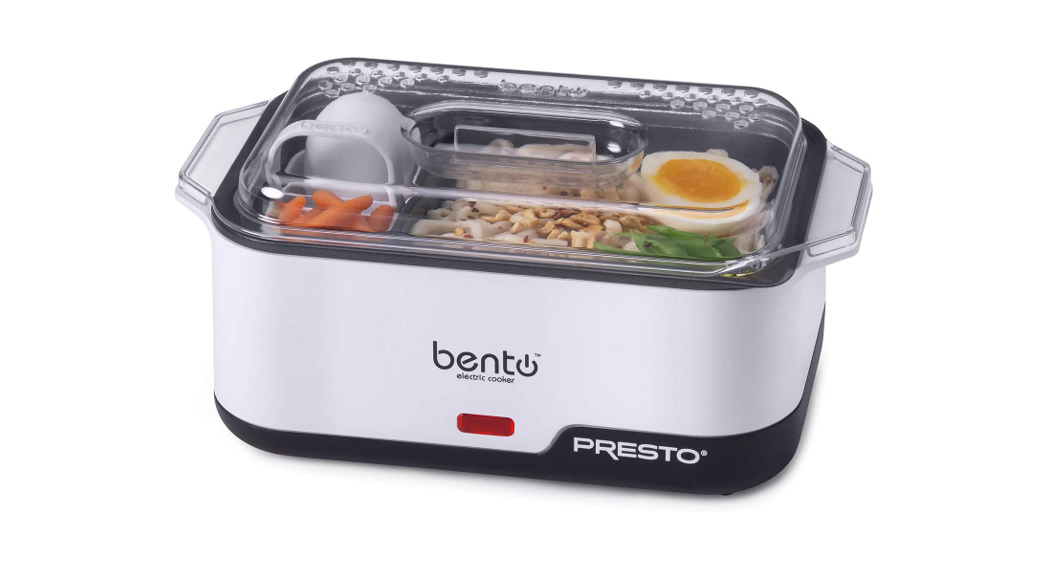
- Cooks ramen noodles plus eggs or vegetables in minutes.
- Compact size is ideal for one or two servings.Great for college students.
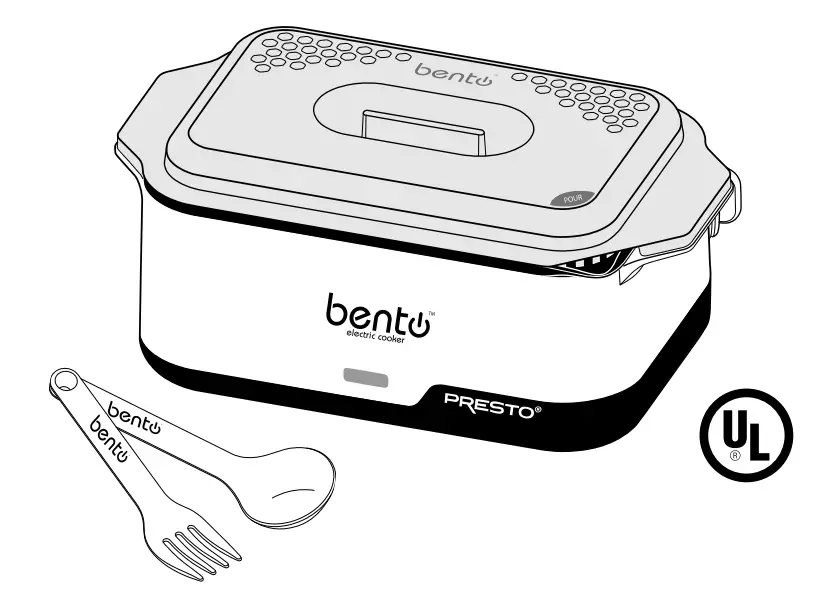
- Eat right out of the cooker with the included spoon and fork.
- Two-egg holder with handle for easy egg removal.
Scan this QR code for more ideas and information.
 http://www.gopresto.com/bentoVisit www.GoPresto.com
INSTRUCTIONS
©2020 National Presto Industries, Inc.Form 4056-171BThis is a ![]() Listed appliance. The following important safeguards are recommended by most portable appliance manufacturers.
Listed appliance. The following important safeguards are recommended by most portable appliance manufacturers.
IMPORTANT SAFEGUARDS
To reduce the risk of personal injury or property damage when using electrical appliances, basic safety precautions should always be followed, including the following:
- Read all instructions before using this appliance.
- Do not touch hot surfaces. Use handles or knobs.
- To protect against the risk of electrical shock, never put the cord, plug, or unit in water or other liquids.
- Close supervision is necessary when any appliance is used by or near children.
- Unplug from the outlet when not in use and before cleaning. Allow cooling before putting on or taking off parts, and before cleaning the appliance.
- Do not operate any appliance with a damaged cord or plug or in the event the appliance malfunctions or has been damaged in any manner. Return the appliance to the Presto Factory Service Department for examination, repair, or electrical or mechanical adjustment.
- The use of accessory attachments not recommended or sold by the appliance manufacturer may cause injuries. Use only genuine Presto® accessory attachments and replacement parts.
- Do not let the cord hang over the edge of the table or counter or touch hot surfaces.
- Do not use outdoors.
- Do not place on or near a hot gas or electric burner or in a heated oven.
- Extreme caution must be used when moving an appliance containing hot oil or other hot liquids.
- Do not use this appliance for other than intended use.
SAVE THESE INSTRUCTIONSTHIS APPLIANCE IS FOR HOUSEHOLD USE ONLY.
Important Cord Information
This appliance has a polarized plug (one blade is wider than the other). To reduce the risk of electric shock, this plug is intended to fit into a polarized outlet only one way. If the plug does not fit fully into the outlet, reverse the plug. If it still does not fit, contact a qualified electrician. Do not attempt to modify the plugin anyway.A short power supply cord is provided to reduce the risk of becoming entangled in or tripping over a longer cord. An extension cord may be used if care is properly exercised in its use.If an extension cord is used, the marked electrical rating of the extension cord should be at least as great as the electrical rating of the appliance. The cord should be arranged so that it will not drape over the countertop or tabletop where it can be pulled on by children or tripped over unintentionally.Connect the power supply cord to a 120VAC electrical outlet only.
Getting Acquainted
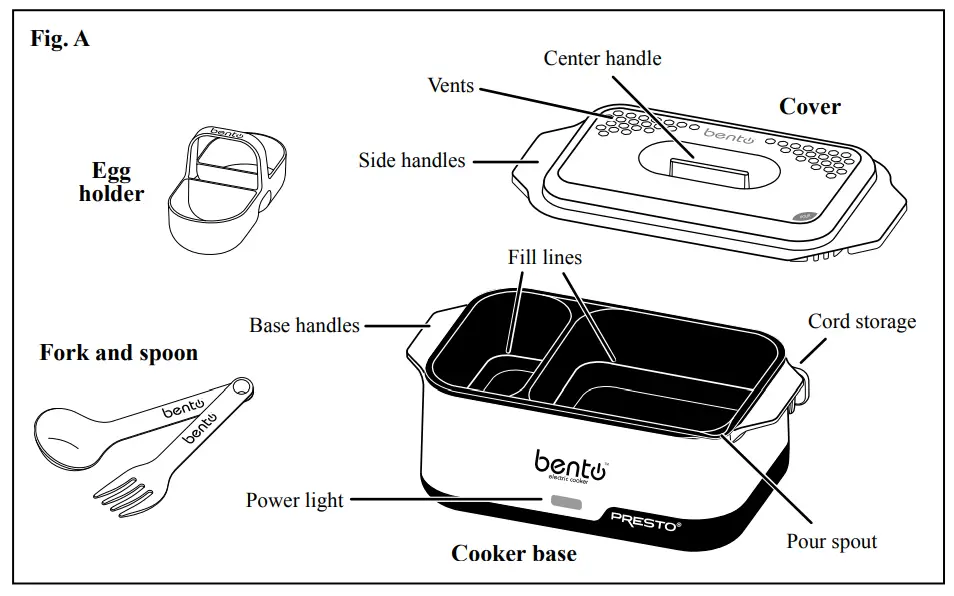
Before using it for the first time, become familiar with the Bento™ electric cooker parts (Fig. A). For your convenience, a plastic fork and spoon are provided to prevent scratching the nonstick surface.Pull apart to separate them. Do not use metal utensils. Wipe the cooker base with a damp cloth before initial use. Never immerse the cooker base in water or any other liquid. Wash the cover, egg holder, fork, and spoon in warm, soapy water. Rinse and dry.The large compartment of your Bento™ electric cooker will hold 1 package of ramen or fresh-packed (not dry) udon noodles, or 8 frozen Chinese dumplings/ potstickers.
How to Use
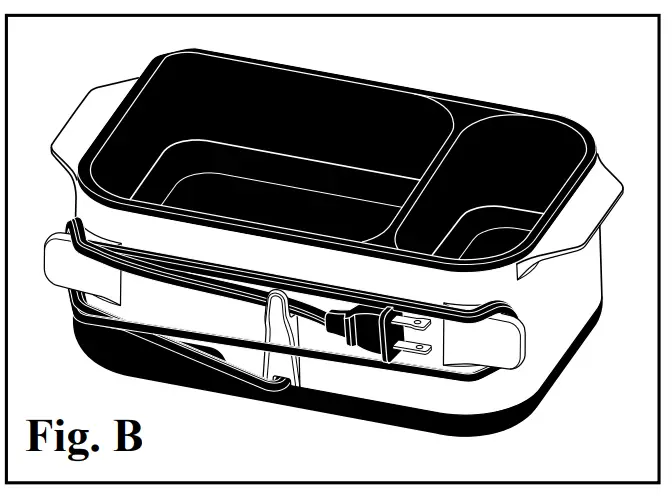
- Place the cooker base on a dry, level surface. To avoid steam damage to cabinets, position the unit so it is not directly under cabinets. Unwrap the cord from the back of the cooker base (Fig. B, page 4).IMPORTANT: Do not plug the unit in until you have completed steps 2 through 5 below, as preheating will alter the cooking times.
- Add water up to the fill lines in both compartments of the cooker base.NOTE: If you choose to cook in only one compartment, you must still add water to the compartment that is not being used.• Large compartment: 1½ cups• Small compartment: ¼ cup
- If cooking only noodles or dumplings, skip steps 4 and 5.
- If veggies or other ingredients are to be added to the cooked ramen (see “Serving Suggestions” on page 3), gather those ingredients and do any necessary prep work, such as peeling, shredding, or mincing.Reminder: Do not plug in until eggs/veggies are in place. Preheating the water will alter cooking times.
- Set the egg holder in the small compartment. Place 1 or 2 eggs and/or veggies in the egg holder. When cooking 2 eggs, position the veggies between and/or on top of the eggs. Place the cover on the unit so the vents are towards the back.
- Plug the cord into a 120VAC electrical outlet. Whenever the unit is plugged in, the power light will illuminate and the unit will heat.
- A. If cooking eggs and/or veggies WITH noodles or dumplings :Cook eggs and/or veggies for 7 minutes when making ramen noodles, 8 minutes when making udon noodles, or 5 minutes when making dumplings. When time is up, remove the cover. Add an unwrapped package of noodles or dumplings to the large compartment. Place the cover back on the unit; if cooking udon noodles, leave the cover off. Cook 3 more minutes when making noodles or 5 more minutes when making dumplings.B. If cooking ONLY noodles or dumplings:Bring the water to a boil. Add an unwrapped package of noodles or dumplings to the large compartment. Place the cover on the unit; if cooking udon noodles leave the cover off. Cook noodles for 3 minutes or dumplings for 5 minutes.NOTE: During cooking, you may hear an occasional clicking sound and notice the unit cycling between vigorous boiling and simmering. This is normal as the appliance is regulating the cooking temperature.
- CAUTION!It is normal for steam to escape from the cover vents during cooking. To prevent steam burns, keep well away from the vents. When time is up, unplug the unit. Keeping your hand away from the vents, use the center handle to carefully remove the cover.
- If the egg holder was used, lift it out of the base.• For eggs: If soft-cooked eggs are desired, allow the eggs to cool for 2 minutes. If medium-cooked eggs are desired, cool for 5 minutes. Run eggs under cold water long enough to make them comfortable to peel. Peel and cut eggs into halves; add to cooked noodles.• For veggies: Simply add to cooked noodles.
- If desired, the broth can be drained from the noodles before adding the eggs or veggies. Place the cover on the base. Grasp the side handles and base handles together and carefully drain the broth using the pour spout (Fig. A).
- Remove the cover and, using the provided spoon, stir in the contents of the flavor packet(s) that came with the noodles or add any of the suggested seasonings or toppings listed below.
- Use the provided fork and spoon for eating.CAUTION! If eating food directly from the Bento™ electric cooker, to prevent burns, place the unit on a flat surface and allow food and unit to cool. Avoid touching the metal surfaces on the rim of the cooker base.
Serving Suggestions
VeggiesLarger and longer cooking veggies, such as broccoli and cauliflower florets and baby-cut carrots, can be placed in the egg holder and cooked for 10 minutes.Smaller and quick-cooking veggies can be cooked along with the ramen or udon noodles in the large compartment. These veggies include shredded carrots, shredded or spiralized zucchini, sliced green onions and mushrooms, Chinese snap peas, grated fresh ginger, and minced garlic.Seasonings/ToppingsAdd sauces or toppings such as sriracha, soy sauce, tamari, sesame oil, chopped nuts, sesame seeds, cilantro, basil, jalapeño slices, avocado slices, or lime wedges to the cooked noodles.
Other Uses
ReheatingCanned and ready-to-serve foods such as soups, beef stew, chili, and quick-cooking oats can be heated in the electric cooker.
- Add food product to the large compartment. Follow the package instructions to see if additional liquid is needed. The food product plus any additional liquid should not exceed 2 cups.NOTE: If only the large compartment is being used, it is still necessary to add ¼ cup of water to the small compartment.
- Plug-in unit. Do not use the cover when heating foods that tend to foam up and boil over, such as oatmeal. Heat food until the desired temperature is reached, stirring occasionally using the provided spoon.
Cooking scrambled eggs
- Plugin the unit and preheat while mixing the eggs. Add 1 teaspoon butter to the large compartment and water up to the fill line in the small compartment.
- Beat up to four eggs, salt, and pepper in a medium bowl until blended. Pour egg mixture into the large compartment when butter is melted.
- If desired, add small pieces of cooked ham, precooked sausage, and/or veggies to the egg holder and place them in the small compartment.
- Cook uncovered, use the provided spoon or a non-metal utensil to stir, and fold the eggs over occasionally until thickened and no liquid egg remains.
- Stir in ham, sausage, and/or veggies.
Care, Cleaning, and Storage
- Always unplug and allow the cooker base to cool before cleaning.
- Never immerse the cooker base in water or any other liquid.Wash the inside of the cooker base with a damp, soapy cloth. Rinse by pouring water into the compartments, being careful not to drip the water onto the outside of the base. If necessary, add soapy water to the base, plug the unit in, and heat briefly to loosen food debris. Gently scrub the surface with a nylon mesh pad, such as a Scotch-Brite* Multi-Purpose Scrub Sponge or Scotch-Brite* Dobie* Cleaning Pad as needed. Do not use steel wool or abrasive cleaners.
- Wash the egg holder, fork, spoon, and cover in warm, soapy water. Rinse and dry thoroughly.Only the egg holder is dishwasher safe (top rack).
- For storage, wrap the cord around the tabs on the back of the base (Fig. B).

*Scotch-Brite and Dobie have registered trademarks of 3M Company. Presto is not affiliated with this company.
Consumer Service Information
If you have any questions regarding the operation of your Presto® appliance or need parts for your appliance, contact us by any of these methods:
- Call 1-800-877-0441 weekdays 8:00 AM to 4:00 PM (Central Time)
- Email us through our website at www.GoPresto.com/contact
- Write: National Presto Industries, Inc., Consumer Service Department 3925 North Hastings Way, Eau Claire, WI 54703-3703
Inquiries will be answered promptly by telephone, email, or letter. When emailing or writing, please include a phone number and a time when you can be reached during weekdays if possible. When contacting the Consumer Service Department, please indicate the model and series numbers for the electric cooker. These numbers can be found on the bottom of the cooker base. Please record this information:Model _____________________Series _____________________Date Purchased _____________________The Presto Factory Service Department is equipped to service Presto® appliances and supply genuine Presto® replacement parts.Genuine Presto® replacement parts are manufactured to the same exacting quality standards as Presto® appliances and are engineered specifically to function properly with its appliances. Presto can only guarantee the quality and performance of genuine Presto® replacement parts. “Look-alikes” might not be of the same quality or function in the same manner. To ensure that you are buying genuine Presto® replacement parts, look for the Presto® trademark.Canton Sales and Storage Company, Presto Factory Service Department 555 Matthews Drive, Canton, MS 39046-3251
Product Registration
IMPORTANT: Please go online and register this product within ten days of purchase. Proper registration will serve as proof of purchase in the event your original receipt becomes misplaced or lost. Registration will not affect warranty coverage but may expedite the processing of warranty claims. The additional information requested will help us develop new products that best meet your needs and desires. To register the product, visit www.GoPresto.com/registration or simply scan this QR code. If you do not have computer access, contact the Consumer Service Department at 1-800-877-0441.
 http://www.gopresto.com/registration/
Presto® Limited Warranty
(Applies only in the United States)This quality Presto® appliance is designed and built to provide many years of satisfactory performance under normal household use. Presto pledges to the original owner that should there be any defects in material or workmanship during the first year after purchase, we will repair or replace it at our option. Our pledge does not apply to damage caused by shipping. Outside the United States, this limited warranty does not apply.To obtain service under the warranty, please call our Consumer Service Department at 1-800-877-0441. If unable to resolve the problem, you will be instructed to send your Presto® appliance to the Presto Factory Service Department for a quality inspection; shipping costs will be your responsibility. When returning an appliance, please include your name, address, phone number, and the date you purchased the appliance as well as a description of the problem you are encountering with the appliance.We want you to obtain maximum enjoyment from using this Presto® appliance and ask that you read and follow the instructions enclosed. Failure to follow instructions, damage caused by improper replacement parts, abuse, misuse, disassembly, alterations, or neglect will void this pledge. This warranty gives you specific legal rights, and you may also have other rights which vary from state to state. This is Presto’s personal pledge to you and is being made in place of all other express warranties.
National Presto Industries, Inc.Eau Claire, WI 54703-3703Form 4056-171B
References
[xyz-ips snippet=”download-snippet”]

