
INSTRUCTIONS FOR USEStream Box S2 Ultra
Dear music lover,thank you for purchasing a Pro-Ject Audio Systems streamer.In order to achieve maximum performance and reliability you should study these instructions for use carefully.
![]() Warning of a hazard for the user, the unit or possible misuse
Warning of a hazard for the user, the unit or possible misuse
![]() Important notice
Important notice
Safety instructions
AC outlet voltages vary from country to country. Before connecting to the mains, make sure that the voltage in your area meets the voltage requirements printed on the power supply.The power supply is used to disconnect the unit from the mains. Make sure that the power supply is easily accessible at all times. Never handle the device or the power supply while your hands are wet or damp.![]() Avoid letting liquids enter the device or the power supply. Never place any item containing liquid, such as a flower vase on or near the device. Never spill any liquid on the device or the power supply. Never place any naked flame sources, such as lighted candles on or near the device. The product shall not be usedin damp or wet locations, next to a bathtub, sink, swimming pool, or any other similar conditions. For optimum performance please place the unit on a well-vented spot.
Avoid letting liquids enter the device or the power supply. Never place any item containing liquid, such as a flower vase on or near the device. Never spill any liquid on the device or the power supply. Never place any naked flame sources, such as lighted candles on or near the device. The product shall not be usedin damp or wet locations, next to a bathtub, sink, swimming pool, or any other similar conditions. For optimum performance please place the unit on a well-vented spot.
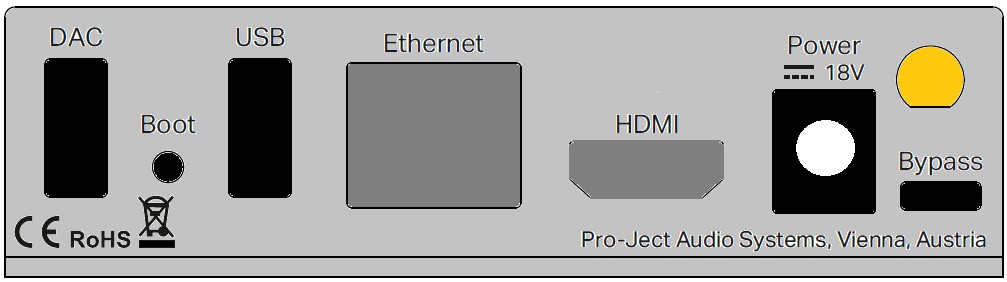
Connectors
![]() Make all connections whilst the unit is disconnected from the power supply
Make all connections whilst the unit is disconnected from the power supply
Mains power connectionConnect the low voltage plug from the power supply to the Power 18V DC socket before connecting the power supply to the mains.
HDMI outputthis output allows to connect a TV or monitor. It can be used as an alternative to the small screen of a mobile device.
![]() In order to control the unit, the attached screen must be a touchscreen, unless a mouse and/or keyboard is connected.
In order to control the unit, the attached screen must be a touchscreen, unless a mouse and/or keyboard is connected.
Ethernet
Connect the unit with an Ethernet cable to your network to ensure a stable connection to your network music library and internet services. Ethernet connection is recommended for High-Resolution music playback.
USB inputs
The unit offers 2 USB inputs, one is located on the front panel and second on the rear panel marked as USB, these inputs allow to connect USB flash disks and drives. When a drive is connected, all the music stored on it will be automatically indexed and can be accessed from the Browse – Music Library section of the control screen.
DAC connection
The unit does not include a D/A converter. For connection to a USB DAC use the USB socket on the rear panel marked as DAC.
![]() Pro-Ject S2 USB DACs can be powered directly from the streamer. Connect USB B cable between Stream Box S2 Ultra and any of the S2 line USB DAC.
Pro-Ject S2 USB DACs can be powered directly from the streamer. Connect USB B cable between Stream Box S2 Ultra and any of the S2 line USB DAC.
BypassThe micro USB connector marked Bypass on the back panel allows to connect the unit to a computer or laptop and to “detox” the USB output from the computer before it reaches D/A converter. This will clean up the signal coming from your PC or laptop, the unit must be connected to a DAC. The detox mode can be activated by pushing the USB/PC button on the front or by clicking on the corresponding icon in the control screen.
Boot
![]() This function is intended only for experienced users who have knowledge about installing a system into Raspberry Pi computers. Manufacturer takes no responsibility for any damage or malfunction caused by any change or manipulation with software of the unit. Regular updates of the supplied software are managed in the Settings>System menu of the unit.
This function is intended only for experienced users who have knowledge about installing a system into Raspberry Pi computers. Manufacturer takes no responsibility for any damage or malfunction caused by any change or manipulation with software of the unit. Regular updates of the supplied software are managed in the Settings>System menu of the unit.
This button allows to boot into different Operating Systems that can be loaded into the internal memory of the Stream Box S2 Ultra.
The Boot button allows to place the device in bootloader mode, allowing to reflash its software.
– With the device on, press continuously the Boot button for at least 5 seconds– The device will enter “bootloader mode” and the red Led will start blinking– You can now access the device as a normal storage device
To exit from Bootloader mode press the USB/PC button once, the LED will become blue.
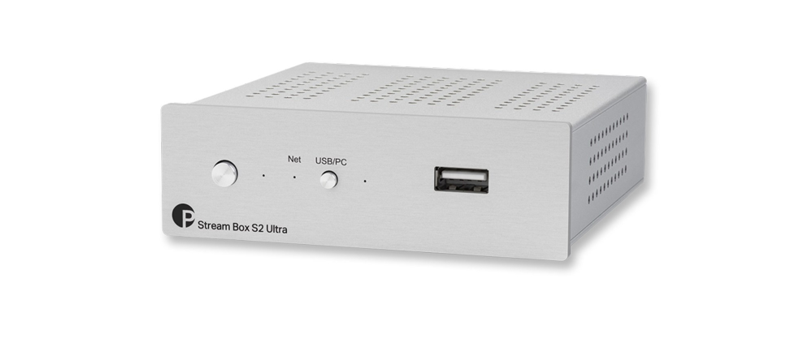
Front panel
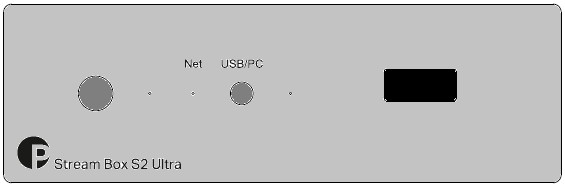
To switch on from standby or to standbyThe push-button on the left side of the front panel turns the Stream Box S2 Ultra on, or returns it to standby mode. The LED next to the button indicates standby with a stable red light, fully functional status is indicated by blue light. The unit has finished booting and is ready to use when the LED underneath Net is fully lid.
![]() Power on and return to standby mode takes some time. Longer time of switching off is to ensure all the open files and data are closed safely. During this period is the status LED is blinking red and blue.
Power on and return to standby mode takes some time. Longer time of switching off is to ensure all the open files and data are closed safely. During this period is the status LED is blinking red and blue.
NetThe LED underneath Net lights up blue when the connection to the network is established and the unit has completed the boot sequence. Only when the LED is stable blue the unit can be used.
USB/PCThe button USB/PC on the front panel activates the function for USB “detox”. The LED next to the button lights up when the function is active. The Bypass input on the rear panel cleans up the audio signal coming from a Laptop or Personal Computer.
It is possible to activate the function directly from the control screen by using icon USB/PC![]()
![]() Once the function is active the unit does not work as a network player anymore. The control app will show “No Audio Output Available”. This mode can be de-activated by pushing the USB/PC button on front again or by clicking the corresponding icon in the control screen. Alternatively the unit changes back to network mode when a file from the Music Library is played or an Internet Radio station has been started.
Once the function is active the unit does not work as a network player anymore. The control app will show “No Audio Output Available”. This mode can be de-activated by pushing the USB/PC button on front again or by clicking the corresponding icon in the control screen. Alternatively the unit changes back to network mode when a file from the Music Library is played or an Internet Radio station has been started.
Installation and first use
The unit can be connected to the network/internet via wired or wireless connection.
1. Wired connection: Connect a LAN cable from your router to the socket Ethernet on the back panel.
2. Wireless connection:
![]() make sure that the supplied antenna is mounted to its connector on the back panel.
make sure that the supplied antenna is mounted to its connector on the back panel.
Open Settings in your mobile device > Wi-Fi > search for available networks > connect to Stream Box S2 Ultra network.The welcome page will open automatically (open web browser if not). Go through the first config wizard:
1. Language – select your system language2. Name – choose a unique name of the unit (here you can see the address where you will find the unit in your browser available only for iOS and MacOS)3. Output – select a DAC with which you want to use with Stream Box S2 Ultra.4. Network – here you can connect to a wireless network, a list of available Wi-Fi networks is shown. Select your desired Wi-Fi network, type in the password and tap on connect. The unit will reconnect to selected WiFi network at every reboot.5. Music – managing all the network music location
![]() all the steps from the wizard can be changed later in Settings.
all the steps from the wizard can be changed later in Settings.
The control screen can be accessed by any web browser. A web browser is available on all platforms (Windows, MacOS, Android, iOS, and other operating systems). To access the control screen please enter the unit’s IP address in the address bar of your browser.
There are several different ways to open the unit´s control web page:
1. Open your internet browser and type in the IP address of the unit directly into the browser (e.g.: http://192.168.0.1)The IP address can be found in the list of connected devices in the DHCP server list in your router administrations. Alternately programs such as Advanced IP Scanner, FING (Android) or Network Analyzer (iOS), can be used to find out the IP address of the streamer.2. Use the address of the streamer which is shown in step 2 of the first config wizard (http://stream-box-s2ultra.local by default)
available only for iOS and MacOS
3. When using a Windows computer, the device can be found by the following path: File Explorer >Network > Media Devices. Here you can directly open the control page of the streamer by double-clicking on the streamer icon.
4. In the App Store or Google Play Store the application Pro-Ject Play can be downloaded free of charge, with this App you can connect to the Stream Box S2 Ultra.
BT connection
Pairing with Android devices
Open Settings and tap on BT. Turn on BT and tap on Scan. All found devices will show up now, tap on Stream Box S2 Ultra and confirm the connection.
BT pairing with Apple® devices
Open Settings and tap on BT, turn on BT if it is not activated yet. Your device will automatically start searching for available devices. Tap on Stream Box S2 Ultra and confirm “Pairing” on your Apple device.
Control the unit
The control screen is divided into three parts: Browse, Playback and QueueBrowse works as a home page. Here you can go to any of the following pages.
 Music library – here you can find all the available Music in your network and connected directly to the streamer: USB or NAS. Your library will be created automatically and sorted using the available metadata. (Some of these options are shown only when available)
 Web radio – here you have access to a list of available internet radio stations. You also have access to a list of selected internet radio stations under Pro-Ject Selection.
 BT connection – enables the BT input. Play music from connected devices.
 USB/PC – see chapter USB/PC
 Shairport-Sync – This option lets you connect to Apple devices using the Airplay protocol
The following icons are shown after a successful login into the respective services under Settings > My Music Tidal – gives you access to the Tidal streaming service
 Spotify – gives you access to the Spotify streaming service
Playback: This page shows the currently playing music. You also see information about the Artist and the Album. Additionally, you will see the Album Cover, given it is available. Here you also have the option to add tracks to your Favourites or to a playlist. On the right side, you have volume control with which you can set the volume level of the unit. It is recommended to leave the volume at level 100 to ensure bit-perfect playback.
Queue: This page shows the list of tracks in the current queue. At the upper right corner, you also have the options for playback (shuffle, repeat), also you can save the current queue as a playlist.
Other useful Buttons
![]() Pro-Ject Logo – tap on this button to go back to the home page (Browse)
Pro-Ject Logo – tap on this button to go back to the home page (Browse)
![]() Settings – gives you access to all general settings. The following menus are accessible here:
Settings – gives you access to all general settings. The following menus are accessible here:
My Music: here you have access to all options for Network Drives and attached storages via USB. Also, you can enter your account information for TIDAL and Spotify. Additional settings can be found for Album Art and Music Library. Under Functionalities Control you have the ability to enable or disable certain services. This is especially useful to enhance the performance of the unit.
![]() Spotify and Tidal icons appear on the home page (Browse) only after the login information are successfully entered
Spotify and Tidal icons appear on the home page (Browse) only after the login information are successfully entered
Playback options: Here you have the option to choose your desired Output Device (USB DAC) and other settings for Playback, Volume, and Audio Resampling.
Appearance: Here you can change the language of the unit, switch between background images or set your own images as background.
Network: Here you can find all information about your network. You can assign your unit a static IP address, pick a wireless network and activate/deactivate the hotspot function of the unit. You can also make settings on your DNS Server.
System: General settings can be made here. You can also enable/disable the video output via the HDMI socket. Under System Updates you can search for new software for the unit and download it. You can also set the unit back to Factory Settings.
Alarm: Here you can set a time for an alarm clock. This function needs an already existing playlist.Sleep: With the sleep timer you can set a time value after which the unit either turns off or stops the music.Shutdown: Power off or reboot the unit.
Technical data
Internal Memory – 16 GBAudio Formats – PCM 32bit/352.8kHz, DSD256Internet Radio – ShoutcastStreaming Services – TIDAL, SpotifySupported data protocols – RAAT, Shairport, DLNAMulti-room – Up to six devicesInputs – 2 x USB A (maximum combined current draw 1A), Micro USB B (PCDetox), Network (Ethernet, WiFi), BTSupported WiFi standards – 802.11 b/g/n/d/e/h/iBT – BT Classic + EDR v2.1, v3.0, v4.0 and Low EnergyOutputs – Audio optimized USB A, HDMI (video)Outboard Power supply – 18V/1A DC (included)Accessories – Wi-Fi antennaDimensions W x H x D – 103 x 37 x 115 mmWeight (without power supply): – 375 g
Service
Should you encounter a problem which you are not able to alleviate or identify, please contact your dealer for further advice. Only if the problem cannot be resolved there, the unit should be sent to the responsible distributor in your country.
Warranty
The manufacturer accepts no responsibility for damage caused by not adhering to these instructions for use. Modification or changes to any part of the product by unauthorized persons release the manufacturer from any liability over and above the lawful rights of the customer.
Copyright, trademarks
Pro-Ject Audio Systems is a registered Trademark of H. Lichtenegger.
This guide was produced by: Pro-Ject Audio Systems Copyright© 2018. All rights reserved.
The information was correct at the time of going to press. The manufacturer reserves the right to make changes to the technical specification without prior notice as deemed necessary to uphold the ongoing process of technical development.
Windows® is a registered trademark of the Microsoft group of companies. Mac® and Mac OS® are trademarks of Apple Inc., registered in the U.S. and other countries. DSD is a registered trademark of Sony Corporation. BT® is a trademark owned by the BT SIG, Inc., Apple is registered trademark of Apple Inc., Android™ is a trademark of Google Inc. Contains FCC ID: VVXLM811-0451
© Pro-Ject Audio Systems · Stream Box S2 Ultra · Revision 22.04.2021
[xyz-ips snippet=”download-snippet”]