
 ASSEMBLY INSTRUCTIONS

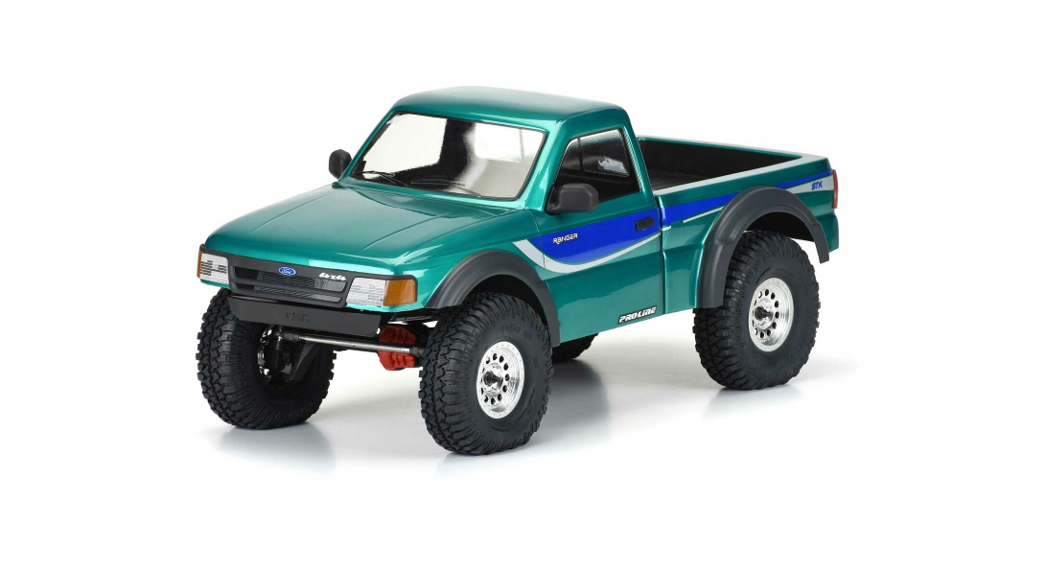
Congratulations on the purchase of your new 1993 Ford® Ranger body from Pro-Line! Please take a moment to review these instructions. To ensure the easiest assembly of your body set, it is advised to follow these instructions in order!
PAINT & DECAL
Scan this QR Code for painting tips!

https://www.youtube.com/watch?v=6fXfazftU8A
- Wash the inside of your body with dish soap.
- Place window masks inside the cab section of the body and place tail light masks inside the bed section of the body.
- Paint your scheme using polycarbonate-safe paint
- Peel off the protective overspray film from outside of both sections of your body & remove all masks.
- Detail your body using the included decal sheet. Place headlight & tail light detail decals on clear plastic lenses.
ASSEMBLE
Locate the black & clear plastic parts trees and get your reamer ready!
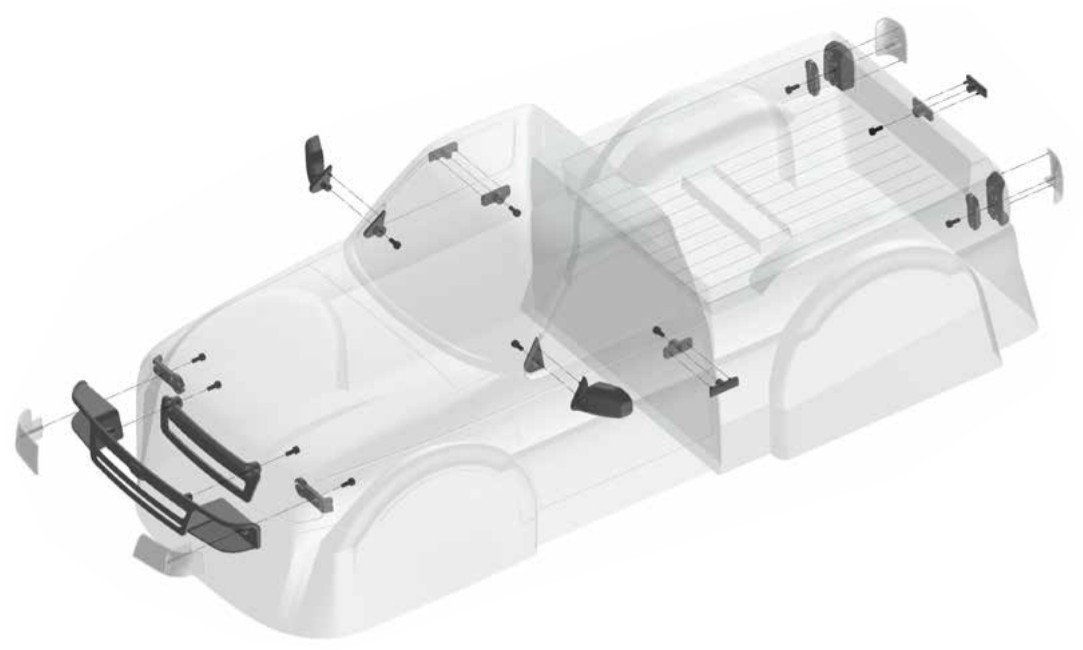
- Carefully cut out the headlight openings on the cab section of the body, following the marked lines. Ream two center drill holes on the marked locations.
- Insert grille & headlight part into the body. Fasten using grill backing plate.
- Install clear headlight lenses, backing with LED retainer clips behind the headlight bucket.
- Install Mirrors: ream a small 2mm hole on the marked location for the pin with a larger 6mm hole below for the screw boss.
- Install Handles: ream two small 2mm holes on marked locations for pins, with a larger 5mm center hole for the screw boss.
- Install tail light buckets: ream two small 2mm holes on marked locations for pins, with a larger 5mm center hole for screw boss. Fasten lenses to the inner bucket, backing with LED retainer clip.
TRIM & MOUNT
Put on the final touches!
- Trim both sections of the body on the lower trim line using body scissors and/or a hobby knife.
- Screw cab to bed using three screws on marked locations.
- Trim out center sections of cab/bed walls to clear your chassis/electronics (varies by chassis).
- Place on chassis to mark out your body post locations and ream holes to mount (varies by chassis).
- Optional: wire up your Ranger with LED lighting (sold separately).
Each headlight or taillight requires (1) 5mm LED and (1) 3mm LED.Feed the wires through the slots in the LED retainer clip before screwing the clip to the lenses.
![]() Ford® Ranger trademarks used under license to Pro-Line.
Ford® Ranger trademarks used under license to Pro-Line.
[xyz-ips snippet=”download-snippet”]

