![]() QwikPad™ for Condensers
QwikPad™ for Condensers
Installation Instructions
Pad size and anchoring methods should be chosen to meet wind loading requirements in your area. Visit www.qwik.com for the most up-to-date engineering documentation or to use our online pad selection tool.
- Inspect Hardware Package Contents:

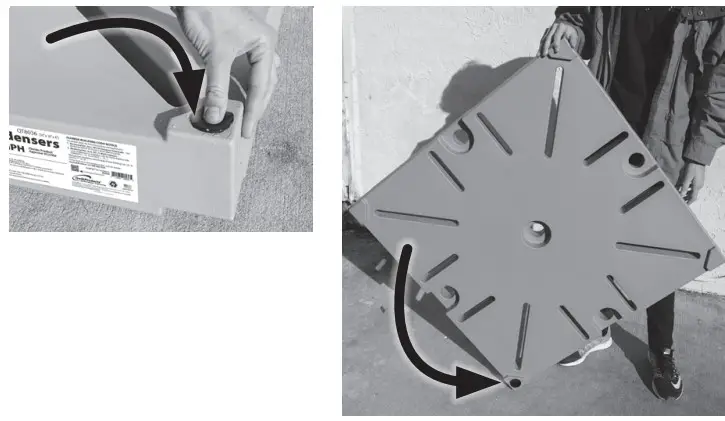
- Locate the fill port cap (corner nearest the product label) and ensure it is securely pressed into the pad and then tip the pad onto its corner where the plug is located. This process should shift the powdered gelling agent contained inside the pad towards the filled corner.
- Place the QwikPad™ for Condensers on level, the compacted ground where equipment is to be installed (or on top of existing, level concrete pad).
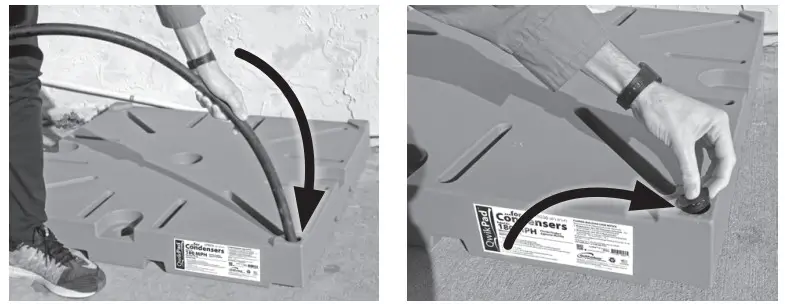
- Remove fill port cap. Insert a garden hose into fill port and fill QwikPad™ for Condensers to the top with tap water.Do not overfill – Overfilling may result in loss of a portion of the gelling agent. Replace fill port cap.
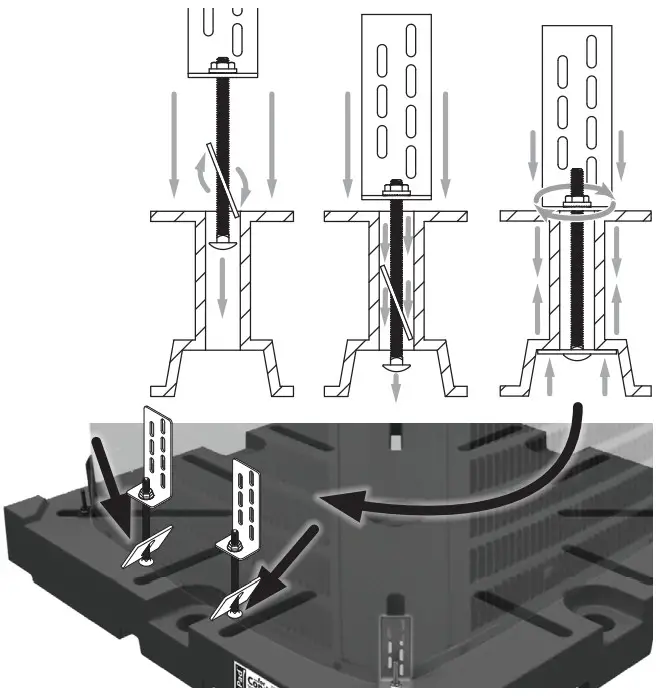
- (Required for some installations) Install ground or concrete anchors as determined by your wind loading requirements.Ground Anchor (QT8110) Installation:• Insert anchors into the hole located on the outer edge of the pad.• Using a 1” wrench, turn the anchor clockwise while pushing down on top of the anchor.• Continue driving anchor down until anchor head meets the pad.Do not over-tighten.• When using ground anchors, install them on opposite sides (see example at right).•NEVER INSTALL AN ANCHOR IN THE CENTER HOLE.Concrete Anchor (QT8111) Installation:• With the pad in place, drill four (4) holes in concrete to 1.375” minimum depth, centrally located in anchor holes using a 3/16” masonry bit (included in QT8111). Center the drill bit in the anchor holes.• Secure pad using four (4) 1/4” x 4” concrete anchors with fender washers. (included).
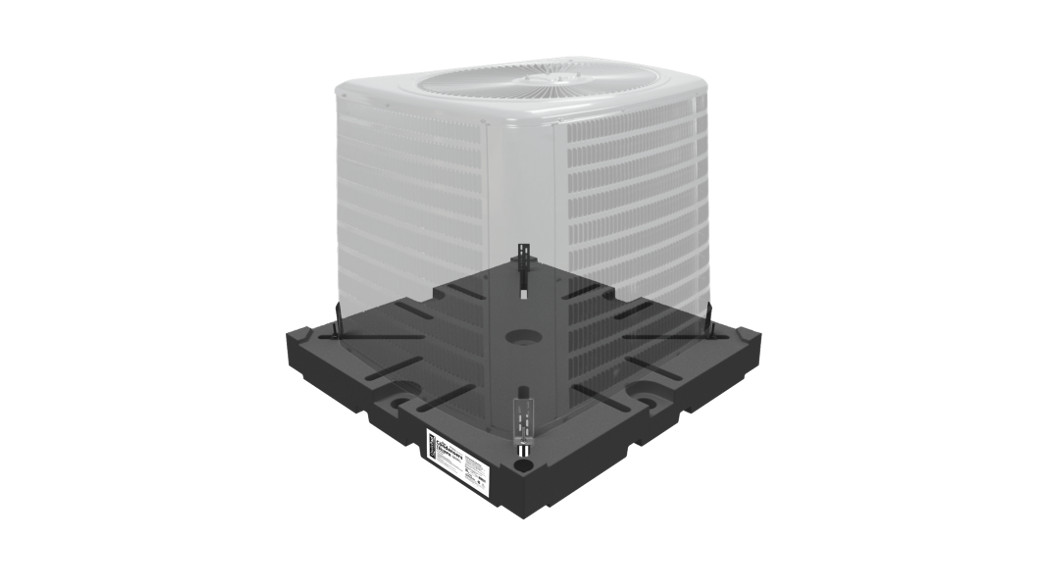
- Place the equipment onto the QwikPad™ for Condensers and center.
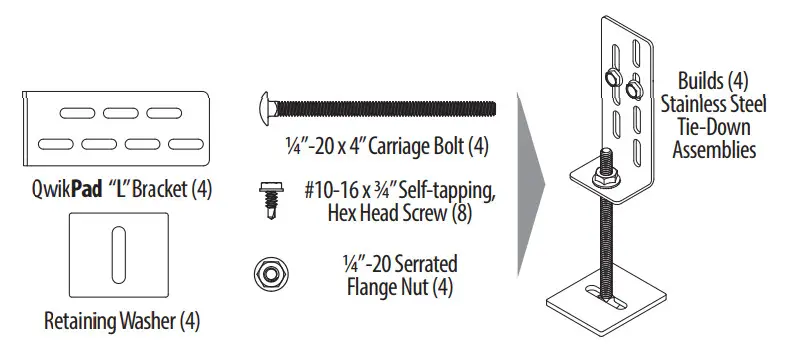
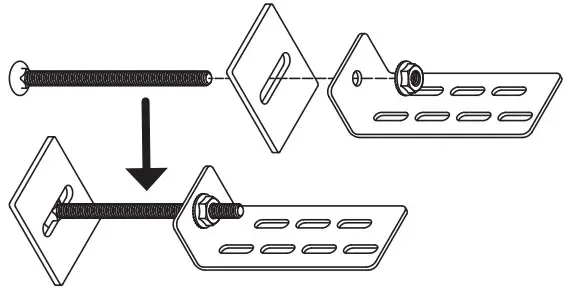
- Assemble four (4) condenser unit tie-down assemblies as shown below.
- Insert tie-down assemblies into appropriate pad slots by angling the bottom retaining washer as shown and dropping it into the slot.
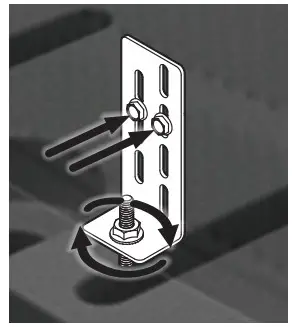
- Slide tie-down assemblies inward toward unit until L-bracket meets up with the unit. Tighten down the flange nut on the tie-down assembly to secure it to the QwikPad™ for condensers.
- Install two (2) self-tapping hex head screws through each tie-down assembly into the base of the unit, securing the unit to the QwikPad™ for Condensers.Here, the completed tie-down assemblies are shown in-place, attached with self-tapping hex head screws to the condenser unit, which is centered on the QwikPad™ for Condensers.
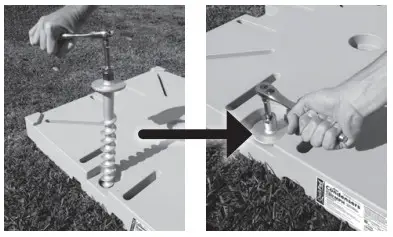 Ground Anchor (QT8110) Installation:
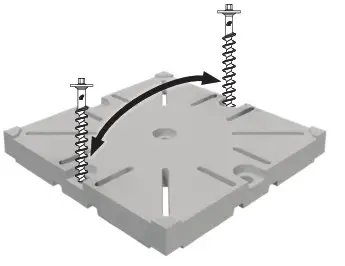 • Insert anchors into the hole located on the outer edge of the pad.• Using a 1” wrench, turn the anchor clockwise while pushing down on top of the anchor.• Continue driving anchor down until anchor head meets the pad.Do not over-tighten.• When using ground anchors, install them on opposite sides (see example at right).•NEVER INSTALL AN ANCHOR IN THE CENTER HOLE.Concrete Anchor (QT8111) Installation:
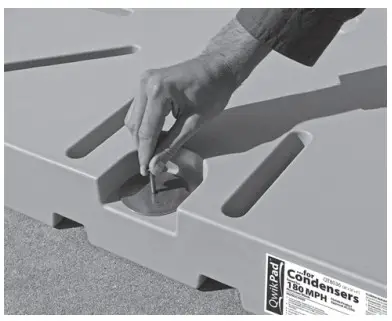 • With the pad in place, drill four (4) holes in concrete to 1.375” minimum depth, centrally located in anchor holes using a 3/16” masonry bit (included in QT8111). Center the drill bit in the anchor holes.• Secure pad using four (4) 1/4” x 4” concrete anchors with fender washers. (included).
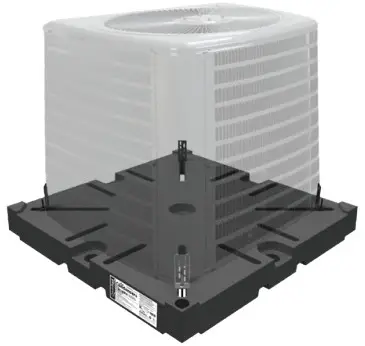
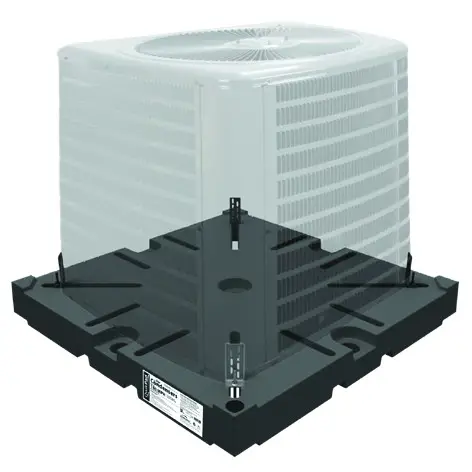 Here, the completed tie-down assemblies are shown in-place, attached with self-tapping hex head screws to the condenser unit, which is centered on the QwikPad™ for Condensers.
For more details or information about the QwikPad™ for Condensersvisit www.qwik.com/qwikpad4cond/, email [email protected]or call 1-321-631-3550

MADE IN THE USAQwikProducts® is a registered trademark and QwikPad™ is a trademark of Mainstream Engineering Corporation® Rockledge, Florida 32955, (321) 631-3550, © 2020 Mainstream Engineering Corporation®U.S. Patents #10,408,493,#10,559,742 and other Patents Pending
References
[xyz-ips snippet=”download-snippet”]