R DE Microphones VideoMic User Guide

RØDE SOUNDBOOTH
now for Broadcast mics
Hear and compare RØDE microphones at www.rodemic.com/soundbooth or on your iPad®

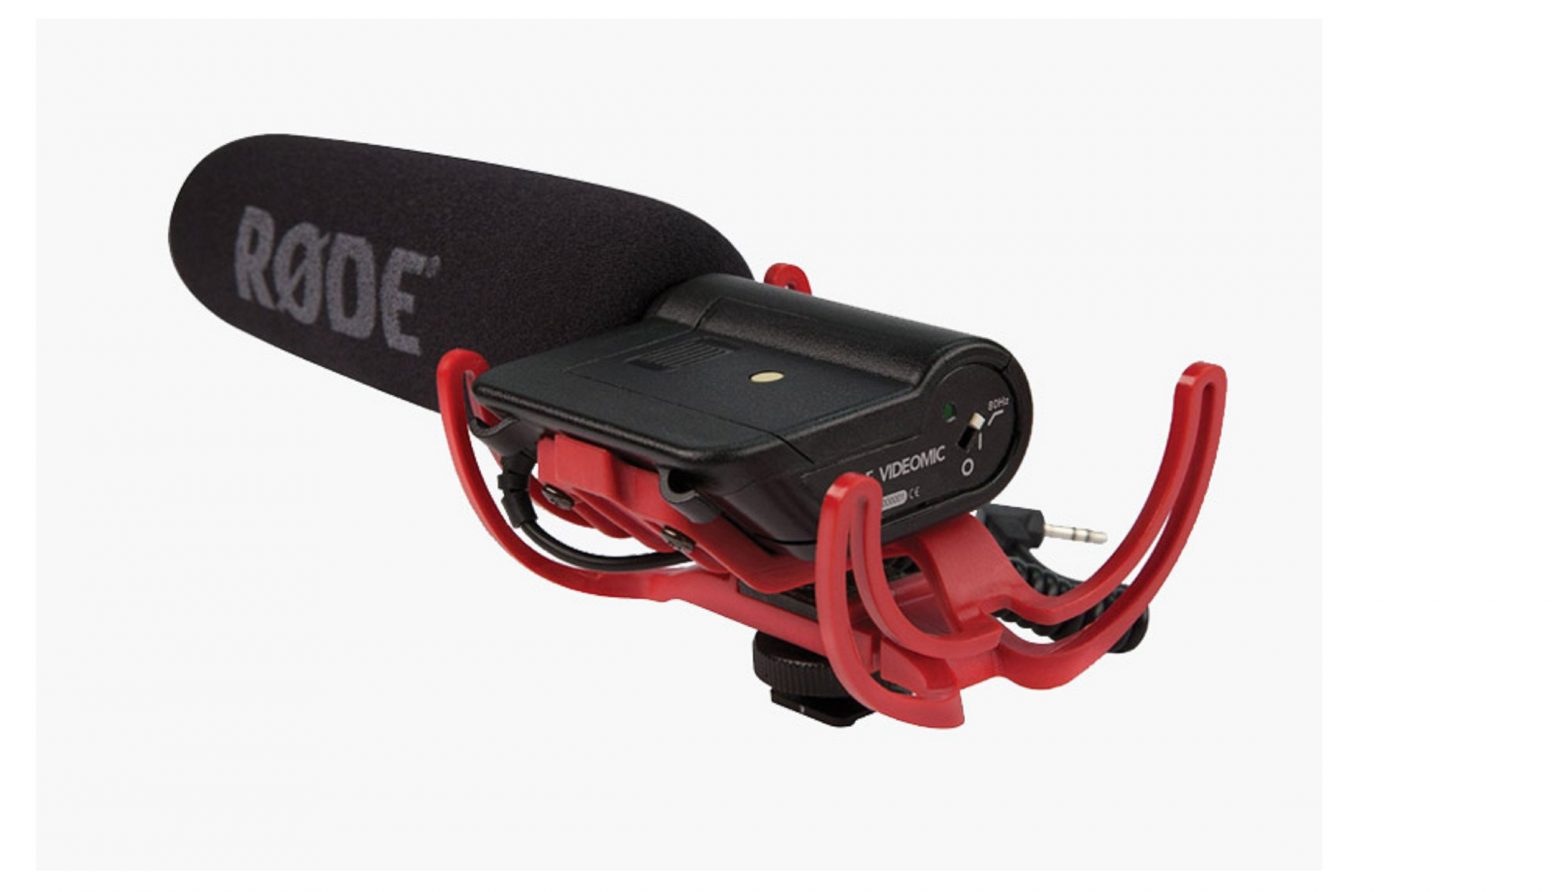
The RØDE VideoMicTM features an integrated shock mount based on Rycote® Lyre® technology. Constructed from a single piece of hard-wearing thermoplastic, the Lyre® provides superior acoustic suspension to traditional elastic solutions, and will never wear out, sag or snap.
Don’t FORGET
to register for your FREE ten year warranty!
 Scan the QR code to register now, or visit warranty.rodemic.com/videomic
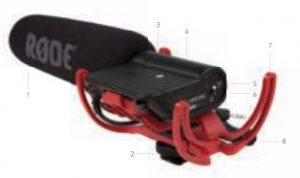
- Foam windshield
- Camera shoe mount
- Battery cover
- PAD switch (inside battery compartment)
- LED power indicator
- Power and HPF switch
- Integrated Rycote® Lyre® suspension
- 3.5mm dual mono output cable
Mic Controls

The High Pass Filter (HPF![]() ) is a low frequency cut-off setting, which you can use to remove rumble, camera noise or other low frequency noise while recording.
) is a low frequency cut-off setting, which you can use to remove rumble, camera noise or other low frequency noise while recording.
mounting to camera
- Turn the tightening ring counterclockwise to loosen the camera shoe connection, before attaching to camera.

- Slide the camera-shoe into place on the camera mount. When the mic is in place, secure it by gently tightening the ring clockwise.
- Connect the VideoMic’s audio lead to the camera’s “Audio In” or “Mic” socket, and secure the cable in place using the in-built cable clips (see below).
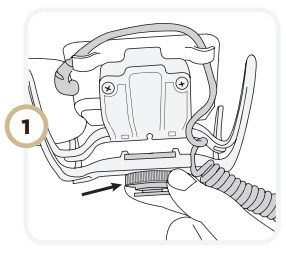
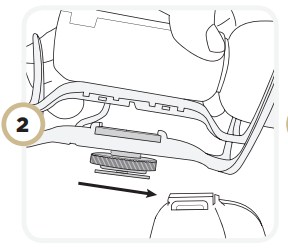

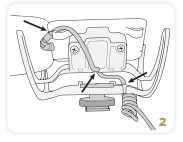
securing the cable
Securing the cable will eliminate undesired noise caused by cable movement.
The cable can be secured in one of two orientations, depending on the location of your camera’s “Audio In” socket.
See diagram 1 for cameras with mic socket on the left.
See diagram 2 for cameras with mic socket on the right.

battery
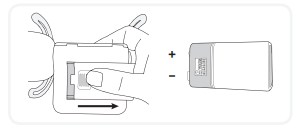
To change the battery, gently push and slide the battery cover off. Insert a standard 9V battery with the positive (+) end upwards.
The VideoMic uses a standard 9V battery. With a good quality Alkaline or Lithium battery, the VideoMic will run for up to 100 continuous hours. We recommend you remove the battery if storing your VideoMic for extended periods without use.
The LED power indicator next to the On/Off switch will turn red when the battery is running low. The mic will work for approximately one hour once the red indicator is lit, however with reduced performance.
PAD switch
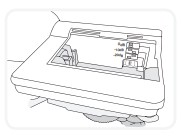
The VideoMic comes with a three-position PAD switch which is located inside the battery compartment.
The PAD provides a selectable 10 or 20db reduction of the input sensitivity, reducing the output level when recording loud sound sources, so that the optimal level can be achieved in a wide range of situations.
References
[xyz-ips snippet=”download-snippet”]