r go Capro 4 D2 Single Monitor Arm
Ergonomic tips
Did you know that a wrong set-up of your monitor effects on your working posture? You can easily get physical complaints, such as neckpain. Here some tips to create a healthy computer set-up:
- Place the top of your screen at eye level. You will automatically sit up straight.
- Place your screen at least at arm’s length to give some relieve to your eyes.
- Place your screen directly in front of you. This way, you will adopt an upright posture while working.
To make maximum use of the depth of your desk, we recommend that you do not fix the base of the monitor arm in the middle, but position it approximately 45 cm out of the middle of the desktop.Do you work with two monitors? We recommend to place the most frequently used screen right in front of you. The other (additional) screen should be placed directly next to it, at the same height, and pulled slightly towards you. This set-up ensures that you will sit straight most of your working day
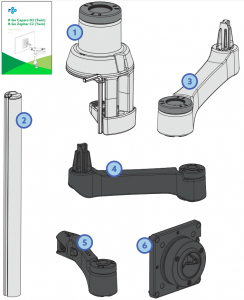
What’s in the box?
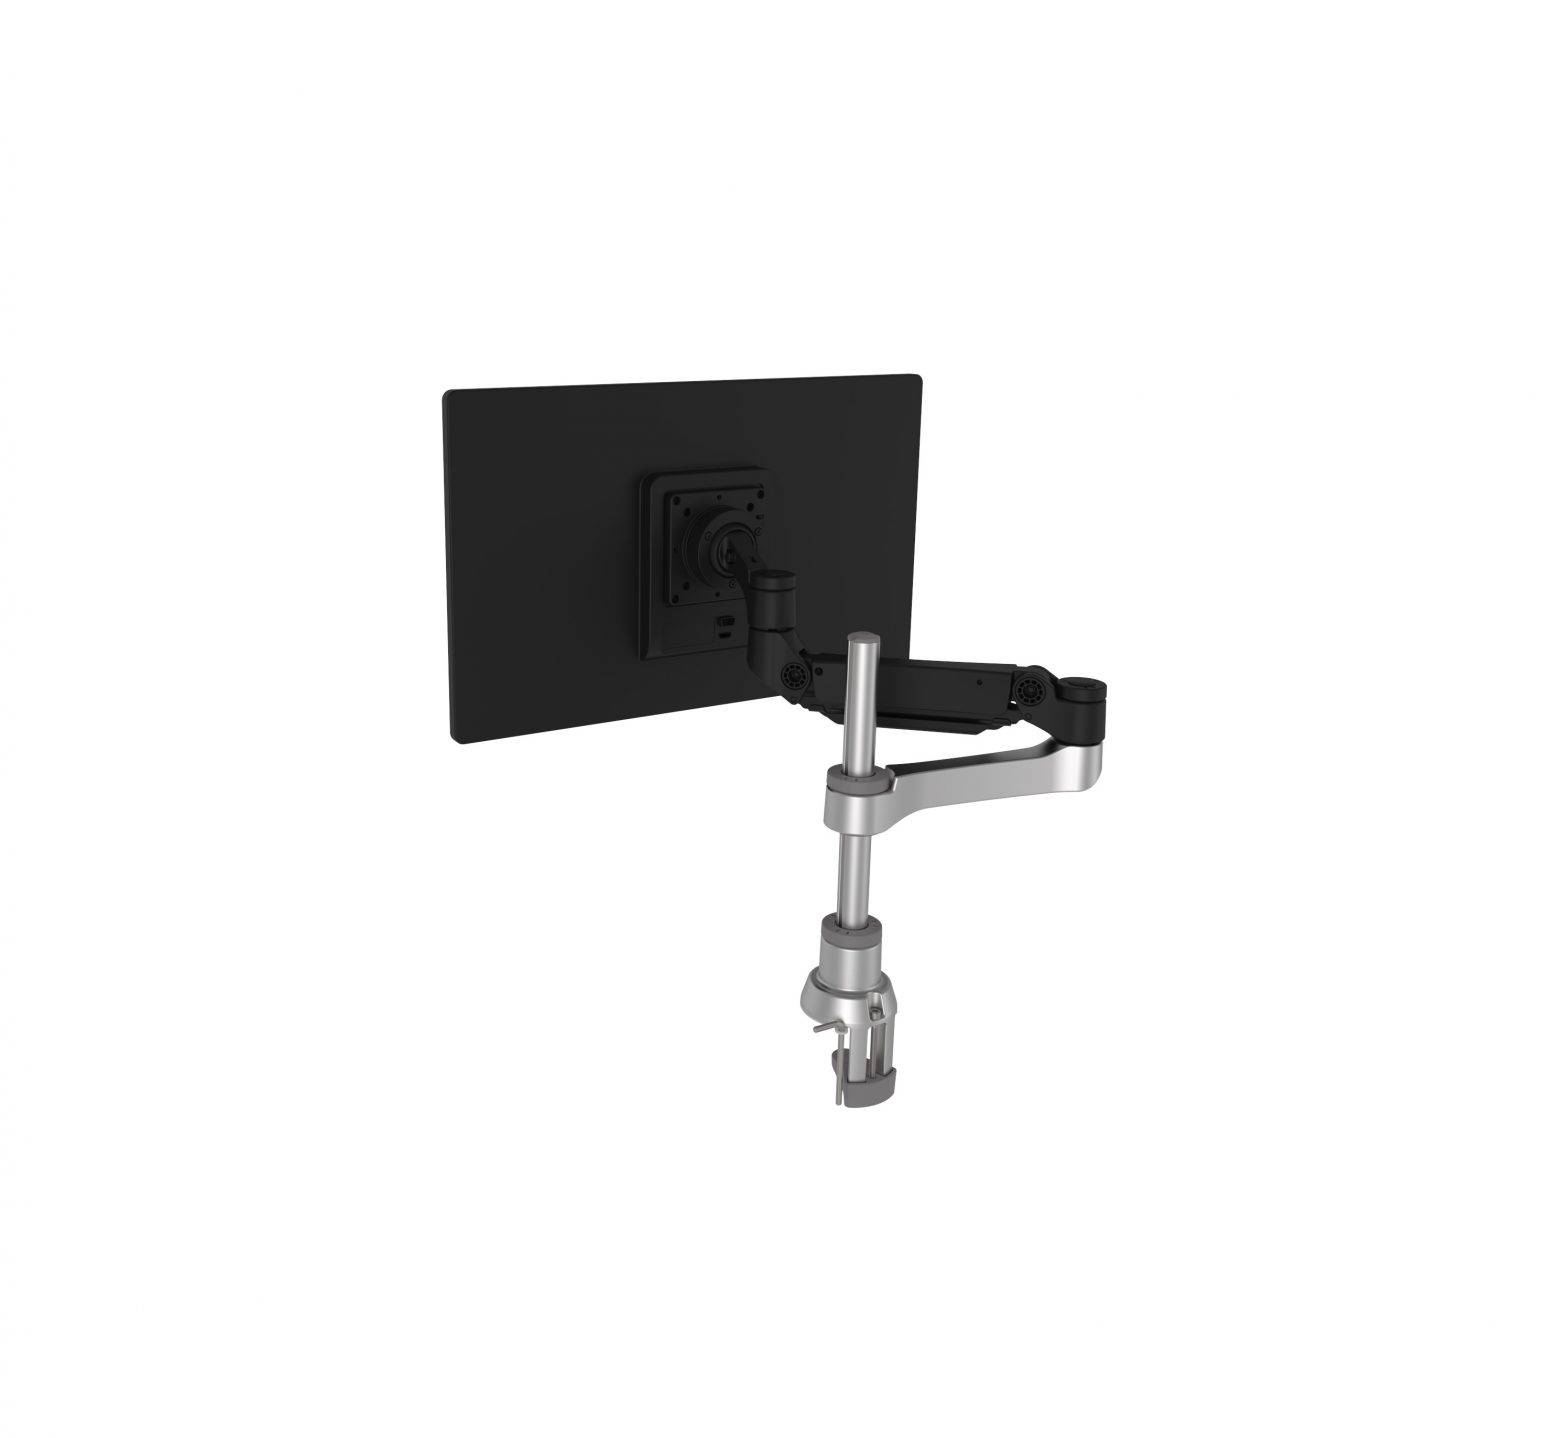
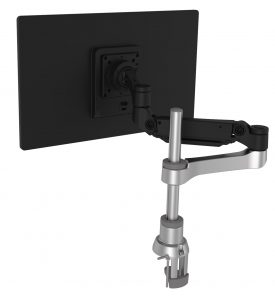
R-Go Caparo 4 D2 Single Monitor Arm

R-Go Zepher C2 Single Monitor Arm
R-Go Caparo 4 D2 Dual Monitor

R-Go Zepher 4 C2 Dual Monitor Arm
Setup
Single Monitor Arm
Step 1Slide the base ![]() onto the desktop. Tighten the screw
onto the desktop. Tighten the screw  with the hex key
  .
.
Step 2aInsert the pole 2 into the base 1 until you hear it make contact with the table.
Step 2bKeep the pole  pressed down while tightening the ring
 ![]() .
.
Smart Stop™
Create your own setup
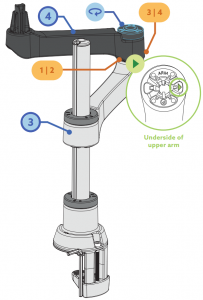
* Smart Stop™: At the bottom of the ring there is a small arrow. This arrow indicates where the Smart StopTM is, i.e. where the arm stops rotating. It is important to have the arrow on the correct side (left or right), so that the arm stops rotating and for example does not bump into an acoustic screen (see p. 10 & 11 for setup). Step 3aChoose which Smart StopTM setup you want (setup
 ![]() ,
,  ,
, ![]() or
or  , Check above).Step 3bPlace the forearm
  on the pole . Make sure the arrow points in the direction of the number of your chosen setup. See numbers on the base (
 ![]() |
| ![]() ).
).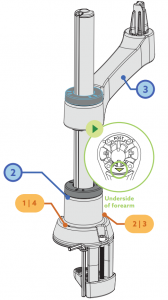
Step 4aPlace the upper arm 4 on the forearm 3 . While doing so, make sure that the arrow point in the direction of the number of your chosen setup. See numbers on the base ( ![]() or
or ![]() ).
).
Step 4bPush the upper arm 4 down while tightening the ring ![]() .
.
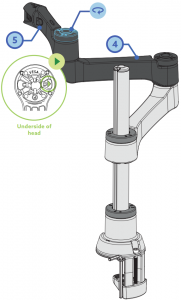
Step 5aPlace the head  on the upper arm
  . Make sure that the arrow
 ![]() points in the direction of the arrow on the upper arm.
points in the direction of the arrow on the upper arm.
Step 5bPress the head down while tightening the ring ![]() .
.
Step 6a
Attach the VESA plate  to the monitor using the enclosed hexagonal screws (see VESA plate).Use the enclosed hex key to do this. Click the VESA plate onto the head .
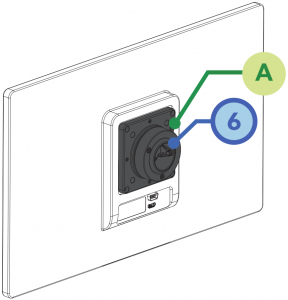
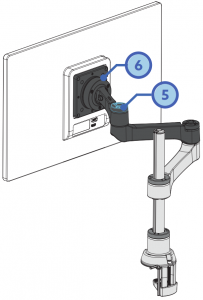
Step 6bIn order to straighten the monitor, you will find 3 screws at the back of the VESA plate . The screws can be tightened with the enclosed hex key, so you can increase the resistance and straighten the monitor.
Step 6c (Only for R-Go Caparo 4 D2)Depending on the weight of your monitor, you can increase or decrease the resistance of the gas spring arm (upper arm ) by tightening the hexagonal screws. Use the enclosed hex key.
Step 6d (Only for R-Go Zepher 4 C2)Set the arm at the correct height by sliding the lower arm on the pole. Then tighten the ring ![]() on the lower arm.
on the lower arm.
Setup
Dual Monitor Arm
Install the first arm following step 1-6 and follow step 3-6 to install the extra arm.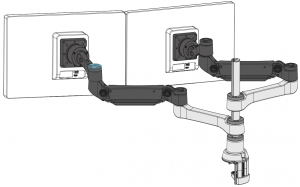

[xyz-ips snippet=”download-snippet”]