
R-TEC AUTOMATION® RTMWSR5C Installation Guide
R-TEC Smart Controls – Surface Mount Wall Switch
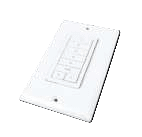
Surface Mount Wall Switch in flush mount provides a sensible control option for individual window treatment, room and home control.
Available in 5 channel model, wall switches are compatible with all ARC motors.
Flush wall switches feature a contemporary design and a wirefree deployment, making them retrofit ready for any location. They can be mounted on top of any surface as either a fixed mount or magnetic mount. Its slim profile eliminates the need for any holes to be cut in walls.
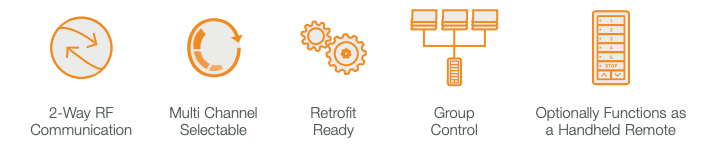
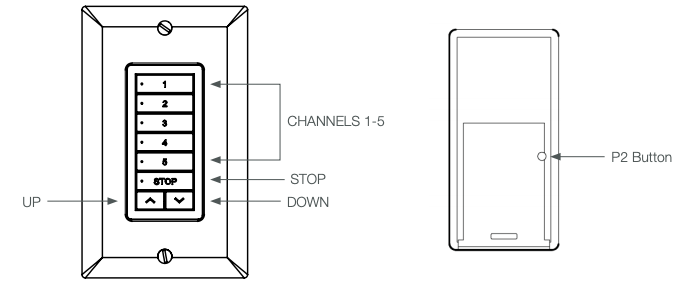
FEATURES – 5 CHANNEL
COMPLIANCE STATEMENT
This device complies with part 15 of the FCC Rules. Operation is subject to the following two conditions:
- This device may not cause harmful interference.
- This device must accept any interference received, including interference that may cause undesired operation.
TECHNICAL DATA / PACK CONTENTS
PRODUCT SPECIFICATIONS
| Parameters | Value |
| Voltage | 3 V DC |
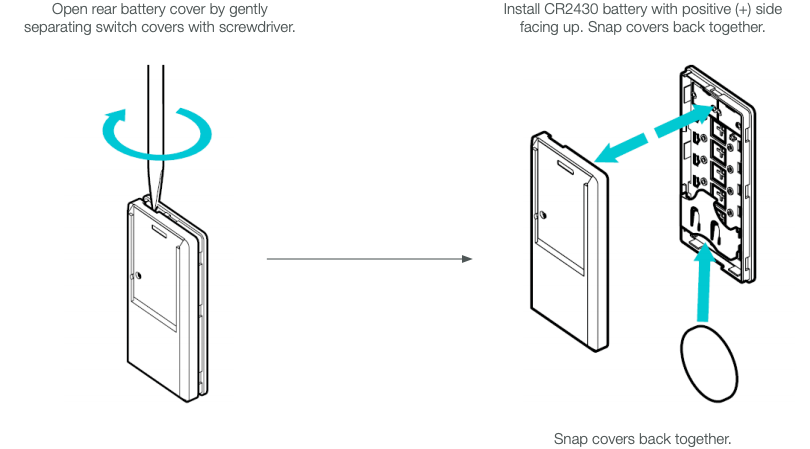
| Battery | CR2430 |
| Radio Frequency | 433.92 MHz |
| Transmitting Power | 10 milliwatt |
| Transmission Range | 65′ |
| Temperature Working Range | 14º F – 122º F (-10º C – 50º C) |
PACK CONTENTS
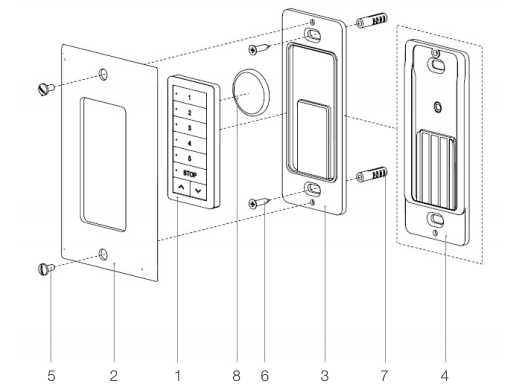
- Surface Mount Wall Switch, 5 Channel
- Cover
- Magnetic Wall Clip
- Fixed Wall Clip
- Pan Head Screws (2)
- Phillips Head Screws (2)
- Anchors (2)
- 3 V – CR2450 Battery
- Instruction Manual
SAFETY
![]() WARNING
WARNING
Any changes or modifications to this unit not expressly approved by the party responsible for compliance could void the user’s authority to operate the equipment. Incorrect installation can lead to serious injury and will void manufacturer’s liability and warranty.
CAUTION
- Do not expose to moisture or extreme temperatures.
- Do not allow children to play with this device.
- Use or modification outside the scope of this instruction manual will void warranty.
- Installation and programming to be performed by a suitably qualified installer.
- Use only R-TEC Automation® hardware.
- Keep clear when in operation.
- Replace battery with correctly specified type.
IMPORTANT SAFETY INSTRUCTIONS TO BE READ PRIOR TO OPERATION
- It is important for the safety of persons to follow the enclosed instructions. Save these instructions for future reference.
- Persons (including children) with reduced physical, sensory or mental capabilities, or lack of experience and knowledge should not be allowed to use this product.
- Frequently inspect for improper operation. Do not use if repair or adjustment is necessary.
- Keep away from children.
 Do no dispose of in general waste.
Please recycle batteries and damaged electrical products appropriately.

INSTALLATION
INSTALL SWITCH BATTERIES
MAGNETIC WALL CLIP
Use the Magnetic Wall Clip if you require the remote to be easily detachable.
Best Practice Tip:
Pair the Switch to the motor prior to installation, then test radio performance in the location the switch will be installed in, to ensure best performance.
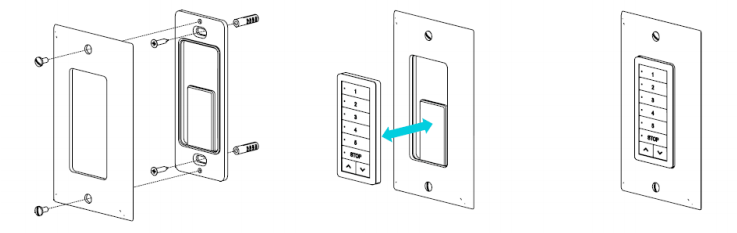
- Use supplied fasteners and anchors as needed to attach the base and cover.
- Switch is held in position magnetically and can be removed as desired.
- Safely dispose of the unused Fixed Wall Clip.
FIXED WALL CLIP
Use the Fixed Wall Clip if you require the remote to be non-removable.
Best Practice Tip:
Pair the Switch to the motor prior to installation, then test radio performance in the location the switch will be installed in, to ensure best performance.
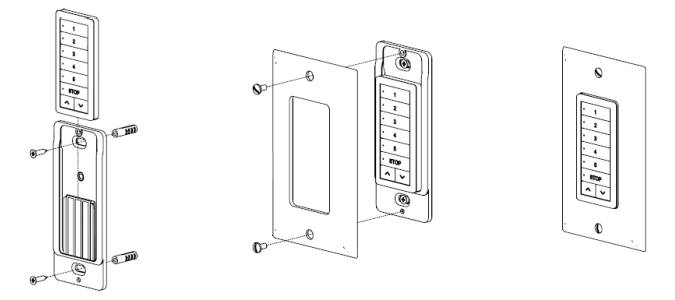
- Slide the Switch onto the Wall Clip.
- Use supplied fasteners and anchors as needed to attach the base and cover.
- Switch is secured unless the Cover is removed.
- Safely dispose of the unused Magnetic Wall Clip.
FUNCTIONAL OVERVIEW
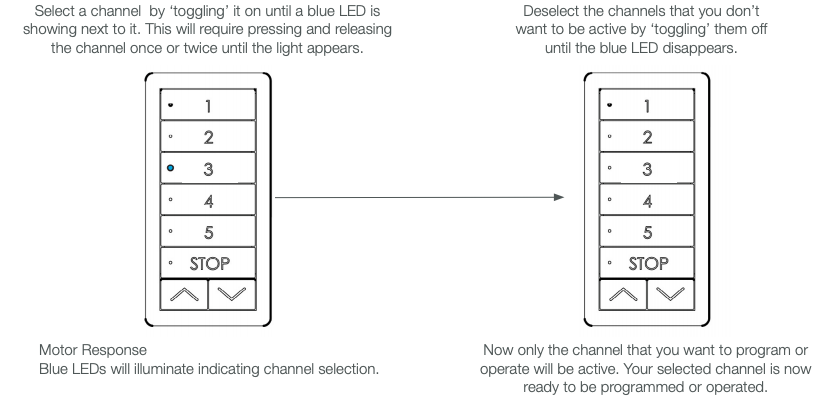
SELECTING A CHANNEL
![]() IMPORTANT
IMPORTANT
To determine which channel is activated prior to programming or operating the control simply press and release any of the `channel’ buttons or the `stop’ button once and the active channel or channels will illuminate.
![]() IMPORTANT
IMPORTANT
You can program one channel at a time but you can operate several channels at once if desired after the programming has been completed.
![]() IMPORTANT
IMPORTANT
When a channel is selected, the blue LED will stay illuminated for four seconds and then go out. The channel remains active. Programming and operation of the window treatment(s) on the channel can proceed without reselecting the channels.
PROGRAMMING
![]() IMPORTANT
IMPORTANT
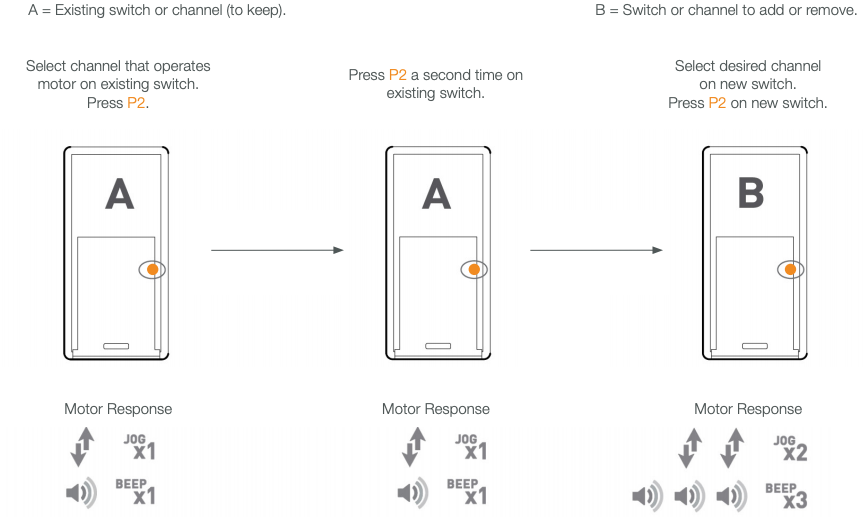
Multiple motors can be grouped onto shared channels for coordinated control.
- Confirm that motor limits and favorite position are already set for each individual motor.
- Ensure that each motor you want to group is also assigned to another channel by itself.
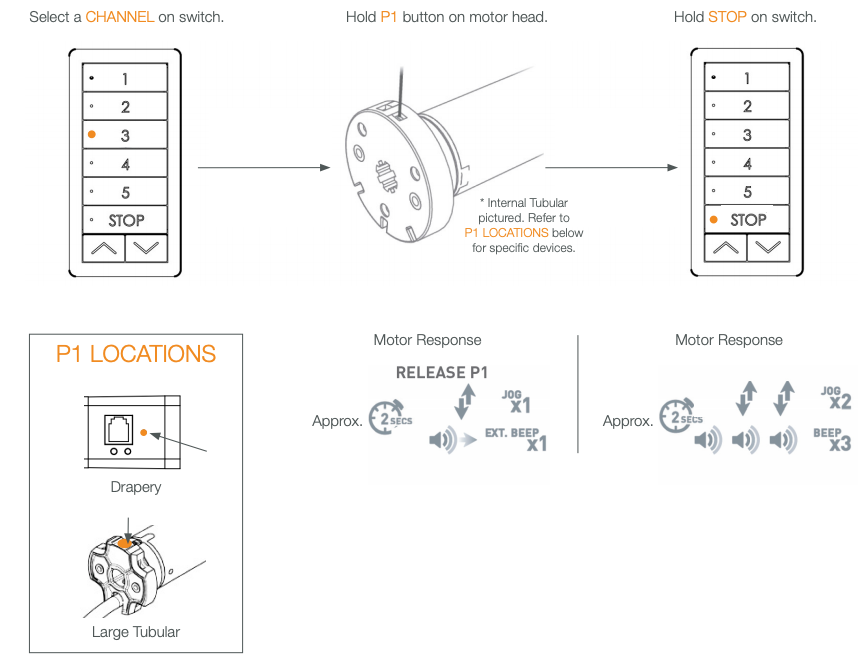
USING PRE-EXISTING CONTROLLER
INITIAL SET UP
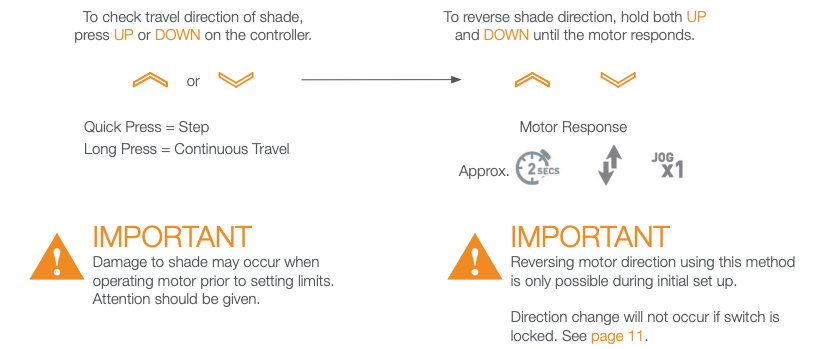
CHECK MOTOR DIRECTION
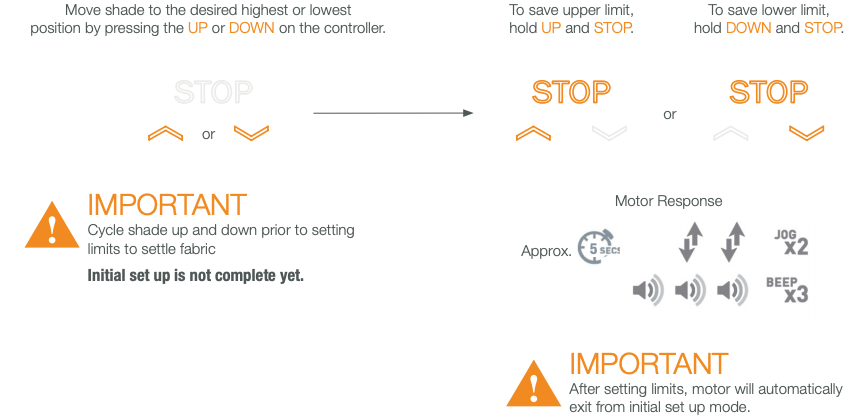
SET LIMITS
![]() IMPORTANT
IMPORTANT
For FT Motors, the bottom limit should be set ~ 1.38 in. (35mm) below the Ultra-Lock to disengage the auto lock mechanism when the shade is raised.
LOCKING THE LIMIT SETTING FUNCTION
Stops unwanted changes to limit settings.

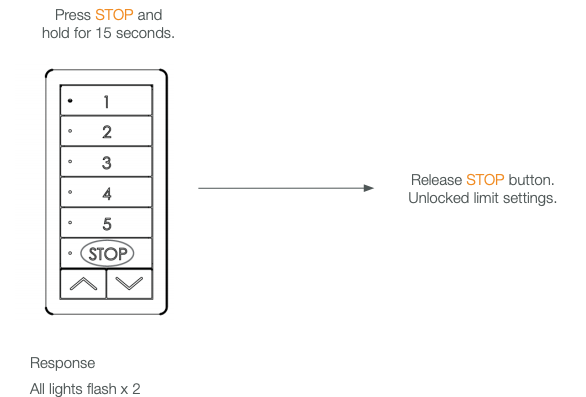
![]() IMPORTANT
IMPORTANT
The locked setting will prevent any multi-button functions. These include reversing direction before setting limits, limit setting and toggling between tilt and roller modes.
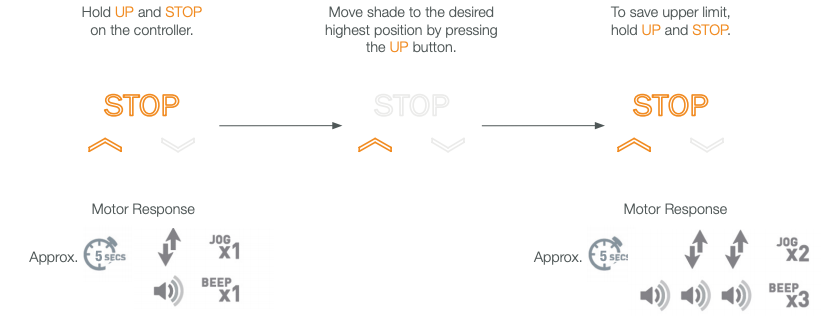
ADJUSTING LIMITS
ADJUST UPPER LIMIT
ADJUST LOWER LIMIT
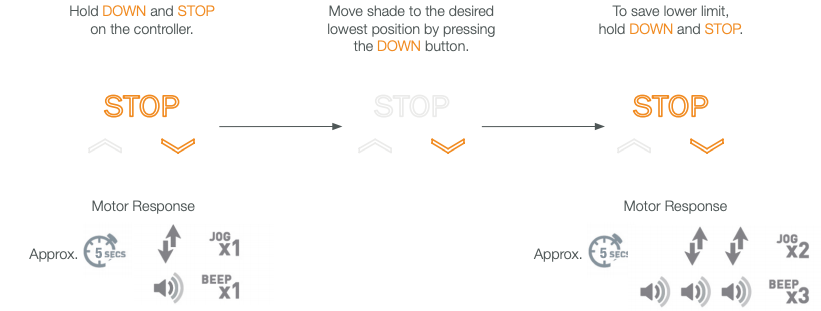
![]() IMPORTANT
IMPORTANT
For FT Motors, the bottom limit should be set ~ 1.38 in. (35mm) below the Ultra-Lock to disengage the auto lock mechanism when the shade is raised.
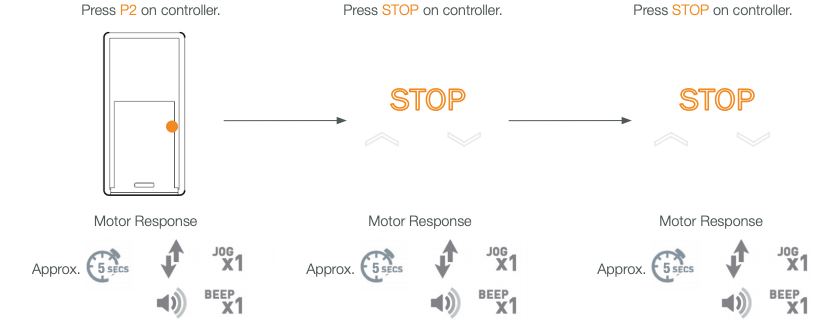
FAVORITE POSITIONING
SET A FAVORITE POSITION

SEND SHADE TO FAVORITE POSITION

DELETE A FAVORITE POSITION
TROUBLESHOOTING

Any Questions?Contact our R-TEC Automation® in-house experts at 866.985.3423. Email us at [email protected].
© 2021 Rowley® Company. All rights reserved. R-TEC Automation® is a registered trademark of the Rowley® Company, LLC.
[xyz-ips snippet=”download-snippet”]