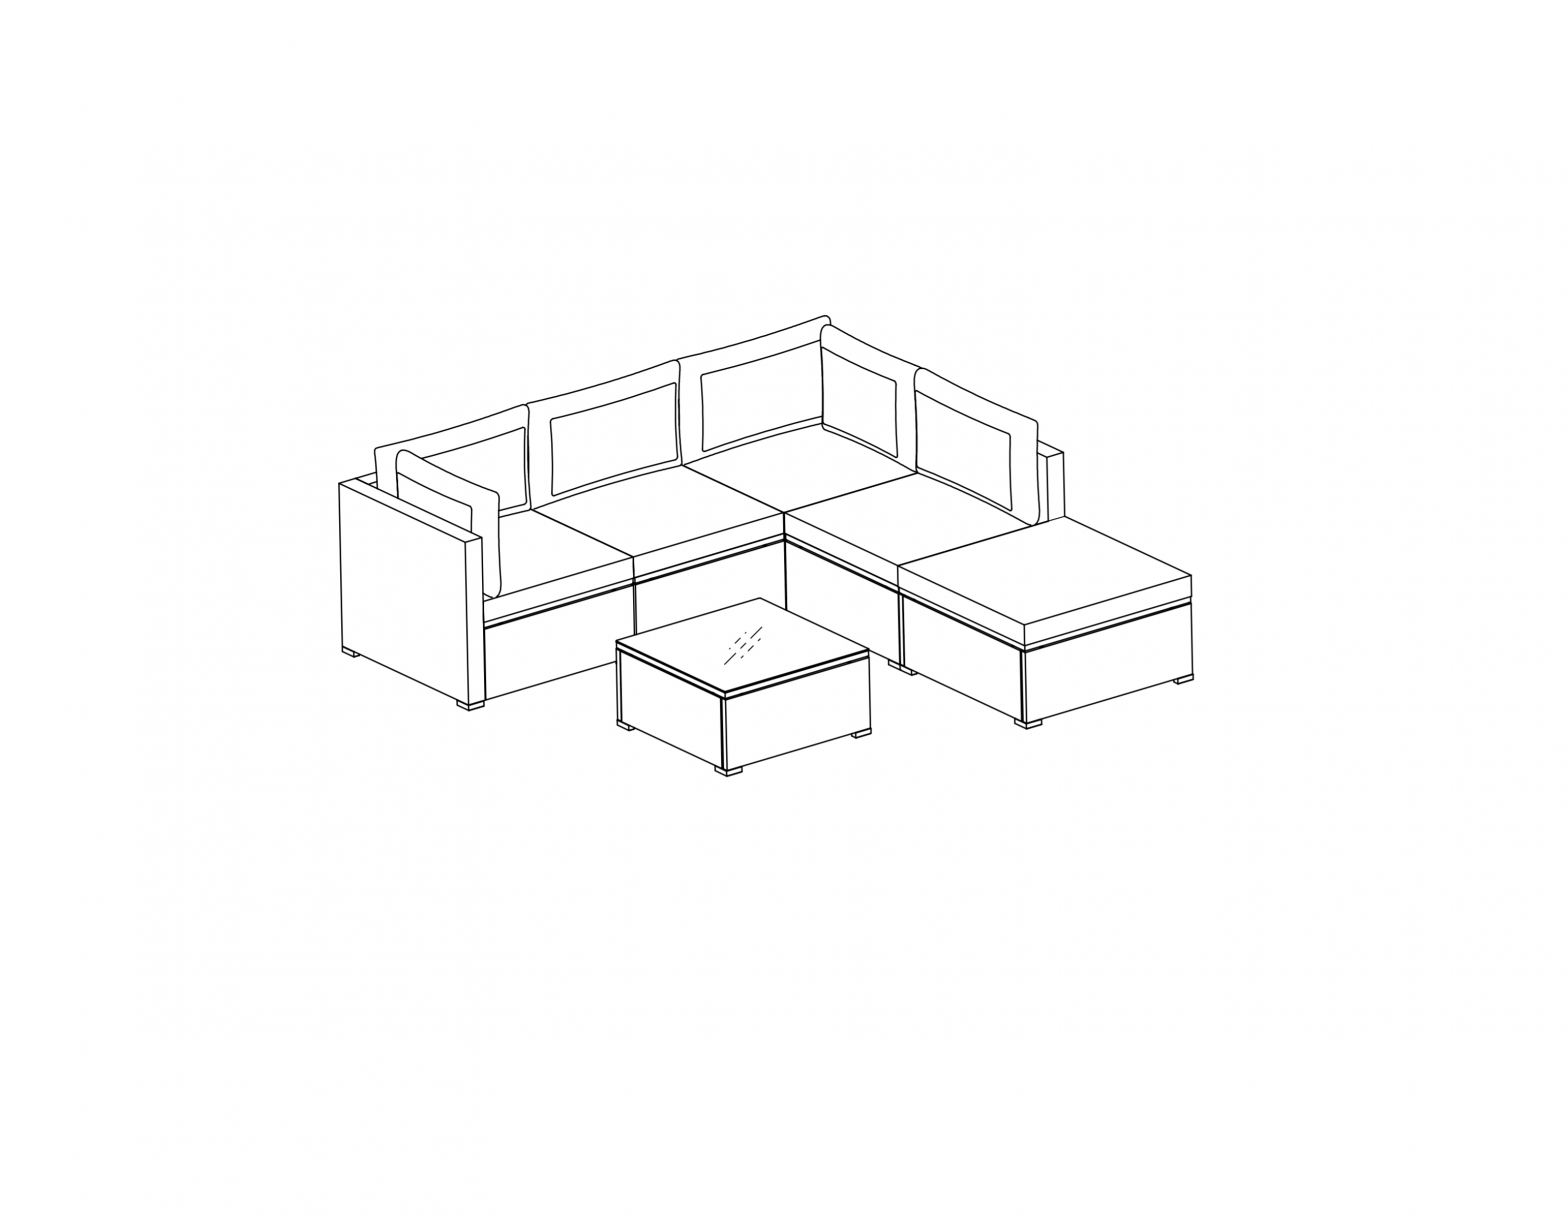
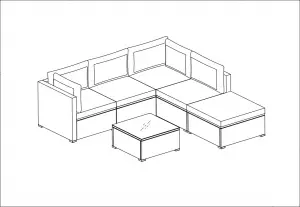
RATTAN SOFA SET
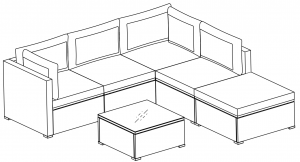
RATTAN SOFA SET INSTRUCTIONS
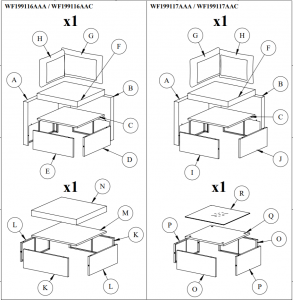
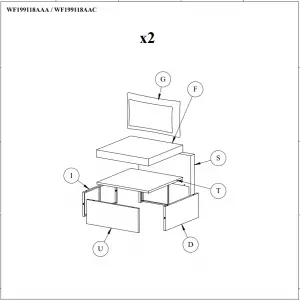
WF199116AAA, WF199117AAA, WF199118AAAORWF199116AAC, WF199117AAC, WF199118AAC
Note:
- 50% Tighten before fixing all screws, Allen wrench is recommended instead of an electric drill.
- Place the item on a flat ground to adjust and make sure it remains stable.
- Tighten up all screw with tools gradually.
- If screw are not aligned with holes furring assembly, please loosen all the other screws to 50% and continue the assembly process.
- If the item is not stable, please loosen all screws, adjust it on a flat ground and tighten up all screws again.
- Note: If one or some screws are fully tighten during assembly, chances are the others will not be aligned with holes. In addition, all the holes are designed to be relatively larger to provide more space for the adjustment of the screws.
Note:
- 50% Tighten before fixing all screws, Allen wrench is recommended instead of an electric drill.
- Place the item on a flat ground to adjust and make sure it remains stable.
- Tighten up all screw with tools gradually.
- If screw are not aligned with holes furring assembly, please loosen all the other screws to 50% and continue the assembly process.
- If the item is not stable, please loosen all screws, adjust it on a flat ground and tighten up all screws again.
- Note: If one or some screws are fully tighten during assembly, chances are the others will not be aligned with holes. In addition, all the holes are designed to be relatively larger to provide more space for the adjustment of the screws
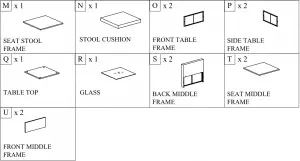
CARTON CONTENT
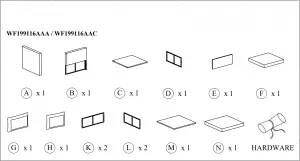
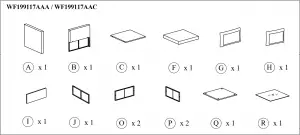
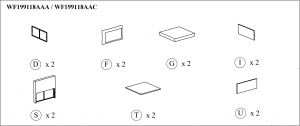
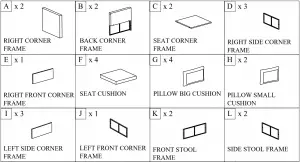
Part List
Hardware

ASSEMBLY
STEP 1Use Allen key to loosen Bolt on the side of Back Corner Frame (B) about 10 mm.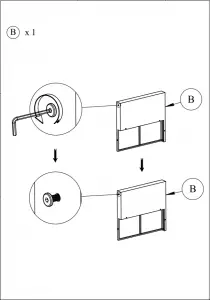
STEP 2Connect part from STEP 1 & Right Frame (A) with Bolt (1) & Washer (3).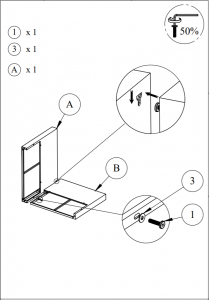
STEP 3Connect part from STEP 2 & Seat Corner Frame (C) with Bolt (2) & Washer (3).
STEP 4Connect part from STEP 3 & Right side Corner frame (D) with Bolt (1) & Washer (3).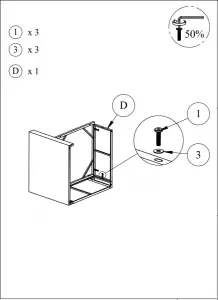
STEP 5Connect part from STEP 4 & Right front Corner frame (D) with Bolt (1) & Washer (3).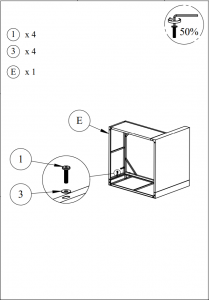
STEP 6Connect part from STEP 5 & Leg (5) with Bolt (1).
STEP 7100% Tighten
STEP 8Put on Seat cushion (F) & Pillow Big Cushion (G) & Pillow Small Cushion (H) to complete the Right Corner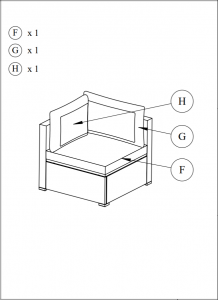
STEP 9Use Allen key to loosen Bolt on the side of Back Corner Frame (B) about 10 mm.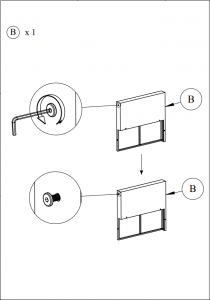
STEP 10Connect part from STEP 9 & Right Frame (A) with Bolt (1) & Washer (3).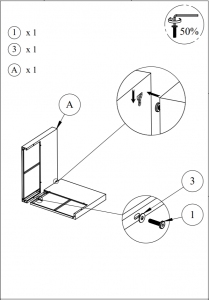
STEP 11Connect part from STEP 10 & Seat Corner Frame (C) with Bolt (2) & Washer (3).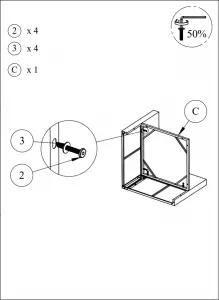
STEP 12Connect part from STEP 11 & Left side Corner frame (I) with Bolt (1) & Washer (3).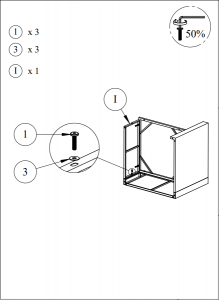
STEP 13Connect part from STEP 12 & Left front Corner frame (J) with Bolt (1) & Washer (3).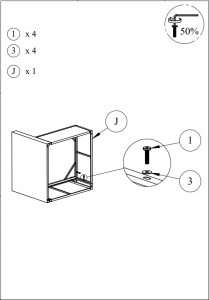
STEP 14Connect part from STEP 13 & Leg (5) with Bolt (1).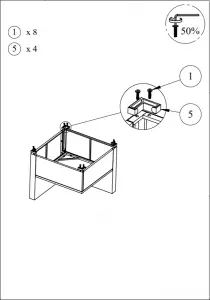
STEP 15100% Tighten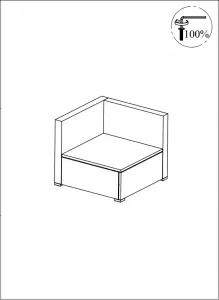
STEP 16Put on Seat cushion (F) & Pillow Big Cushion (G) & Pillow Small Cushion (H) to complete the Left Corner
STEP 17Connect Seat Middle Frame (T) & Front Middle Frame (U) & Left side Corner frame (I) & Right side Corner frame(D).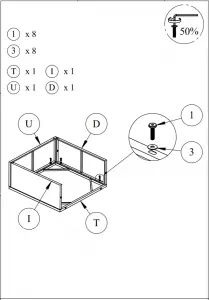
STEP 18Connect part from STEP 17 & Back Middle Frame (S) with Bolt (1) (2) & Washer (3).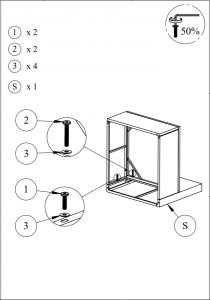
STEP 19Connect part from STEP 18 & Leg (5) with Bolt (1).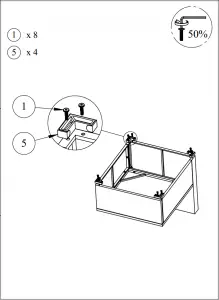
STEP 20100% Tighten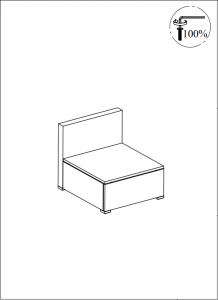
STEP 21Put on Seat Cushion (F) & Pillow Big Cushion (G) to complete the Middle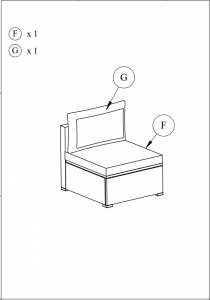
STEP 22Connect Seat Stool (M) & Front Stool Frame (K) & Side Stool Frame (L) with Bolt (1) & Washer (3)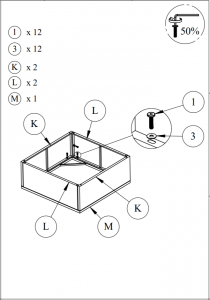
STEP 23Connect part from STEP 22 & Leg (5)with Bolt (1).
STEP 24100% Tighten.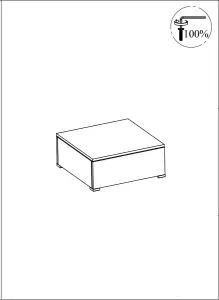
STEP 25Put on Stool Cushion (N) to complete the Stool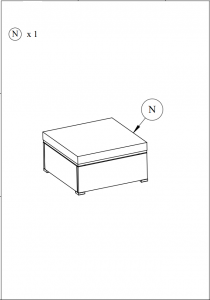
STEP 26Connect Table Top (Q) & Front Table Frame (O) & Side Table Frame (P) with Bolt (1) & Washer (3).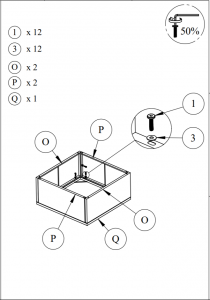
STEP 27Connect part from STEP 26 & Leg (5) with Bolt (1).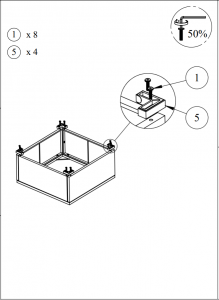
STEP 28100% Tighten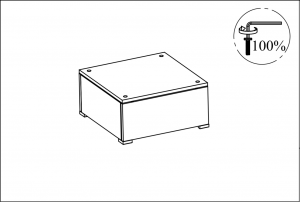
STEP 29Put on Glass (R) to complete the Table.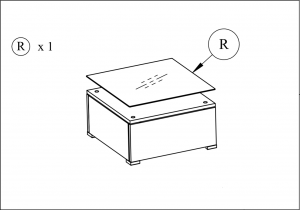
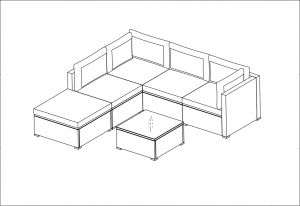
OPTION 1: LEFT CORNER
Connect Right & Left Corner, 2 Middle & Stool with Connector (6)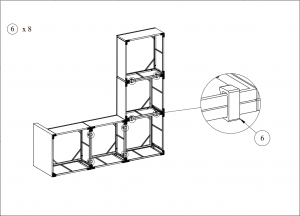
OPTION 2: RIGHT CORNER
Connect Right & Left Corner, 2 Middle & Stool with Connector (6)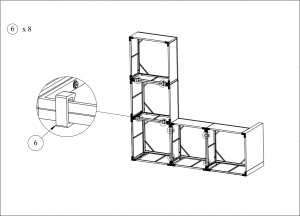
[xyz-ips snippet=”download-snippet”]