RAZER Chroma PC Case Lighting Kit
PACKAGE CONTENTS/ SYSTEM REQUIREMENTS
PACKAGE CONTENTS
- Razer Chroma PC Case Lighting Kit module
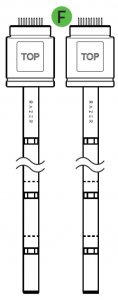
- 2x 16-LED strips
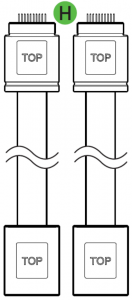
- 2x LED extension cables
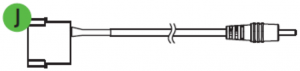
- Molex to DC Cable
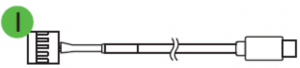
- Internal USB header connector to Micro-USB cable
- Important Product Information Guide
SYSTEM REQUIREMENTS
PRODUCT REQUIREMENTS
- Power outlet/ Power Supply Unit (PSU) with a free Molex socket
- Motherboard with a free internal USB header
RAZER SYNAPSE 3 REQUIREMENTS
- Windows® 7 (or higher)
- Internet connection
- 500 MB of free hard disk space
REGISTRATION/ TECHNICAL SUPPORT
REGISTRATION
Register your product on line at www.razerid.razer.com/warranty using your Razer ID to get real-time information on your product’s warranty status.
If you haven’t registered for a Razer ID yet, register now at www.razerid.razer.com to get a wide range of Razer benefits.
TECHNICAL SUPPORT
What you’ll get
- 1 year limited manufacturer’s warranty for the Razer Chroma PC Case Lighting Kit module.
- 6 months limited manufacturer’s warranty for the LED strips.
- Free on line technical support at support.razer.com
DEVICE LAYOUT
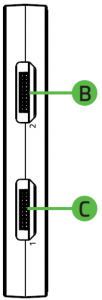
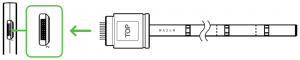
- A. Razer Chroma PC Case Lighting Kit module

- B. LED channel 2 port
- C. LED channel 1 port
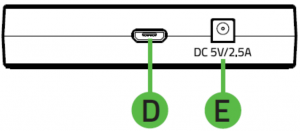
- D. Micro-USB port
- E. Power port
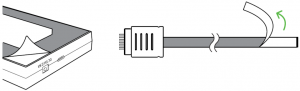
- F. 2 x 16-LED strips
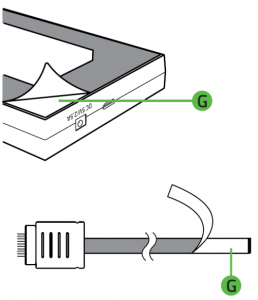
- G. Adhesive tapes
- H. 2x LED extension cables
- I. Internal USB header connector to Micro-USB cable
- J. Molex to DC cable
*Compatible with PC I Mac I Switch I PS4 I Xbox One (Xbox One Stereo Adapter maybe required, purchased separately).
SETTING UP YOUR RAZER CHROMA PC CASE LIGHTING KIT
To set up your Razer Chroma PC Case Lighting Kit, simply do the following:
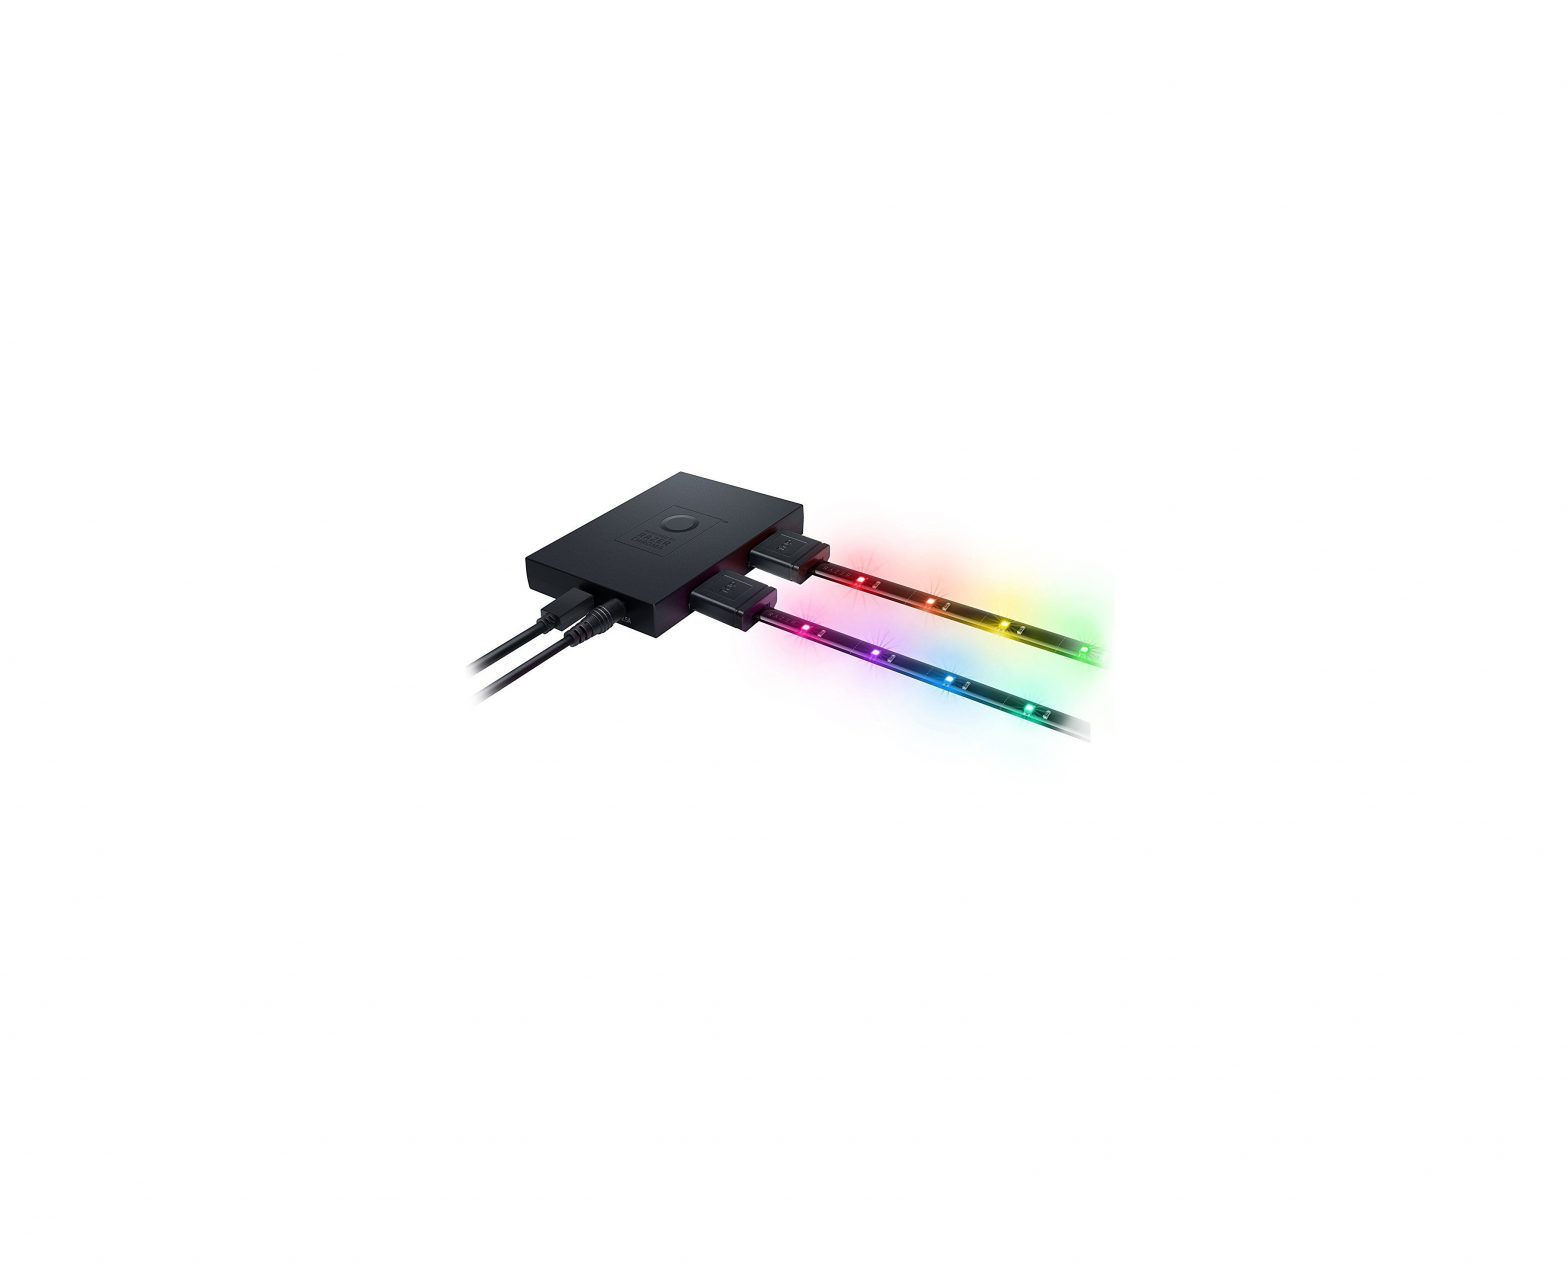
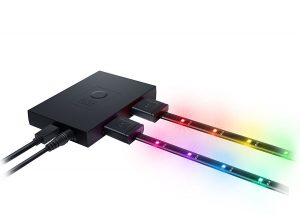
- Connect an LED strip’s connector to any of the Razer Chroma PC Case Lighting Kit module’s LED channel ports.Align the connector to the desired port first before plugging it in, to avoid damaging the connector’s pins.
- You may customize the length of an LED strip by using the included LED extension cables and/or by trimming an LED strip on any of its designated cutting areas.Only use the designated cutting areas of an LED strip. Once removed, the trimmings of an LED strip can neither be reattached nor reused.
- You may use the adhesive layers on both the Razer Chroma PC Case Lighting Kit module and the LED strips to fasten each component to a clean, dry, and flat surface.
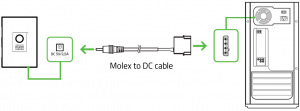
- Connect the Razer Chroma PC Case Lighting Kit module to the Molex socket of your PC’s power supply unit using the included Molex to DC cable.
- Connect the Razer Chroma PC Case Lighting Kit module to the motherboard of your PC using the included Internal USB header connector to Micro-USB cable.You can power the Razer Chroma PC Case Lighting Kit using only the Internal USB header connector to Micro-USB cable. However, it is highly recommended to use this together with the Molex to DC connection to maximize the brightness levels of all connected LED strips.


INSTALLING RAZER SYNAPSE FOR YOUR RAZER CHROMA PC CASE LIGHTING KIT
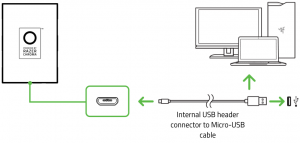
Step 1: Make sure that the Razer Chroma PC Case Lighting Kit is connected to the motherboard of your PC using the Internal USB header connector to Micro-USB cable.
Step 2: Install Razer Synapse when prompted* or download the installer from www.razer.com/synapse.
Step 3: Register for a Razer ID or log in with an existing Razer ID.
*Applicable for Windows 8 or later.

References
[xyz-ips snippet=”download-snippet”]