RDS Car Multimedia Player Owner’s Manual

Preface
In order to make sure the product fits for the car 100%, customers need to take the measurement of dashboard installation before purchase, mainly the length and heightof panel. In order to prevent injuries and fires, please pay attention to the following instruction:Please check the car horn line carefully before installation, if it is grounded or collided, you need to rewire the car horn line and connect the product, otherwise the machine will be burned. In order to prevent short circuit and so on, do not drop the metal object in the device. If there is smoke or peculiar smell of the device, please turn off the power at once. Please do not make the device falling or strong collision. In order to prevent device failure, please observe the following note: Please do not install the device in the place of strong sunlight, high temperature, high humidity or dusty.Please replace the fuse which is the same specification. If you are using different specification of fuse, may cause failure of the device.In order to prevent short circuit, please pull out the power wire when you replace the fuse. In order to be able at any time to deal with road and traffic conditions change, pleaselower the volume when driving. Please do not get the device wet when washing car, this may cause short circuit, then fire or failure will be caused.
Precautions
- If any abnormal behavior of the unit is found, please use spiky object to press RESET/RES key to resume factory default.
- If you have parked the car in hot or cold weather for a long time, please wait until the temperature in the car becomes normal before operating the unit.
- No fierce impact to the unit for preventing damage to any mechanisms inside.
- The unit consists of high precision parts, please do not open the lid or adjust any component without authorization. Any maintenance needed, please go to professional after-sale service center for services.
- Operate the unit correctly according to this manual to prevent unnecessary problem. The guarantee won’t be valid if the problem is caused by inappropriate operation.
Warning
- Only connect the unit to a DC 12V power supply with negative grounding. If connect 24Vwill burned the unit.
- Never install the unit where the operation for safety driving is restrained.
- Never use the video display function in the front when driving to prevent the violation of laws regulation and also to reduce the risk of traffic accident except using for rearview video camera.
- Never expose the unit, amplifier, speakers to moisture or water to prevent electronic sparks or fires.
- Please don’t change the fuse in the power cord without professional guidance; improper fuse may cause damage to this using unit or even cause fire.
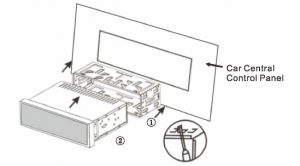
Installation
The unit installs for security , please install it refer to the following diagram description:
- Please make the unit in proper place, connect the unit refer to the diagram, and test it works well or not.
- Please wrapped the connection line with insulation tape to ensure complete wiring after testing well.
- Please bend the hook of metal G), and insert the metal to instrument panel then fixed it.
- Put the unit into metal hook until it lock.
Remove
Note:
- Please ensure install the unit in the position that doesn’t interfere with the normal operations of driver, and no harm for emergency braking.
- For exactly install, please use the accessories provided by the unit only, otherwise it will cause unnecessary damages. If more holes or other changes in facing or structures are needed, please contact with dealer nearby.
- Installed after the first power test please press the reset button, then press the clock button to set the clock, the unit can be used normally. Dismantling: The unit without key, you can pull out by your hand.
General Features
Support MP4/3GP/AVI/MOV/MPG/M4V/DAT/VOB Video formatSupport MP3/WMA/WMV/OGG/APE/ACC/FLAC Audio formatSupport JPEG/BMP/GIF Image format7 Color BacklightSupport FM/AM/RDS radio function and 30 stations presetSupport High Capacity TF card/ U-DiskSupport front AUX Audio InputClock functionSupport EQ Sound AdjustSupport Rear View Camera functionSupport Steering Wheel Remote ControlSupport SWC Remote I Remote Control functionSupport Boot LOGO settingSupport BT Call/ BT Music functionSupport Rear Microphone InputISO Power Interface1 way video Input2 way audio Input1 way video output2 way audio output1 way Subwoofer output
Basic Operation
- When use reversing rear view function, reversing video signal from the corresponding port input connection back line, when reversing will automatically switch to reversing visual state.
- Video &Audio output Connect audio/ video lines, when play the video, press button on the bottom bar of the screen can output the video & audio to the other device.
- BT function (Only for the unit with BT) Firstly, open BT function of your phone, and then search BT name of the unit, pairing, enter the password “0000” (if it is need), after pairing successfully, the BT symbol ~ will be turn blue, that will be ok. When calls come in, it will enter the interface of BT automatically, press to answering the phone, press to hanging the phone.
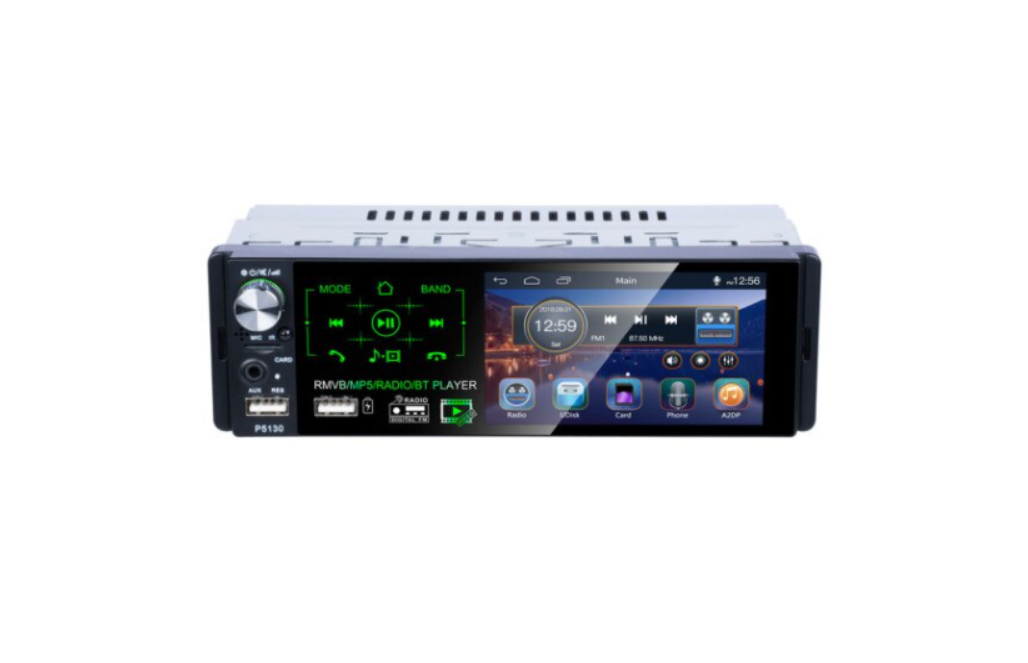
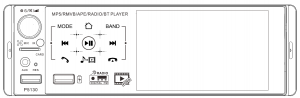
Front Panel Function Description
- When power is off, press short time to turn on power; When power is on, short press is turn on/off mute function, long press is turn off power, rotate left or right to adjust volume,
- Mode switch.
- Home Page.
- Band switch between (FM1/FM2/FM3/AM1/AM2).
- USB I TF Card/ BT Music Mode: Press to select previous track; Radio Mode: Auto searching radio station backward.
- USB / TF Card/ BT Music Mode: Play/ Pause; Radio Mode: Next radio station stored in (1~6) position.
- USB / TF Card/ BT Music Mode: Press to select next track; Radio Mode: Auto searching radio station forward.
- Switch to BT Mode when BT is connected/ Answer an incoming call.
- USB I TF Card Mode: Press to switch between Music and Video mode.
- Hang up the phone/ Reject the incoming call.
- RES Resetthe unit.
Remote Control Description

1.Power switch 10. Menu2. ◄ Previous Page 11. Confirm/Play/Pause3. Mode switch 12. ► Next Page4. Previous Track 13. ![]() Under5. USB/SD 14. Next Track6. Volume- 15. Choice?. Band/ Automatic/ 16. Volume+Station search 17. Answer the phone8. Digital key 18. Hang up9.
Under5. USB/SD 14. Next Track6. Volume- 15. Choice?. Band/ Automatic/ 16. Volume+Station search 17. Answer the phone8. Digital key 18. Hang up9. ![]() UP
UP
Wire Diagram

 Please check the speaker line carefully before installation. If any groundingor touching, please connection again, otherwise the unit will be burned.
Note: Make sure not to damage the unit, please wrap the exposed wires or unconnected
Specification
SNR 65dBFrequency response 20Hz-20KHzLoudspeaker impedance 40-80Tone Control Bass+/-7dB(100Hz)Treble+/-7dB(1 00Hz) FMFM frequency 87.5MHz-108.0MHzSensitivity 25dBSelectivity 60d BSeparation 35dB AMFrequency 522KHz-1620MHz (Europe)530KHz-1710MHz (USA)Usable Sensitivity 25dB
Read More About This Manual & Download PDF:
[xyz-ips snippet=”download-snippet”]