![]()
SC10 Solar Charger Copyright: October 2020
Getting Started
- Connect the SC10 internal battery.Your SC10 comes with the red wire disconnected from the positive terminal on the battery.use the Thumb Screw on the back of the unit to loosen the top/front of the unit from the back/bottom. Rotate the top/front forward to reveal the SC10 battery.Remove the plastic cap from the positive terminal on the battery and plug the red wire onto this terminal.Close the unit and tighten the thumbscrew to hold the two halves together.
- Connect the SC10 to the camera by plugging the shielded power cable into the external power jack on the bottom of your cellular camera.
- Turn on your camera (with no internal batteries inside) to test and see if everything is working.
- Optionally, you can now install a set of Lithium batteries inside the camera if you would like to have a backup power source in case someone or something unplugs or cuts the shielded cable going between the camera and the SC10 Solar Unit.
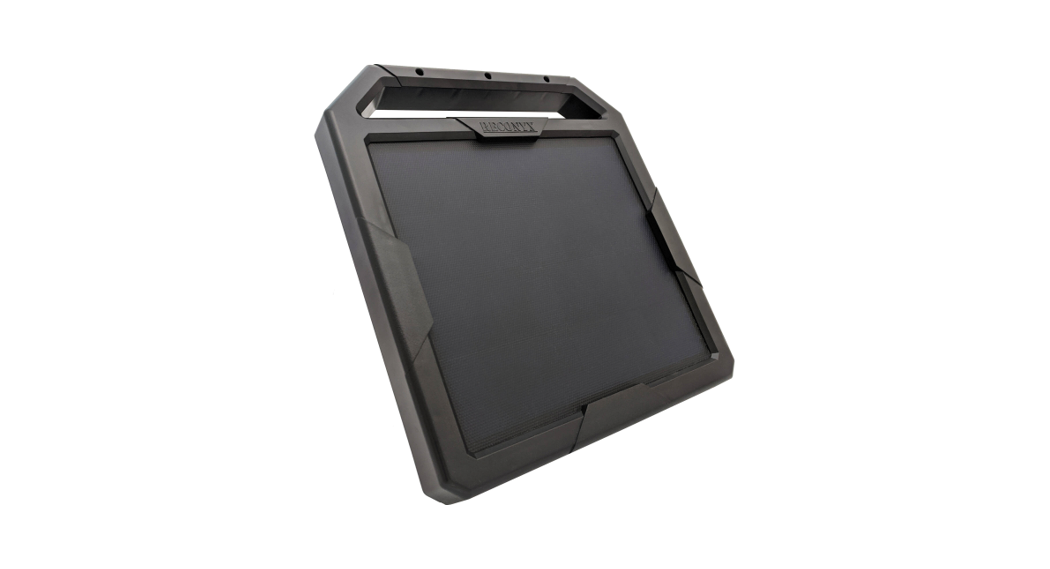
SC10 Solar Charger Overview
The SC10 Solar Charger is a great complement to your Reconyx Cellular camera.The SC10 is a complete power supply system that includes a 10-Watt solar panel with a 108 Watt Hour (9 Amp Hour) Sealed Lead Acid battery. The Lead-Acid battery was chosen because it is a tried and true battery chemistry that will run in the hottest summers and coldest winters that most of us will ever experience.With the SC10, you can power your cellular camera indefinitely with power from the sun. For cellular users that can mount the SC10 in a spot that gets a few hours of direct sunlight per day, this unit should provide sufficient power to run your cellular camera indefinitely.If you can get the SC10 in full sunlight, at mid-latitude locations, it should provide enough power to take and send 500 to1000 pictures per day through the cellular modem. Most users will never need nor want to send this many pictures.If you cannot get enough sunlight, or you are needing to send a very large number of photos, you can daisy chain more than one SC10 together to double or triple the power available to your camera.
Warranty
RECONYX® warrants this product to be free of manufacturer’s defects in materials and workmanship for a period of 1 year from date of original purchase. If during this period, through normal use, the product fails due to defects in materials or workmanship, RECONYX® will either repair or replace the product at our sole discretion. This warranty is void if a product failure results from “acts of God”, accident, abuse, improper use, disassembly, or unauthorized maintenance and repair.
NOTE: If you have any questions or concerns relating to the operation or functionality of your camera with the SC10 Solar Charger, please contact our Technical Service Department by email at [email protected] or by calling toll-free 866-493-6064.
Mounting the SC10
Integrated T-Post (Star Post) MountThe SC10 is designed to sit atop almost any “T-post” style metal fencepost (also works with “Y” and “Star” posts) and can be rotated 360 degrees.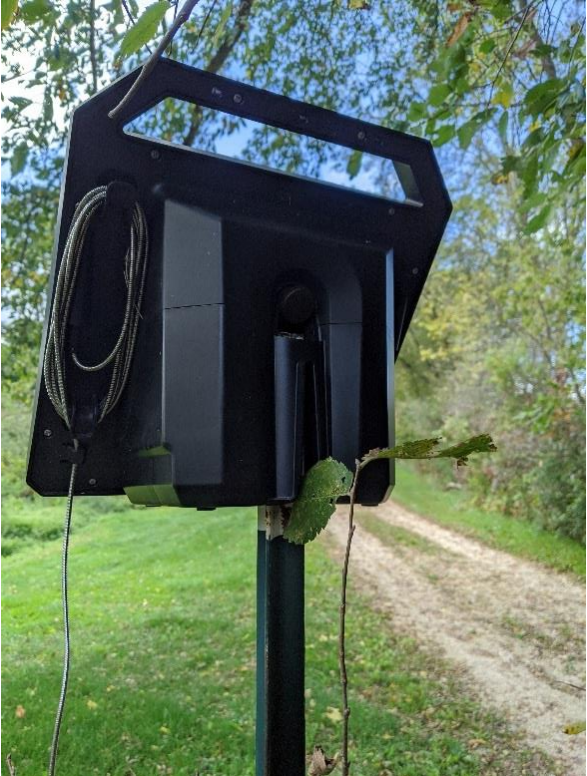 Rotate the unit so that it is facing the direction where it will get the most hours of sunlight during the day. Then lower it onto the post until the post is fully inserted in the slot. Gravity will hold the unit onto the post.
Using the Camera T-Post mount with the SC10 A great way to deploy your SC10 Solar unit and HyperFire 2 Cellular camera is to mount both of them to the same T-Post. This allows you to put the camera exactly where you want it and more than likely get sun on the correct facet of the Solar unit at the same time.The T-Post Camera Mount is sold separately and can be purchased at www.reconyx.com.
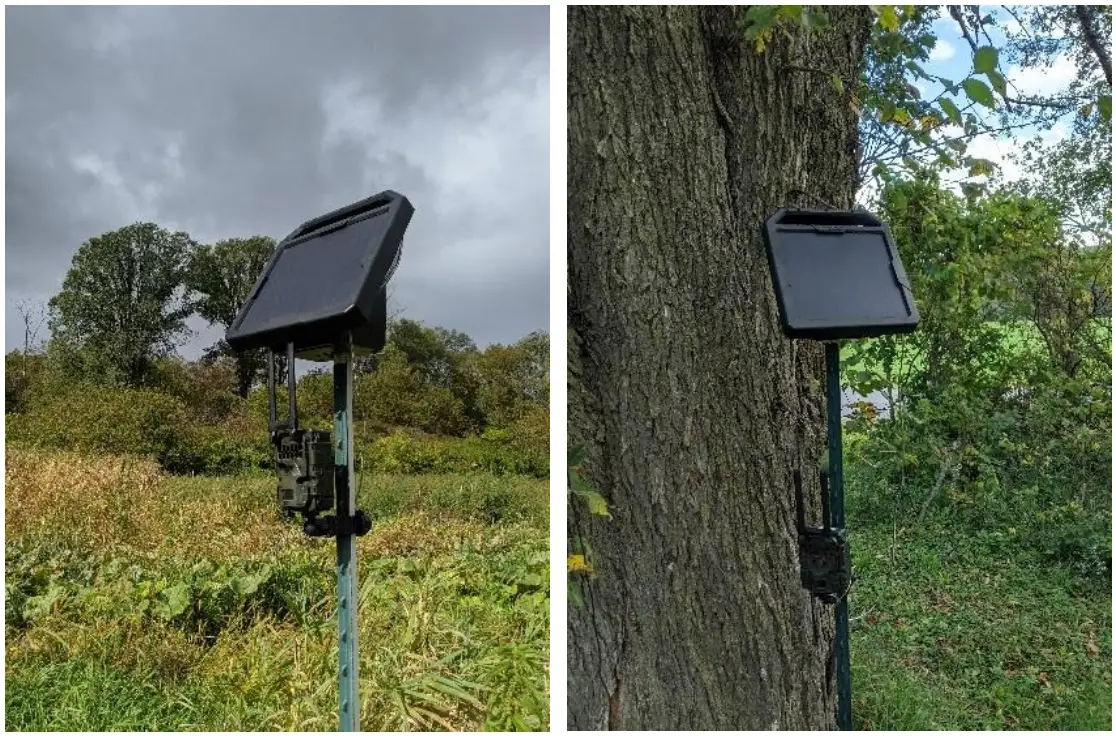
Note: We do not recommend setting the SC10 on the ground. There are two primary reasons for this: 1) snow, 2) foliage. You don’t want the unit covered by snow or hidden by vegetation. You want the face of the SC10 to get as much sunlight as possible.
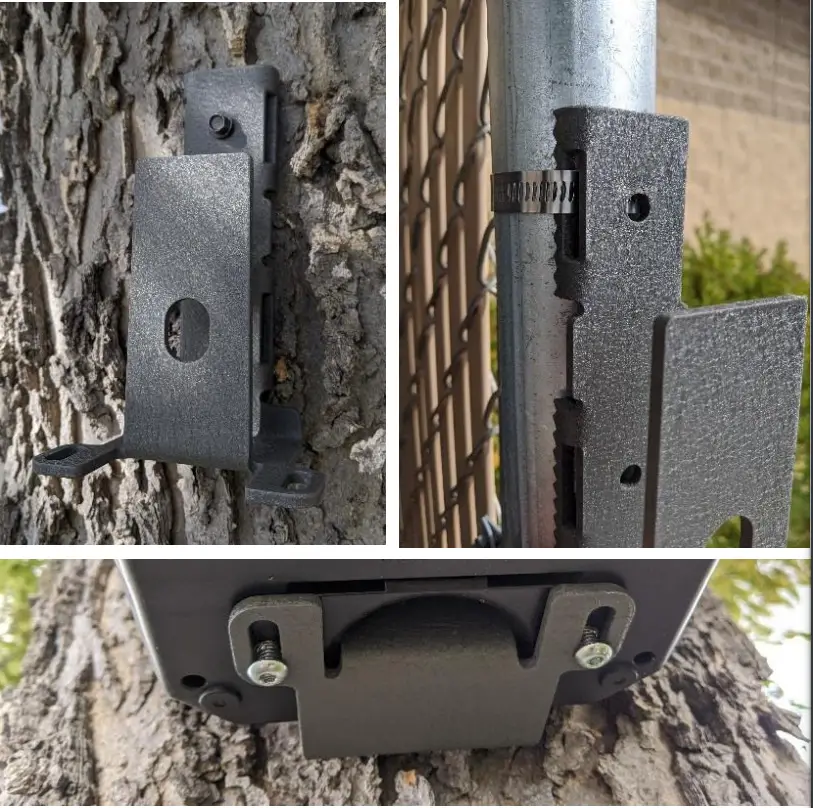
Mounting with Screws
The SC10 can also be mounted on a post, wall, or tree using a couple of screws or lag bolts; one to hang the unit on, and one to keep it from rotating.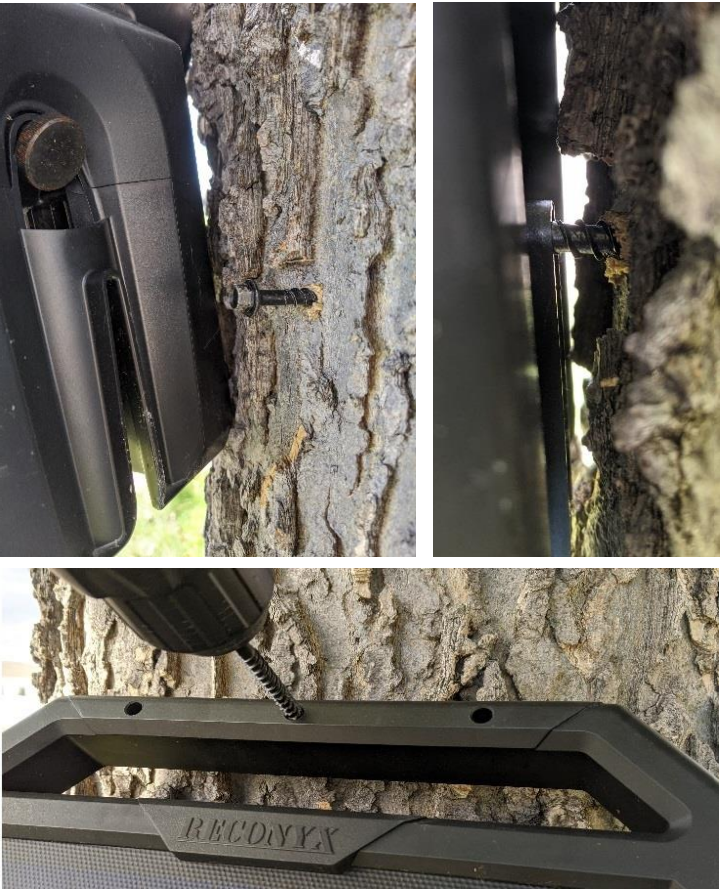 Mounting Bracket (Sold Separately)The SC10 Mounting Bracket allows you to mount the bracket to a post, pole, wall, or tree, then simply slip the SC10 onto the bracket and secure it to the bracket with a couple of bolts on the bottom of the unit.
Connecting the System
Connecting to CameraThe SC10 comes with a 12-foot power cable that is wound around the keeper cleats on the backside of the unit. This provides you with enough cable to hopefully mount the SC10 where it can get the most sunlight (up to 12 feet from the camera). There is a hold-down under these cleats to clip the cable into to hold the excess wire on the cleats if your camera is closer than 12 feet. Note the Input Jack on the right side as you look at the back of the unit. This is the input for daisy-chaining more than one solar unit together. There are two basic reasons you might daisy chain: 1) you need to take and send a lot of pictures, and one unit won’t keep up, 2) you are under the canopy and you are not getting enough sunlight to recharge the SC10 internal battery to keep up with even a moderate level of activity. To daisy chain, the SC10s, just plug the output from one into the input of the other, and then plug the output from that one, into the camera. You can add as many units as you need to in this fashion.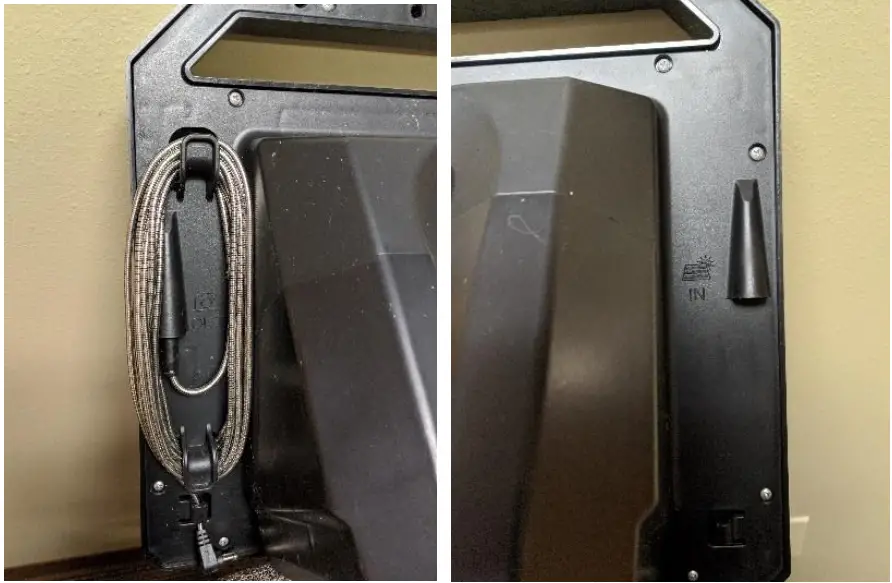
Using Desiccant in your Camera
 report this ad
Long Term Deployment with Internal BackupWhen you are deploying your camera for long-term operation (a year or greater), we highly recommend that you use one of our desiccant options inside of your camera to absorb any moisture that can penetrate the seals over time with the heating and cooling cycles of the day. This will ensure your camera runs at an optimal level for as many years as possible.If you are using internal backup batteries, your desiccant option is to use our desiccant sheets. They lay over top of the batteries and absorb moisture that may enter the camera over time. These are available at www.reconyx.com.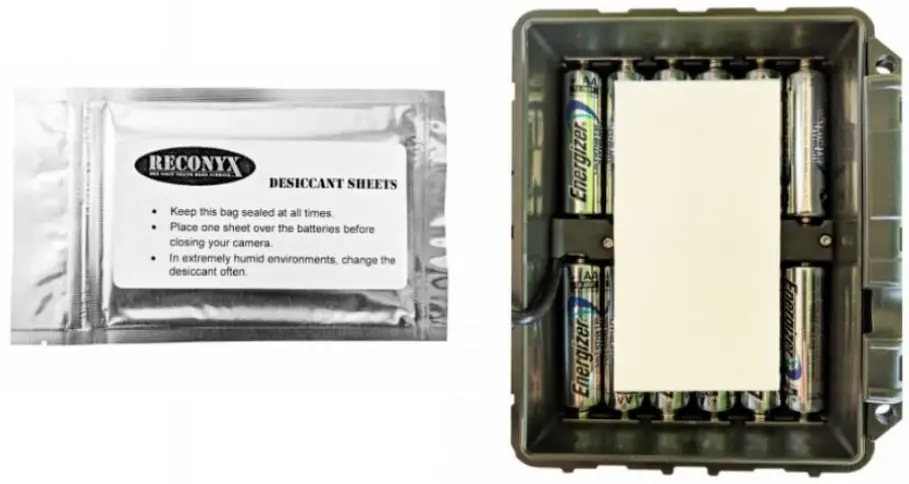
Long Term Deployment without Internal BackupIf you choose to deploy without internal backup batteries, you have an even better desiccant option. This is the 14-gram indicating desiccant pouches we have available on our website as well. You can put one or two of these in the cameras in place of a bank of batteries. These pouches are indicating. The little strip across the middle allows you to see inside the pouch. If the pellets are blue, they are dry. When they turn pink/white, they need to be recharged. You can recharge them by placing them on a cookie sheet in a low oven (170F). Bake them dry and you can re-use them.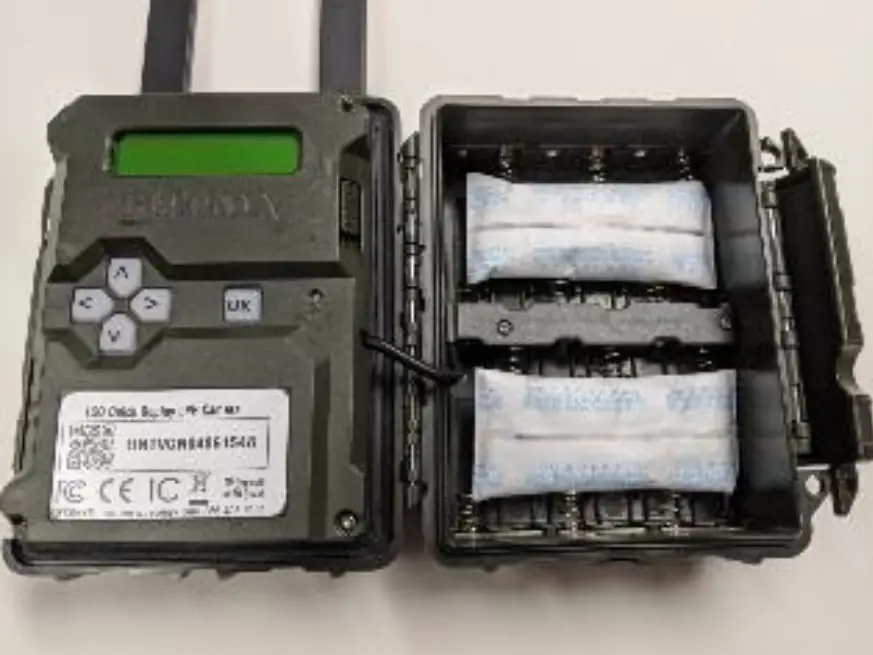
Camera Setup
Setting Battery Type on CameraIn the setup for the camera, find where you choose Battery Type.When you find this option, Choose SC10 Solar for your setting. This will provide you with % battery readings that are appropriate for the SC10 Solar unit.We recommend that you try to run your camera at an activity level where your internal battery rarely goes below 25%. This will give you the longest life possible for the internal battery.You have the option of installing a set of Lithium batteries inside the camera that can act as a battery backup to the solar unit. If a Saber Tooth Squirrel were to chew through your cable, or someone/something unplugs the cable from the camera, the internal batteries will take over and keep your camera running.Note, if your camera reads 0% while set to SC10 and it is still running for some time, you can be pretty sure something has gone wrong, and it is running on its internal batteries. In this case, you may want to plan a trip to the camera to check it out. If you have a sunny day and the % goes back up, then you know the Solar unit is working and it was likely too many clouds or too much drain on the batteries that got you into this state. In this case, you may want to buy another SC10 unit to daisy chain to prevent over-stressing your battery.
Copyright & Trademark InformationCopyright October 2020Other trademarks and registered trademarks referred to in this document:• HyperFire2TM is a trademark of RECONYX®All other trademarks and copyrights referred to are the property of their respective owners.RECONYX, Inc.3828 Creekside LnHolmen, WI 54636866-493-6064 www.reconyx.comManual Version: 20201001©RECONYX, Inc.
References
[xyz-ips snippet=”download-snippet”]